1. Увод
This manual provides detailed instructions for the safe and efficient use of your Vivitar VIVICAM-7340RED 7.0MP Digital Camera. Please read this manual thoroughly before operating the camera and keep it for future reference. Your camera is designed for capturing high-quality still images and video recordings with ease.
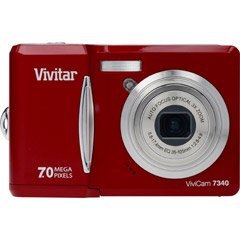
Слика 1: Предња страна view of the Vivitar VIVICAM-7340RED Digital Camera. This image shows the lens, flash, and the overall compact design of the camera.
2. Подешавање
2.1. Уметање батерија
- Пронађите поклопац одељка за батерију на дну или бочној страни камере.
- Померите резу да бисте отворили поклопац.
- Insert the required batteries (typically AA or AAA, refer to packaging) according to the polarity indicators (+ and -) inside the compartment.
- Чврсто затворите поклопац одељка за батерије док не кликне на своје место.
Note: Ensure batteries are inserted with correct polarity as indicated inside the compartment.
2.2. Убацивање меморијске картице
Your camera requires a compatible memory card (e.g., SD card) to store photos and videos. The memory card slot is usually located near the battery compartment or on the side of the camera.
- Отворите поклопац слота за меморијску картицу.
- Insert the memory card with the metal contacts facing the correct direction (refer to the diagram near the slot). Push gently until it clicks into place.
- Затворите поклопац слота за меморијску картицу.
Note: Do not force the memory card. If it does not insert easily, check its orientation.
2.3. Укључивање/искључивање
- Да бисте укључили камеру, притисните дугме ПОВЕР button. The LCD screen will illuminate.
- To turn off the camera, press and hold the ПОВЕР button again until the LCD screen turns off.
2.4. Почетна подешавања (датум и време)
Upon first use or after battery replacement, you may need to set the date and time. Follow the on-screen prompts or navigate to the МЕНУ > СЕТУП > ДАТУМ/ВРЕМЕ option to adjust these settings.
3. Руковање камером
3.1. Снимање фотографија
- Turn on the camera. Ensure it is in photo capture mode (usually indicated by a camera icon on the LCD).
- Кадрирајте снимак помоћу ЛЦД екрана од 2.4 инча.
- Press the shutter button halfway down to allow the camera to focus. A green frame or beep typically indicates focus lock.
- Притисните дугме затварача до краја да бисте снимили слику.
3.2. Коришћење оптичког зума
Your camera features a 3x optical zoom. Use the zoom lever (often located around the shutter button) to zoom in or out. Optical zoom adjusts the lens elements to magnify the subject without losing image quality.
- Померите ручицу за зумирање према T (Телефото) за зумирање.
- Померите ручицу за зумирање према W (Широки приказ) за умањење зума.
The camera also has a 5x digital zoom, which can be accessed after reaching the maximum optical zoom. Digital zoom digitally enlarges the image, which may result in reduced image quality.
3.3. Снимање видео записа
- Switch the camera to video recording mode (usually via a mode dial or menu option).
- Press the shutter button to start recording. A red dot or timer on the LCD indicates recording is in progress.
- Притисните дугме затварача поново да бисте зауставили снимање.
3.4. Viewснимање фотографија и видео записа
- Притисните тастер ПЛАИБАЦК дугме (често означено иконом за репродукцију).
- Use the directional buttons to navigate through your captured images and videos.
- Да бисте репродуковали видео, изаберите га и притисните OK or ПЛАИ дугме.
3.5. Преношење Files to a Computer (PictBridge)
Your camera is PictBridge compatible, allowing direct printing to compatible printers. For transferring fileс на рачунар:
- Повежите камеру са рачунаром помоћу приложеног УСБ кабла.
- Turn on the camera. It should appear as a removable disk or device on your computer.
- Open the camera's folder and copy the desired photos and videos to your computer.
- Safely eject the camera from your computer before disconnecting the USB cable.
4. Одржавање
4.1. Чишћење камере
- Објектив: Користите меку крпу која не оставља влакна, посебно дизајнирану за објективе камера. Нежно обришите кружним покретима. Избегавајте употребу јаких хемикалија.
- ЛЦД екран: Обришите меком, сувом крпом. За тврдокорне мрље, благо дamp cloth (water only) can be used, followed by a dry wipe.
- Тело камере: Користите меку, суву крпу да обришете прашину и отиске прстију.
Do not use solvents, alcohol, or abrasive cleaners on any part of the camera.
4.2. Брига о батерији
- Извадите батерије ако се камера неће користити дуже време како бисте спречили цурење.
- Користите само препоручене типове батерија.
- Старе батерије одлажите одговорно у складу са локалним прописима.
4.3. Складиштење
Store the camera in a cool, dry place away from direct sunlight, extreme temperatures, and high humidity. Use the included case for protection during transport.
КСНУМКС. Решавање проблема
| Проблем | Могући узрок | Решење |
|---|---|---|
| Камера се не укључује. | Празне или неправилно уметнуте батерије. | Replace batteries or ensure they are inserted with correct polarity. |
| Фотографије су мутне. | Подрхтавање камере, ван фокуса или прљаво сочиво. | Hold camera steady, ensure focus is achieved before shooting, clean the lens. |
| Порука „Грешка меморијске картице“. | Картица није правилно уметнута, оштећена је или пуна. | Поново уметните картицу, покушајте са другом картицом или је обришите fileс да ослободите простор. |
| Блиц се не активира. | Flash mode set to OFF, or batteries low. | Проверите подешавања блица у менију, замените батерије. |
6. Спецификације
| Феатуре | Детаљ |
|---|---|
| Бранд | Уживо |
| Број модела | VIVICAM-7340RED |
| Ефективна резолуција мировања | 7 МП |
| Оптицал Зоом | 3x |
| Дигитални зум | 5x |
| Величина ЛЦД екрана | 2.4-инчни |
| Видео Рецординг | Up to 640 x 480 at 30fps |
| Резолуција слике | До 3072 к 2304 |
| Аутофокус | Да |
| PictBridge Compatible | Да |
| Извор напајања | Батерије (укључене) |
| Боја | Црвени |