
1. Увод
This manual provides comprehensive instructions for the installation, operation, and maintenance of your LUX Pro PSD010B Mechanical Non-Programmable Thermostat. This thermostat is designed for use with 1 Heat Only systems, including fireplaces, stoves, and in-floor radiant heating. It does not require a fan switch and is battery-powered for reliable operation.

Слика 1.1: Фронт view of the LUX Pro PSD010B Thermostat, displaying a temperature of 72 degrees Fahrenheit on its digital screen, along with up and down arrow buttons for temperature adjustment.
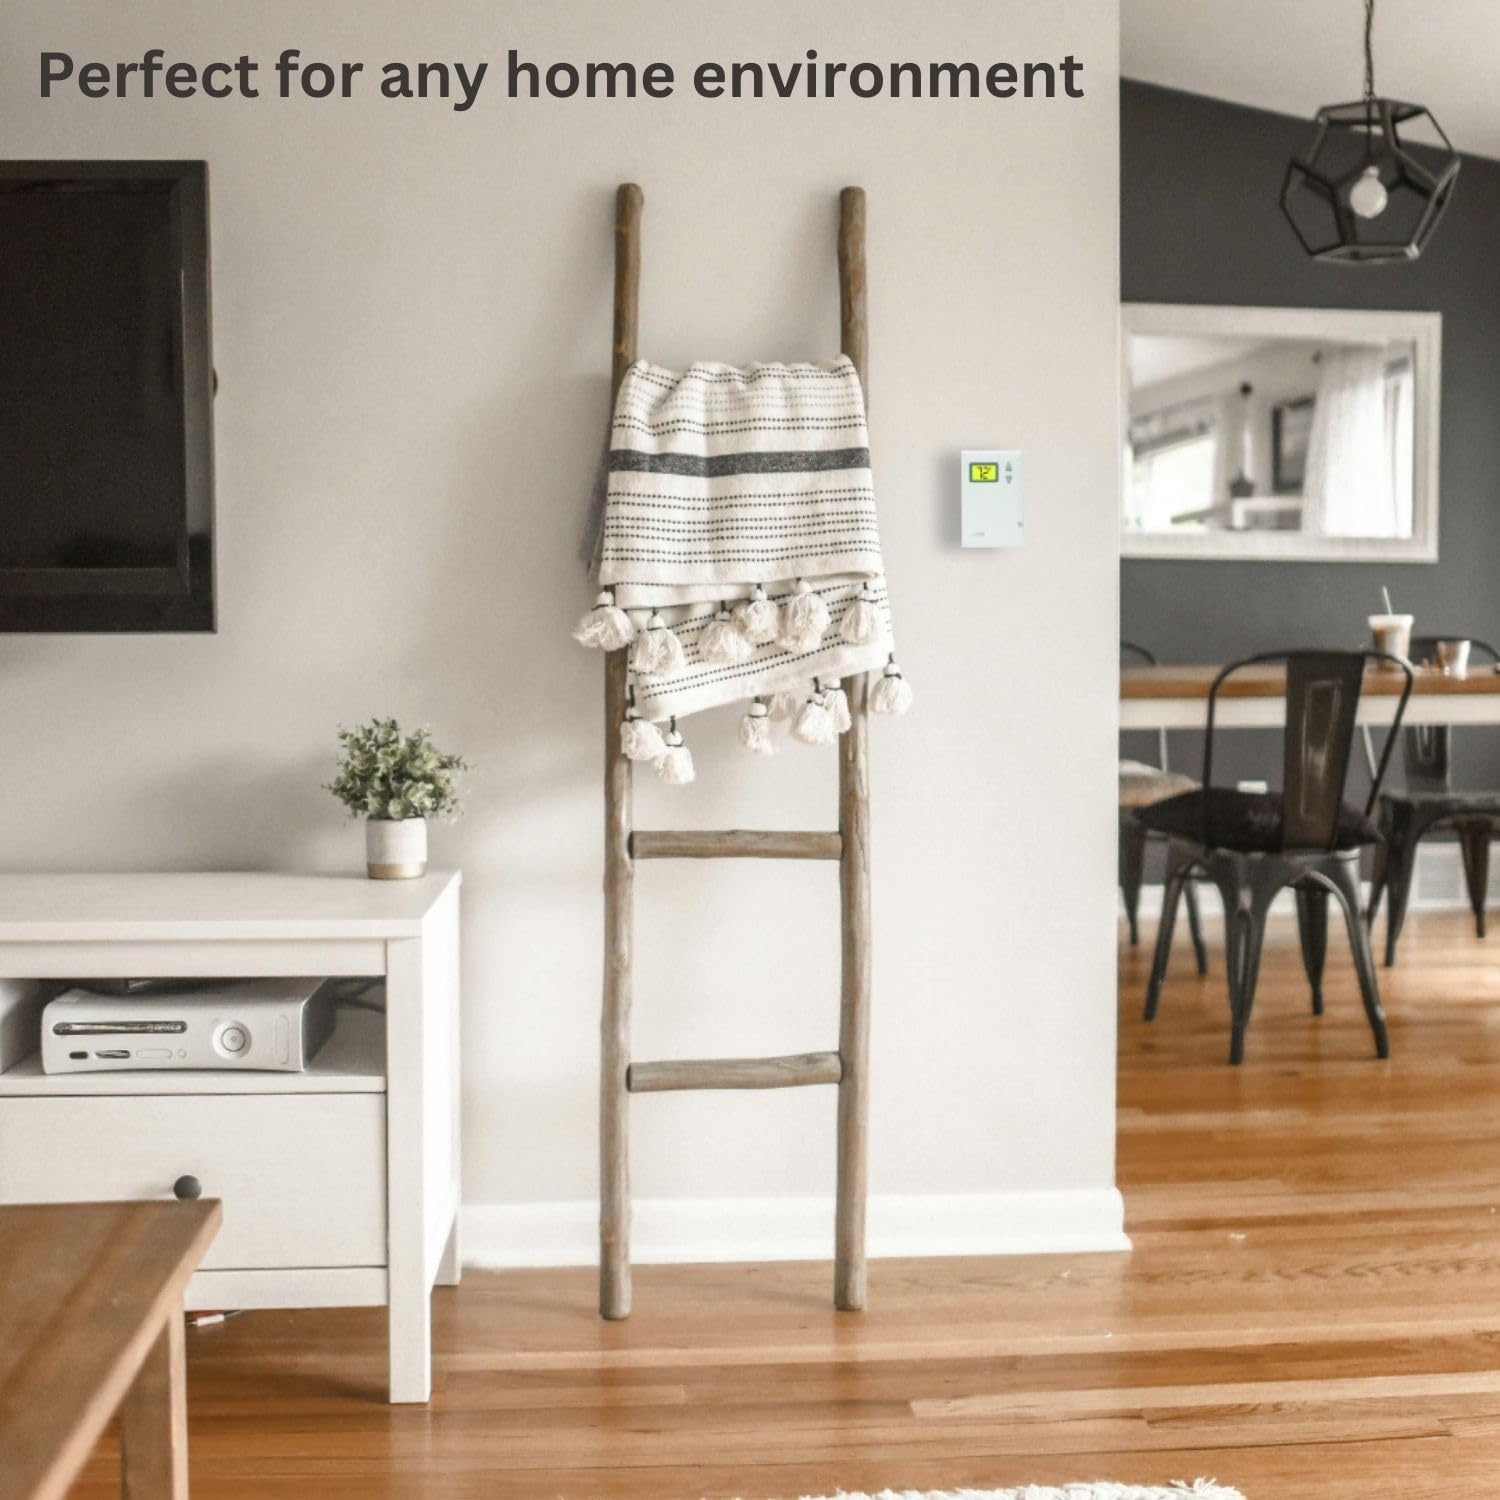
Слика 1.2: The LUX Pro PSD010B Thermostat mounted on a wall in a contemporary living room, demonstrating its discreet integration into a home environment.
2. Безбедносне информације
- Always turn off power to the heating system at the main fuse or circuit breaker panel before installing or servicing the thermostat.
- Овај термостат је дизајниран за ниске напонеtage (24V) heating systems or millivolt systems. Do not use with line voltagе (120V/240V) системи.
- Уверите се да су сви прикључци ожичења безбедни и да су у складу са локалним електричним прописима.
- Одложите батерије у складу са локалним прописима. Не спаљујте батерије.
3. Садржај пакета
Проверите да ли ваш пакет садржи следеће ставке:

Слика 3.1: Visual representation of the items included in the product box: the PSD010B thermostat, two AA LR6 batteries, two ST screws, two wall anchors, and wire labels.
- LUX Pro PSD010B Thermostat
- 2 AA LR6 Batteries
- 2 Mounting Screws (ST screws)
- 2 Зидна сидра
- Жичане налепнице
- Упутство за употребу (овај документ)
4. Инсталација
4.1 Контролна листа пре инсталације
- Ensure your heating system is compatible (see Section 6: System Compatibility).
- Gather necessary tools: Phillips screwdriver, wire strippers (if needed), drill (if installing wall anchors).
- Turn off power to your heating system at the circuit breaker or fuse box.
4.2 Уклањање старог термостата
- Turn off the power to your heating system.
- Скините поклопац старог термостата.
- Note the wire connections. This thermostat is designed for 2-wire heat-only systems. Label the wires (e.g., R and W) using the provided wire labels.
- Искључите жице и уклоните стару базу термостата са зида.
4.3 Монтажа новог термостата
- Одвојите предњи поклопац од основе термостата.
- Position the thermostat base on the wall where the old thermostat was located. Ensure it is level.
- Mark the mounting holes. If new holes are required, drill pilot holes and insert wall anchors if mounting into drywall.
- Secure the thermostat base to the wall using the provided screws.
4.4 Ожичење
The PSD010B is compatible with 2-wire heat-only systems. Connect the wires from your heating system to the terminals on the thermostat base. Typically, these are R (power) and W (heat call) wires. Ensure connections are tight.
4.5 Инсталација батерије
- Insert the two AA batteries into the battery compartment on the back of the thermostat, observing the correct polarity (+/-).
- Snap the front cover onto the thermostat base.
- Restore power to your heating system at the main fuse or circuit breaker panel.
5. Операција
5.1 Display and Controls Overview
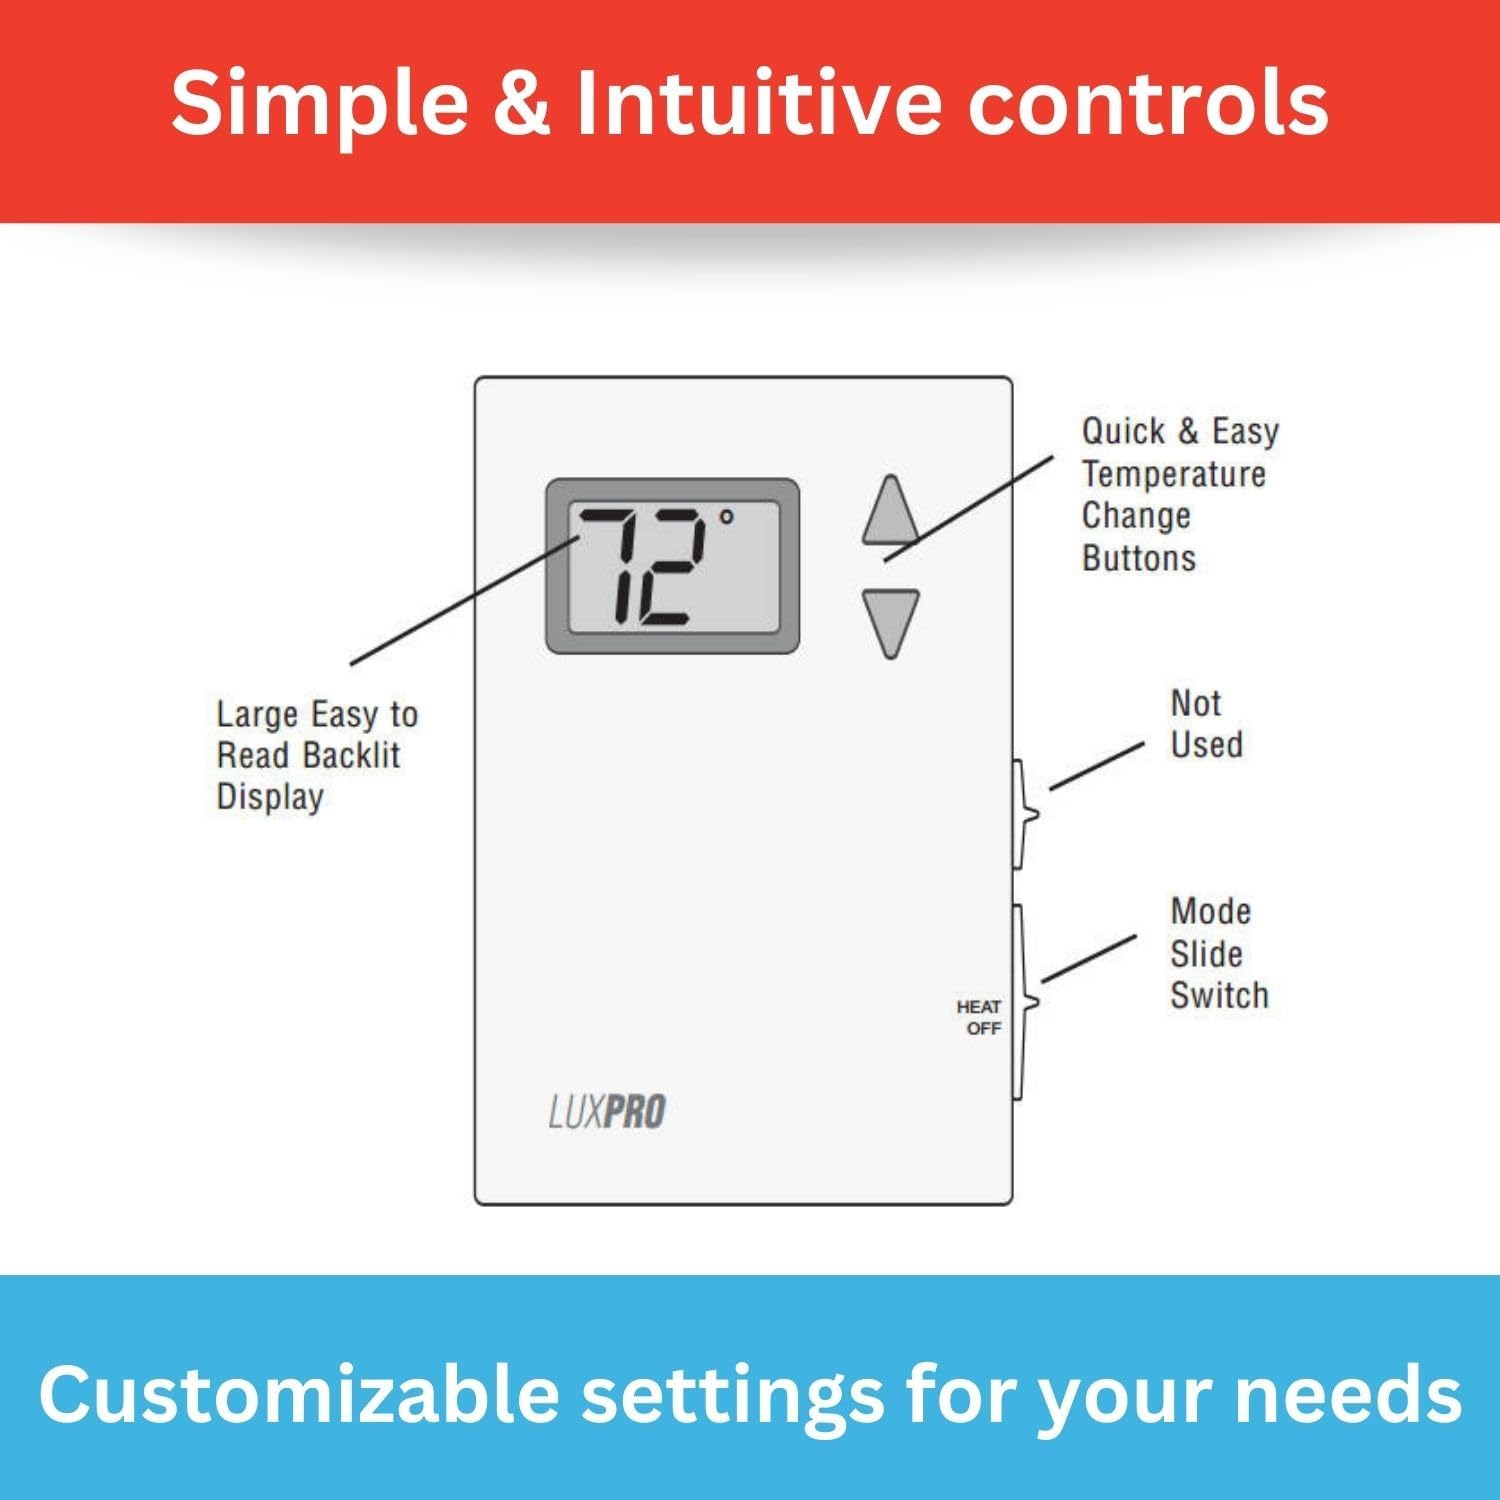
Слика 5.1: Diagram illustrating the controls of the LUX Pro PSD010B Thermostat, highlighting the large backlit display, quick and easy temperature change buttons (up/down arrows), and the Heat/Off mode slide switch on the side.
- Дигитални екран: Shows the current room temperature and the set temperature. It is backlit for easy reading.
- Дугмад за горе/доле: Used to adjust the desired temperature setting.
- Mode Slide Switch: Located on the side of the thermostat. Select 'HEAT' for heating operation or 'OFF' to turn the system off.
5.2 Подешавање температуре
Да бисте подесили жељену температуру, користите Up or Доле arrow buttons. The display will show the set temperature as you adjust it, then revert to showing the current room temperature after a few seconds. The thermostat will automatically activate your heating system when the room temperature falls below your set temperature.
5.3 Избор режима
Use the slide switch on the side of the thermostat to select the operating mode:
- ТОПЛОТА: Термостат ће контролисати ваш систем грејања како би одржао подешену температуру.
- ВАН: The heating system will remain off.
5.4 Fahrenheit/Celsius Selection
The thermostat allows selection between Fahrenheit and Celsius temperature display. Refer to the detailed specifications or the full manual for instructions on how to switch this setting, typically involving a button combination or a switch on the circuit board.
5.5 Adjustable Temperature Limits
The thermostat features adjustable temperature limits, allowing you to set a minimum and maximum temperature range. This prevents the temperature from being set too high or too low. Consult the full manual for instructions on how to configure these limits.
6. Компатибилност система
The LUX Pro PSD010B thermostat is designed for specific heating systems. Please review the compatibility information below before installation.

Слика 6.1: A chart detailing the system compatibility of the LUX Pro PSD010B Thermostat. It is compatible with 2-wire Hydronic (Hot Water), 750 Millivolt, and Gas Fireplaces (24V). It is not compatible with Heat Pump Multistage, Radiant Ceiling Heat, Electric Baseboards, Heat Pump w/ Auxiliary Heat, Portable space heaters, 3-wire Hydronic (Hot Water), Gas/Oil/Electric Furnace - Multistage, Cool Multistage, Cooling only, Plug-in air conditioners, Heat Pump w/o Auxiliary Heat, Gas/Oil/Electric Furnace - Heating only, and Gas/Oil/Electric Furnace - Single Stage.
Compatible Systems (Heat Only - 24V or Millivolt)
- 2-wire Hydronic (Hot Water) systems
- 750 Millivolt systems (e.g., gas fireplaces, floor furnaces)
- Гасни камини (24V)
Није компатибилно са
- Мултисистеми топлотних пумпиtagе системи
- Зрачно грејање плафона
- Електричне лајсне
- Топлотна пумпа са помоћним грејањем
- Преносиви грејачи простора
- 3-wire Hydronic (Hot Water) systems
- Гасна/нафтна/електрична пећ - вишенаменскаtage
- Кул Мултиtagе системи
- Системи само за хлађење
- Клима уређаји са утичницом
- Топлотна пумпа без помоћног грејања
- Gas/Oil/Electric Furnace - Heating only (if it requires a fan control)
- Гасна/нафтна/електрична пећ - једнострука Stage (if it requires a fan control)
7. Одржавање
7.1 Замена батерије
The thermostat is powered by two AA batteries. When the battery power is low, a low battery indicator will appear on the display. Replace batteries annually or when the low battery indicator appears to ensure continuous operation.
- Gently pull the bottom of the thermostat cover forward to release it from the base.
- Уклоните старе АА батерије.
- Уметните две нове алкалне батерије типа АА, водећи рачуна о исправном поларитету.
- Snap the cover back onto the thermostat base.
7.2 Чишћење
Очистите спољашњост термостата меком крпомamp крпу. Не користите абразивна средства за чишћење или раствараче. Избегавајте прскање течности директно на термостат.
КСНУМКС. Решавање проблема
| Проблем | Могући узрок | Решење |
|---|---|---|
| Нема приказа или празан екран | Празне или неправилно постављене батерије | Replace batteries with new AA alkaline batteries, ensuring correct polarity. |
| Heating system not turning on |
|
|
| Нетачно очитавање температуре | Thermostat located near heat source/draft, or internal sensor issue. | Ensure thermostat is not exposed to direct sunlight, drafts, or heat sources. If problem persists, contact support. |
9. Спецификације

Слика 9.1: A detailed list of features for the LUX Pro PSD010B Thermostat, including digital, non-programmable operation, battery power, temperature range of 40°F to 90°F, clean design, large backlit display, easy installation, F/C selectable display, 5-minute minimum run/off time, and adjustable temperature stop.
- Модел: ПСД010Б
- Тип: Mechanical, Non-Programmable
- Компатибилност система: 1 Heat Only (2-wire Hydronic, 750 Millivolt, 24V Gas Fireplaces)
- Извор напајања: 2 АА батерија (укључено)
- Температурни опсег: 40°Ф до 90°Ф (4°Ц до 32°Ц)
- Тип приказа: Дигитални ЛЦД са позадинским осветљењем
- Тип контроле: Button Control (Up/Down arrows), Slide Switch (Heat/Off)
- Димензије: 1.13"Д к 5"Ш к 3.5"В
- Тежина артикла: 0.4 фунте (6.4 унци)
- Волtage: 24 Volts (compatible with millivolt systems)
- Материјал: Пластика
- Тип монтаже: Валл Моунт
- УПЦ: 021079070107
10. Гаранција и подршка
The LUX Pro PSD010B Thermostat comes with a 5-годишња ограничена гаранција, ensuring reliable performance and peace of mind. For warranty claims, technical assistance, or further inquiries, please refer to the contact information provided with your product packaging or visit the official LUX webсајту.

Слика 10.1: The LUX Pro PSD010B Thermostat displayed with icons highlighting its key features: a backlit display, adjustable temperature limits, battery-only power, and a 5-year limited warranty.