
1. Увод
This manual provides comprehensive instructions for the installation, operation, and maintenance of the Supermicro X10SLM+-LN4F motherboard. Designed for server applications, this motherboard features an LGA1150 socket, Intel C224 PCH, DDR3 memory support, and multiple Gigabit Ethernet ports. Please read this manual thoroughly before proceeding with installation to ensure proper setup and optimal performance.
2. Производ је готовview
The Supermicro X10SLM+-LN4F is a microATX server motherboard built for reliability and performance. Key features include:
- LGA1150 Socket for Intel Xeon E3-1200 v3/v4 and 4th Gen Core i3 processors.
- Intel C224 PCH chipset.
- Four DDR3 DIMM slots supporting up to 64GB ECC/non-ECC UDIMM.
- Multiple SATA3 (6Gbps) ports.
- Integrated quad Gigabit Ethernet ports.
- USB 3.0 and USB 2.0 support.
- VGA output for integrated graphics.
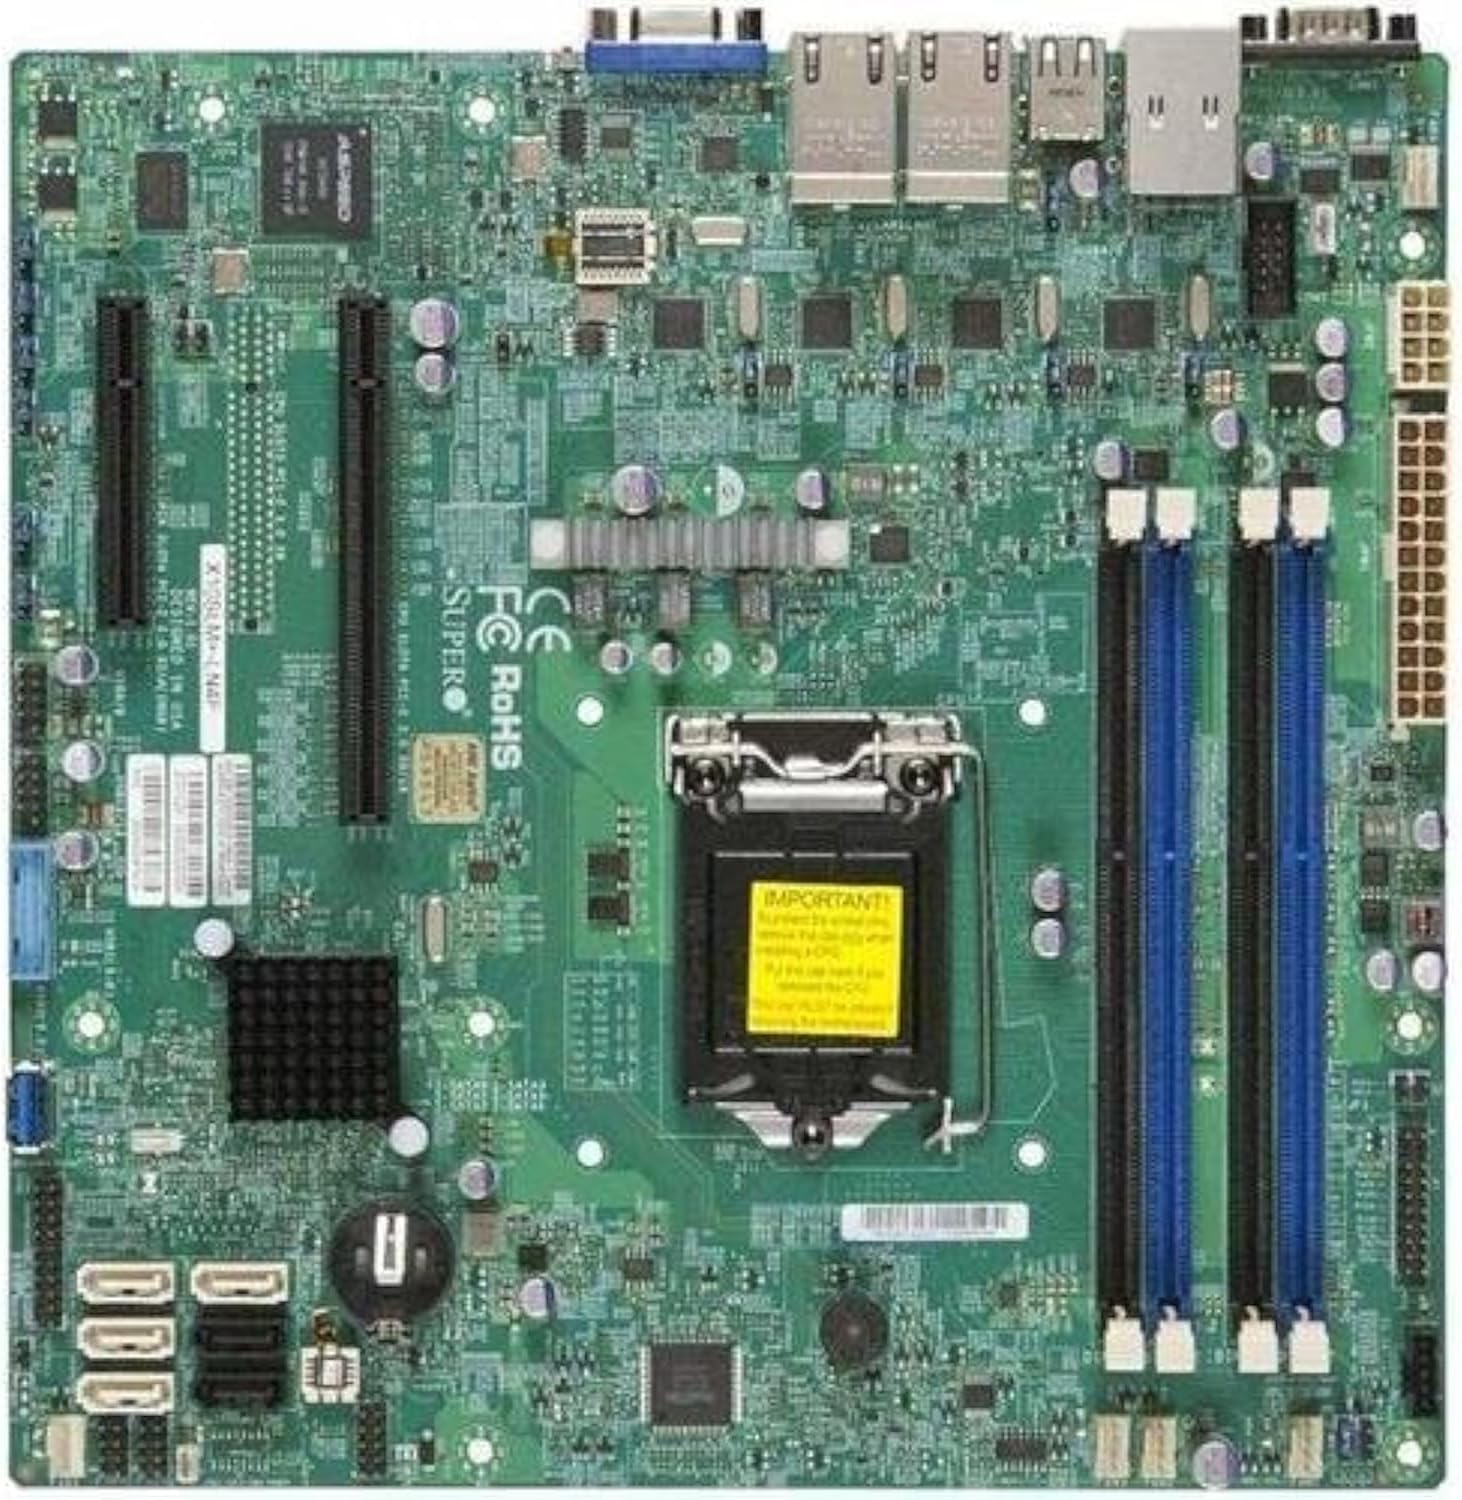
Слика 2.1: Одозго надоле view of the Supermicro X10SLM+-LN4F motherboard, showing the CPU socket, DIMM slots, PCIe slots, and various connectors.

Слика 2.2: Англед view of the motherboard, highlighting the layout of components and expansion slots.
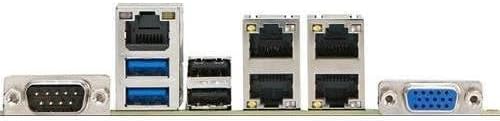
Слика 2.3: Rear I/O panel of the Supermicro X10SLM+-LN4F motherboard, featuring multiple LAN ports, USB ports, and serial ports.
3. Подешавање и инсталација
Before beginning installation, ensure your system is powered off and disconnected from the power source. Wear an anti-static wrist strap to prevent electrostatic discharge (ESD) damage to components.
3.1. Инсталација процесора
- Пронађите LGA1150 процесорски сокет на матичној плочи.
- Пажљиво притисните ручицу за оптерећење надоле и повуците је у страну да бисте отворили оквир за задржавање процесорског сокета.
- Пажљиво поравнајте троугласту ознаку на процесору са одговарајућом ознаком на утичници.
- Уметните процесор у сокет без притиска.
- Close the retention frame and secure it with the load lever.
- Apply a thin, even layer of thermal paste to the CPU's integrated heat spreader (IHS).
- Инсталирајте хладњак процесора према упутствима произвођача.
3.2. Инсталација меморије (RAM)
- Locate the four DDR3 DIMM slots. For optimal performance, refer to the motherboard's specific memory population guidelines, typically starting with slots closest to the CPU or specific colored slots for dual-channel configurations.
- Open the retention clips at both ends of the DIMM slot.
- Поравнајте зарез на DDR3 меморијском модулу са кључем у DIMM слоту.
- Insert the memory module firmly into the slot until the retention clips snap into place.
- Уверите се да су обе копче потпуно затворене и да је модул правилно постављен.
3.3. Инсталација уређаја за складиштење
Connect SATA storage devices (HDDs/SSDs) to the SATA ports on the motherboard using SATA data cables. Connect the power cables from your power supply unit (PSU) to the storage devices.
3.4. Инсталација картице за проширење
This motherboard features PCI Express (PCIe) slots. To install an expansion card:
- Remove the corresponding slot cover from your chassis.
- Поравнајте картицу за проширење са PCIe слотом.
- Press down firmly until the card is fully seated in the slot.
- Secure the card with a screw or retention clip from your chassis.
3.5. Прикључци за напајање
- 24-пински ATX конектор за напајање: Connect the main 24-pin power cable from your PSU to the ATX power connector on the motherboard.
- 8-pin EPS/CPU Power Connector: Connect the 8-pin (or 4+4 pin) CPU power cable from your PSU to the EPS connector near the CPU socket.
3.6. Предњи панел и задњи У/И конекције
- Конектори предње плоче: Connect the power switch, reset switch, power LED, and HDD activity LED cables from your chassis to the corresponding pins on the motherboard's front panel header. Refer to the motherboard's silkscreen labels for correct orientation.
- УСБ заглавља: Connect front panel USB ports to the onboard USB headers.
- Audio Headers: Connect front panel audio jacks to the onboard audio header.
- Задњи И/О панел: Connect peripherals such as keyboard, mouse, monitor (via VGA), and network cables (to the Gigabit Ethernet ports) to the rear I/O panel.
4. Упутство за употребу
4.1. Initial Power On and BIOS/UEFI Setup
- After all components are installed and connected, connect the power cord to the PSU and turn on the power switch on the PSU.
- Press the power button on your chassis.
- Током самотеста при укључивању (POST), више пута притисните ДЕЛ or F2 key (or as indicated on screen) to enter the BIOS/UEFI setup utility.
- In the BIOS/UEFI, configure essential settings such as date and time, boot order, and enable/disable specific features as required for your operating system and hardware.
- Сачувајте измене и изађите из BIOS/UEFI-ја. Систем ће се поново покренути.
4.2. Инсталација оперативног система
To install an operating system (e.g., Windows, Linux, VMware ESXi):
- Insert the operating system installation media (USB drive or DVD) into the system.
- Boot from the installation media (you may need to adjust the boot order in BIOS/UEFI).
- Follow the on-screen prompts to install the operating system on your chosen storage device.
- After installation, install all necessary drivers for the motherboard components (chipset, LAN, VGA, etc.) from the Supermicro website or the provided driver disc.
5. Одржавање
Редовно одржавање помаже у обезбеђивању дуготрајности и стабилног рада ваше матичне плоче и система.
5.1. Чишћење
- Periodically clean dust from the motherboard and system components using compressed air. Ensure the system is powered off and unplugged before cleaning.
- Избегавајте употребу течних средстава за чишћење директно на компонентама.
- Ensure proper airflow within the chassis by keeping fan vents clear.
5.2. Firmware and Driver Updates
- Проверите Супермицро website periodically for updated BIOS/UEFI firmware and drivers for your motherboard model.
- Follow the provided instructions carefully when updating firmware to avoid system instability.
5.3. Разматрања животне средине
- Operate the motherboard within recommended temperature and humidity ranges to prevent damage.
- Ensure adequate ventilation in the server chassis.
КСНУМКС. Решавање проблема
Овај одељак пружа решења за уобичајене проблеме на које можете наићи.
6.1. Нема напајања / Нема POST-а (самотестирање при укључивању)
- Verify that the power supply unit (PSU) is connected correctly to the motherboard (24-pin ATX and 8-pin EPS connectors).
- Ensure the PSU is switched on and receiving power from the wall outlet.
- Check that the front panel power switch cable is correctly connected to the motherboard header.
- Reseat the CPU, RAM modules, and any expansion cards.
- Try booting with only essential components (CPU, one RAM stick, CPU cooler) to isolate the issue.
- Listen for beep codes from the system speaker, which can indicate specific hardware failures. Refer to the Supermicro website for beep code interpretations.
6.2. Проблеми са приказом
- Ensure the monitor is properly connected to the motherboard's VGA port.
- Проверите да ли је монитор укључен и подешен на исправан улазни извор.
- If using a discrete graphics card, ensure it is properly seated and connected to power (if required).
6.3. Operating System Not Booting
- Check the boot order in the BIOS/UEFI to ensure the correct storage device is prioritized.
- Verify that the operating system is installed correctly on the storage device.
- Ensure SATA data and power cables are securely connected to the storage device and motherboard.
7. Спецификације
Below are the technical specifications for the Supermicro X10SLM+-LN4F motherboard:
| Феатуре | Детаљ |
|---|---|
| Бранд | Супермицро |
| Назив модела | X10SLM+-LN4F-B |
| ЦПУ Соцкет | ЛГА1150 |
| Тип чипсета | Интел Ц224 |
| Технологија РАМ меморије | ДДР3 СДРАМ |
| Брзина меморије | 1600 МХз |
| Капацитет меморије | До 64 ГБ |
| Број УСБ 2.0 портова | 2 (задњи I/O) |
| Интерфејс графичке картице | Integrated, PCI |
| Компатибилни уређаји | Сервер |
| Платформа | Виндовс 10 |
| Тежина артикла | 5.8 фунти |
| Димензије производа (ДкШкВ) | 10 к 10 к 2 инча |
| Датум првог доступног | 4. јуна 2013. године |
Note: Specifications are subject to change without notice. For the most current information, please refer to the official Supermicro product page.
8. Гаранција и подршка
For detailed warranty information, please refer to the warranty card included with your product or visit the official Supermicro website. Technical support is available through Supermicro's customer service channels, including their support portal, email, and phone. Please have your product model number (X10SLM+-LN4F) and serial number ready when contacting support.
For the latest drivers, BIOS updates, and additional documentation, please visit: ввв.супермицро.цом