1. Увод
This manual provides instructions for the Vivitek D555 XGA DLP Portable Projector. The D555 is designed for clear and vivid image projection, featuring XGA resolution, 3000 lumens brightness, and 3D readiness via DLP Link. It incorporates DLP and Brilliant Color technologies for enhanced visual performance and offers various connectivity options including HDMI v1.4.
2. Безбедносне информације
- Не блокирајте вентилационе отворе. Обезбедите довољно простора око пројектора за правилан проток ваздуха.
- Не гледајте директно у сочиво пројектора када је укљученоamp је укључено. Јако светло може изазвати оштећење ока.
- Избегавајте постављање пројектора на директну сунчеву светлост, близу извора топлоте или у окружења са високом влажношћу или прашином.
- Користите само кабл за напајање који се испоручује са пројектором.
- Не покушавајте сами да сервисирате овај производ. Све сервисирање препустите квалификованом сервисном особљу.
- Држите пројектор даље од воде или других течности.
- Unplug the projector from the power outlet before cleaning or when not in use for extended periods.
3. Садржај пакета
Проверите да ли су све ставке наведене у наставку укључене у ваш пакет:
- Vivitek D555 Projector
- Кабл за напајање наизменичном струјом
- ВГА кабел
- Ремоте Цонтрол
- Batteries for Remote (AA x 2)
- User's Manual (on CD)
4. Производ је готовview
4.1 Предња и горња страна View
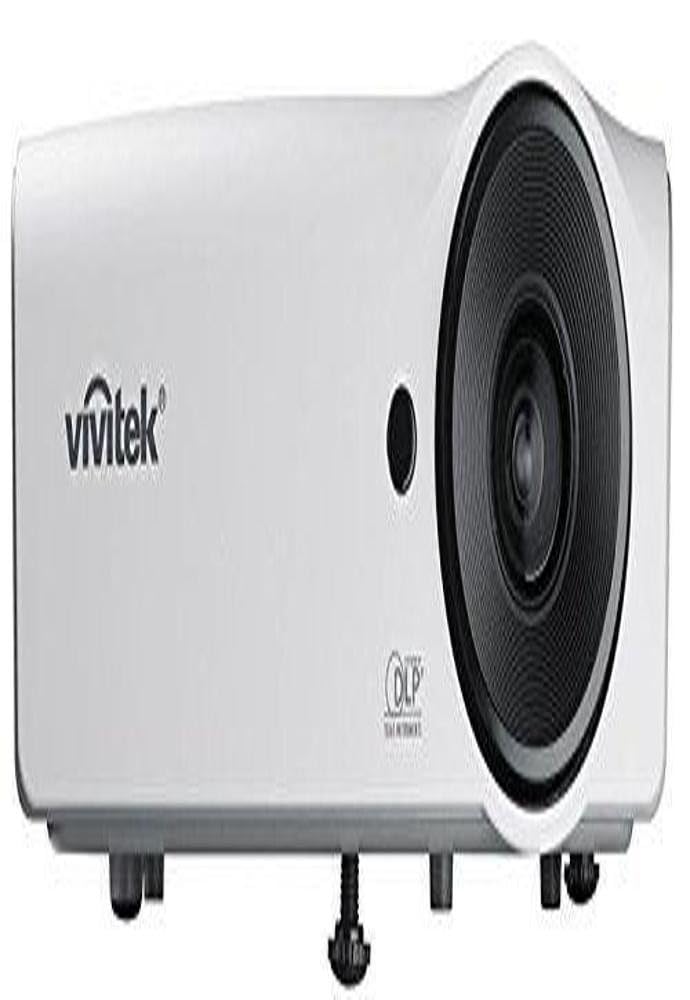
Слика 4.1: Предњи и горњи view of the Vivitek D555 projector. This image shows the projector's lens, control panel on top, and the Vivitek logo.
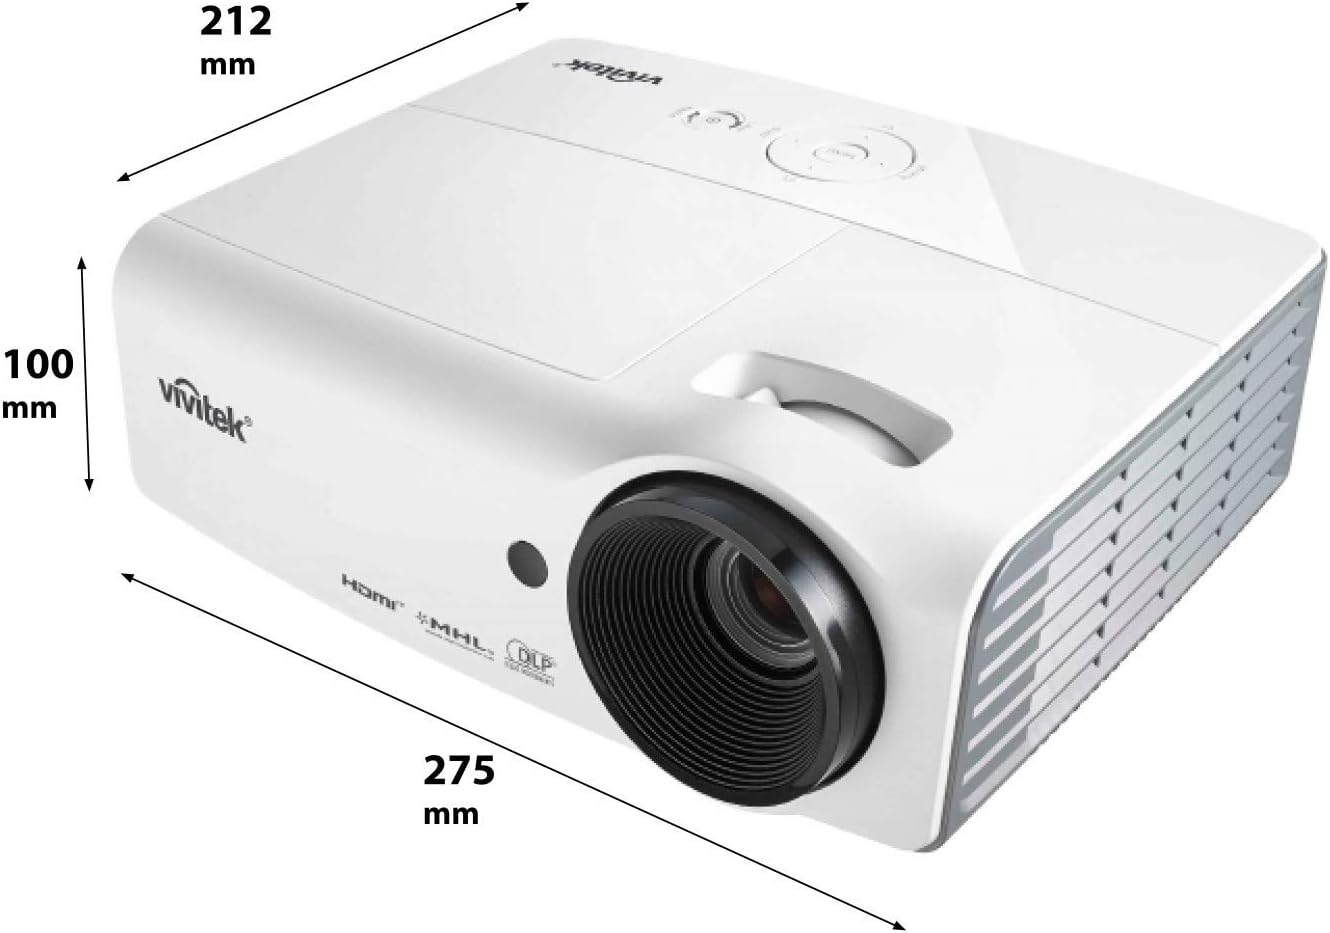
Слика 4.2: Dimensions of the Vivitek D555 projector. The image indicates a width of 275 mm, a depth of 212 mm, and a height of 100 mm.
The front of the projector features the projection lens. The top panel includes the control buttons for power, menu navigation, source selection, and focus/zoom adjustments. The Vivitek logo is prominently displayed.
4.2 Прикључци задње плоче

Слика 4.3: Rear panel of the Vivitek D555 projector showing various input and output ports. These include HDMI, dual VGA inputs, VGA output, S-Video, Composite Video, audio input/output, and a USB port.
The rear panel provides all necessary connection ports for video and audio sources. These include:
- HDMI верзија 1.4: For digital video and audio input.
- Рачунарски улаз 1 (VGA): D-Sub 15-pin input for computer connection.
- Рачунарски улаз 2 (VGA): Second D-Sub 15-pin input for computer connection.
- Computer Out (VGA): D-Sub 15-pin output for monitor loop-through.
- С-Видео: For S-Video input.
- Видео (композитни): RCA jack for composite video input.
- Аудио улаз: 3.5mm stereo mini-jack for audio input.
- Аудио излаз: 3.5mm stereo mini-jack for audio output.
- УСБ (тип Б): За сервис или ажурирања фирмвера.
- Улаз за наизменичну струју: За повезивање кабла за напајање.
5. Подешавање
5.1 Постављање пројектора
Place the projector on a stable, flat surface or mount it securely. Ensure the projector is positioned at an appropriate distance from the screen to achieve the desired image size. The lens should be perpendicular to the screen for optimal image geometry.
5.2 Повезивање на извор напајања
- Connect the AC power cord to the projector's AC power inlet.
- Укључите други крај кабла за напајање у уземљену електричну утичницу.
5.3 Повезивање видео извора
Choose the appropriate cable for your video source and connect it to the corresponding port on the projector's rear panel.
- ДВИ: For high-definition digital sources like Blu-ray players, gaming consoles, or laptops.
- VGA (Computer In 1/2): For computers or other devices with VGA output.
- S-Video/Composite Video: For standard definition video sources like DVD players or VCRs.
For audio, connect an audio cable from your source to the projector's Audio In port, or use the HDMI connection which carries both video and audio.
6. Руковање пројектором
6.1 Укључивање/искључивање
- За укључивање: Press the Power button on the projector's control panel or the remote control. The power indicator light will turn blue.
- За искључивање: Press the Power button twice. The projector will enter a cooling down cycle, and the power indicator will flash. Do not unplug the projector until the cooling cycle is complete and the power indicator light stops flashing.
6.2 Подешавање слике
- Фокус: Окрећите прстен за фокусирање на објективу пројектора док слика не постане оштра и јасна.
- Зумирање: Rotate the zoom ring on the projector lens to adjust the image size.
- Кеистоне Цоррецтион: If the image appears trapezoidal, use the Keystone Correction function in the projector's OSD (On-Screen Display) menu to square the image.
6.3 Selecting an Input Source
Press the "Source" button on the projector or remote control to cycle through available input sources (HDMI, VGA1, VGA2, S-Video, Video).
6.4 3Д функционалност
The Vivitek D555 is 3D-ready via DLP Link. To view 3Д садржај:
- Connect a 3D-compatible source (e.g., 3D Blu-Ray player) to the projector via HDMI.
- Ensure your 3D content is playing.
- Wear active DLP Link 3D glasses (sold separately). The projector will automatically detect the 3D signal and enable 3D mode.
7. Одржавање
7.1 Чишћење пројектора
- Екстеријер: Користите меку крпу која не оставља длачице дampened with a mild cleaning solution to wipe the projector's casinг. Не користите абразивна средства за чишћење или раствараче.
- Објектив: Use a lens cleaning cloth and lens cleaning solution specifically designed for optical surfaces. Avoid touching the lens with your fingers.
- Вентилациони отвори: Regularly check and clean the air vents to prevent dust buildup, which can affect cooling and performance. Use a soft brush or compressed air.
7.2 Лamp Замена
Пројектор лamp has a lifespan of up to 6,000 hours in Eco-mode. When the lamp reaches the end of its life, a warning message will appear, or the lamp indicator light will illuminate. Refer to the detailed instructions in the full user manual (on CD) for safe lamp поступке замене. Увек дозволите пројектору да се потпуно охлади пре него што покушатеamp замена.
КСНУМКС. Решавање проблема
| Проблем | Могући узрок | Решење |
|---|---|---|
| Нема слике на екрану |
|
|
| Слика је мутна |
|
|
| Слика је трапезоидног облика |
|
|
| Нема звука |
|
|
9. Спецификације
| Број модела | DP535-264VVUP (D555) |
| Бранд | Вивитек |
| Дисплаи Тецхнологи | ДЛП |
| Нативе Ресолутион | КСГА (1024 к 768) |
| Максимална резолуција | ВУКСГА (1920 к 1200) |
| Осветљеност | 3000 лумена |
| Однос контраста | 15000:1 |
| Lamp Живот | До 6,000 сати (еко-режим) |
| Повезивање | HDMI v1.4, Dual VGA In, VGA Out, S-Video, Composite Video, Audio In/Out, USB |
| Посебне карактеристике | 3D-Ready (DLP Link), Brilliant Color Technology |
| Димензије производа | 10.8 к 8.35 к 3.66 инча (275 к 212 к 100 мм) |
| Тежина артикла | 5.1 фунти |
| Произвођач | Vivitek Corp. |
| Батерије (за даљински) | 2 АА батерије (укључене) |
10. Гаранција и подршка
For warranty information and technical support, please refer to the official Vivitek website or the warranty card included with your product. Do not attempt to repair the projector yourself, as this may void your warranty. Contact Vivitek customer service for assistance with any issues not covered in the troubleshooting section.