1. Увод
This manual provides detailed instructions for the installation, operation, and maintenance of your Advance Darkside 8303B30 Micro ATX PC Case. Please read this manual thoroughly before beginning installation to ensure proper setup and to maximize the performance and longevity of your system components.
The Advance Darkside ATX Mid-Tower PC case features a top panel with a 2.5/3.5 inch SATA HDD docking station, 2 USB 3.0 ports, and 1 USB 2.0 port. It is designed to accommodate Micro ATX motherboards and offers efficient cooling solutions.
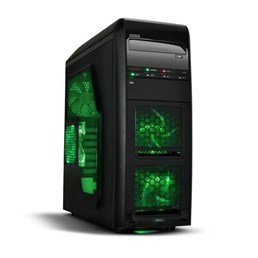
Слика 1: Предња страна view of the Advance Darkside 8303B30 PC Case, showcasing its design and front panel features.
2. Карактеристике производа
- Модел: Advance Darkside 8303B30
- Материјал шасије: SGCC Steel
- Боја: Black (interior and exterior)
- Компатибилност матичне плоче: Мицро АТКС
- Повезивање предњег панела: 2 x USB 3.0, 1 x USB 2.0, Audio Jacks
- Карактеристике складиштења: Top panel 2.5/3.5 inch SATA HDD docking station
- Систем за хлађење: Five 120mm fans included (two LED fans at the front, one LED fan on the side, one fan at the rear, and one fan at the top). Water cooling ready.
- Подршка за графичке картице: Designed for King Size graphics cards
- Бочна плоча: Plexiglass window
3. Упутства за подешавање
3.1. Припрема случаја
- Unpack the PC case carefully and remove all packaging materials.
- Поставите кућиште на стабилну, равну површину.
- Remove the side panels by unscrewing the thumbscrews at the rear of the case and sliding the panels backward.
3.2. Инсталација напајања
- Locate the power supply mounting area at the rear bottom of the case.
- Secure the power supply unit (PSU) using the provided screws. Ensure the PSU fan faces the bottom or top, depending on your PSU and case design for optimal airflow.
3.3. Инсталација матичне плоче
- Инсталирајте И/О штит у изрез на задњој страни кућишта.
- Align the motherboard with the standoffs inside the case. Ensure all standoffs match the motherboard's screw holes.
- Причврстите матичну плочу одговарајућим завртњима.
3.4. Инсталација уређаја за складиштење података
- For 3.5-inch HDDs, slide the drive into the drive bay trays. The trays are designed to flex slightly to accommodate the drive without screws in some configurations.
- For 2.5-inch SSDs/HDDs, secure them to the designated mounting points or use adapters if necessary.
- Utilize the top panel SATA docking station for quick access to 2.5/3.5 inch SATA drives. Simply insert the drive into the slot until it clicks into place.
3.5. Инсталација графичке картице и картице за проширење
- Уклоните потребне поклопце слотова за проширење на задњој страни кућишта.
- Insert the graphics card or other expansion cards into the appropriate PCIe slots on the motherboard.
- Secure the cards with screws or retention clips.
3.6. Менаџмент каблова
Route all cables (power, SATA, front panel connectors) through the designated cutouts and tie-down points behind the motherboard tray to ensure clean airflow and an organized interior.
4. Упутство за употребу
4.1. Укључивање система
- Ensure all components are correctly installed and cables are securely connected.
- Повежите кабл за напајање са напајањем и зидном утичницом.
- Press the power button located on the front panel of the case.
4.2. Using Front Panel Ports
- USB 3.0/2.0 портови: Connect USB devices such as keyboards, mice, external drives, or flash drives.
- Аудио прикључци: Connect headphones, microphones, or speakers.
- HDD Docking Station: Insert a 2.5-inch or 3.5-inch SATA HDD/SSD into the top docking slot for quick data access. Ensure the drive is properly seated.
5. Одржавање
5.1. Cleaning the Case
- Редовно чистите спољашњост кућишта меком,amp тканина. Избегавајте абразивна средства за чишћење.
- Use compressed air to remove dust from fan filters and internal components.
5.2. Одржавање вентилатора
- Periodically check the case fans for dust buildup. Clean them gently with compressed air or a soft brush.
- Ensure no cables are obstructing fan blades.
КСНУМКС. Решавање проблема
6.1. Систем се не укључује
- Check if the power cable is securely connected to both the PSU and the wall outlet.
- Уверите се да је прекидач напајања у положају „УКЉУЧЕНО“.
- Проверите да ли је кабл дугмета за напајање на предњој плочи правилно повезан са матичном плочом.
6.2. Проблеми са прегревањем
- Ensure all case fans are spinning correctly and are not obstructed.
- Check for excessive dust buildup on fans and heatsinks.
- Verify proper cable management to allow for unobstructed airflow.
6.3. Front Panel USB/Audio Not Working
- Confirm that the front panel USB and audio cables are correctly connected to the corresponding headers on the motherboard.
- Check motherboard drivers for USB and audio.
7. Спецификације
| Феатуре | Детаљ |
|---|---|
| Бранд | Напред |
| Број модела | 8303Б30 |
| Боја | Црно |
| Материјал шасије | Alloy Steel (SGCC Steel) |
| Компатибилност матичне плоче | Мицро АТКС |
| Димензије (Д к Ш к В) | 48 к 19.5 к 48.2 цм |
| Тежина производа | 5.8 кг |
| Портови на предњој плочи | 2 x USB 3.0, 1 x USB 2.0, Audio Jacks |
| Стораге Доцк | Top panel 2.5/3.5 inch SATA HDD docking station |
| Инцлудед Фанс | 5 x 120mm (2 front LED, 1 side LED, 1 rear, 1 top) |
| Подршка за хлађење | Water cooling ready |
| Сиде Панел | Плексиглас |
| Препоручена употреба | Гаминг |
8. Гаранција и подршка
8.1. Гаранција произвођача
This product comes with a manufacturer's warranty of 1 year from the date of purchase. Please retain your proof of purchase for warranty claims. The warranty covers defects in materials and workmanship under normal use.
8.2. Корисничка подршка
For technical assistance, troubleshooting, or warranty inquiries, please contact Advance customer support. Refer to the official Advance webсајт за најновије контакт информације и ресурсе за подршку.