1. Производ је готовview
The HP ProDisplay P17A is a 17-inch LED-backlit LCD monitor designed for general computing tasks. It features a 5:4 aspect ratio with a maximum resolution of 1280 x 1024 pixels, providing clear and consistent visuals. This monitor is equipped with both VGA and HDMI connectivity options, offering versatility for various system configurations. Its compact design and energy-efficient LED backlighting make it suitable for a range of environments.

Слика 1: Предња страна view of the HP ProDisplay P17A monitor, showcasinњегов дисплеј и постоље.
2. Упутства за подешавање
2.1 Распакивање монитора
Пажљиво извадите све компоненте из паковања. Уверите се да су присутне следеће ставке:
- HP ProDisplay P17A Monitor
- Monitor Stand (base and neck)
- Повер Цабле
- VGA Cable (may vary by region/package)
- HDMI Cable (may vary by region/package)
2.2 Састављање постоља
- Поставите монитор лицем надоле на меку, чисту површину да бисте спречили огреботине.
- Причврстите врат постоља на задњу страну монитора, поравнајте језичке и гурајте док не кликне на место.
- Attach the stand base to the bottom of the stand neck, securing it with the captive screw if present.
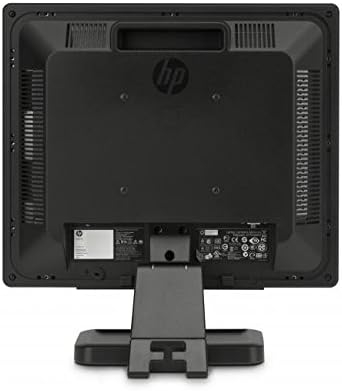
Слика 2: Задња страна view of the monitor, illustrating the stand attachment point and various connectivity ports.
2.3 Каблови за повезивање
- Прикључак за напајање: Повежите кабл за напајање са улазом за напајање монитора, а затим са уземљеном електричном утичницом.
- Видео веза:
- For VGA: Connect one end of the VGA cable to the VGA port on the monitor and the other end to the VGA port on your computer. Tighten the screws on the VGA connector.
- For HDMI: Connect one end of the HDMI cable to the HDMI port on the monitor and the other end to the HDMI port on your computer.
- Уверите се да су све везе безбедне.
3. Упутство за употребу
3.1 Укључивање/искључивање
Press the power button located on the front bezel of the monitor to turn it on or off. The power indicator light will illuminate when the monitor is on.
3.2 Подешавање подешавања екрана (OSD мени)
The On-Screen Display (OSD) menu allows you to adjust various monitor settings. Use the buttons on the front bezel to navigate and select options.
- Дугме менија: Отвара ОСД мени.
- Тастери за навигацију (+ / - or Up/Down): Move through menu options and adjust values.
- Дугме Селецт/ОК: Потврђује избор или улази у подмени.
- Дугме за излаз: Излази из тренутног менија или OSD-а.
Уобичајена подесива подешавања укључују:
- Осветљеност/контраст: Подешава укупну осветљеност и разлику између светлих и тамних подручја.
- Контрола боје: Allows adjustment of color temperature, RGB levels, or preset color modes.
- Изаберите улаз: Manually switches between VGA and HDMI input sources.
- Контрола слике: Adjusts sharpness, aspect ratio, and auto-adjustment for analog signals.
- Менаџмент: Power-saving options, OSD timeout, language selection.
4. Одржавање
4.1 Чишћење монитора
- Увек искључите монитор и извуците кабл за напајање пре чишћења.
- Лагано користите меку крпу која не оставља длачице дampиспрати водом или неабразивним средством за чишћење екрана.
- Не прскајте средство за чишћење директно на екран или мониторasing.
- Avoid using benzene, thinner, ammonia-based cleaners, or abrasive materials, as these can damage the surface.
4.2 Општа нега
- Избегавајте постављање монитора на директну сунчеву светлост или близу извора топлоте.
- Обезбедите одговарајућу вентилацију око монитора.
- Не блокирајте отворе за вентилацију.
- Заштитите екран од оштрих предмета или прекомерног притиска.
КСНУМКС. Решавање проблема
Пре него што контактирате подршку, покушајте са следећим основним корацима за решавање проблема:
5.1 Нема слике на екрану
- Ensure the monitor's power cable is securely connected to both the monitor and a working electrical outlet.
- Verify the power indicator light on the monitor is on. If not, press the power button.
- Check that the video cable (VGA or HDMI) is securely connected to both the monitor and the computer.
- Ensure the correct input source is selected on the monitor (use the OSD menu to switch inputs).
- Поново покрените рачунар.
5.2 Лош квалитет слике
- Fuzzy or Blurry Image: Уверите се да је резолуција екрана на рачунару подешена на нативну резолуцију монитора (1280 x 1024).
- Нетачне боје: Adjust color settings through the OSD menu or your computer's display settings.
- Image Off-Center/Incorrect Size (VGA only): Use the "Auto Adjust" function in the OSD menu.
- Треперење: Check the refresh rate setting on your computer; ensure it is set to 60 Hz.
5.3 Monitor Not Responding to Buttons
- Unplug the monitor's power cable, wait 10 seconds, then plug it back in and try again.
- Уверите се да ниједно дугме није заглављено.
6. Техничке спецификације
| Феатуре | Спецификација |
|---|---|
| Бранд | ХЕВЛЕТТ ПАЦКАРД |
| Назив модела | HP P17A |
| Број модела | F4M97AAABA |
| Величина екрана | 17 инча |
| Дисплаи Типе | ЛЦД са ЛЕД позадинским осветљењем |
| Нативе Ресолутион | 1280 к 1024 (СКСГА) |
| Аспецт Ратио | 5:4 |
| Однос контраста | 1000:1 |
| Рефресх Рате | 60 Хз |
| Време одговора | 5 милисекунди |
| Viewинг Англе | 170 степени |
| Повезивање | 1x VGA, 1x HDMI |
| Потрошња енергије | 25 вати (максимално) |
| Димензије артикла (Д к Ш к В) | 8.12"Д к 14.85"Ш к 15.24"В |
| Тежина артикла | 8.2 фунти |
| Тип монтаже | Зидни носач (компатибилан са VESA стандардом) |
| Додатне карактеристике | Anti Glare Screen |

Figure 3: Dimensions of the HP ProDisplay P17A monitor.
7. Гаранција и подршка
7.1 Информације о гаранцији
This product is often sold as a refurbished item. Refurbished products typically come with a limited warranty provided by the refurbisher or seller. Please refer to your purchase documentation for specific warranty terms and conditions, including duration and coverage details.
7.2 Техничка подршка
For technical assistance, troubleshooting beyond this manual, or warranty claims, please contact the vendor or HP customer support. Have your monitor's model number (F4M97AAABA) and serial number ready when contacting support.
You can find additional support resources, drivers, and documentation on the official HP support webсајту.