1. Увод
This manual provides detailed instructions for the installation, operation, and maintenance of your REXING F9US Dash Camera. Please read this manual thoroughly before using the device to ensure proper functionality and to maximize your user experience.
2. Садржај пакета
Молимо вас да проверите да ли су све ставке наведене у наставку укључене у ваш пакет:
- REXING F9US Dash Camera
- In-car charging cable
- Windshield Suction Cup mount
- УСБ кабл
- Упутство за употребу
Напомена: A Micro SD Card (Class 10 or higher, up to 128GB) is required for operation and is not included in the package.
3. Производ је готовview
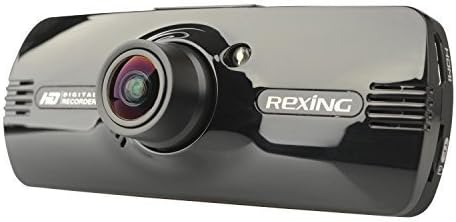
Image: REXING F9US Dash Camera
The REXING F9US Dash Camera is a compact, high-definition car dashboard camera designed to record your driving. It features a 170-degree wide-angle lens, a 2.7-inch 16:9 TFT LCD screen, and supports Full HD 1080p video recording. Key features include G-Sensor for automatic accident detection, Wide Dynamic Range (WDR) technology for optimal video quality in varying light conditions, and motion detection for recording when the vehicle is parked.
4. Подешавање
4.1 Инсталирање микро СД картице
- Уверите се да је камера за аутомобил искључена.
- Locate the Micro SD card slot on the side of the camera.
- Insert a Class 10 or higher Micro SD card (up to 128GB) into the slot until it clicks into place.
- Да бисте је уклонили, нежно гурните картицу унутра док не искочи.
4.2 Монтирање камере за аутомобил
- Пажљиво очистите жељено подручје на ветробранском стаклу.
- Attach the suction cup mount to the camera.
- Чврсто притисните вакуумску чашицу уз ветробранско стакло и померите полугу да бисте је учврстили.
- Подесите угао камере да бисте осигурали јасан view на путу.
4.3 Повезивање напајања
- Connect the in-car charging cable to the camera's power input port.
- Plug the other end of the cable into your vehicle's 12V power outlet (cigarette lighter socket).
- The camera will typically power on automatically when the vehicle's ignition is turned on.
4.4 Почетна подешавања
Upon first use, or after a reset, you may need to set the date, time, and language. Navigate through the menu using the camera's buttons.
5. Упутство за употребу
5.1 Основно снимање
- Once powered on and connected to power, the camera will automatically begin loop recording. A flashing red record indicator will confirm recording is active.
- To manually start/stop recording, press the РЕЦ дугме.
5.2 Навигација кроз мени
The camera features several buttons for navigation and control:
- Дугме МЕНУ (bottom left): Press once to enter video settings, press twice to enter tool settings.
- EVENT Button (top right, with a triangle): Functions as an 'Up' button in menus. When held for 3 seconds during recording, it locks the current video file.
- МИЦ дугме: Functions as a 'Down' button in menus.
- Дугме РЕЦ: Functions as 'Select' or 'OK' in menus.
- Дугме за слику (bottom right): When held, enters review режим до view снимљено files.
5.3 Репродукција и File Менаџмент
- То view recordings on the camera, enter review mode using the Picture button.
- За пренос files to a computer, connect the camera via the USB cable. The camera will appear as a removable disk.
- The camera also supports HDMI output for viewинг на већем дисплеју.
6. Објашњење карактеристика
6.1 Снимање у петљи
The camera continuously records video in segments (e.g., 2, 3, or 5 minutes). When the memory card is full, the oldest unlocked video file is automatically overwritten by the newest recording. This ensures continuous recording without manual intervention.
6.2 G-Sensor (Accident Auto Detection Feature)
The built-in G-Sensor detects sudden movements or impacts (e.g., in case of a collision). When triggered, the current video segment is automatically locked and saved to prevent it from being overwritten by loop recording. These files are stored in a protected folder.
6.3 Wide Dynamic Range (WDR) Technology
WDR technology enhances video quality by balancing exposure in scenes with high contrast, such as driving from a dark tunnel into bright sunlight. This ensures clearer images with more detail in both bright and dark areas.
6.4 Детекција покрета
When enabled, the camera will automatically start recording if it detects motion in front of the lens while the vehicle is parked. This feature is useful for monitoring your vehicle when it's unattended.
6.5 Ноћни вид
The camera supports night vision capabilities to improve recording quality in low-light conditions. Note that the built-in LED light is primarily for use when the camera is outside the car in battery mode, acting as a flashlight. For in-car recording, it's generally recommended to keep it off to avoid windshield reflections.
7. Одржавање
- Чишћење: Користите меку, суву крпу за чишћење сочива и екрана камере. Избегавајте употребу абразивних средстава за чишћење или растварача.
- Форматирање СД картице: It is recommended to format the Micro SD card periodically (e.g., once a month) within the camera's settings to ensure optimal performance and prevent data corruption. Back up any important fileс пре форматирања.
- Складиштење: Store the camera in a cool, dry place away from direct sunlight and extreme temperatures when not in use.
КСНУМКС. Решавање проблема
| Проблем | Могуће решење |
|---|---|
| Камера се не укључује. | Ensure the power cable is securely connected to both the camera and the vehicle's 12V outlet. Check the vehicle's power outlet for functionality. |
| Camera powers off unexpectedly or stops recording. | Verify the power connection is stable. Ensure the Micro SD card is Class 10 or higher and formatted correctly. Try a different Micro SD card. |
| Квалитет видеа је лош или мутан. | Clean the camera lens. Ensure the protective film (if any) has been removed from the lens. Check if the windshield is clean. |
| Грешка микро СД картице. | Format the Micro SD card within the camera's settings. Ensure the card is Class 10 or higher. Try a different, reputable brand Micro SD card. |
| Датум и време су нетачни. | Adjust the date and time settings in the camera's menu. |
9. Спецификације
| Феатуре | Детаљ |
|---|---|
| Видео Ресолутион | 1080FHD (1920x1080), 1080P (1440x1080), 720P (1280x720), WVGA (848x480), VGA (640x480), QVGA (320x240) |
| Ленс | 170 degree 6-layers glass lens |
| Величина екрана | 2.7 inch 16:9 TFT LCD |
| Видео File Формат | МОВ |
| Слика File Формат | ЈПГ |
| Подршка за меморијску картицу | Up to 128GB Class10 or upper Micro SD/TF Card (not included) |
| Повезивање | HDMI, AV-OUT, USB |
| Аудио Рецординг | Подржано |
| Систем језика | енглески, француски, шпански, португалски, немачки, италијански, поједностављени кинески, традиционални кинески, руски, јапански |
| Димензије производа | 7 к 5 к 3 инча |
| Тежина артикла | 12.1 унци |
| Батерија | Потребна је 1 литијум-полимерска батерија (унутрашња) |
10. Гаранција и подршка
For information regarding product warranty, technical support, or service inquiries, please visit the official REXING website or contact REXING customer service directly. Please have your product model number (F9US) and purchase details available when contacting support.