Увод
Thank you for choosing the Magnasonic EAAC470 Alarm Clock Radio. This manual provides essential instructions for setting up, operating, and maintaining your device. Please read it thoroughly to ensure proper use and to maximize the features of your alarm clock radio.
Слика 1: Предња страна view of the Magnasonic EAAC470 Alarm Clock Radio.
Садржај пакета
- Magnasonic EAAC470 Alarm Clock Radio
- Повер Адаптер
- Кориснички приручник (овај документ)
- CR2032 Lithium Battery (for backup)
Сетуп
1. Прикључак за напајање
- Connect the power adapter to the DC input jack on the back of the alarm clock.
- Plug the power adapter into a standard wall outlet. The display will illuminate.
2. Инсталација резервне батерије
The EAAC470 includes a CR2032 lithium battery for backup power. This ensures that time and alarm settings are maintained during a power outage, and the alarm will still sound.
- Пронађите одељак за батерију на дну уређаја.
- Отворите поклопац одељка за батерије.
- Insert one CR2032 lithium battery, observing the correct polarity (+/-).
- Добро затворите поклопац одељка за батерије.
3. Automatic Time Setting (SelfSet Technology)
The alarm clock is equipped with SelfSet technology, which automatically displays the correct time upon initial power-up. You only need to set your time zone.
- Upon first power-up, the clock will display a default time.
- Притисните тастер ВРЕМЕНСКА ЗОНА button (location may vary, refer to device buttons).
- Користите ХОУР or МИНУТЕ buttons to select your correct time zone.
- The clock will automatically adjust to the correct time for your selected zone.
- Напомена: If the time is incorrect after setting the time zone, manual adjustment may be required.
4. Manual Time and Date Adjustment
If the automatic time setting is inaccurate or if you need to adjust the time manually:
- Притисните и држите ВРЕМЕНСКИ СКЛОП дугме док дисплеј не затрепери.
- Користите ХОУР и МИНУТЕ дугмад за подешавање тренутног времена.
- Притисните ВРЕМЕНСКИ СКЛОП поново да потврдите време.
- Follow similar steps to adjust the year, month, and day if necessary, using the appropriate buttons.
5. FM Antenna Setup
For optimal FM radio reception, fully extend the wire antenna located on the back of the unit. Position it for the best signal.
Упутство за употребу
1. Setting Alarms (Alarm 1 & Alarm 2)
The EAAC470 features dual alarms that can be set independently.
- Притисните и држите било који АЛАРМ 1 or АЛАРМ 2 дугме док време аларма не почне да трепери.
- Користите ХОУР и МИНУТЕ дугмад да бисте подесили жељено време аларма.
- Притисните одговарајуће АЛАРМ button again to select the alarm source (Buzzer or Radio).
- Притисните тастер АЛАРМ button a third time to select the alarm schedule (Every Day, Weekdays, Weekends).
- Притисните тастер АЛАРМ button a fourth time to confirm and activate the alarm. An alarm indicator will appear on the display.
- To disable an alarm, repeatedly press its АЛАРМ button until the alarm indicator disappears.
2. Рад радија (AM/FM)
The clock radio includes a digital AM/FM tuner with station presets.
- Притисните тастер РАДИО ОН/ОФФ дугме за укључивање радија.
- Притисните тастер АМ/ФМ дугме за пребацивање између опсега.
- Користите ТУНЕ +/- дугмад за ручно подешавање станице или притисните и држите за аутоматско скенирање следеће доступне станице.
- Да бисте сачували унапред подешену вредност:
- Подесите жељену станицу.
- Притисните и држите ПРЕСЕТ дугме док број предефинисане поставке не затрепери.
- Користите УНАПРЕД ПОДЕСОВАНО +/- дугмад да бисте изабрали број предефинисане поставке (1-20).
- Притисните ПРЕСЕТ поново да би спасао станицу.
- Да бисте позвали предефинисану поставку: Кратко притисните ПРЕСЕТ дугме и користите УНАПРЕД ПОДЕСОВАНО +/- да бисте се кретали кроз сачуване станице.
- Подесите јачину звука помоћу ВОЛУМЕ +/- дугмад.
Note on Radio Quality: The built-in speaker is designed for alarm clock functionality. Sound quality may not match dedicated audio systems. AM reception can be directional; adjust the unit's position for better clarity.
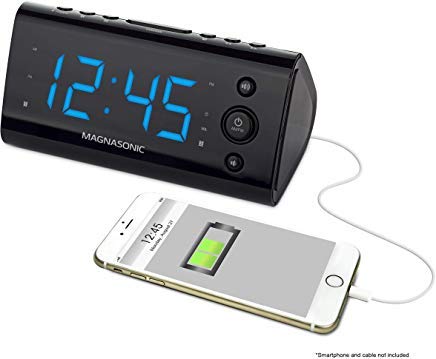
3. УСБ порт за пуњење
A convenient USB charging port is located on the front of the unit.

Слика 2: Предња страна view highlighting the USB charging port.
Plug your smartphone, tablet, or other USB-powered device into this port to charge. This port provides power for charging and does not transfer data.
4. Display Dimming Options
The 1.2" LED display offers four brightness settings (High, Medium, Low, Off).

Figure 3: Close-up of the LED display.
Притисните тастер ДИММЕР button (often integrated with the SNOOZE button) repeatedly to cycle through the brightness levels: High → Medium → Low → Off.
Note on Brightness: Even the lowest setting may appear bright in a completely dark room. The "Off" setting allows for a completely dark display if preferred.
5. Функције одлагања и спавања
- Одгода: Када се огласи аларм, притисните дугме СНООЗЕ button to temporarily silence the alarm for a set period (e.g., 9 minutes). The alarm will sound again after the snooze period.
- Мерач спавања: Док радио свира, притисните дугме СЛЕЕП button repeatedly to set a sleep timer (e.g., 90, 60, 30, 15 minutes). The radio will play for the selected duration and then automatically turn off.
6. Приказ температуре
The unit can display the indoor temperature. Press the ТЕМП button (or a multi-function button) to cycle between time and temperature display.
Одржавање
Чишћење
- Искључите адаптер за напајање пре чишћења.
- Користите меку, суву крпу да обришете спољашњост јединице.
- Не користите абразивна средства за чишћење, воскове или раствараче јер могу оштетити завршну обраду.
- Избегавајте улазак влаге у било какве отворе.
Замена батерије
The CR2032 backup battery typically lasts for several years. If the time or settings are lost during a power outage, it may be time to replace the battery.
- Искључите адаптер за напајање.
- Отворите одељак за батерије на дну јединице.
- Уклоните стару ЦР2032 батерију.
- Insert a new CR2032 lithium battery, ensuring correct polarity.
- Затворите одељак за батерије.
- Reconnect power. You may need to reset the time zone and any manual time adjustments.
Решавање проблема
| Проблем | Могући узрок / решење |
|---|---|
| Приказ сата је празан или не ради. |
|
| Аларм се не оглашава. |
|
| Radio reception is poor or static. |
|
| Пуњење преко USB-а не ради. |
|
| Time is incorrect after power-up. |
|
| Display is too bright even on the lowest setting. |
|
Спецификације
| Феатуре | Детаљ |
|---|---|
| Бранд | Магнасониц |
| Број модела | ЕААЦ470 |
| Дисплаи Типе | Digital LED (1.2") |
| Затамњење екрана | 4 Options (High, Medium, Low, Off) |
| Извор напајања | АЦ адаптер |
| Баттери Бацкуп | 1 x CR2032 литијумска батерија (укључена) |
| Повезивање | USB (for charging only) |
| Радио тјунер | Digital AM/FM (20 programmable stations) |
| Аларми | Dual Alarm with selectable source (Buzzer/Radio) and schedule |
| Посебне карактеристике | Auto Time Set (SelfSet), Indoor Temperature Display |
| Димензије производа | 6 к 3.1 к 3 инча |
| Тежина артикла | 12 унце (0.75 фунте) |
| Материјал | Акрилонитрил бутадиен стирен |
Информације о гаранцији
The Magnasonic EAAC470 Alarm Clock Radio is covered by a 1 Year Manufacturer's Direct Warranty. This warranty covers defects in materials and workmanship under normal use. Please retain your proof of purchase for warranty claims. For specific terms and conditions, refer to the warranty card included with your product or visit the Magnasonic official webсајту.
Подршка
For further assistance, technical support, or warranty inquiries, please contact Magnasonic customer service. Contact information can typically be found on the manufacturer's webсајту или на паковању производа.
Webсајт: ввв.магнасониц.цом (Напомена: Ово је резервисано место URL, please refer to official product documentation for the correct support webсајту.)