
1. Увод
This manual provides essential information for the safe and efficient operation, setup, and maintenance of your Scheppach Basa3 12 Band Saw. Please read this manual thoroughly before operating the machine to ensure proper use and to prevent injury or damage.
The Scheppach Basa3 12 is a robust band saw designed for precise cutting of various materials, primarily wood and aluminum. It features a powerful 800 Watt motor, a large cast iron table, and adjustable settings for versatile applications.
2. Опште информације о безбедности
УПОЗОРЕЊЕ: Увек се придржавајте основних мера безбедности приликом коришћења електричних алата како бисте смањили ризик од пожара, струјног удара и телесних повреда.
- Безбедност на радном месту: Радно место одржавајте чистим и добро осветљеним. Неред или тамна места могу изазвати несреће. Немојте користити електричне алате у експлозивним атмосферама, као што је присуство запаљивих течности, гасова или прашине.
- електрична безбедност: Утикачи електричних алата морају одговарати утичници. Никада не модификујте утикач на било који начин. Избегавајте контакт тела са уземљеним површинама.
- Лична безбедност: Always wear eye protection, hearing protection, and a dust mask. Do not overreach. Keep proper footing and balance at all times. Dress properly; avoid loose clothing, jewelry, and long hair that can be caught in moving parts.
- Употреба и одржавање алата: Не форсирајте електрични алат. Користите одговарајући електрични алат за вашу примену. Искључите утикач из извора напајања пре него што извршите било каква подешавања, промените додатну опрему или одложите електрични алат.
- Specific Band Saw Safety: Ensure blade guards are in place and properly adjusted. Keep hands clear of the blade path. Use push sticks when cutting small pieces.
3. Компоненте и садржај пакета
Your Scheppach Basa3 12 Band Saw package includes the following main components:
- Band Saw Unit
- Stand/Base Frame
- Cross-cut Gauge (Miter Gauge)
- Rip Fence (Parallel Guide)
- Operating Handle (for mobility)

Слика 3.1: Завршеноview of the Scheppach Basa3 12 Band Saw with its stand and included cross-cut gauge.
4. Подешавање и монтажа
Before initial operation, the band saw requires assembly of its stand and proper installation of the blade and accessories.
4.1 Састављање постоља
Carefully unpack all components. Assemble the stand according to the diagrams provided in the separate assembly instructions. Ensure all bolts and nuts are securely tightened. The stand provides a stable base for the band saw and includes wheels for easy repositioning.

Figure 4.1: The integrated wheels and handle allow for easy tilting and movement of the band saw.
4.2 Mounting the Band Saw Unit
Once the stand is assembled, carefully lift the band saw unit and secure it to the stand using the provided hardware. Ensure it is firmly attached and stable before proceeding.
4.3 Монтажа и затезање сечива
Refer to the specific blade installation instructions for your model. Proper blade tension is crucial for accurate cuts and blade longevity. Adjust the blade tension knob until the blade is taut but not overly stressed.
4.4 Повезивање усисавања прашине
The Scheppach Basa3 12 is equipped with a dust extraction port. Connect a suitable dust collection system or shop vacuum to this port to minimize sawdust accumulation and improve air quality during operation.
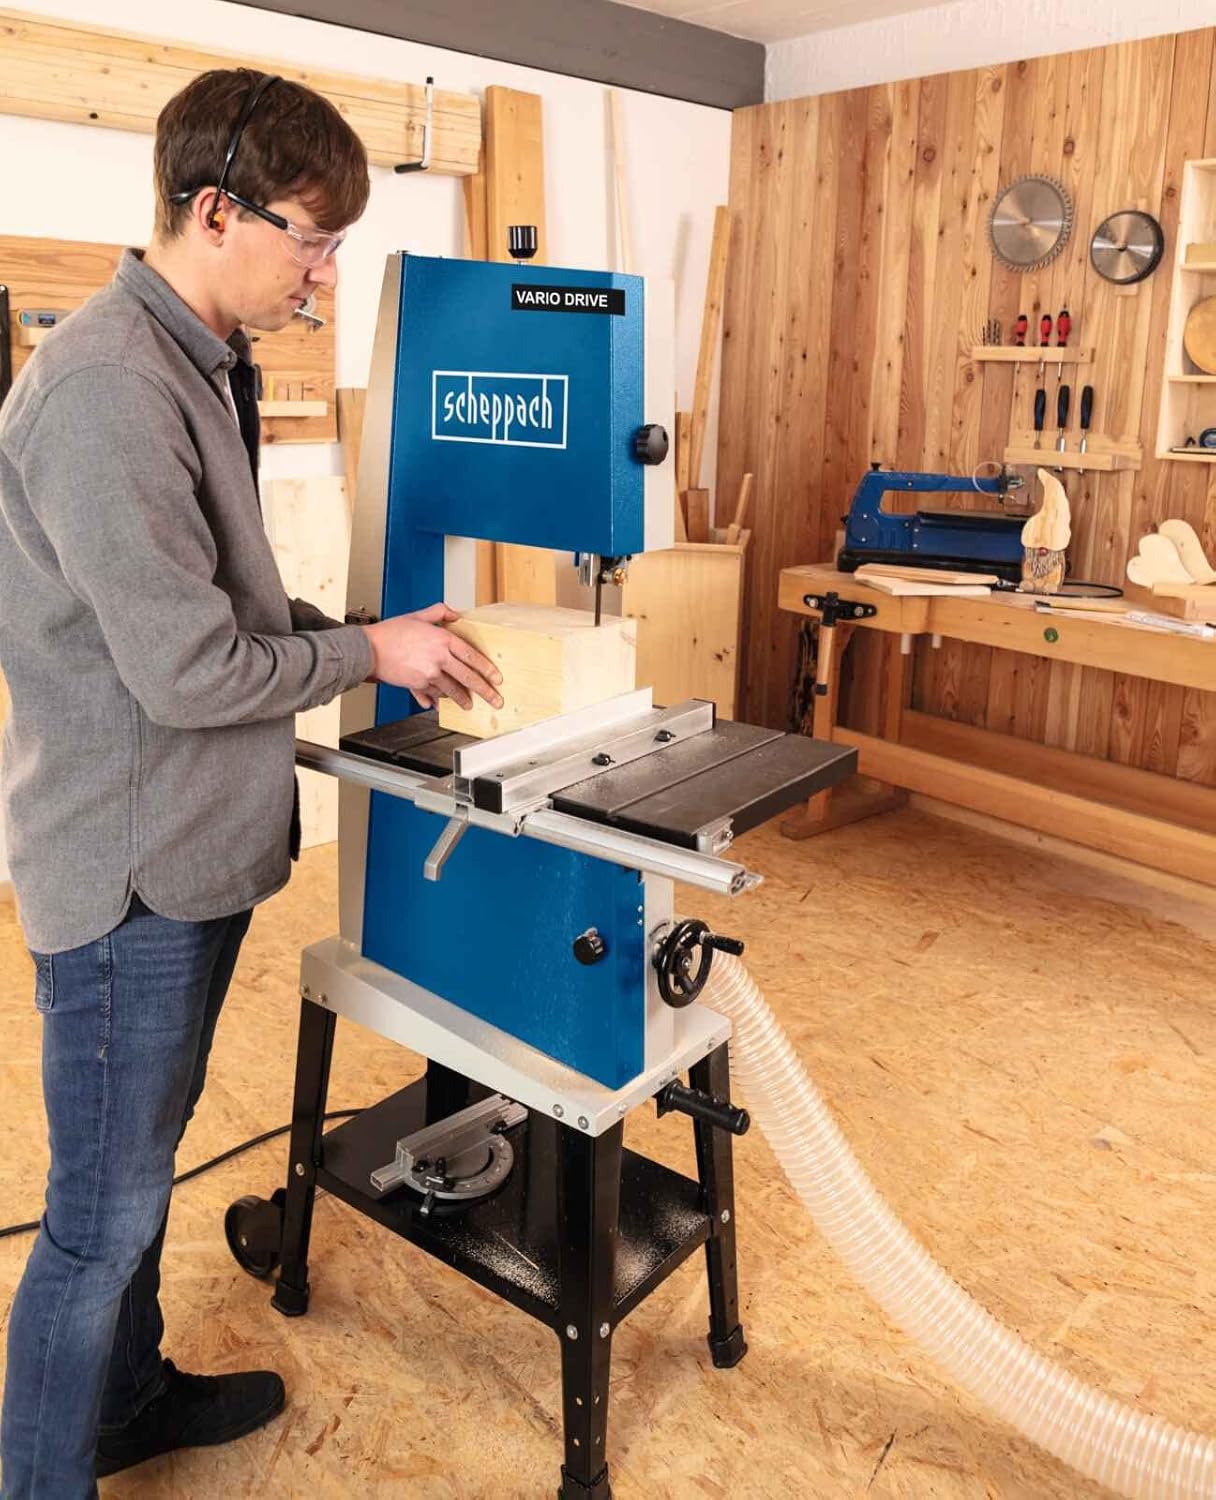
Figure 4.2: Connecting a dust extraction hose to the band saw for cleaner operation.
5. Упутство за употребу
Упознајте се са контролама и подешавањима пре него што направите било какве резове.
5.1 Укључивање/искључивање
Locate the main power switch, typically a large red button for emergency stop and a green button for start. Ensure the work area is clear before starting the machine.
5.2 Adjusting Blade Guides
The blade guides (upper and lower) must be adjusted to be just clear of the blade, providing support without causing friction. This prevents blade deflection and ensures straight cuts.
5.3 Подешавање нагиба стола
The work table can be tilted for angled cuts. Loosen the locking mechanism beneath the table, adjust to the desired angle (up to 45 degrees), and then securely tighten the lock. The machine features continuous table adjustment.

Figure 5.1: Adjusting the work table for angled cuts.
5.4 Using the Rip Fence and Cross-cut Gauge
The rip fence is used for making straight, parallel cuts. Position it at the desired distance from the blade and lock it in place. The cross-cut gauge (miter gauge) is inserted into the table slot and used for making accurate cross-cuts and angled cuts across the width of the workpiece.
5.5 Операција сечења
Place the workpiece firmly on the table. Turn on the machine and allow the blade to reach full speed. Feed the workpiece slowly and steadily into the blade, applying even pressure. Always keep your hands away from the blade path and use a push stick when necessary.

Figure 5.2: Proper technique for feeding material into the band saw.
6. Одржавање
Regular maintenance ensures the longevity and optimal performance of your band saw. Always disconnect the machine from the power supply before performing any maintenance.
6.1 Чишћење
After each use, clean the machine to remove sawdust and debris. Use a brush or vacuum cleaner. Do not use solvents that could damage painted surfaces or plastic components.
6.2 Замена оштрице
Blades will dull over time and need replacement. Follow the instructions for releasing blade tension, removing the old blade, and installing a new one. Ensure the new blade is correctly seated on the wheels and properly tensioned.
6.3 Belt and Pulley Inspection
Periodically inspect the drive belt and pulleys for wear or damage. A worn belt can lead to reduced power and inconsistent blade speed. Replace if necessary.

Слика 6.1: Унутрашњи view of the drive system, showing the belt and pulleys.
КСНУМКС. Решавање проблема
Овај одељак се бави уобичајеним проблемима са којима се можете сусрести са вашом трачном тестером.
| Проблем | Могући узрок | Решење |
|---|---|---|
| Сечиво лута или сече нетачно | Dull blade, incorrect blade tension, misaligned blade guides, worn blade. | Replace blade, adjust blade tension, adjust blade guides, check for blade damage. |
| Motor runs but blade does not move or moves slowly | Loose or broken drive belt, obstruction in blade path. | Inspect and replace drive belt if necessary, remove any obstructions. |
| Прекомерне вибрације или бука | Лабаве компоненте, неуравнотежена сечива, истрошени лежајеви. | Check all fasteners, replace blade, consult a qualified technician for bearing issues. |
| Dust collection is ineffective | Clogged dust port, inadequate dust collector, loose hose connection. | Clear dust port, use a more powerful dust collector, secure hose connections. |
8. Техничке спецификације
Key technical data for the Scheppach Basa3 12 Band Saw:
| Спецификација | Валуе |
|---|---|
| Модел | Basa3 - 230 V |
| Референца произвођача | 1901503901 |
| Волtage | 230 Волтс |
| Повер | 800 Ваттс |
| Пречник тракастог точка | 315 мм |
| Димензије стола (Д x Ш) | 54.8 к 40 цм |
| Бладе Ленгтх | 306 милиметара |
| Брзина | 750 рпм |
| Димензије производа (Д к Ш к В) | 45 x 50 x 20 cm (shipping/package) / 116L x 62W x 42H cm (assembled) |
| Тежина | 9999 Kilograms (Note: This weight appears to be a placeholder or error in source data) |
| Material (Handle/Lever) | Метал и пластика |
| Бладе Материал | легирани челик |
| Препоручена површина | Алуминијум, дрво |
| Посебна карактеристика | Continuous table adjustment |
| Цертифицатион | CE |
9. Гаранција и подршка
For warranty information, please refer to the documentation included with your purchase or contact Scheppach customer service directly. Information regarding the availability of spare parts is not explicitly provided in the product details. For technical support or spare parts inquiries, it is recommended to contact Scheppach or your authorized dealer.
You can find more information about Scheppach products and support on their official webсајту или преко овлашћених продаваца.