1. Увод
The Rain Bird XC-801I-E is an advanced indoor electric irrigation programmer designed for efficient residential watering systems. This unit provides simple, reliable control for up to 8 irrigation stations. It features three independent programs, each capable of four daily start times, offering flexible scheduling options. The XC-801I-E is engineered for compatibility with the intelligent Solar Sync sensor, allowing for automatic adjustments to irrigation schedules based on local climate conditions, thereby optimizing water usage. Additionally, it supports connection with other sensors for enhanced control. This manual provides essential information for the installation, operation, and maintenance of your irrigation programmer.
2. Безбедносне информације
Please read all safety instructions before installing or operating the Rain Bird XC-801I-E irrigation programmer. Failure to follow these instructions may result in electric shock, fire, or damage to the product.
- електрична безбедност: This device operates on 24 Volts. Ensure the power supply is disconnected before performing any wiring or maintenance. Only use the provided external transformer. Do not expose the unit to water or extreme moisture.
- Инсталација: Install the programmer indoors, away from direct sunlight, rain, or excessive humidity. Ensure proper ventilation around the unit.
- деца: Држите уређај ван домашаја деце.
- Одржавање: Refer to the maintenance section for cleaning and care instructions. Do not attempt to repair the unit yourself; contact qualified service personnel.
3. Садржај пакета
Проверите да ли су све компоненте присутне у пакету:
- Rain Bird XC-801I-E Indoor Irrigation Programmer
- External Transformer (Power Supply)
- Кориснички приручник (овај документ)
- Монтажни прибор (вијци, анкери)
4. Подешавање и инсталација
Follow these steps for proper installation of your irrigation programmer.
4.1 Монтажа контролера
- Choose an indoor location near a standard electrical outlet, protected from extreme temperatures and moisture.
- Use the provided mounting hardware to securely attach the controller to a wall. Ensure it is at a convenient height for programming and viewинг.
4.2 Wiring the Valves
The XC-801I-E supports up to 8 irrigation zones and operates with 24V solenoid valves.
- Искључите напајање: Ensure the external transformer is unplugged from the electrical outlet.
- Connect Common Wire: Connect one common wire from all your solenoid valves to the 'COMMON' terminal on the controller.
- Connect Zone Wires: Connect the individual control wire from each solenoid valve to its corresponding station terminal (e.g., Station 1, Station 2, etc.) on the controller.
4.3 Sensor Connection (Optional)
The controller allows for the installation of a sensor, such as the Rain Bird Solar Sync or other compatible sensors.
- Refer to your sensor's instruction manual for specific wiring details.
- Connect the sensor wires to the designated sensor terminals on the XC-801I-E controller.
4.4 Прикључак за напајање
- Plug the external transformer into a standard 230V AC electrical outlet.
- Connect the transformer's output cable to the power input port on the XC-801I-E controller.
- The controller display should illuminate, indicating power is supplied.
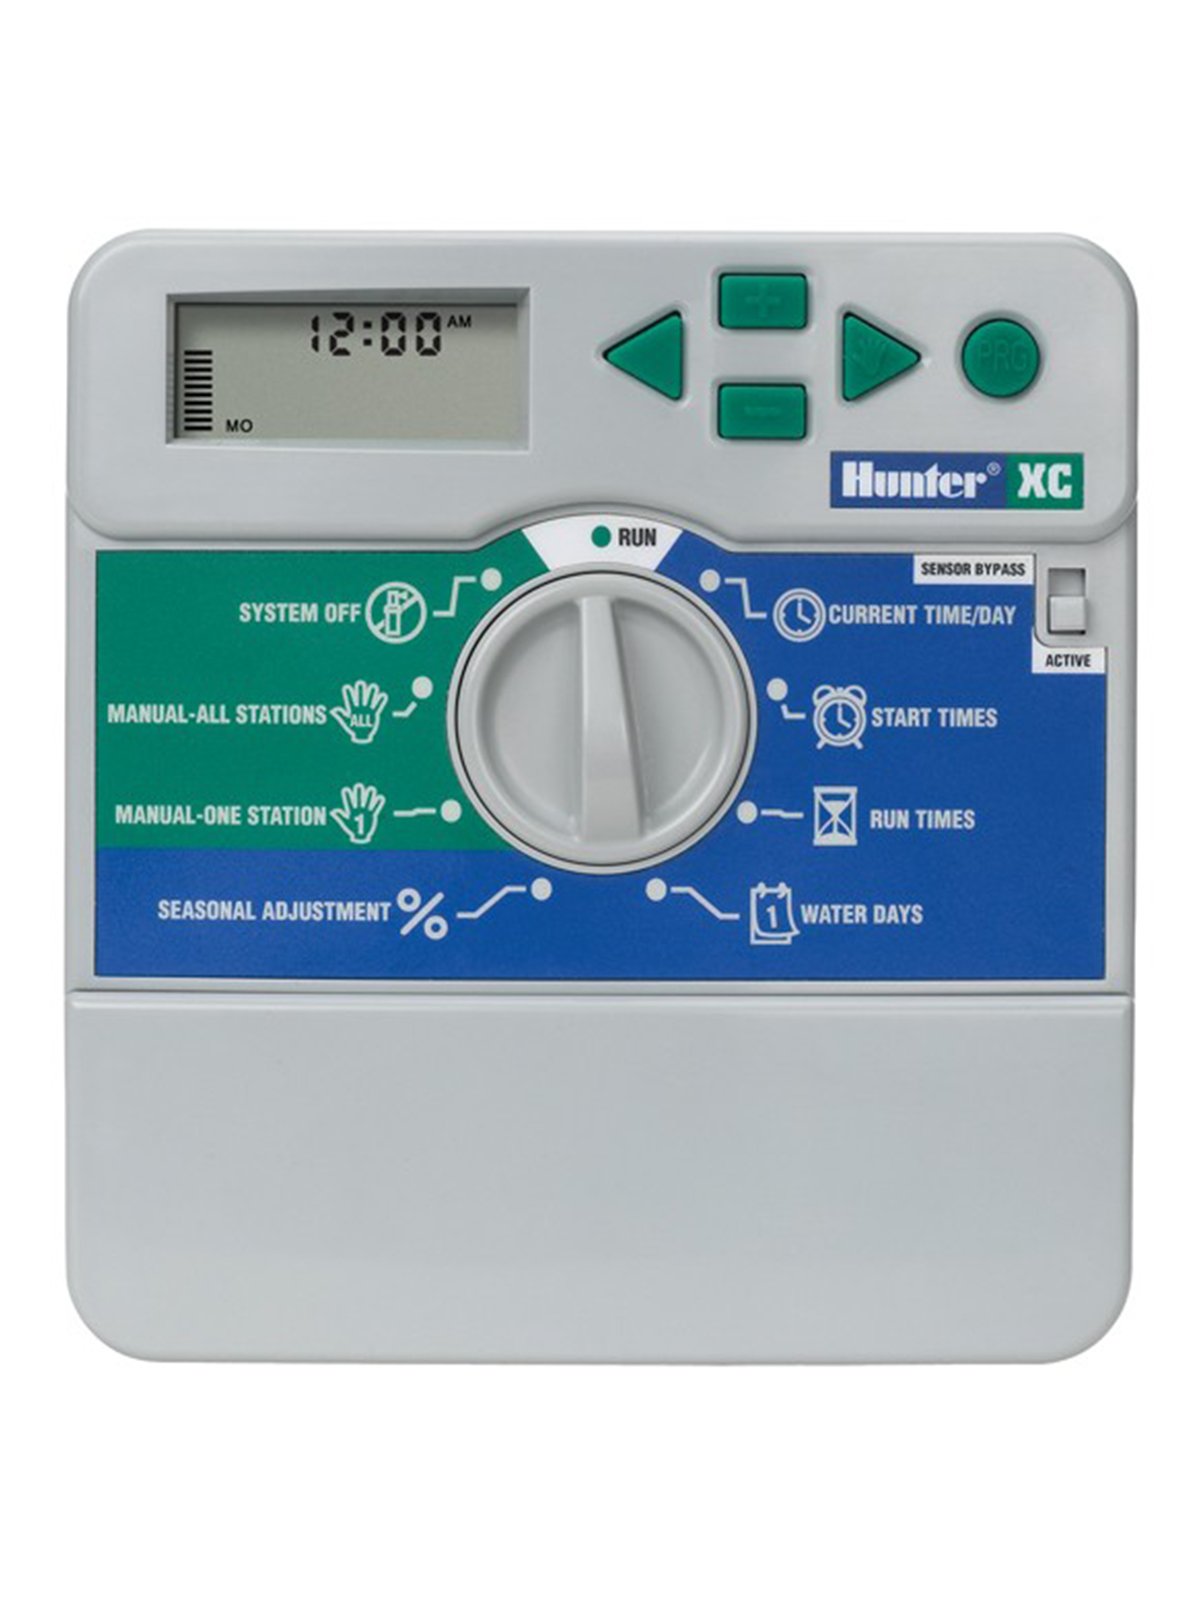
Слика 1: Фронт view of the Rain Bird XC-801I-E Indoor Electric Irrigation Programmer. This image shows the display, programming buttons, and the dial for mode selection.
5. Упутство за употребу
The XC-801I-E features a user-friendly interface for programming your irrigation schedules.
5.1 Setting Current Time and Date
- Turn the dial to the 'SET TIME/DATE' position.
- Use the arrow buttons to adjust the current time and date.
- Press the 'NEXT' button to move between settings (hour, minute, day, month, year).
5.2 Programming Irrigation Schedules
The controller offers three independent programs (A, B, C) and four start times per program.
- Изаберите програм: Turn the dial to 'PROGRAMS'. Use the 'PROGRAM' button to select Program A, B, or C.
- Постави време почетка: For the selected program, use the arrow buttons to set up to four start times. Each start time initiates the watering sequence for all zones assigned to that program.
- Подесите време рада зоне: Turn the dial to 'RUN TIMES'. Select the desired program and then use the arrow buttons to set the watering duration for each individual station (zone).
- Set Watering Days: Turn the dial to 'WATER DAYS'. Select the desired program and then choose the specific days of the week for irrigation, or select an interval schedule (e.g., every 2 days).
5.3 Ручни рад
To manually operate a single station or all stations:
- Single Station: Turn the dial to 'MANUAL SINGLE STATION'. Use the arrow buttons to select the station and set its run time. Press 'START'.
- Све станице: Turn the dial to 'MANUAL ALL STATIONS'. Set the run time for each station sequentially. Press 'START'.
5.4 System Off / Rain Delay
To temporarily suspend irrigation:
- Систем искључен: Turn the dial to 'SYSTEM OFF' to halt all automatic irrigation.
- Кашњење кише: Turn the dial to 'RAIN DELAY'. Use the arrow buttons to set the number of days for the delay. Irrigation will resume automatically after the set period.
6. Одржавање
Regular maintenance ensures the longevity and optimal performance of your irrigation programmer.
- Чишћење: Wipe the controller's exterior with a soft, damp тканина. Немојте користити абразивна средства за чишћење или раствараче.
- Везе: Периодично проверавајте све спојеве ожичења како бисте били сигурни да су безбедни и да немају корозије.
- Зимљење: In regions with freezing temperatures, it is recommended to disconnect the controller and store it indoors during winter months to prevent damage. Drain all water from the irrigation system.
- Батерија (ако је применљиво): If your model includes a backup battery for settings retention during power outages, check and replace it as recommended by the manufacturer (typically every 1-2 years).
КСНУМКС. Решавање проблема
If you encounter issues with your Rain Bird XC-801I-E, refer to the following common problems and solutions:
| Проблем | Могући узрок | Решење |
|---|---|---|
| Екран контролера је празан | No power; faulty transformer; internal fuse (if applicable) | Check power outlet; ensure transformer is securely connected; test transformer output; consult a technician if fuse is suspected. |
| Зоне које се не заливају | Rain delay active; system off; faulty wiring; valve issues; low water pressure | Check rain delay/system off settings; inspect wiring connections; manually test valves; check water supply. |
| Incorrect watering times | Incorrect programming; sensor interference | Review program start times, run times, and water days; check sensor operation and settings. |
| Порука о грешци на екрану | Wiring fault; sensor fault; internal error | Note the error code and refer to the full product manual or contact support. Check wiring for shorts. |
Ако проблем и даље постоји након покушаја ових решења, обратите се корисничкој подршци.
8. Спецификације
| Феатуре | Спецификација |
|---|---|
| Модел | XC-801I-E |
| Бранд | Хунтер |
| Произвођач | Раин Бирд |
| Број зона | 8 |
| Програми | 3 (А, Б, Ц) |
| Start Times per Program | 4 |
| Оператинг Волtage | 24 В АЦ |
| Материјал | Пластика |
| Боја | Греи |
| Тежина артикла | 1.57 килограма |
| Радна температура | 20 степени Целзијуса |
| Компатибилност паметног дома | Compatible with smart home systems (via sensor integration) |
9. Гаранција и подршка
For warranty information, technical support, or service inquiries, please contact your authorized dealer or the manufacturer directly. Keep your purchase receipt as proof of purchase.
Произвођач: Раин Бирд
Бренд: Хунтер
For further assistance, visit the official Rain Bird webсајт или се консултујте са локалним дистрибутером.