Увод
The UNI-T UT151C is a high-reliability handheld digital multimeter designed for precise electrical measurements. It functions as a multimeter, LCR meter, and temperature tester, capable of measuring DC/AC voltage, DC/AC current, resistance, capacitance, and temperature. This manual provides essential information for the safe and effective operation, setup, and maintenance of your UT151C device.
Безбедносне информације
Упозорење: To avoid electric shock or personal injury, read all safety information before using this product. Use the product only as specified in this manual, or the protection provided by the product may be impaired.
- Увек се уверите да су мерни каблови у добром стању и правилно повезани.
- Немојте примењивати више од оцењеног волtagе, како је означено на мерачу, између терминала или између било ког терминала и уземљења.
- Будите изузетно опрезни када радите са волtagизнад 30V AC RMS, 42V вршне струје или 60V DC. Ови напониtagпредстављају опасност од удара.
- Пре мерења струје, уверите се да је коло искључено из напона и да је мерач повезан серијски.
- Пре промене функција, искључите испитне каблове из кола које се тестира.
- Не користите мерач са отвореним кућиштем или ако поклопац батерије није добро затворен.
- Замените батерију чим се појави индикатор празне батерије како бисте осигурали тачна очитавања.
Производ је завршенview
Familiarize yourself with the components of your UNI-T UT151C Digital Multimeter.
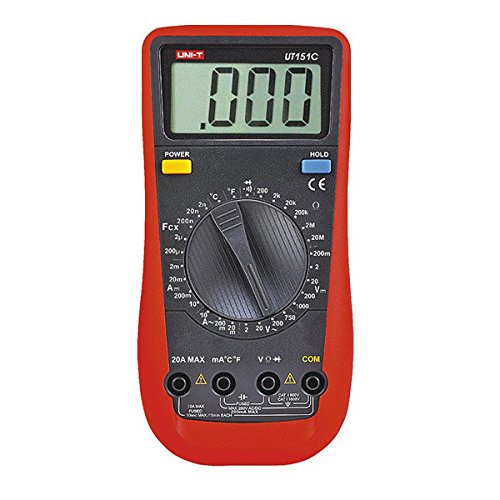
Слика 1: Фронт view of the UNI-T UT151C Digital Multimeter. This image displays the LCD screen, the central rotary function switch, and the input terminals at the bottom. The 'HOLD' button is visible on the right side of the display.
- ЛЦД екран: Приказује очитавања мерења, јединице и индикаторе функција.
- Функција ротационог прекидача: Used to select the desired measurement function (e.g., V~, V-, A~, A-, Ω, F, °C/°F, Diode, Continuity).
- Улазни прикључци: Terminals for connecting test leads. Typically include COM (common), VΩmA (voltage, resistance, small current), and 20A (high current).
- Дугме ХОЛД: Замрзава тренутно очитавање на екрану.
- Дугме за напајање: Укључује или искључује уређај.
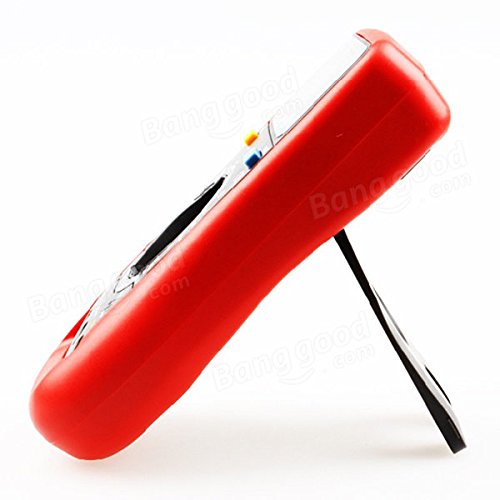
Слика 2: Сиде view of the UNI-T UT151C Digital Multimeter. This image highlights the integrated kickstand, allowing the meter to be propped up for easier viewинг током употребе.
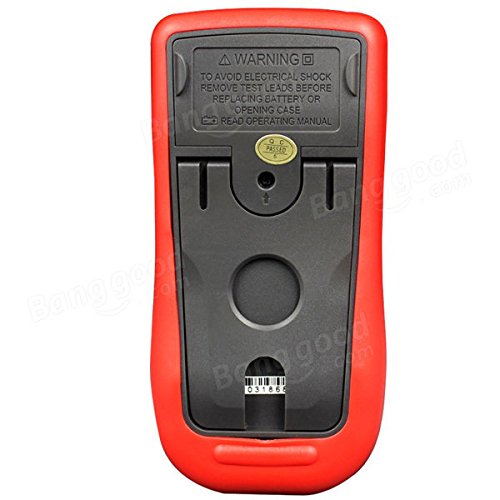
Слика 3: Назад view of the UNI-T UT151C Digital Multimeter. This image shows the battery compartment cover and important safety warnings regarding electrical shock and battery replacement.
Сетуп
1. Инсталација батерије
The UNI-T UT151C requires a 9V (6F22) battery for operation. The battery is not included.
- Уверите се да је мултиметар искључен и искључите све мерне каблове.
- Пронађите одељак за батерије на задњој страни мерача (погледајте слику 3).
- Одврните завртањ(е) за причвршћивање и уклоните поклопац батерије.
- Connect a new 9V battery to the battery clips, observing correct polarity.
- Ставите батерију у одељак и вратите поклопац, причврстивши га завртњем (завртњима).
Напомена: Replace the battery immediately when the low battery indicator appears on the display to maintain measurement accuracy.
2. Повезивање мерних каблова
Увек повежите црни мерни кабл са ЦОМ (заједнички) прикључак. Повежите црвени мерни кабл са одговарајућим улазним прикључком на основу типа мерења:
- Фор волtage, resistance, capacitance, diode, continuity, and temperature measurements, connect the red lead to the VΩmA Јацк.
- За мерења струје до 200mA, повежите црвени кабл са VΩmA Јацк.
- За мерења струје до 20А, повежите црвени кабл са 20А Јацк.
Опрез: Incorrect lead connection can damage the meter or the circuit under test.
Упутство за употребу
Follow these steps for various measurement functions.
1. Укључивање/искључивање
Притисните тастер ПОВЕР button to turn the multimeter on. The meter features an auto power-off function to conserve battery life. To turn it off manually, press the ПОВЕР дугме поново.
2. Мерење једносмерне струје (DC Vol)tagе (В-)
- Повежите црни вод на ЦОМ and the red lead to VΩmA.
- Set the rotary switch to the desired V- range (e.g., 2V, 20V, 200V, 1000V). If the voltagАко је е непознато, почните са највишим опсегом и смањите га по потреби.
- Повежите мерне каблове паралелно преко компоненте или кола које се мери.
- Прочитајте књtagе вредност на ЛЦД екрану.
3. Меасуринг АЦ Волtagе (В~)
- Повежите црни вод на ЦОМ and the red lead to VΩmA.
- Set the rotary switch to the desired V~ range (e.g., 2V, 20V, 200V, 750V).
- Connect the test leads in parallel across the AC source or component.
- Прочитајте АЦ волtagе вредност на ЛЦД екрану.
4. Measuring DC Current (A-)
- Опрез: Always connect the meter in series with the circuit. Never connect it in parallel across a voltage source when measuring current.
- Искључите напајање струјног кола.
- Break the circuit at the point where current is to be measured.
- For currents up to 200mA, connect the black lead to ЦОМ and the red lead to VΩmA.
- For currents up to 20A, connect the black lead to ЦОМ and the red lead to 20А.
- Set the rotary switch to the appropriate A- домет.
- Connect the test leads to complete the circuit.
- Apply power to the circuit and read the DC current value.
5. Measuring AC Current (A~)
- Follow the same safety precautions and connection steps as for DC Current measurement.
- Set the rotary switch to the appropriate A~ домет.
- Apply power to the circuit and read the AC current value.
6. Мерење отпора (Ω)
- Ensure the circuit or component is completely de-energized before measuring resistance.
- Повежите црни вод на ЦОМ and the red lead to VΩmA.
- Окретни прекидач поставите на Ω домет.
- Повежите мерне каблове преко компоненте.
- Очитајте вредност отпора на дисплеју.
7. Measuring Capacitance (F)
- Уверите се да је кондензатор потпуно испражњен пре мерења како бисте спречили оштећење мерача.
- Повежите црни вод на ЦОМ and the red lead to VΩmA.
- Окретни прекидач поставите на F (Capacitance) range.
- Спојите мерне каблове преко кондензаторских терминала.
- Очитајте вредност капацитивности на екрану.
8. Measuring Temperature (°C/°F)
- Connect the temperature probe (if included and compatible) to the ЦОМ и VΩmA утичнице, поштујући поларитет.
- Окретни прекидач поставите на °Ц or °Ф положај.
- Поставите врх температурне сонде на или близу објекта чија температура треба да се мери.
- Очитајте вредност температуре на дисплеју.
9. Test diode
- Уверите се да је диода искључена из кола.
- Повежите црни вод на ЦОМ and the red lead to VΩmA.
- Окретни прекидач поставите на Диоде симбол.
- Спојите црвени кабл на аноду, а црни кабл на катоду диоде. Директни токtage drop (e.g., 0.5V to 0.8V for silicon diodes) will be displayed.
- Замените места водова. Дисплеј би требало да приказује „OL“ (отворена петља) за исправну диоду.
10. Test kontinuiteta
- Уверите се да је коло или компонента без напона.
- Повежите црни вод на ЦОМ and the red lead to VΩmA.
- Окретни прекидач поставите на Континуитет symbol (often shared with Diode test).
- Connect the test leads across the component or circuit path.
- If there is continuity (low resistance), the buzzer will sound, and a low resistance value will be displayed. "OL" indicates an open circuit.
11. Функција чувања података
Притисните тастер ХОЛД button to freeze the current reading on the display. Press it again to release the hold and resume live measurements.
Одржавање
Правилно одржавање осигурава дуготрајност и тачност вашег мултиметра.
- Чишћење: Обришите кућиште огласомamp krpom i blagim deterdžentom. Ne koristite abrazivna sredstva ili rastvarače.
- Замена батерије: Replace the 9V battery when the low battery indicator appears. Refer to the "Battery Installation" section for instructions.
- Замена осигурача: If the current measurement function fails, the fuse may need replacement. This typically requires opening the back case. Refer to the safety warnings on the back of the meter (Figure 3) and consult a qualified technician if unsure. Use only fuses of the specified type and rating.
- Складиштење: If the meter is not used for an extended period, remove the battery to prevent leakage. Store the meter in a cool, dry place, away from direct sunlight and extreme temperatures.
Решавање проблема
If you encounter issues with your UNI-T UT151C, refer to the following common problems and solutions:
| Проблем | Могући узрок | Решење |
|---|---|---|
| Нема дисплеја или блед дисплеј | Празан или празна батерија | Замените 9В батерију. |
| Приказано је „OL“ (преоптерећење) | Мерење прелази изабрани опсег или је коло отворено | Select a higher range or check for an open circuit in the component/leads. |
| Нетачна очитавања | Incorrect function selected, poor lead connection, or low battery | Verify function selection, ensure leads are securely connected, or replace battery. |
| Мерење струје не ради | Прегорео осигурач | Replace the fuse (refer to Maintenance section). |
Спецификације
Technical specifications for the UNI-T UT151C Digital Multimeter.
| Феатуре | Спецификација |
|---|---|
| Модел | UT151C (Internal Model: 365BG1060568) |
| ДЦ Волtagе (В) | 200mV/2V/20V/200V/1000V; ±(0.5%+1) |
| АЦ Волtagе (В) | 2V/20V/200V/750V; ±(0.8%+3) |
| ДЦ струја (А) | 2mA/20mA/200mA/20A; ±(0.8%+1) |
| АЦ струја (А) | 20mA/200mA/20A; ±(1%+3) |
| Отпор (Ω) | 200Ω/2KΩ/20KΩ/200KΩ/2MΩ/20MΩ; ±(1%+2) |
| Капацитет (Ф) | 2nF/20nF/200nF/2µF/100µF; ±(4%+3) |
| температура (°Ц) | -40°C ~ 1000°C; ±(1%+3) |
| температура (°Ф) | -40°F ~ 1832°F; ±(1%+4) |
| Дисплаи Цоунт | 1999 |
| Ручни опсег | Да |
| Диодни тест | Да |
| Аутоматско искључивање | Да |
| Цонтинуити Буззер | Да |
| Индикација слабе батерије | Да |
| Задржавање података | Да |
| Input Impedance for DC Voltage | ≥10MΩ |
| Повер Суппли | 9V (6F22) Battery (not included) |
| Величина ЛЦД-а | 63 мм к 29 мм |
| Боја производа | Црвена и сива |
| Нето тежина производа | 300г |
Гаранција и подршка
Информације о гаранцији производа и корисничкој подршци обично се налазе у документацији о куповини или на званичном сајту произвођача. website. Please refer to those resources for specific details.