
1. Важна безбедносна упутства
Please read these instructions carefully before using the appliance and keep them for future reference. Failure to follow these safety instructions may result in fire, electric shock, or injury.
- Always ensure the appliance is disconnected from the power supply before cleaning or maintenance.
- Do not immerse the main body of the appliance (above the minimum water level mark) in water or other liquids.
- Овај уређај није намењен за употребу од стране особа (укључујући децу) са смањеним физичким, чулним или менталним способностима или недостатком искуства и знања, осим ако им је дат надзор или упутства о употреби уређаја од стране особе одговорне за њихову безбедност .
- Децу треба надзирати како би се осигурало да се не играју са уређајем.
- Use the appliance only for its intended purpose, which is sous vide cooking.
- Do not operate the appliance if it has a damaged cord or plug, or if it malfunctions or has been damaged in any manner. Contact customer support for assistance.
- Always place the appliance in a suitable pot or container on a stable, heat-resistant surface.
- Ensure the water level is always between the 'MIN' and 'MAX' marks on the immersion circulator.
- Не додирујте вруће површине. Користите ручке или дугмад.
2. Производ је готовview
The ProfiCook PC-SV 1126 is a high-quality sous vide cooker designed for precise temperature control, ensuring perfectly cooked food every time. It features an LED multifunction display, a touch control panel, and an integrated fastening clamp for easy use with various pots.
Компоненте
- Соус Виде имерзиони циркулатор
- Integrated Fastening Clamp
- LED Multifunction Display
- Додирните Контролна табла

Image: The ProfiCook PC-SV 1126 Sous Vide Cooker, a sleek black and stainless steel device with an LED display.

Image: Close-up of the LED multifunction display showing current temperature, selected temperature, and timer settings.

Image: The integrated fastening clamp securely attaching the sous vide cooker to the side of a cooking pot.
3. Подешавање
Пре прве употребе, уверите се да је сав материјал за паковање уклоњен и да је уређај чист.
3.1 Распакивање и почетни преглед
- Carefully remove the sous vide cooker from its packaging.
- Check for any visible damage. If damaged, do not use and contact customer support.
- Wipe the stainless steel part of the circulator with a damp тканина.
3.2 Placement and Water Filling
- Place a suitable cooking pot or heat-resistant container on a stable, level, and heat-resistant surface.
- Attach the sous vide cooker to the side of the pot using the integrated fastening clamp. Ensure it is securely fixed.
- Fill the pot with water. The water level must be between the 'MIN' and 'MAX' marks indicated on the sous vide cooker. Do not overfill or underfill.
- Укључите уређај у уземљену електричну утичницу. Екран ће се упалити.

Image: The sous vide cooker immersed in a pot of water, illustrating the water circulation for even temperature distribution.
4. Упутство за употребу
The PC-SV 1126 allows for precise temperature control for various cooking methods.
4.1 Basic Sous Vide Cooking
- Припремају храну: Season your food and place it in a vacuum-sealable bag. Remove as much air as possible and seal the bag.
- Подешена температура: With the appliance plugged in, use the touch control panel to set your desired cooking temperature. The temperature can be set between 20°C and 100°C in 0.5°C increments.
- Подеси тајмер: Set the desired cooking time using the touch control panel. The timer can be set up to 99 hours.
- Почетак грејања: Press the start button. The appliance will begin heating the water to the set temperature. The LED display will show the current water temperature.
- Додај храну: Once the water reaches the target temperature, carefully place the sealed food bag into the water bath. Ensure the bag is fully submerged and not blocking the water circulation.
- Процес кувања: The timer will begin counting down once the target temperature is reached. The appliance will maintain the precise temperature throughout the cooking process.
- Заврши кување: When the timer expires, the appliance will alert you. Carefully remove the food bag from the water bath.
- Sear (Optional): For many foods, especially meats, a quick sear in a hot pan after sous vide cooking will create a desirable crust.
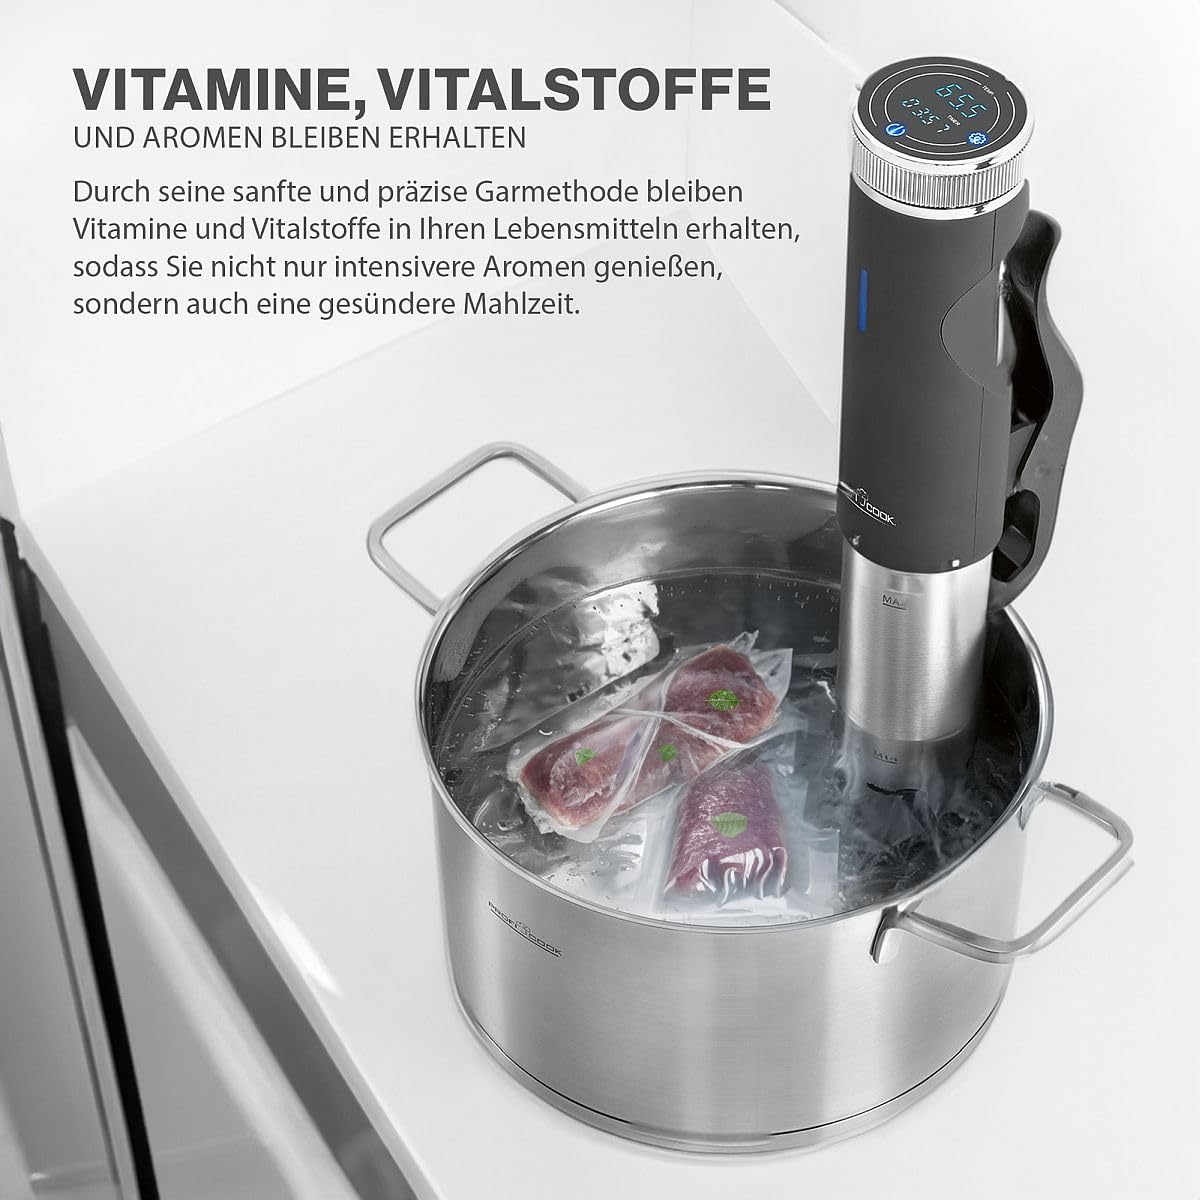
Image: A vacuum-sealed bag of meat being carefully placed into the water bath with the sous vide cooker.
4.2 Посебне функције
The PC-SV 1126 also offers additional functions for versatility:
- Апарат за јогурт: This function allows you to maintain the ideal temperature for making homemade yogurt. Refer to specific yogurt recipes for temperature and time settings.
- Загрејати: Use this function to keep cooked food warm at a safe temperature.
- Одмрзавање: The appliance can be used to gently defrost food at a controlled temperature.

Image: The sous vide cooker operating in a pot, demonstrating its use for making yogurt.
5. Чишћење и одржавање
Regular cleaning and maintenance will ensure the longevity and optimal performance of your sous vide cooker.
5.1 Генерално чишћење
- Увек искључите уређај из струје и оставите да се потпуно охлади пре чишћења.
- Обришите спољашњост уређаја огласомamp тканина. Немојте користити абразивна средства за чишћење или јастучиће за рибање.
- The stainless steel part of the immersion circulator can be cleaned with a mild detergent and water. Rinse thoroughly.
- Do not immerse the top part of the appliance (where the display and controls are located) in water.
5.2 Уклањање каменца
Over time, mineral deposits (limescale) may build up on the heating element, especially in areas with hard water. Descaling is recommended periodically.
- Fill a pot with water and add white vinegar (approximately 1 part vinegar to 4 parts water).
- Attach the sous vide cooker and set the temperature to 60°C (140°F).
- Run the appliance for 30 minutes to 1 hour, or until the limescale deposits are dissolved.
- Unplug the appliance, let it cool, and rinse the stainless steel part thoroughly with clean water.
5.3 Складиштење
Чувајте уређај на чистом и сувом месту када се не користи.
КСНУМКС. Решавање проблема
If you encounter issues with your PC-SV 1126, refer to the following table:
| Проблем | Могући узрок | Решење |
|---|---|---|
| Уређај се не укључује. | Није укључено; квар утичнице. | Ensure the plug is securely inserted into a working outlet. Check the circuit breaker. |
| Вода се не загрева. | Temperature not set; heating element malfunction. | Verify the desired temperature is set and the start button is pressed. If the problem persists, contact support. |
| Порука о грешци на екрану. | Low water level; internal error. | Check water level and add water if below 'MIN' mark. If error persists, unplug and replug the device. Contact support if the issue continues. |
| Нетачно очитавање температуре. | Limescale buildup on sensor. | Perform descaling as described in the maintenance section. |
7. Техничке спецификације
| Феатуре | Спецификација |
|---|---|
| Број модела | PC-SV 1126 (501126) |
| Повер | 800 Ваттс |
| Волtage | 220В |
| Температурни опсег | 20°C - 100°C (in 0.5°C steps) |
| Тајмер | До 99 сати |
| Циркулација воде | 7-8 Liters/minute |
| Димензије (Д к Ш к В) | 11 x 44.5 x 13 cm (Product) / 12P x 46l x 14H cm (Item) |
| Тежина | 1.45 килограма |
| Материјал | нерђајући челик |
| Контролни метод | Контрола додиром |

Image: Diagram showing the dimensions of the ProfiCook PC-SV 1126 Sous Vide Cooker.
8. Гаранција и подршка
The ProfiCook PC-SV 1126 Sous Vide Cooker comes with a 2-year availability for spare parts, ensuring long-term usability and support for your appliance.
For technical assistance, warranty claims, or to inquire about spare parts, please refer to the contact information provided with your purchase documentation or visit the official ProfiCook webсајту.