1. Производ је готовview
The Atlanta 1882-19 is a compact, radio-controlled digital alarm clock designed for ease of use. It features an easy-to-read LCD display that shows the current time, date, and temperature. The clock automatically adjusts its time based on the DCF77 atomic clock radio signal, including automatic daylight saving time changes. It includes a convenient snooze function and a blue backlight for visibility in low light conditions.
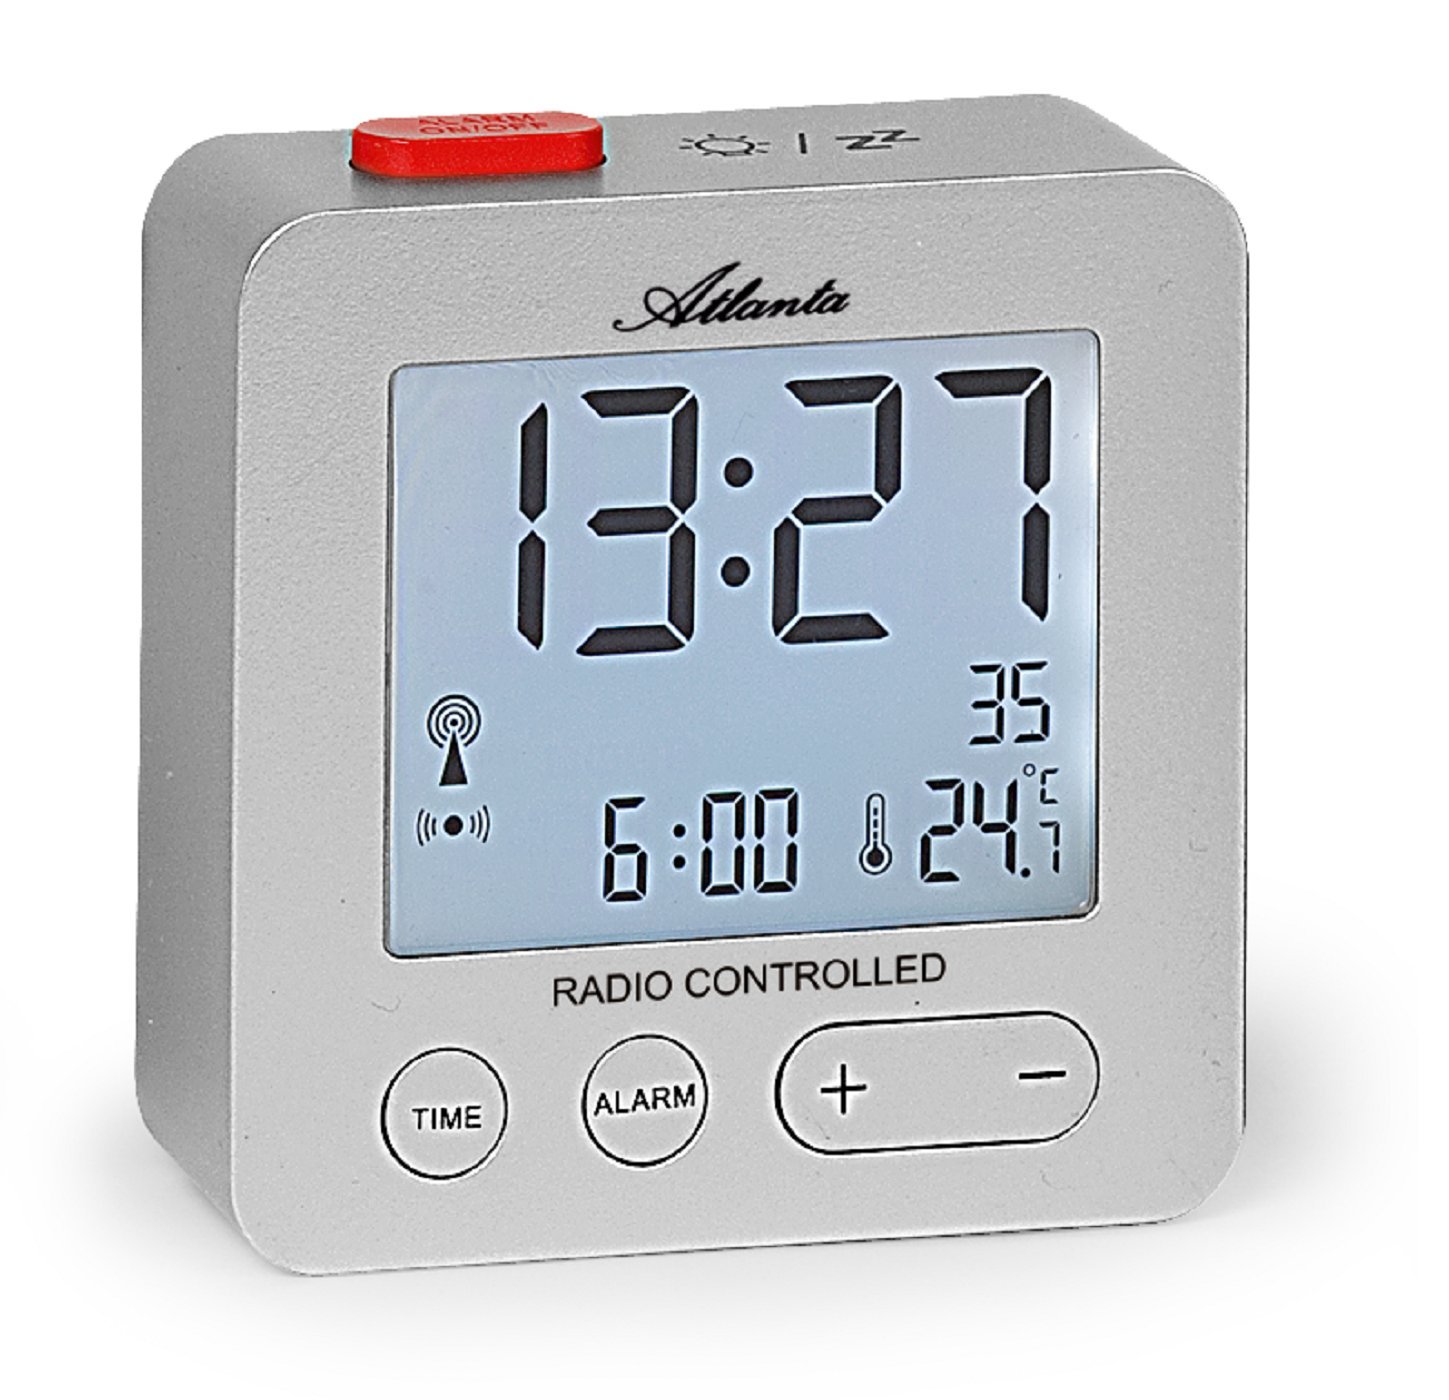
Слика 1: Фронт view of the Atlanta 1882-19 Digital LCD Alarm Clock. The display shows the time, date, and temperature, along with a radio signal indicator. A red button for alarm on/off is visible on top.
2. Садржај пакета
- Atlanta 1882-19 Digital LCD Alarm Clock
- Кориснички приручник (овај документ)
Напомена: Батерије нису укључене и морају се купити засебно.
3. Подешавање
3.1 Инсталација батерије
- Пронађите поклопац одељка за батерије на задњој страни будилника.
- Померите или откопчајте поклопац да бисте отворили одељак.
- Уметните потребне батерије (обично 2x AAA, нису укључене) према индикаторима поларитета (+ и -) унутар одељка.
- Replace the battery compartment cover, ensuring it is securely closed.

Слика 2: Позади view of the alarm clock, illustrating the battery compartment and the 'WAVE' button for radio signal reception.
3.2 Initial Power On and Radio Signal Reception
Upon battery installation, the clock will automatically attempt to receive the DCF77 radio signal to set the time. This process may take several minutes. Ensure the clock is placed away from electronic devices that may cause interference and near a window for optimal signal reception.
- A radio signal icon will appear on the display when the clock is attempting to receive the signal.
- Once the signal is successfully received, the time will automatically set, and the icon will stabilize.
- If the signal is not received after a prolonged period, try relocating the clock or manually setting the time (refer to section 4.1).
4. Упутство за употребу
4.1 Setting Time Manually
In areas with poor radio signal reception, the time can be set manually.
- Притисните и држите ВРЕМЕ button (located on the front) for a few seconds until the time display starts flashing.
- Користите + и - дугмад за подешавање сати.
- Притисните тастер ВРЕМЕ button again to switch to minutes adjustment. Use + и - да се поставе минуте.
- Наставите да притискате ВРЕМЕ да бисте се кретали кроз подешавања године, месеца и дана, подешавајући свако помоћу + и -.
- Притисните ВРЕМЕ one last time or wait a few seconds for the settings to be saved.
4.2 Подешавање аларма
- Притисните и држите АЛАРМ button (located on the front) for a few seconds until the alarm time display starts flashing.
- Користите + и - buttons to adjust the alarm hours.
- Притисните тастер АЛАРМ button again to switch to alarm minutes adjustment. Use + и - да се поставе минуте.
- Притисните АЛАРМ one last time or wait a few seconds for the alarm setting to be saved.
- To activate or deactivate the alarm, briefly press the red АЛАРМ УКЉУЧЕН / ИСКЉУЧЕН button on the top of the clock. An alarm icon will appear on the display when the alarm is active.
4.3 Функција одлагања
When the alarm sounds, press the red АЛАРМ УКЉУЧЕН / ИСКЉУЧЕН button on the top of the clock to activate the snooze function. The alarm will temporarily stop and sound again after a few minutes (typically 5-10 minutes, depending on the model's default setting).
4.4 Позадинско осветљење екрана
To illuminate the display with a blue backlight, briefly touch the top of the clock. The backlight will remain on for a few seconds, providing temporary visibility in the dark.
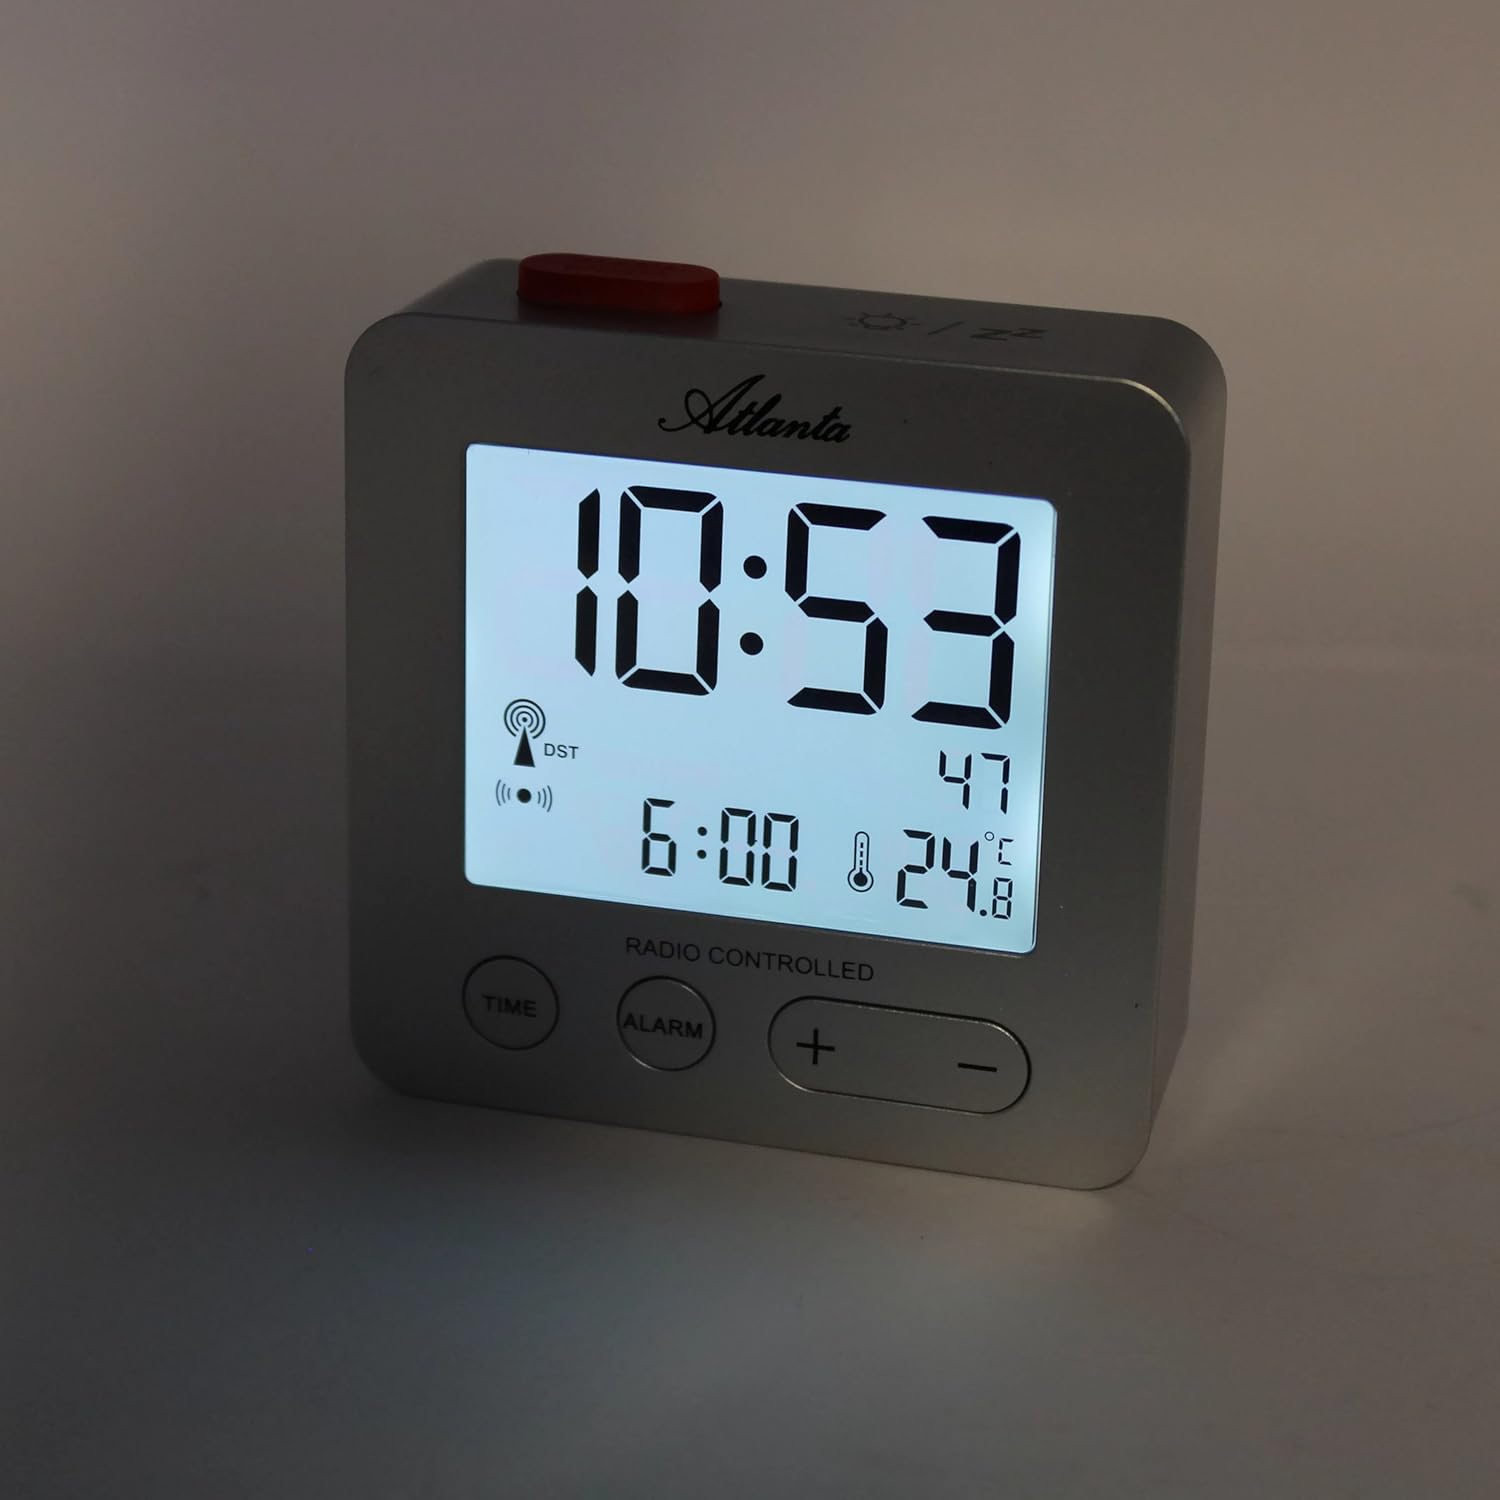
Слика 3: The alarm clock display with the blue backlight activated, enhancing readability in low light.
4.5 Temperature and Date Display
The clock continuously displays the indoor temperature and the current date alongside the time. No specific action is required to view ови детаљи.
5. Одржавање
- Чишћење: Обришите сат меком, сувом крпом. Не користите абразивна средства за чишћење или раствараче.
- Замена батерије: Replace batteries when the display dims or the clock functions become unreliable. Always replace all batteries at the same time with new ones of the same type.
- Складиштење: Ако складиштите сат дуже време, извадите батерије да бисте спречили цурење.
КСНУМКС. Решавање проблема
- Clock not setting time automatically:
Ensure the clock is placed in an open area, away from electronic interference (e.g., TVs, computers, mobile phones). Try placing it near a window. If the issue persists, manually set the time as described in section 4.1. - Аларм се не оглашава:
Verify that the alarm is activated (alarm icon visible on display). Check battery levels and replace if necessary. - Екран је замагљен или празан:
Replace the batteries. Ensure batteries are inserted with correct polarity. - Нетачно очитавање температуре:
Ensure the clock is not exposed to direct sunlight or placed near heat sources/vents, which can affect the sensor.
7. Спецификације
| Број модела | 1882/19 |
| Бранд | Атланта |
| Дисплаи Типе | Дигитални ЛЦД |
| Посебне карактеристике | Temperature Display, Alarm, Snooze, Radio-Controlled (DCF77), Backlight |
| Димензије (Д к Ш к В) | 7 x 3.81 x 7 цм (приближно 2.76 x 1.5 x 2.76 инча) |
| Тежина | 65 грама (приближно 2.3 унци) |
| Извор напајања | Напајање батеријама (батерије нису укључене) |
| Материјал | Пластика (акрилонитрил бутадиен стирен) |
| Боја | Сребро |
8. Гаранција и подршка
This product comes with a standard manufacturer's warranty. For detailed warranty information, please refer to the packaging or contact Atlanta customer support. For technical assistance or further inquiries, please visit the official Atlanta webсајту или се обратите њиховом одељењу за корисничку подршку.