1. Увод
This manual provides detailed instructions for the installation, operation, and maintenance of your SUNNYSKY 60A MPPT Solar Charge Controller. This device is designed to efficiently manage power flow from solar panels to batteries, ensuring optimal charging and battery longevity. It features an intelligent LCD display for real-time monitoring and configuration.
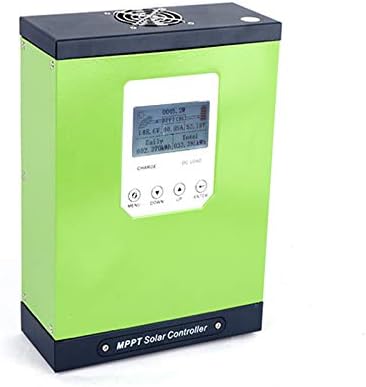
Слика 1: Предња страна view of the SUNNYSKY 60A MPPT Solar Charge Controller. The device is green with a black top and bottom, featuring an LCD screen and control buttons on the front panel.
2. Кључне карактеристике
- MPPT solar controller with real-time power generation and current display.
- Displays daily and cumulative power generation.
- Records fault history for easy troubleshooting.
- Supports lead-acid, colloidal, and lithium batteries.
- Constructed with premium brand components for a theoretical design lifespan exceeding 10 years and high-temperature resistance above 105°C.
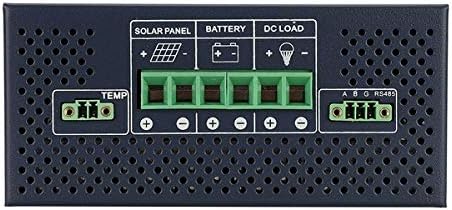
Figure 2: The controller utilizes the latest MPPT algorithm for maximum power point tracking, achieving over 98.5% charging efficiency and over 99.73% tracking accuracy.
3. Безбедносне информације
Please read and understand all safety instructions before installation and operation. Failure to follow these instructions may result in electric shock, fire, or severe injury.
Заштитне карактеристике:
- ПВ заштита од обрнутог поларитета
- ПВ заштита од кратког споја
- PV over current alarm protection
- Заштита од преоптерећења батерије
- Заштита батерије од прекомерног пражњења
- Заштита од обрнутог поларитета батерије
- Заштита од кратког споја оптерећења
- Заштита од преоптерећења
- Заштита контролера од прегревања
4. Производ је готовview
4.1. Физичке димензије
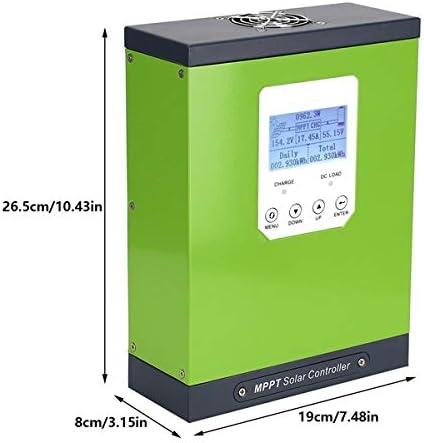
Figure 3: The controller measures 26.5 cm (10.43 inches) in height, 19 cm (7.48 inches) in width, and 8 cm (3.15 inches) in depth.
4.2. Предња плоча и контроле

Figure 4: The front panel features an LCD display, charging status indicator, DC output indicator, Menu button, Down page button, Up page button, and Enter button. The wire connection cover is located at the bottom.
4.3. Connection Terminals

Figure 5: The rear panel includes terminals for Solar Panel (+/-), Battery (+/-), DC Load (+/-), and a TEMP sensor port, along with an RS485 communication port.
5. Подешавање и инсталација
Proper installation is crucial for the safe and efficient operation of the charge controller. Ensure all connections are secure and correctly polarized.
5.1. Ожичење
- Connect the battery to the controller first. Ensure correct polarity (+ to + and - to -).
- Connect the solar panel to the controller. Ensure correct polarity.
- Connect the DC load to the controller (optional). Ensure correct polarity.
- Connect the temperature sensor to the TEMP port.
- If using communication features, connect the RS485 cable.
Video 1: Demonstration of the controller activating a lithium battery. This video illustrates how the MPPT controller can initiate charging even when a battery is deeply discharged.
Video 2: Short demonstration showing the controller's ability to activate a dead battery, allowing it to begin charging from solar input.
6. Упутство за употребу
The intelligent LCD display provides real-time data and allows for system configuration.
6.1. LCD Display Overview
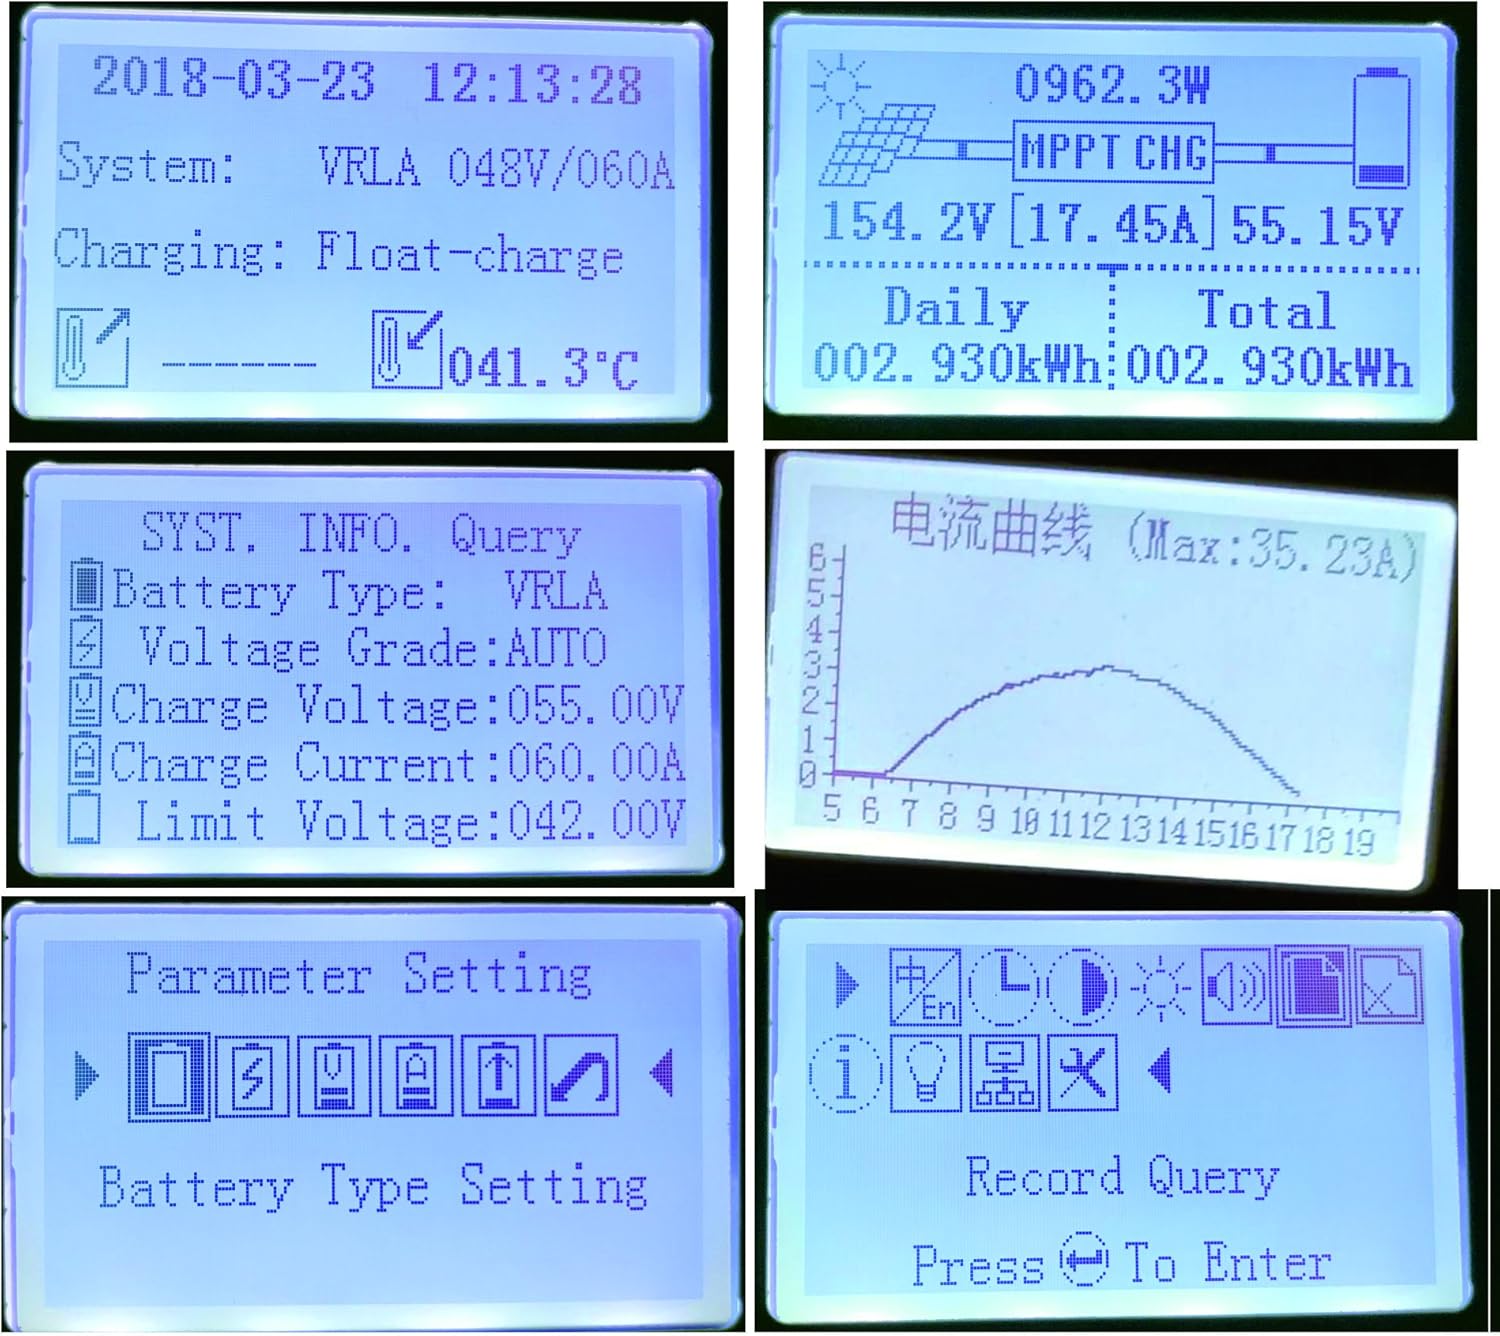
Figure 6: The LCD displays real-time information such as system voltage, charging current, daily and total power generation, battery type, and temperature. It also shows various menu screens for settings and record queries.
6.2. Мену Навигатион
Use the 'MENU', 'DOWN', 'UP', and 'ENTER' buttons to navigate through the display screens and adjust settings.
- МЕНИ: Приступа главном менију или враћа на претходни екран.
- ДОЉЕ: Scrolls down through options or decreases a value.
- УП: Scrolls up through options or increases a value.
- ЕНТЕР: Потврђује избор или улази у подмени.
7. Параметер Сеттингс
To access parameter settings, press the 'MENU' button and navigate to the 'Parameter Setting' option. A password may be required (refer to your product's specific documentation for default password).
7.1. Battery Type Setting
Select the appropriate battery type (lead-acid, colloidal, or lithium) to ensure correct charging algorithms are applied.
7.2. Charge Voltagе Подешавање
Adjust the charge voltage according to your battery manufacturer's specifications. This includes float, boost, and equalization voltagес.
7.3. Charge Current Setting
Set the maximum charging current to prevent overcharging or damage to your batteries.
7.4. Discharge Limit Voltagе Подешавање
Configure the minimum voltage at which the load will be disconnected to protect the battery from over-discharge.
7.5. Time and Date Adjustment
Set the current time and date for accurate record-keeping of power generation data.
8. Одржавање
Редовно одржавање осигурава дуготрајност и оптималне перформансе вашег соларног регулатора пуњења.
- Периодично проверавајте све спојеве ожичења на чврстоћу и корозију.
- Clean the controller's exterior and display screen with a dry, soft cloth.
- Обезбедите одговарајућу вентилацију око контролера како бисте спречили прегревање.
- Check battery terminals for corrosion and clean as necessary.
КСНУМКС. Решавање проблема
The controller's fault record display can assist in diagnosing issues.
- Без напајања/искључивање екрана: Проверите прикључке батерије и волtage. Ensure solar panels are receiving sufficient sunlight.
- Батерија се не пуни: Verify solar panel connections and output. Check battery type settings. Inspect for any fault codes on the display.
- Учитавање не ради: Check DC load connections. Ensure battery voltage is above the discharge limit. Check for load short circuit or overload protection activation.
- прегревање: Ensure proper ventilation. Reduce load if ambient temperature is high.
Видео 3: Детаљан прегледview of the SUNNYSKY MPPT Solar Charge Controller, demonstrating its features, display, and configuration options. This video also highlights comparisons with other controllers and discusses installation aspects.
10. Спецификације
| Атрибут | Валуе |
|---|---|
| Димензије производа | 7.56 к 10.24 к 3.15 инча |
| Тежина артикла | 8.43 фунти |
| Произвођач | СУННИСКИ |
| ASIN | B07CXZQQTP |
| Батерије су потребне | No (8 12V batteries required for system operation, not included with controller) |
| Бранд | СУННИСКИ |
| УПЦ | 606814417296 |
11. Гаранција и подршка
For warranty information and technical support, please refer to the documentation included with your purchase or contact SUNNYSKY customer service directly. Protection plans may be available for extended coverage.