1. Увод
Хвала вам на куповиниasing the DBPOWER RD810 Portable Mini Projector. This manual provides essential information for the safe and optimal use of your projector. Please read it thoroughly before operating the device and retain it for future reference.
This projector is designed for home entertainment, offering a portable solution for displaying videos, photos, and presentations. Ensure all safety guidelines are followed to prevent damage to the device or personal injury.
2. Садржај пакета
Please verify that all components are present in your package. If any items are missing or damaged, contact DBPOWER customer support.
- DBPOWER RD810 Portable Mini Projector
- Ремоте Цонтрол
- Повер Цабле
- ХДМИ кабл
- АВ кабл
- Упутство за употребу
3. Производ је готовview
Familiarize yourself with the various parts of your DBPOWER RD810 projector.

Слика 3.1: Предња страна view of the DBPOWER RD810 Projector, showing the lens and ventilation.
Слика 3.2: Страна view of the projector, illustrating input ports such as HDMI, USB, and VGA.
Кључне компоненте:
- Објектив: Пројектује слику на екран.
- Прстен за фокусирање: Подешава јасноћу слике.
- Keystone Correction Knob: Исправља трапезоидно изобличење слике.
- Контролна табла: On-device buttons for basic navigation and settings.
- Улазни портови: HDMI, USB, VGA for connecting various devices.
- Напајање: За повезивање кабла за напајање.
- Вентилационе решетке: Essential for heat dissipation. Do not block.
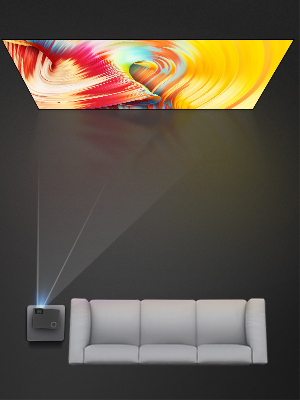
4. Подешавање
4.1 Постављање
- Place the projector on a stable, flat surface (Tabletop Mount).
- Ensure there is adequate space around the projector for proper ventilation.
- Position the projector perpendicular to the projection surface for the best image quality.
4.2 Прикључак за напајање
- Connect the power cable to the projector's power port.
- Укључите други крај кабла за напајање у утичницу.
- The power indicator light on the projector should illuminate.
4.3 Connecting Input Devices
The projector supports HDMI, USB, and VGA connectivity.
- ДВИ: Connect an HDMI cable from your source device (e.g., laptop, DVD player, game console) to the HDMI port on the projector.
- УСБ: Уметните УСБ диск у УСБ порт да бисте репродуковали медије files directly. Note: The USB port is primarily for media playback and charging, not for direct computer connection for display.
- ВГА: Повежите VGA кабл са рачунара на VGA порт на пројектору.
- Аудио излаз: If desired, connect external speakers to the projector's audio output port for enhanced sound.
5. Упутство за употребу
5.1 Укључивање/искључивање
- Укључено: Press the power button on the projector or the remote control. The projector lamp ће се укључити.
- Искључивање: Press the power button again. The projector will initiate a shutdown sequence. Do not unplug the power cable until the fan has stopped and the projector has fully cooled down.
5.2 Подешавање фокуса и трапезоидног искривљења
- Фокус: Rotate the focus ring located around the lens until the projected image appears sharp and clear.
- Кеистоне Цоррецтион: If the image appears trapezoidal (wider at the top or bottom), adjust the keystone correction knob until the image is rectangular.
5.3 Избор улазног извора
After connecting your input device, you need to select the correct source:
- Press the 'Source' button on the remote control or the projector's control panel.
- Use the arrow keys to navigate through the input options (HDMI, USB, VGA).
- Press 'OK' or 'Enter' to confirm your selection.
5.4 Навигација кроз мени
Use the 'Menu' button on the remote or projector to access settings. Navigate with arrow keys and confirm with 'OK' or 'Enter'. Common settings include Picture Mode, Aspect Ratio, Sound Settings, and Time Settings.
6. Одржавање
6.1 Чишћење сочива
Use a soft, lint-free cloth or lens cleaning paper to gently wipe the lens. Avoid using abrasive cleaners or excessive force, which can scratch the lens surface.
6.2 Ventilation Cleaning
Regularly check and clean the ventilation grilles to prevent dust buildup, which can lead to overheating. Use a soft brush or a vacuum cleaner with a brush attachment to remove dust from the vents.
6.3 Складиштење
Када се пројектор не користи дуже време, чувајте га на хладном, сувом и месту без прашине. Користите оригинално паковање или заштитну футролу да бисте спречили оштећења.
КСНУМКС. Решавање проблема
| Проблем | Могући узрок | Решење |
|---|---|---|
| Но Повер | Power cable not connected; Power outlet faulty; Projector overheated. | Ensure power cable is securely connected; Test power outlet; Allow projector to cool down. |
| Нема слике | Incorrect input source selected; Input cable loose or faulty; Source device not outputting signal. | Select correct input source; Check cable connections; Ensure source device is on and configured to output. |
| Мутна слика | Focus not adjusted; Keystone not adjusted; Projector too far/close to screen. | Adjust focus ring; Adjust keystone correction knob; Reposition projector. |
| Нема звука | Volume too low; Mute enabled; External speakers not connected/configured; Source device audio settings. | Increase volume; Disable mute; Connect external speakers if desired; Check audio settings on source device. |
| Даљински управљач не ради | Батерије су празне; Препрека између даљинског управљача и пројектора; Сензор даљинског управљача је блокиран. | Replace batteries; Remove obstructions; Ensure remote sensor on projector is clear. |
8. Спецификације
| Феатуре | Спецификација |
|---|---|
| Бранд | ДБПОВЕР |
| Назив модела | РД810 |
| Број модела | 810Кс |
| Технологија повезивања | HDMI, USB, VGA |
| Изворна резолуција екрана | 800 к 480 |
| Максимална резолуција екрана | 1920 к 1080 |
| Дисплаи Типе | ЛЦД |
| Однос контраста | 1000:1 |
| Радни век извора светлости | 30,000 сата |
| Ватtage | 24 вати |
| Контролни метод | Даљински управљач, дугме |
| Тип монтаже | Таблетоп Моунт |
| Форм Фацтор | Портабле |
9. Гаранција и подршка
DBPOWER products are designed and manufactured to the highest quality standards. For information regarding warranty coverage, technical support, or service inquiries, please refer to the warranty card included with your product or visit the official DBPOWER website. Please have your model number (RD810 / 810X) and purchase details ready when contacting support.