Безбедносне информације
Read and understand all instructions before beginning installation. Failure to follow these instructions could result in electric shock, fire, or serious personal injury.
- Уверите се да је место инсталације структурно чврсто и да може да издржи тежину вентилатора (приближно 21 кг).
- Све ожичење мора бити у складу са националним и локалним електричним прописима. Ако нисте упознати са ожичењем, консултујте квалификованог електричара.
- Искључите напајање на прекидачу или кутији са осигурачима пре него што започнете инсталацију или обављате било какво одржавање.
- Не користите вентилатор са оштећеним лопатицама или кућиштем.
- Maintain a minimum clearance of 7 feet from the floor to the bottom edge of the fan blades.
- Овај вентилатор је дизајниран само за унутрашњу употребу.
Подешавање и инсталација
This section guides you through the assembly and installation process of your Hunter ceiling fan.
1. Распакивање и преглед
Carefully remove all components from the packaging. Inspect all parts for any damage. Do not discard packaging materials until assembly is complete and the fan is operating correctly.
2. Монтажа вентилатора
The fan uses a standard profile mounting with included 3-inch and 2-inch downrods. Choose the appropriate downrod length for your ceiling height. Ensure the electrical box is securely mounted and capable of supporting the fan.

Image: Hunter 46-inch ceiling fan installed in a living space, demonstrating typical mounting.
- Причврстите монтажни носач на електричну кутију на плафону.
- Feed electrical wires through the downrod and canopy.
- Причврстите спојну шипку на кућиште мотора.
- Подигните склоп вентилатора и окачите га на носач за монтажу.
3. Електричне везе
Ensure power is OFF at the circuit breaker before making any electrical connections. Connect the fan's wires to the household wiring according to the wiring diagram provided in the full installation guide (not included here). This fan operates on 120 Volts AC.
4. Причвршћивање лопатица вентилатора
The fan includes 5 reversible Medium Density Fiberboard (MDF) blades with Warm Grey Oak and Greyed Walnut finishes. Choose your preferred finish before attaching the blades.

Слика: Крупни план view of the fan's motor housing with the Hunter logo and a blade arm attached, showing the connection point.
- Причврстите сваку оштрицу на крак оштрице помоћу приложених вијака.
- Secure the blade arms to the motor housing.

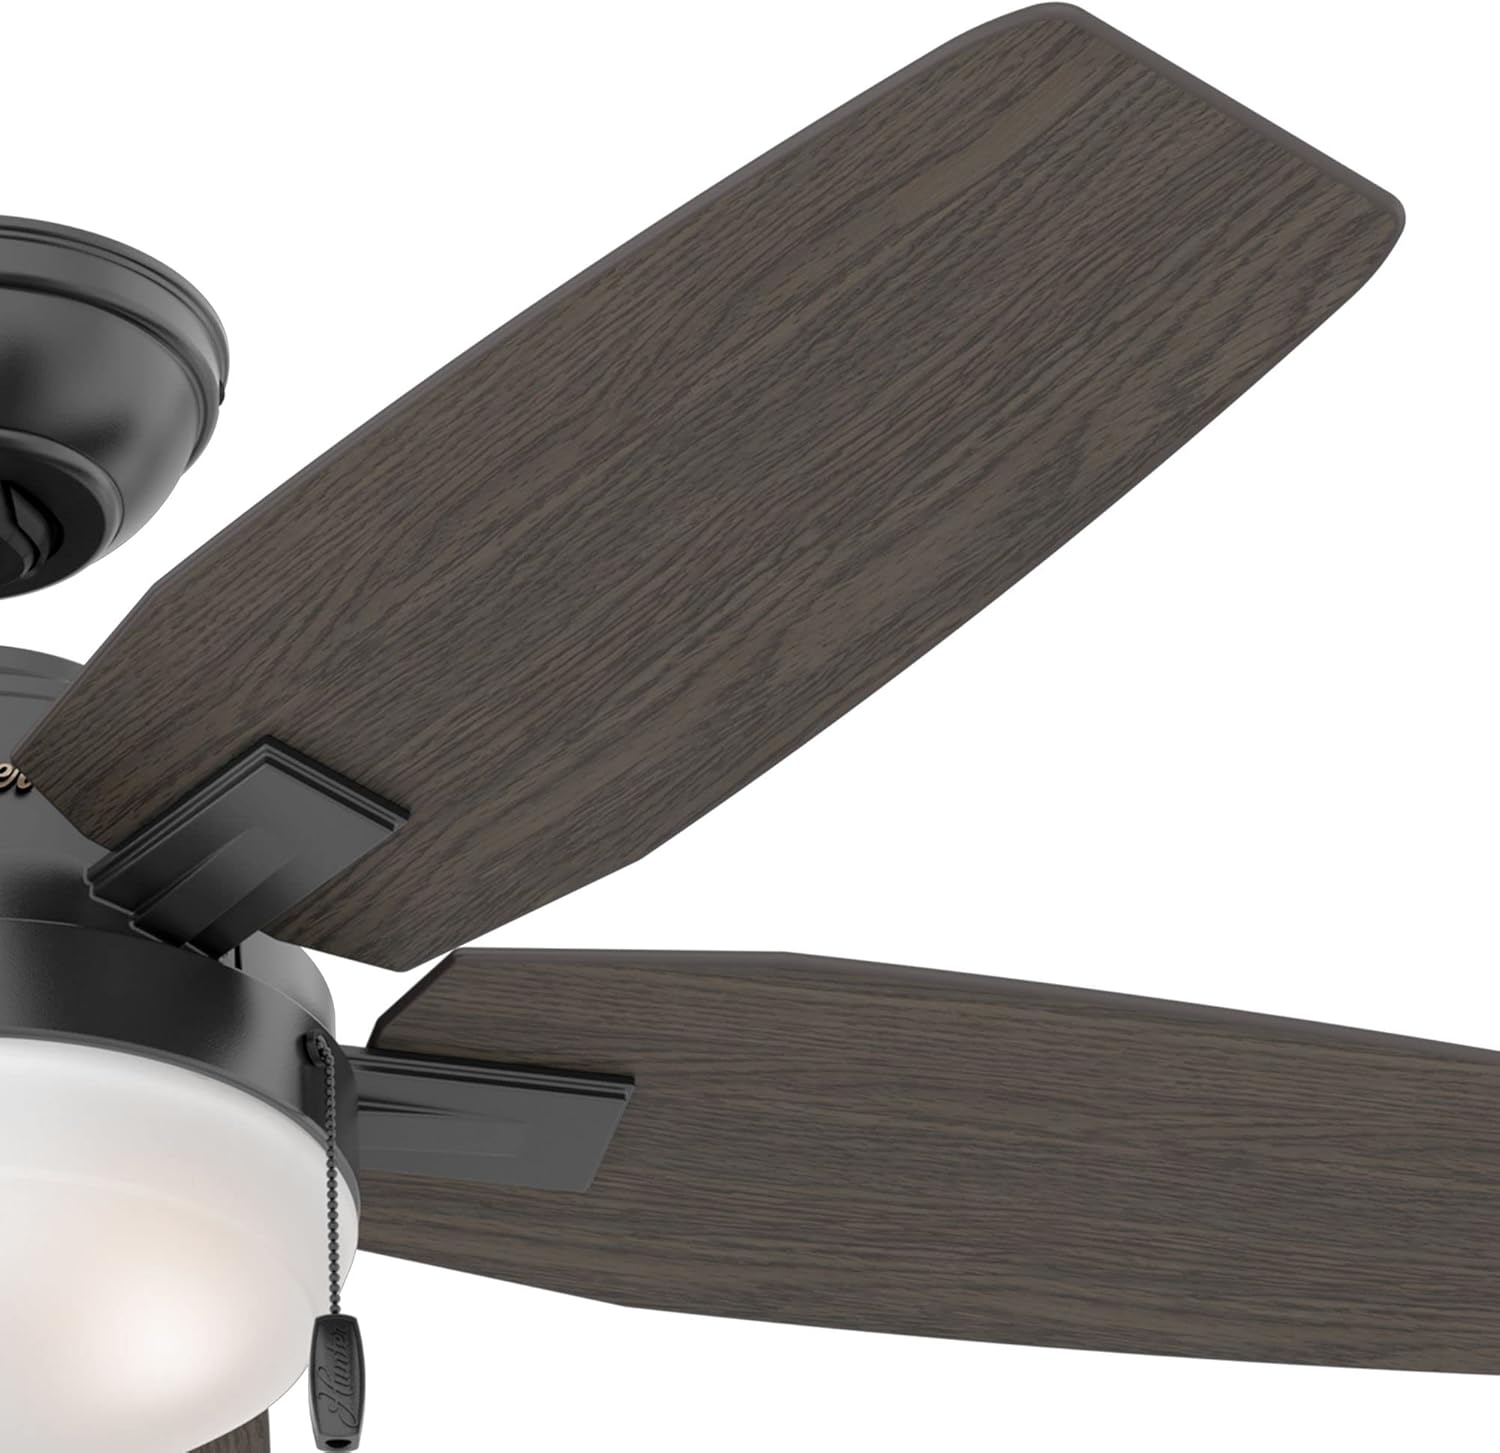
Image: Left shows the Warm Grey Oak side of a fan blade. Right shows the Greyed Walnut side of a fan blade, demonstrating the reversible design.
5. Инсталирање комплета за осветљење
The fan includes an integrated light kit with premium painted cased white glass shading and two 9-watt energy-efficient, dimmable LED bulbs (E26/A19 base).

Image: Close-up of the fan's light kit, showing the frosted white glass shade and the two pull chains for fan speed and light control.
- Спојите жице комплета за осветљење на жице мотора вентилатора.
- Secure the light kit assembly to the fan motor housing.
- Install the LED bulbs into the sockets.
- Attach the glass shade to the light kit.
Упутство за употребу
Your Hunter ceiling fan is controlled by pull chains for both fan speed and light operation.
Контрола брзине вентилатора
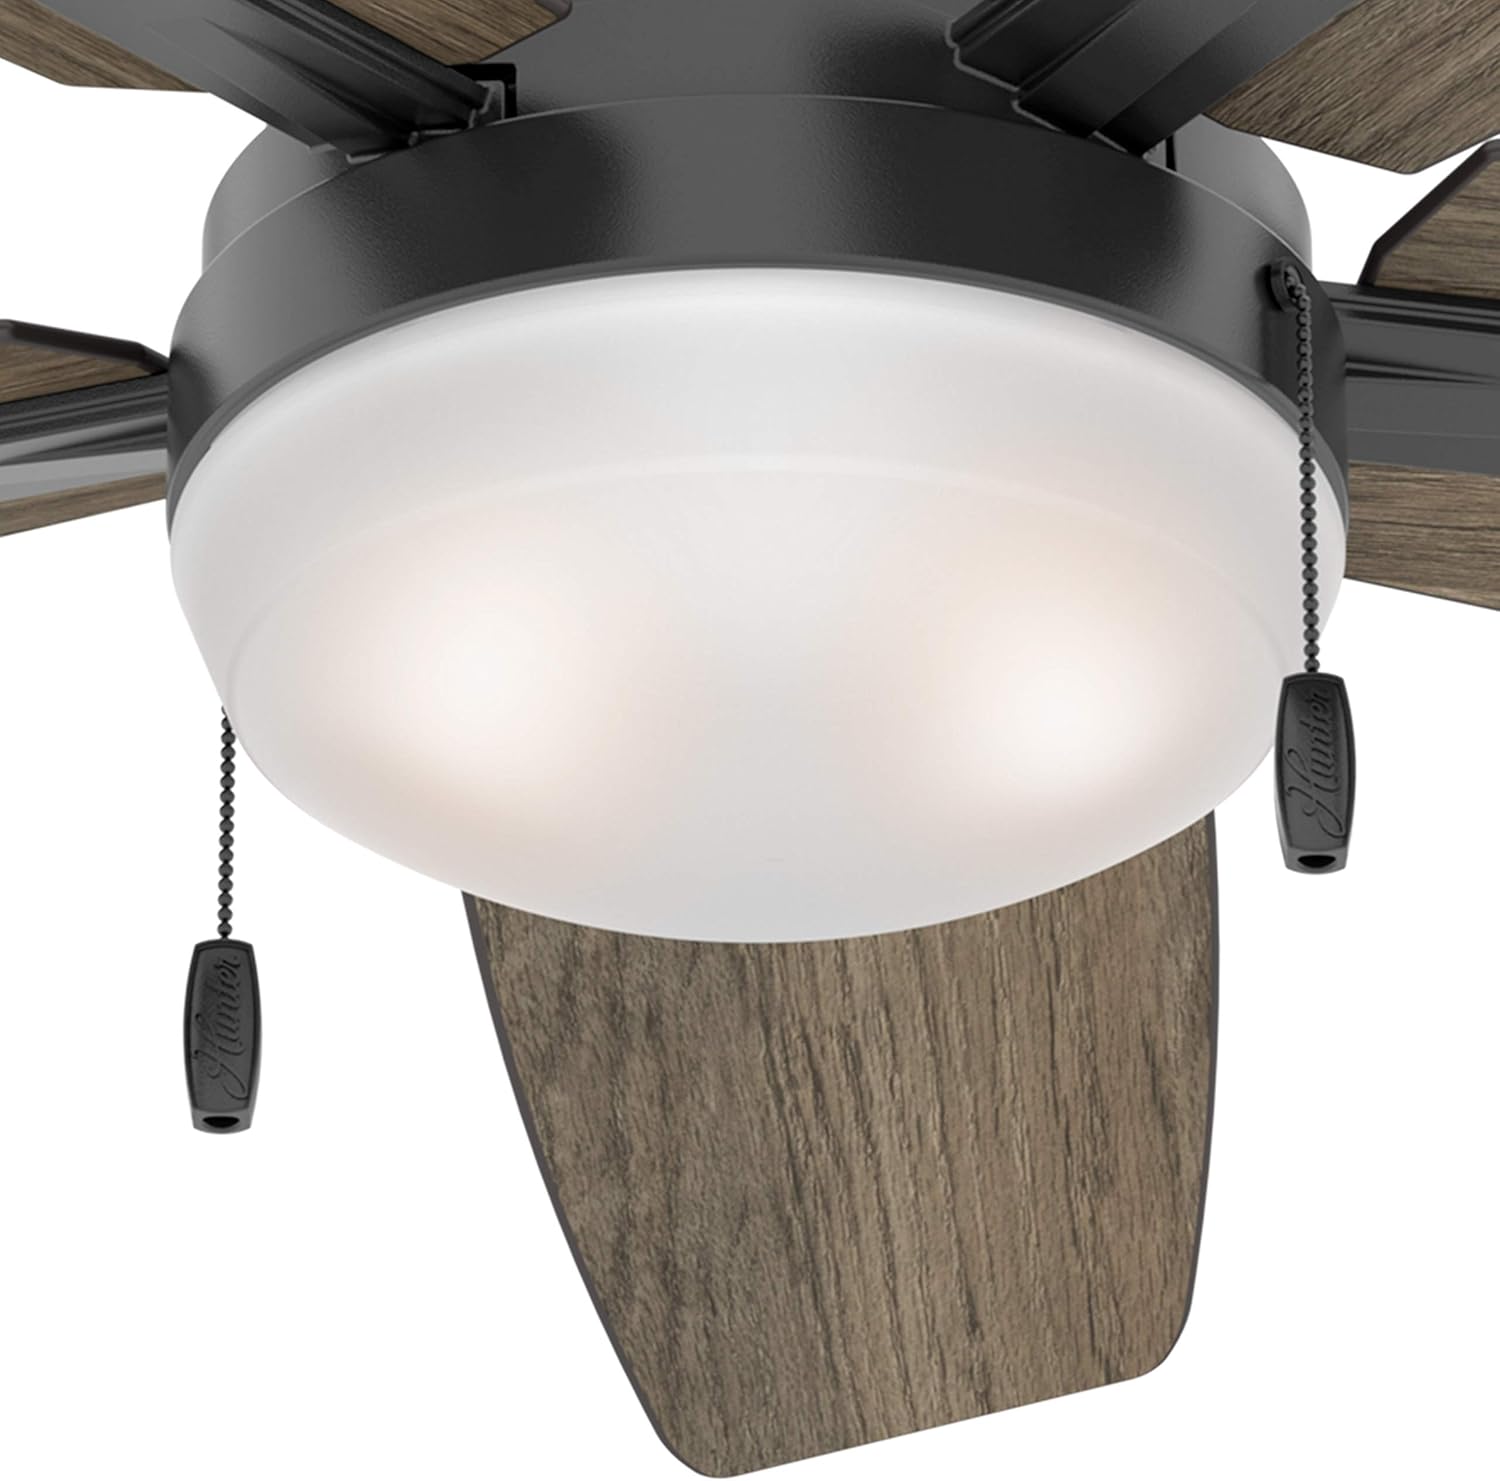
Слика: Детаљна view of the fan's light kit, highlighting the two pull chains. One chain controls the fan speed, and the other controls the light.
- Locate the pull chain designated for fan speed (often marked with a fan icon or a shorter chain).
- Pull the chain once for High speed.
- Pull the chain a second time for Medium speed.
- Pull the chain a third time for Low speed.
- Pull the chain a fourth time to turn the fan OFF.
Контрола светлости
- Locate the pull chain designated for light control (often marked with a light bulb icon or a longer chain).
- Pull the chain once to turn the light ON.
- Pull the chain a second time to turn the light OFF.
- To dim the light, pull and hold the light chain. Release when the desired brightness is reached.
Reversible Blade Operation (Seasonal Use)
Your fan features reversible blades and a reversible motor for year-round comfort. A switch on the fan motor housing allows you to change the direction of blade rotation.
- Летња операција: Set the switch to make the blades rotate counter-clockwise. This creates a downward airflow, producing a cooling effect.
- Зимска операција: Set the switch to make the blades rotate clockwise. This creates an upward airflow, recirculating warm air from the ceiling without creating a direct draft.
- Always turn off the fan and wait for the blades to stop completely before changing the direction switch.
Одржавање
Редовно одржавање осигурава дуготрајност и оптималне перформансе вашег плафонског вентилатора.
- Чишћење: Периодично чистите лопатице вентилатора и кућиште мотора меком крпомamp крпа. Не користите абразивна средства за чишћење или раствараче, јер могу оштетити завршну обраду.
- Вијци за притезање: Check all screws on the fan blades, blade arms, and mounting hardware at least twice a year. Tighten any loose screws to prevent wobbling and noise.
- Замена сијалице: If a light bulb needs replacement, ensure the power is off. Use only 9-watt LED bulbs with an E26/A19 base, or equivalent.
- Није потребно подмазивање: Мотор вентилатора је трајно подмазан и не захтева подмазивање.
Решавање проблема
If you experience issues with your fan, refer to the following common problems and solutions before contacting support.
Вентилатор се не покреће
- Проверите снагу: Ensure the circuit breaker is ON and the wall switch (if applicable) is ON.
- Ожичење: Verify all electrical connections are secure and correctly wired according to the installation instructions.
- Pull Chain: Ensure the fan pull chain has been pulled to an ON position.
Фан Вобблес
- Вијци са сечивом: Check that all blade screws are tightened securely.
- Blade Arms: Ensure blade arms are securely attached to the motor.
- Монтажа: Verify the mounting bracket and downrod are securely fastened to the ceiling and electrical box.
- Баланс сечива: Uneven blade weight can cause wobbling. Use a balancing kit (often sold separately) if necessary.
Светло не ради
- Инсталација сијалице: Ensure bulbs are screwed in tightly.
- Bulb Functionality: Test bulbs in a known working fixture or replace with new ones.
- Ожичење: Check light kit wiring connections.
- Pull Chain: Ensure the light pull chain is in the ON position.
Ноиси Оператион
- Лабави завртњи: Tighten all screws on the fan.
- Монтажа: Ensure the fan is securely mounted and not touching any part of the ceiling.
- Сјенило за стакло: Check if the glass shade is securely fastened and not rattling.
- Размак сечива: Ensure blades are not hitting anything.
Спецификације

Image: Energy Guide label showing estimated yearly energy cost ($10) and airflow (3,133 Cubic Feet Per Minute) for the fan.
| Бранд | Хунтер |
| Број модела | ЦЦ5Ц95Ц84 |
| Димензије производа | 46 cm D x 46 cm Š x 14.51 cm V |
| Тежина артикла | 21.05 фунти |
| Боја | Мат црна |
| Материјал | Metal (Housing), MDF (Blades), Glass (Shade) |
| Број оштрица | 5 (Reversible: Warm Grey Oak / Greyed Walnut) |
| Тип извора светлости | Интегрисана ЛЕД |
| Сијалице укључене | 2 x 9 Watt, Dimmable LED (E26/A19 base) |
| Осветљеност | 800 Lumens (Light Output Maximum) |
| Контролни метод | Повуците контролу ланца |
| Брзине вентилатора | 3 |
| Тип монтаже | Downrod Mount (3" and 2" downrods included) |
| Унутрашња/спољна употреба | Индоор Онли |
| Волtage | 120 Волтс |
| Капацитет протока ваздуха | 2635 кубних стопа у минути |
| Ефикасност | Energy Efficient, ETL Certified |
Гаранција и подршка
For specific warranty information regarding your Hunter ceiling fan, please refer to the documentation included with your purchase or visit the official Hunter Fan Company webсајту.
If you require technical assistance or have questions not covered in this manual, please contact Hunter Customer Support:
- Hunter Fan Company Official Webсајт: ввв.хунтерфан.цом
- Служба за кориснике: Погледајте на website for current contact methods (phone, email, chat).
Please have your model number (CC5C95C84) and date of purchase available when contacting support.