
Увод
Thank you for choosing the ORSKEY Dash Cam S680. This manual provides detailed instructions for the installation, operation, and maintenance of your dash camera. Please read this manual thoroughly before use to ensure proper functionality and to maximize your experience with the product.
Садржај пакета
Молимо вас да проверите пакет за следеће ставке:
- ORSKEY Dash Cam S680 Unit
- Цар Цхаргер
- Усисни носач
- Кориснички приручник (овај документ)

The package contents of the ORSKEY Dash Cam S680, including the main camera unit, a suction cup mount for windshield attachment, and a car charger for power.
Производ је завршенview
The ORSKEY Dash Cam S680 features a 3.0-inch LCD display, a 170-degree wide-angle lens, and records in 1080P Full HD. It is equipped with a Sony Exmor IMX 323 sensor and 6 glass lens elements for superior image quality, especially in low-light conditions with its WDR technology.
This image shows the advanced lens system of the ORSKEY Dash Cam, featuring a Sony Exmor IMX 323 sensor and 6 glass elements for clear 1080P video capture.
Сетуп
1. Уметање микро СД картице
Before using the dash cam, a Micro SD card (Class 10 or higher, up to 32GB) must be inserted. The Micro SD card is није укључено у пакету.
- Уверите се да је камера у аутомобилу искључена.
- Пронађите слот за Micro SD картицу са стране камере за аутомобил.
- Insert the Micro SD card with the gold contacts facing the back of the camera until it clicks into place.
- Да бисте је уклонили, нежно гурните картицу унутра док не кликне, затим је отпустите и она ће искочити.
Note: It is recommended to format the Micro SD card within the dash cam settings before first use and periodically thereafter to ensure optimal performance.
2. Монтажа камере
- Очистите подручје на ветробранском стаклу где намеравате да монтирате камеру за аутомобил.
- Причврстите вакуумски носач на камеру на инструмент табли.
- Чврсто притисните вакуумску чашицу уз ветробранско стакло и померите полугу да бисте је учврстили. Поставите камеру тако да осигурате јасан поглед. view of the road without obstructing your driving visibility.

A visual guide demonstrating how to properly install the dash cam onto your car's windshield using the suction mount and connect the power cable.
3. Повезивање напајања
- Прикључите пуњач за аутомобил на улазни прикључак за напајање камере у аутомобилу.
- Укључите други крај ауто пуњача у утичницу за упаљач у вашем возилу.
- Route the power cable neatly along the edge of the windshield and dashboard to avoid obstructing your view или ометање управљања вожњом.
Упутство за употребу
1. Укључивање/искључивање
- The dash cam will automatically power on and begin recording when your vehicle's engine starts (and the cigarette lighter provides power).
- Аутоматски ће се искључити када се мотор угаси.
- Да бисте ручно укључили/искључили напајање, притисните и држите дугме за напајање.
2. Режими снимања
The dash cam offers several recording features to ensure comprehensive coverage:
- Лооп Рецординг: This feature allows continuous recording. When the Micro SD card reaches its storage limit, the camera automatically overwrites the oldest unlocked footage with new recordings. This ensures that recording never stops due to a full card.

An illustration detailing the loop recording feature, where the camera continuously records and overwrites the oldest footagе када је меморијска картица пуна, осигуравајући непрекидно снимање.
- Г-сензор (снимање у хитним случајевима): The built-in G-sensor detects sudden impacts or collisions. When triggered, it automatically locks the current video segment, preventing it from being overwritten by loop recording. This footage is saved in a separate folder to protect critical evidence.
- Детекција покрета: When enabled, the dash cam will automatically start recording if it detects movement in front of the vehicle while parked. This feature requires continuous power supply (e.g., hardwiring kit, not included) to function when the car is off.
- Надзор паркирања: Similar to motion detection, this mode activates recording if an impact is detected while the vehicle is parked and the engine is off.

This image highlights the 24-hour monitoring capabilities, including motion detection and parking monitoring, which activate the camera when movement or impact is detected while parked.
3. Wide Dynamic Range (WDR) and Night Vision
The dash cam incorporates WDR technology and 6 unique infrared LED fill lights to enhance video quality in various lighting conditions, providing clear recordings both day and night.

A side-by-side comparison demonstrating the dash cam's clear video quality during the day and its enhanced night vision performance in low-light conditions.
4. Навигација кроз мени и подешавања
Use the buttons on the side of the dash cam to navigate through the menu options displayed on the 3-inch LCD screen. Common settings include video resolution, loop recording duration, G-sensor sensitivity, motion detection on/off, date/time stamp, and Micro SD card formatting.

Детаљно view of the dash cam's 3-inch LCD screen displaying the menu options for configuration and settings.
5. Репродукција
То реview снимљено фооtage:
- Stop recording by pressing the OK button (if currently recording).
- Enter playback mode via the menu.
- Browse through video files using the navigation buttons.
- Изаберите а file и притисните ОК за репродукцију.
- Alternatively, remove the Micro SD card and view фооtage on a computer using a card reader.
Одржавање
1. Micro SD Card Management
- Regularly format your Micro SD card (at least once a month) to prevent data corruption and ensure smooth operation.
- Use a high-quality Class 10 or higher Micro SD card from a reputable brand.
- Replace the Micro SD card if you experience frequent errors or recording issues.
2. Чишћење камере за аутомобил
- Use a soft, dry cloth to clean the camera lens and screen. Avoid abrasive materials or chemical cleaners.
- Ensure the suction cup is clean for optimal adhesion to the windshield.
Решавање проблема
- Камера се не укључује: Check if the car charger is properly connected to both the dash cam and the vehicle's cigarette lighter. Ensure the vehicle's ignition is on.
- Camera stops recording or does not record:
- Ensure a Micro SD card is inserted and properly formatted.
- The Micro SD card may be full; enable loop recording or format the card.
- The Micro SD card may be faulty or not Class 10 or higher. Try a different card.
- Check power connection; intermittent power can cause recording interruptions.
- Лош квалитет видеа:
- Clean the camera lens and your car's windshield.
- Уверите се да је заштитна фолија уклоњена са објектива.
- Проверите подешавања резолуције видеа у менију.
- Motion Detection/Parking Monitoring not working effectively:
- These features require continuous power when the vehicle is off, typically via a hardwiring kit (not included).
- The 32GB Micro SD card capacity may limit the duration of parking mode recordings.
- Adjust sensitivity settings in the menu.
- Menu navigation is confusing: Refer to the detailed instructions in the 'Operating Instructions' section for specific button functions and menu layouts.
Спецификације
| Број модела | С680 |
| Резолуција снимања видео записа | 1080p (1920x1080) at 30 fps |
| Величина екрана | 3 инча |
| Реал Англе оф View | 170 степени |
| Технологија оптичког сензора | CMOS (Sony Sensor) |
| Тип флеш меморије | MicroSD (up to 32GB, Class 10 or higher) |
| Технологија повезивања | ХДМИ, УСБ |
| Тип монтаже | Усисни носач |
| Тип батерије | Литхиум Полимер |
| Укључене компоненте | Car Charger, Suction Mount, User Manual |

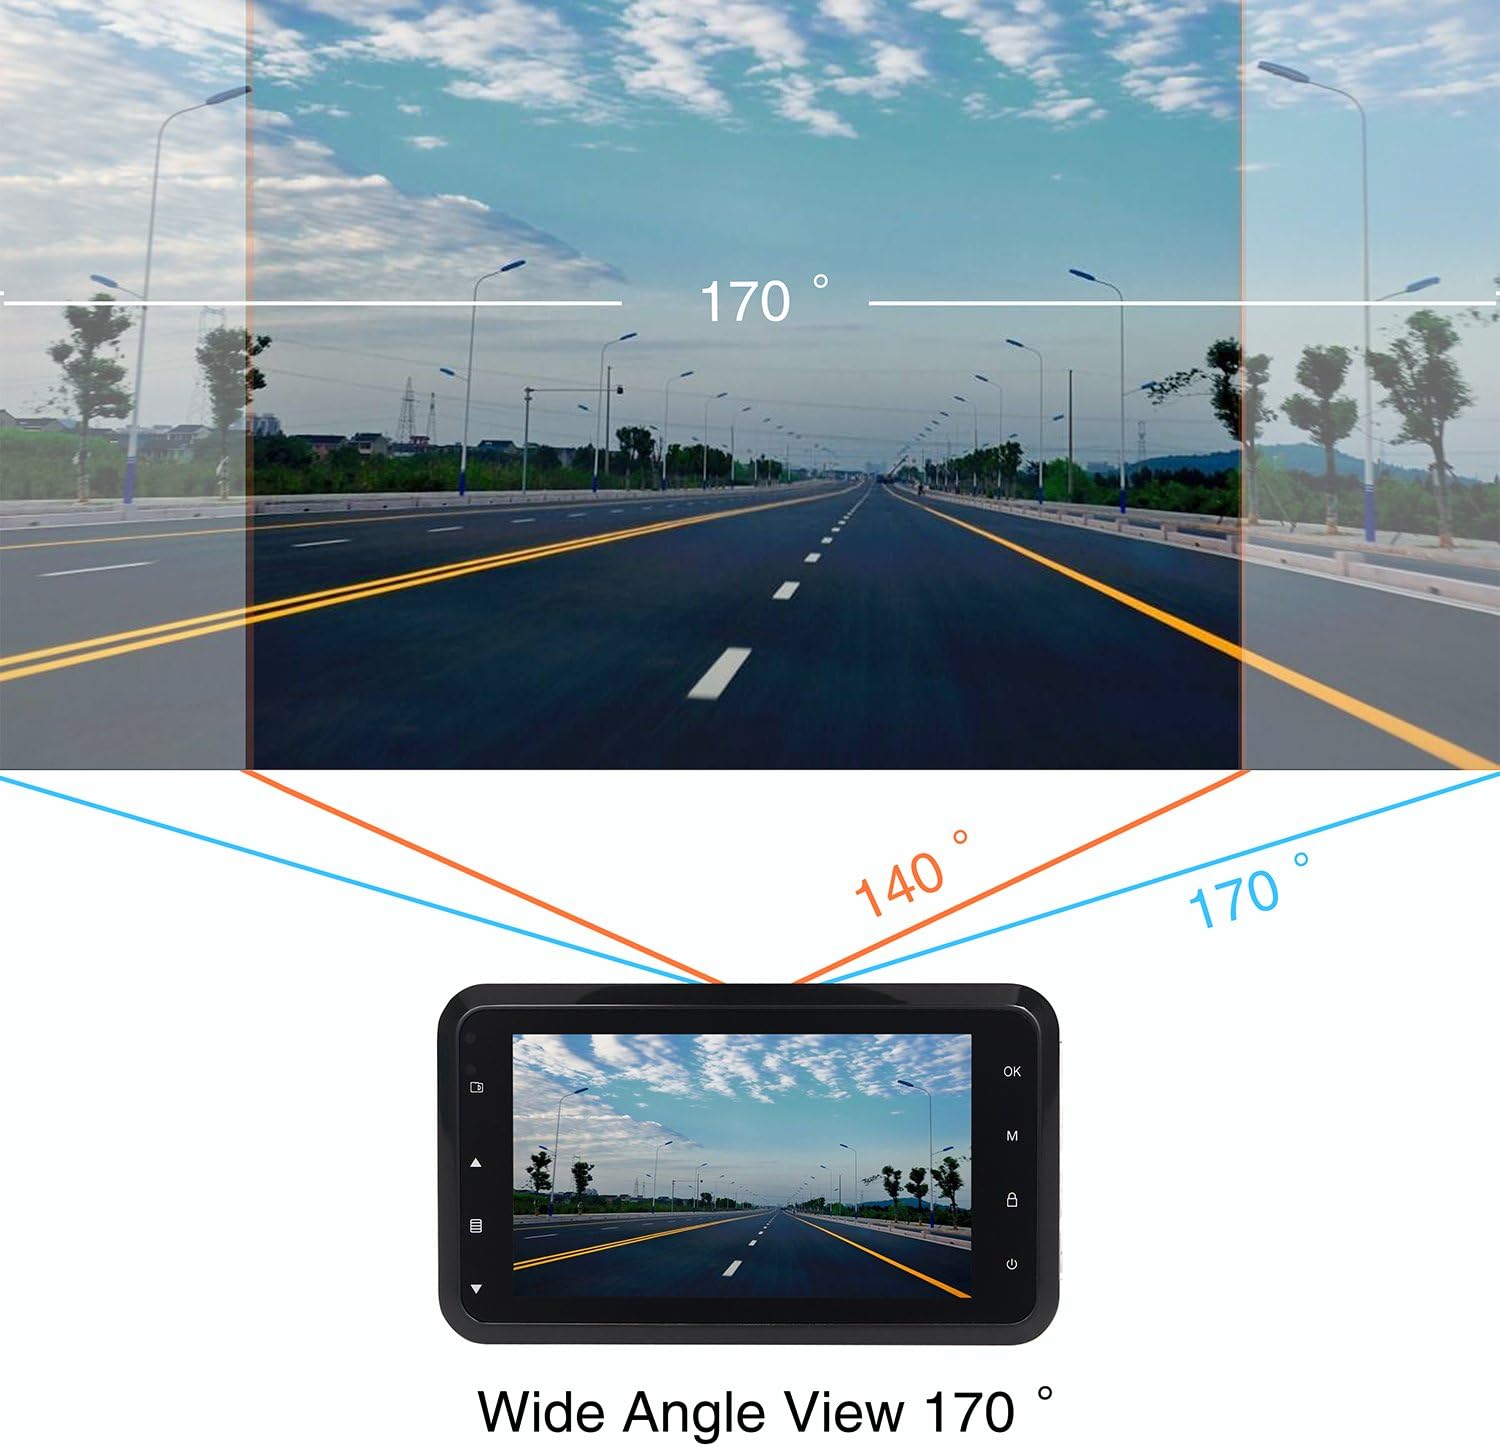
This diagram shows the expansive 170-degree wide-angle field of view captured by the dash cam, providing comprehensive road coverage.
Гаранција и подршка
The ORSKEY Dash Cam S680 comes with a Гаранција 12 месеци од датума куповине. Ова гаранција покрива производне недостатке и осигурава да производ функционише како је предвиђено при нормалној употреби.
For technical support, warranty claims, or any questions regarding your dash cam, please contact ORSKEY customer service. Details for contacting support are typically found on the product packaging or the official ORSKEY webсајту.
ORSKEY provides a qualified after-sale service team, available 7 days a week, 24 hours a day, to assist you.