
1. Увод
The MakeSkyBlue 60A MPPT Solar Charge Controller V119 is an advanced device designed to efficiently manage power flow from solar panels to batteries in various solar power systems. It utilizes Maximum Power Point Tracking (MPPT) technology to maximize energy harvest from your solar array and ensure optimal battery charging. This controller is compatible with 12V, 24V, and 48V battery systems.

Image 1.1: MakeSkyBlue 60A MPPT Solar Charge Controller V119 with its packaging and included accessories.
2. Кључне карактеристике
- Intelligent Maximum Power Point Tracking (MPPT) Technology: Optimizes solar panel output for maximum efficiency.
- Built-in DSP Controller: Ensures high performance and reliable operation.
- Три-Сtagе Пуњење: Optimizes battery performance and extends battery life.
- Multi-function LCD Display: Provides real-time system information and status.
- Широка компатибилност са батеријама: Suitable for various battery types (default for lead-acid, adjustable for others).
- ВиФи конекција: Allows monitoring and configuration via an Android phone application (local connection only, not internet/cloud).
- Свеобухватна заштита: Includes limited current protection, over-temperature protection, and overcharging protection.

Image 2.1: Front panel of the MakeSkyBlue 60A MPPT Solar Charge Controller V119, showing the LCD display and control interface.
3. Подешавање и инсталација
Proper installation is crucial for the safe and efficient operation of your MPPT charge controller. Always ensure all connections are secure and correctly polarized. It is recommended to install appropriate circuit breakers between the solar panels and the controller, and between the controller and the battery bank.
3.1 Дијаграм ожичења
Follow the diagram below for correct wiring. Connect the battery first, then the solar panels, and finally the DC load (if applicable).

Image 3.1: Detailed connection diagram illustrating the wiring of solar panels, circuit breakers, battery, and DC load to the MakeSkyBlue MPPT Solar Charge Controller.
3.2 Кораци повезивања
- Повежите батерију: Connect the positive and negative terminals of your battery bank to the BT+ and BT- terminals on the controller. Ensure correct polarity.
- Повежите соларне панеле: Connect the positive and negative terminals of your solar panel array to the PV+ and PV- terminals on the controller. Verify correct polarity and ensure the PV array open circuit voltage is within the specified range for your battery system voltage.
- Повежите једносмерно оптерећење (опционо): If using a DC load directly from the controller, connect its positive and negative terminals to the OU+ and OU- terminals. Ensure the load current does not exceed 5A.
Important: Always connect the battery first and disconnect it last to prevent damage to the controller.
4. Упутство за употребу
Once installed, the controller will automatically begin operating. The multi-function LCD display provides real-time information about the system status.
4.1 ЛЦД екран прекоview
The LCD display shows various parameters such as PV voltagе, запремина батеријеtage, charging current, and system status. Use the control buttons (PRG/ESC, Up, Down, ENTER) to navigate through the display menus and adjust settings.
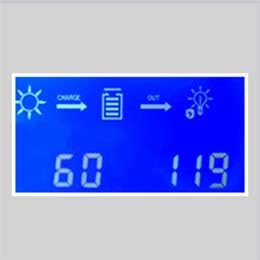
Слика 4.1: Примерample of the LCD display showing solar input, battery charge, and output status with numerical readings.
4.2 Battery Type and Charging Settings
The default charging mode is set for lead-acid batteries. For other battery types, or to fine-tune charging parameters, you can adjust the voltage settings through the controller's menu. Refer to your battery manufacturer's specifications for recommended charging voltagес.
- For 12V Battery Systems: Set voltagе од 12В-17В.
- For 24V Battery Systems: Set voltagе од 24В-34В.
- For 48V Battery Systems: Set voltagе од 48В-68В.
4.3 WiFi Monitoring (Android App)
The V119 model includes WiFi functionality for monitoring and configuration via a dedicated Android application. This connection is local between the controller and your Android phone and does not require an internet connection. Consult the app's instructions for pairing and usage.
5. Одржавање
Regular maintenance ensures the longevity and optimal performance of your charge controller.
- чистоћа: Одржавајте контролер чистим и без прашине и остатака. Уверите се да вентилациони отвори нису зачепљени.
- Провере везе: Периодично проверавајте све спојеве ожичења да ли су чврсти и да ли постоји корозија. Лабави спојеви могу довести до губитка струје или прегревања.
- Услови животне средине: Ensure the controller is installed in a dry, well-ventilated area, away from direct sunlight and extreme temperatures.
- Праћење температуре: The internal fan activates when the temperature exceeds 45℃ and turns off below 40℃. Ensure proper airflow to assist cooling.
КСНУМКС. Решавање проблема
This section addresses common issues you might encounter with your charge controller.
| Проблем | Могући узрок | Решење |
|---|---|---|
| Нема дисплеја нити напајања | Батерија није повезана или је низак ниво напуњеностиtage; loose battery connections. | Ensure battery is connected first with correct polarity. Check battery voltagе и везе. |
| Нема пуњења са соларних панела | Solar panels not connected; PV voltage too low; incorrect PV polarity; insufficient sunlight. | Check PV connections and polarity. Ensure PV open circuit voltage is within the specified range for your system. Verify adequate sunlight. |
| Overcharging protection activated | Баттери волtage reached overcharging protection limit. | This is a normal protection function. The controller will stop charging once the battery is full. Ensure battery type settings are correct. |
| Упозорење о превисокој температури | Controller internal temperature exceeds 75℃. | Ensure adequate ventilation around the controller. Reduce ambient temperature if possible. Check for obstructed fan. |
| Limited current protection activated | Charging current exceeds 61A. | This is a normal protection function to prevent damage. The controller will limit the current. Ensure your solar array power does not significantly exceed the controller's maximum input capacity for your system voltage. |
7. Спецификације
| Параметар | Валуе |
|---|---|
| Модел | 60А-В119 |
| Називна струја пуњења | 60А |
| Систем Волtage | 12V / 24V / 48V Auto Recognition |
| Max PV Array Power (12V System) | ≤ 720В |
| Max PV Array Power (24V System) | ≤ 1440В |
| Max PV Array Power (36V System) | ≤ 2100В |
| Max PV Array Power (48V System) | ≤ 2800В |
| PV Array Open Circuit Voltagе (12В систем) | 20В-80В |
| PV Array Open Circuit Voltagе (24В систем) | 37В-105В |
| PV Array Open Circuit Voltagе (36В систем) | 50В-160В |
| PV Array Open Circuit Voltagе (48В систем) | 72В-160В |
| Limited Current Protection | 61А |
| Заштита од превисоке температуре | >75℃ |
| Fan-on Temperature | >45℃ |
| Fan-off Temperature | <40℃ |
| Оверцхаргинг Протецтион Волtagе (12В) | 15В |
| Оверцхаргинг Протецтион Волtagе (24В) | 30В |
| Оверцхаргинг Протецтион Волtagе (36В) | 45В |
| Оверцхаргинг Протецтион Волtagе (48В) | 60В |
| Димензије производа | 8.46 к 1.97 к 4.53 инча |
| Тежина артикла | 2.97 фунти |
| Дисплаи Типе | ЛЦД |

Image 7.1: Comparison table highlighting features across different MakeSkyBlue MPPT Solar Charge Controller models, including V119.
8. Гаранција и подршка
For warranty information and technical support, please refer to the documentation provided with your purchase or contact MakeSkyBlue customer service directly. Keep your purchase receipt as proof of purchase.
Manufacturer: MakeSkyBlue