Увод
Thank you for choosing the HOMVILLA Digital LED Alarm Clock, Model HU-XI-74. This manual provides detailed instructions for setting up, operating, and maintaining your new alarm clock. Please read this manual thoroughly before use to ensure optimal performance and to understand all features.
Производ је завршенview
The HOMVILLA Digital LED Alarm Clock features a large mirror LED display, dual alarms, temperature display, voice activation, and adjustable settings for brightness and volume. It is designed for ease of use and reliability.
Компоненте и контроле
Familiarize yourself with the clock's layout and control buttons:

Слика: Предња и задња страна view of the alarm clock, highlighting the display, snooze/brightness button, alarm 1/2 switches, time set, up, down, alarm set, volume adjustment, power, reset, and 5V/1A USB port.
- Предњи дисплеј: Shows time, AM/PM indicator, temperature, and alarm icons.
- Горње дугме: Snooze / Brightness Adjustment.
- Контроле са задње стране:
- ALARM1 ON/OFF Switch: Activates or deactivates Alarm 1.
- ALARM2 ON/OFF Switch: Activates or deactivates Alarm 2.
- Дугме за ПОДЕСИВАЊЕ ВРЕМЕНА: Улази у режим подешавања времена.
- UP Button (+): Adjusts values upwards, switches between 12/24-hour format.
- DOWN Button (-): Adjusts values downwards, adjusts volume.
- Дугме СЕТ АЛАРМ: Улази у режим подешавања аларма.
- VOLUME Adjustment Button: Подешава јачину аларма.
- Дугме за укључивање: Turns the clock on/off.
- Ресет: Resets the clock to factory settings.
- 5В/1А УСБ порт: Power input for charging and continuous operation.
Сетуп
Инитиал Повер-Уп
- Connect the included USB cable to the 5V/1A USB port on the back of the clock.
- Plug the other end of the USB cable into a compatible 5V/1A or 5V/2A USB adapter (not included) or a USB port.
- The LED display will light up. If using battery power, ensure the clock is fully charged for optimal performance.
- For accurate temperature display, allow the clock to remain stationary for at least 30 minutes after unpacking.
Функција меморије
The clock features a memory function. When sufficiently charged, it retains time and alarm settings even if the power key is turned off or the USB cable is disconnected for a short period.

Image: The clock displaying time and temperature, then showing it powered off, and finally powered on an hour later with the time advanced, demonstrating the memory function.
Упутство за употребу
Подешавање времена
- Притисните тастер ВРЕМЕНСКИ СКЛОП button on the back of the clock. The hour digits will flash.
- Користите ГОРЕ (+) or ДОЛЕ (-) дугмад за подешавање сата.
- Притисните ВРЕМЕНСКИ СКЛОП поново. Цифре за минуте ће трептати.
- Користите ГОРЕ (+) or ДОЛЕ (-) дугмад за подешавање минута.
- Притисните ВРЕМЕНСКИ СКЛОП трећи пут да бисте потврдили и изашли из режима подешавања времена.

Image: A close-up of the clock display during time setting, showing the hour digits flashing.
Формат 12/24 сата
Док сте у нормалном режиму приказа времена, притисните ГОРЕ (+) дугме за пребацивање између 12-часовног и 24-часовног формата.
Alarm Setting (Alarm 1 & Alarm 2)
The clock supports two independent alarms.
- Померите ALARM1 ON/OFF or ALARM2 ON/OFF switch to the ON position. The corresponding alarm icon will appear on the display.
- Притисните тастер АЛАРМ СЕТ button. The hour digits for the selected alarm will flash.
- Користите ГОРЕ (+) or ДОЛЕ (-) дугмад за подешавање сата аларма.
- Притисните АЛАРМ СЕТ поново. Цифре за минуте ће трептати.
- Користите ГОРЕ (+) or ДОЛЕ (-) дугмад за подешавање минута аларма.
- Притисните АЛАРМ СЕТ трећи пут да бисте потврдили и изашли из режима подешавања аларма.

Image: A close-up of the clock display during alarm setting, showing the alarm icon and flashing hour digits.

Image: Illustration of setting two alarms for different daily routines, such as 7:00 AM for waking up and 6:00 PM for exercise.
Избор мелодије звона
The alarm clock offers 10 different alarm melodies. To select a ringtone:
- While in alarm setting mode (after setting minutes), press the АЛАРМ СЕТ button again. The current ringtone number will flash.
- Користите ГОРЕ (+) or ДОЛЕ (-) buttons to cycle through the 10 available ringtones.
- Притисните АЛАРМ СЕТ да потврдите свој избор.
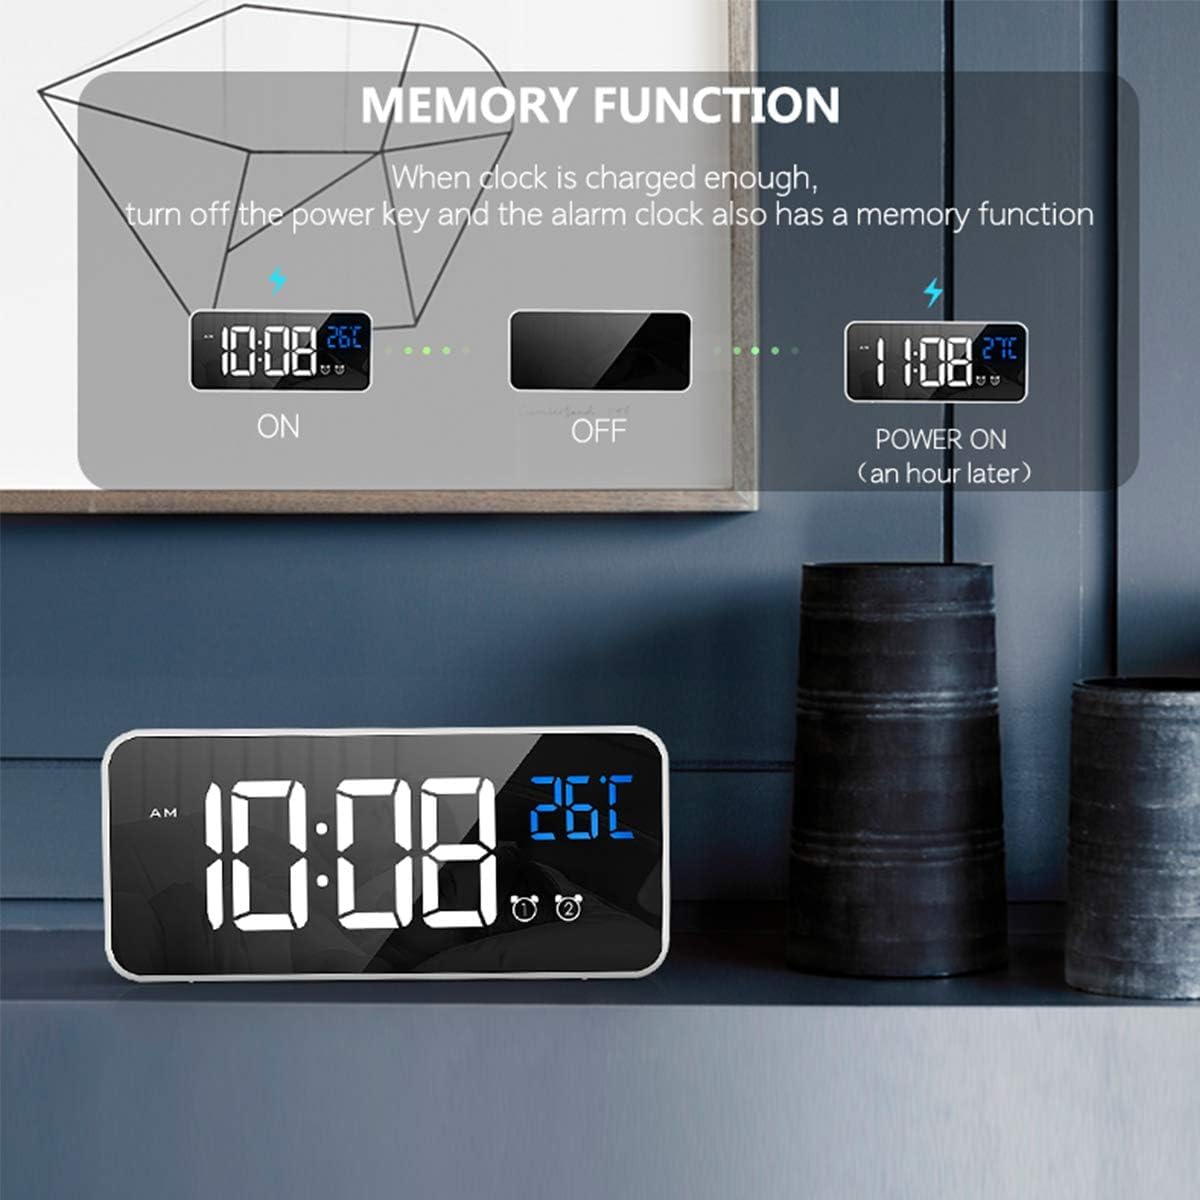
Image: A list of 10 available ringtones, including 'Di Di Di', 'Traditional Ringtone', 'Lullaby', 'The Chirps of Crickets', 'The Sound of the Waves', 'The Birds Chirping Running Water', 'The Sound of Running Water', 'White Noise', 'The Drip of Water', and 'The Sound of Thunderstorm'.
Функција одлагања
When the alarm sounds, gently press the Snooze/Brightness Adjustment button on the top of the clock. The alarm will pause for 5 minutes, and the alarm icon will flicker. To turn off the alarm completely, press any other button on the back of the clock.
Image: A person's hand pressing the top button of the alarm clock to activate the snooze function, with the display showing the time and a snooze icon.
Подешавање осветљености
The clock offers 4 levels of brightness. You can adjust it manually or allow automatic adjustment when powered via USB.
- Ручно подешавање: У режиму нормалног приказа времена, притисните Snooze/Brightness Adjustment button on the top of the clock to cycle through the 4 brightness levels.
- Automatic Adjustment (USB Power Mode): When connected via USB, the clock will automatically adjust its brightness at different times of the day. You can still manually override this setting.

Слика: Четири бившаamples of the clock display at different brightness levels (1 to 4), demonstrating the adjustable illumination.

Image: A close-up of the clock display with a brightness icon, indicating the brightness adjustment feature.
Подешавање јачине звука
The alarm volume can be adjusted to three levels.
- У режиму нормалног приказа времена, притисните VOLUME Adjustment button (often combined with the DOWN button) on the back of the clock.
- Press the button repeatedly to cycle through the three volume levels.

Image: A close-up of the clock display with a volume icon, indicating the volume adjustment feature.
Voice Activation Function
When operating on battery power, the display can be activated by sound (e.g., a clap or tap on the table). The display will turn off automatically after 6 seconds to conserve power.
- To activate the display, make a sound above 90 decibels or gently knock the surface where the clock is placed.
- Note: The voice control function is disabled when the clock is continuously powered via USB. In this mode, the display remains on.

Image: A person making a sound near the alarm clock, causing its display to light up, illustrating the voice activation feature.

Image: A close-up of the clock display with a voice activation icon, indicating the feature is active.
Дисплеј температуре
The clock displays the ambient temperature. The temperature unit can be switched between Celsius (°C) and Fahrenheit (°F).
- У режиму нормалног приказа времена, притисните и држите ГОРЕ (+) дугме за пребацивање између °Ц и °Ф.

Image: A person sleeping, with the alarm clock displaying time and temperature, and arrows indicating the ability to switch between Celsius and Fahrenheit.
Повер Суппли
The HOMVILLA Digital LED Alarm Clock can be powered in two ways:
- USB Cable (Continuous Power): Connect the clock to a 5V/1A or 5V/2A USB adapter for continuous display and power. The LED light will remain on.
- Built-in Lithium Battery (Portable Power): The clock has a built-in rechargeable lithium battery. When running on battery, the LED display will automatically turn off after 6 seconds of inactivity to conserve power. The voice activation function is available in this mode. Ensure the battery is fully charged for extended use.
Important: Only use a 5V/1A or 5V/2A adapter for charging the clock. Using an incompatible adapter may damage the device.
Одржавање
- Очистите сат меком, сувом крпом. Не користите абразивна средства за чишћење или раствараче.
- Избегавајте излагање сата екстремним температурама, директној сунчевој светлости или високој влажности.
- Do not disassemble the clock. This will void any potential warranty and may cause damage.
Решавање проблема
| Проблем | Могући узрок | Решење |
|---|---|---|
| Екран је искључен или затамњен. | Battery low; USB cable disconnected; brightness set too low; voice activation mode (battery power). | Connect to USB power; charge battery; adjust brightness manually; make a sound to activate display if on battery. |
| Аларм се не оглашава. | Alarm is not activated; volume set too low; incorrect alarm time. | Ensure ALARM ON/OFF switch is on; adjust volume; verify alarm time setting. |
| Очитавање температуре делује нетачно. | Clock recently moved or unpacked. | Allow the clock to stabilize for at least 30 minutes in its location for accurate readings. |
| Voice activation not working. | Clock is connected to USB power; ambient noise is too low. | Disconnect USB cable to enable battery mode; ensure sound is above 90dB or tap the surface. |
| Cannot change time/alarm settings. | Not in setting mode. | Притисните одговарајући ВРЕМЕНСКИ СКЛОП or АЛАРМ СЕТ дугме за улазак у режим подешавања. |
Спецификације
- Бренд: ХОМВИЛЛА
- Број модела: HU-XI-74 (also 8808)
- Боја: Бела
- Материјал: Пластика
- Тип приказа: Digital LED Mirror Screen
- Димензије производа: КСНУМКС к КСНУМКС к КСНУМКС цм (КСНУМКС к КСНУМКС к КСНУМКС инча)
- Тежина артикла: 220 грама
- Извор напајања: USB Cable (5V/1A or 5V/2A adapter required) / Built-in Lithium Battery
- Посебне карактеристике: Dual Alarms, Temperature Display (°C/°F), Voice Activation, 10 Ringtones, 4 Brightness Levels, 3 Volume Levels, Snooze Function, Memory Function.
- батерија: 1 C-type battery (included)
Гаранција и подршка
Information regarding warranty coverage and customer support for the HOMVILLA Digital LED Alarm Clock (Model HU-XI-74) is not available in this document. Please refer to the product packaging or the retailer's website for specific warranty terms and contact information for support.