
1. Увод
The Topping DX7 Pro is a high-performance digital-to-analog converter (DAC) and headphone amplifier designed for exceptional audio fidelity. It features an ES9038PRO DAC chip, supports high-resolution audio up to DSD1024 and 32bit/768kHz, and includes Bluetooth 5.0 with LDAC for high-quality wireless streaming. This manual provides essential information for setting up, operating, and maintaining your DX7 Pro.
2. Садржај пакета
Молимо вас да проверите да ли су све ставке наведене у наставку укључене у ваш пакет:
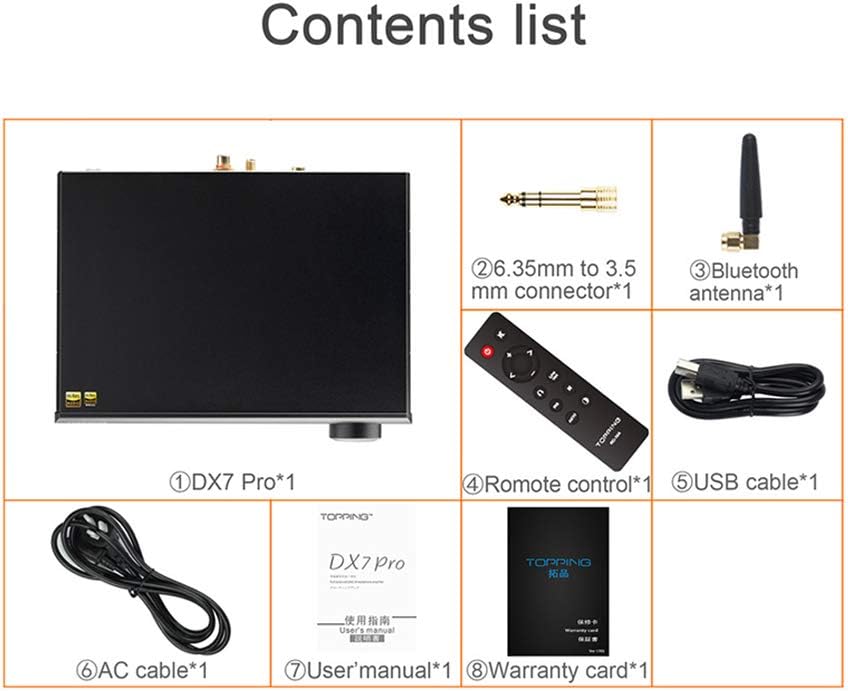
The package contents for the Topping DX7 Pro include the main unit, a 6.35mm to 3.5mm connector, a Bluetooth antenna, a remote control, a USB cable, an AC power cable, a user manual, and a warranty card.
- Topping DX7 Pro Unit
- 6.35mm to 3.5mm Connector
- Блуетоотх антена
- Ремоте Цонтрол
- УСБ кабл
- Кабл за напајање наизменичном струјом
- Упутство за употребу
- Гарантни лист
3. Производ је готовview
3.1 Предња плоча

The front panel of the Topping DX7 Pro features a 6.35mm single-ended headphone output, a 4-pin XLR balanced headphone output, an OLED screen displaying current settings, and a multi-function control knob.
- Single-end 6.35mm Output: Стандардни прикључак за слушалице.
- 4 Pin XLR Balanced Output: За балансиране слушалице.
- ОЛЕД екран: Displays input source, sample rate, volume level, and menu options.
- Квака: Multi-function control for volume adjustment, menu navigation, and input selection.
- Пријемник даљинског управљача: For infrared remote control commands.
3.2 Задња плоча

The rear panel of the Topping DX7 Pro includes left and right channel analog XLR outputs, left and right channel analog RCA outputs, IIS input, Bluetooth antenna connector, optical input, USB input, coaxial input, AES input, power input, and a power switch with fuse.
- Left/Right Channel Analog XLR Output: Balanced audio output for external ampлифиерс или активни говорници.
- Left/Right Channel Analog RCA Output: Unbalanced audio output for external ampлифиерс или активни говорници.
- IIS Input: For connecting IIS-LVDS compatible sources.
- Конектор за Bluetooth антену: За причвршћивање приложене Блутут антене.
- Оптички улаз: Дигитални аудио улаз.
- УСБ улаз: За повезивање са рачунаром или другим УСБ аудио извором.
- COAX Input: Коаксијални дигитални аудио улаз.
- АЕС улаз: AES/EBU digital audio input.
- Улазна снага: Прикључак за наизменичну струју.
- Прекидач: Главни прекидач за напајање.
- Осигурач: Replaceable fuse for power protection.
4. Подешавање
4.1 Прикључак за напајање
Before connecting the power cable, ensure the voltage selector switch on the underside of the unit is set to your local voltage (110V or 220V). Connect the supplied AC power cable to the power input on the rear panel and then to a wall outlet. Use the power switch on the rear panel to turn the unit on or off.
4.2 Улазне везе
Connect your audio sources to the appropriate digital inputs on the rear panel (USB, Optical, Coaxial, AES, IIS). For Bluetooth connectivity, screw the provided Bluetooth antenna onto its connector on the rear panel.
4.3 Излазне везе
Connect your headphones to either the 6.35mm single-ended or 4-pin XLR balanced output on the front panel. For connecting to external amplifiers or active speakers, use the XLR or RCA analog outputs on the rear panel.
5. Упутство за употребу
5.1 Укључивање/искључивање
Toggle the power switch on the rear panel to turn the DX7 Pro on or off.
5.2 Избор улаза
Rotate the front panel knob to cycle through available input sources (USB, Optical, Coaxial, AES, IIS, Bluetooth). The selected input will be displayed on the OLED screen.
5.3 Контрола јачине звука
Rotate the front panel knob to adjust the volume level. The current volume will be shown on the OLED screen. Press the knob to mute/unmute the output.
5.4 Навигација кроз мени
Press and hold the front panel knob to enter the menu. Rotate the knob to navigate through menu options and press to select. Refer to the detailed user manual for specific menu settings.
5.5 Блуетоотх упаривање
Select Bluetooth as the input source. The DX7 Pro will automatically enter pairing mode. On your device (phone, tablet, computer), search for "Topping DX7 Pro" in the Bluetooth settings and select it to pair. The OLED screen will indicate a successful connection.
6. Кључне карактеристике
6.1 High-Fidelity DAC Performance
The Topping DX7 Pro is shown connected to headphones, demonstrating its function as a high-fidelity desktop DAC. It utilizes the ESS DAC ES9038PRO chip to accurately restore audio scenes with low distortion.
The DX7 Pro incorporates the ESS ES9038PRO DAC chip, known for its high performance. Through careful design and tuning, it achieves a distortion level of less than 0.00010%, a Dynamic Range (DNR) greater than 126dB, and a Signal-to-Noise Ratio (SNR) greater than 126dB, ensuring accurate and detailed audio reproduction.
6.2 Bluetooth 5.0 with LDAC Support
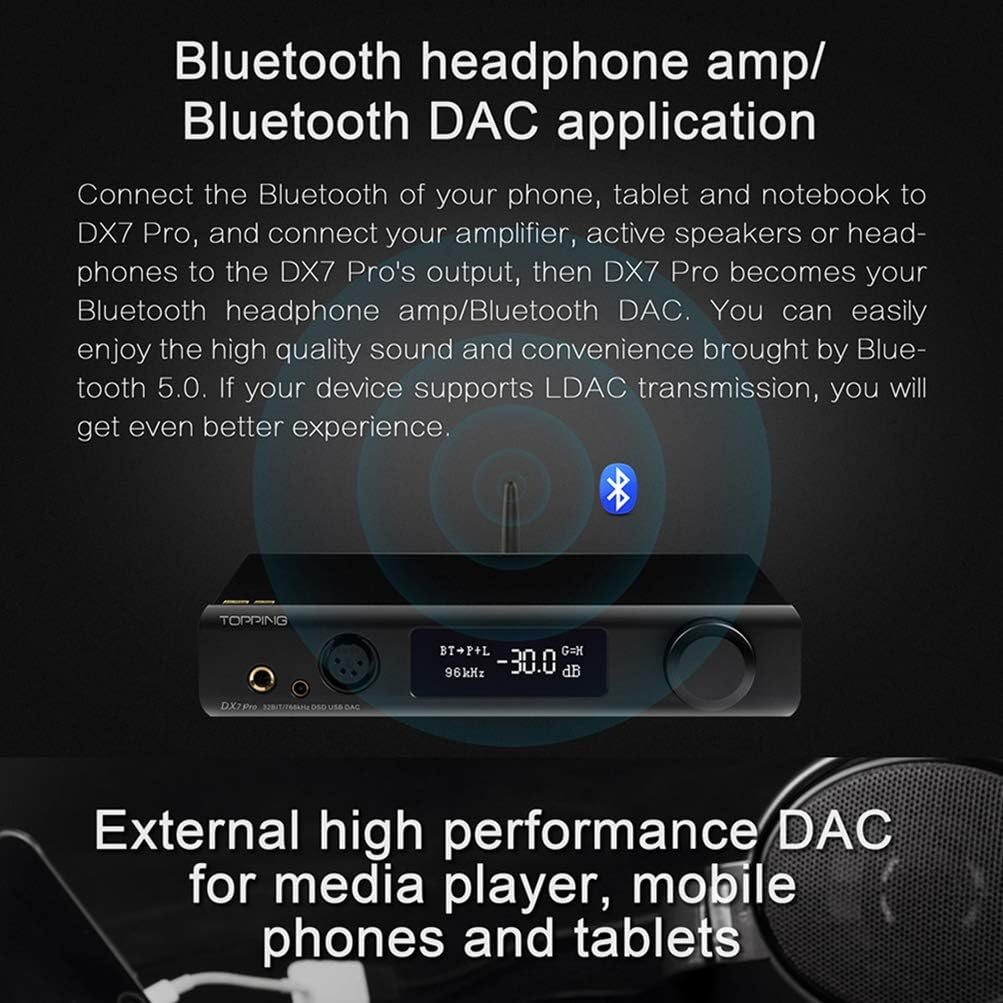
This image shows the Topping DX7 Pro operating in Bluetooth mode, highlighting its Bluetooth 5.0 connectivity with LDAC support for high-definition wireless audio. It uses a CSR8675 chipset for stable and high-quality transmission.
Equipped with a CSR8675 chipset, the DX7 Pro supports Bluetooth 5.0 and various high-quality codecs including LDAC, AAC, SBC, aptX, aptX LL, and aptX HD. This enables high-definition wireless audio transmission up to 24bit/96kHz, providing a convenient and high-quality listening experience. The Bluetooth input can be disabled via the menu if not required.
6.3 Advanced Internal Design

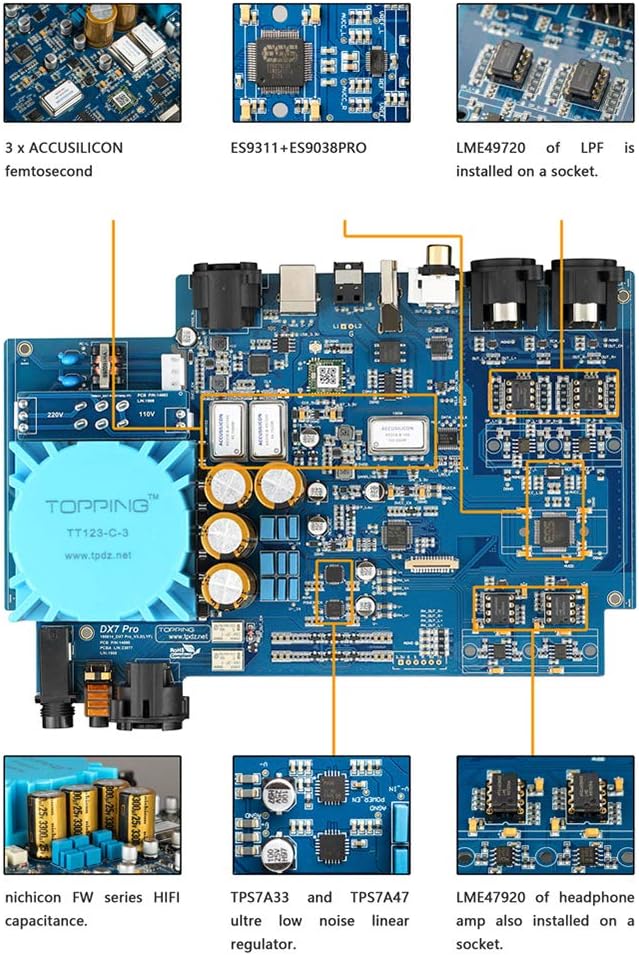
Унутрашњи view of the Topping DX7 Pro's circuit board, showcasing components such as 3 ACCUSILICON femtosecond clocks, ES9311+ES9038PRO DAC chip, LME49720 op-amps, Nichicon FW series HiFi capacitance, and TPS7A33/TPS7A47 ultra-low noise linear regulators.
The internal architecture of the DX7 Pro features three ACCUSILICON femtosecond clocks for precise timing, an ES9311+ES9038PRO DAC chip, LME49720 op-amps for low-pass filtering and headphone amplification, Nichicon FW series HiFi capacitors, and TPS7A33/TPS7A47 ultra-low noise linear regulators, all contributing to its audio performance.
7. Спецификације
- Број модела: ДКС7 Про
- Димензије производа: 9.45 к 3.54 к 14.57 инча
- Тежина артикла: 5.33 фунти
- Произвођач: ТОППИНГ
- ДАЦ чип: ESS ES9038PRO
- Блуетоотх верзија: 5.0
- Блуетоотх кодеци: LDAC, AAC, SBC, aptX, aptX LL, aptX HD
- Макс Сample Rate (USB): 32bit/768kHz, DSD1024
КСНУМКС. Решавање проблема
- Нема напајања: Ensure the AC power cable is securely connected and the rear panel power switch is in the 'On' position. Check the voltage selector switch on the underside of the unit matches your local power supply. Verify the fuse is intact.
- Нема звука: Check all audio cable connections. Confirm the correct input source is selected on the DX7 Pro. Ensure the volume level is not set to minimum or muted. Verify headphones or external speakers are properly connected and functioning.
- Проблеми са Блуетоотх везом: Ensure the Bluetooth antenna is securely attached. Confirm Bluetooth is enabled on your source device and the DX7 Pro is in pairing mode or already paired. Try unpairing and re-pairing the device. Reduce the distance between the DX7 Pro and your Bluetooth device, and remove any obstructions.
- Изобличен звук: Check cable integrity and connections. Ensure the sample rate and bit depth settings on your source device are compatible with the DX7 Pro. Try a different audio source or cable to isolate the issue.
9. Одржавање
To ensure the longevity and optimal performance of your Topping DX7 Pro, follow these maintenance guidelines:
- Чишћење: Користите меку, суву крпу за чишћење спољашњости уређаја. Избегавајте употребу абразивних средстава за чишћење, растварача или хемијских спрејева, јер они могу оштетити завршну обраду.
- вентилација: Обезбедите да уређај има одговарајућу вентилацију. Не блокирајте вентилационе отворе.
- Окружење: Operate the DX7 Pro in a clean, dry environment, away from direct sunlight, excessive heat, moisture, and dust.
- Складиштење: Ако складиштите уређај дуже време, искључите га из струје и чувајте га на хладном и сувом месту.
10. Званични видео производа
Овај видео пружа визуелни прегледview of the Topping DX7 Pro, showcasing its front and rear panels, highlighting the various input and output connections, and demonstrating its compact design.
11. Гаранција и подршка
For detailed warranty information and customer support, please refer to the warranty card included in your package. You may also visit the official Topping website or contact your authorized dealer for assistance.