1. Увод
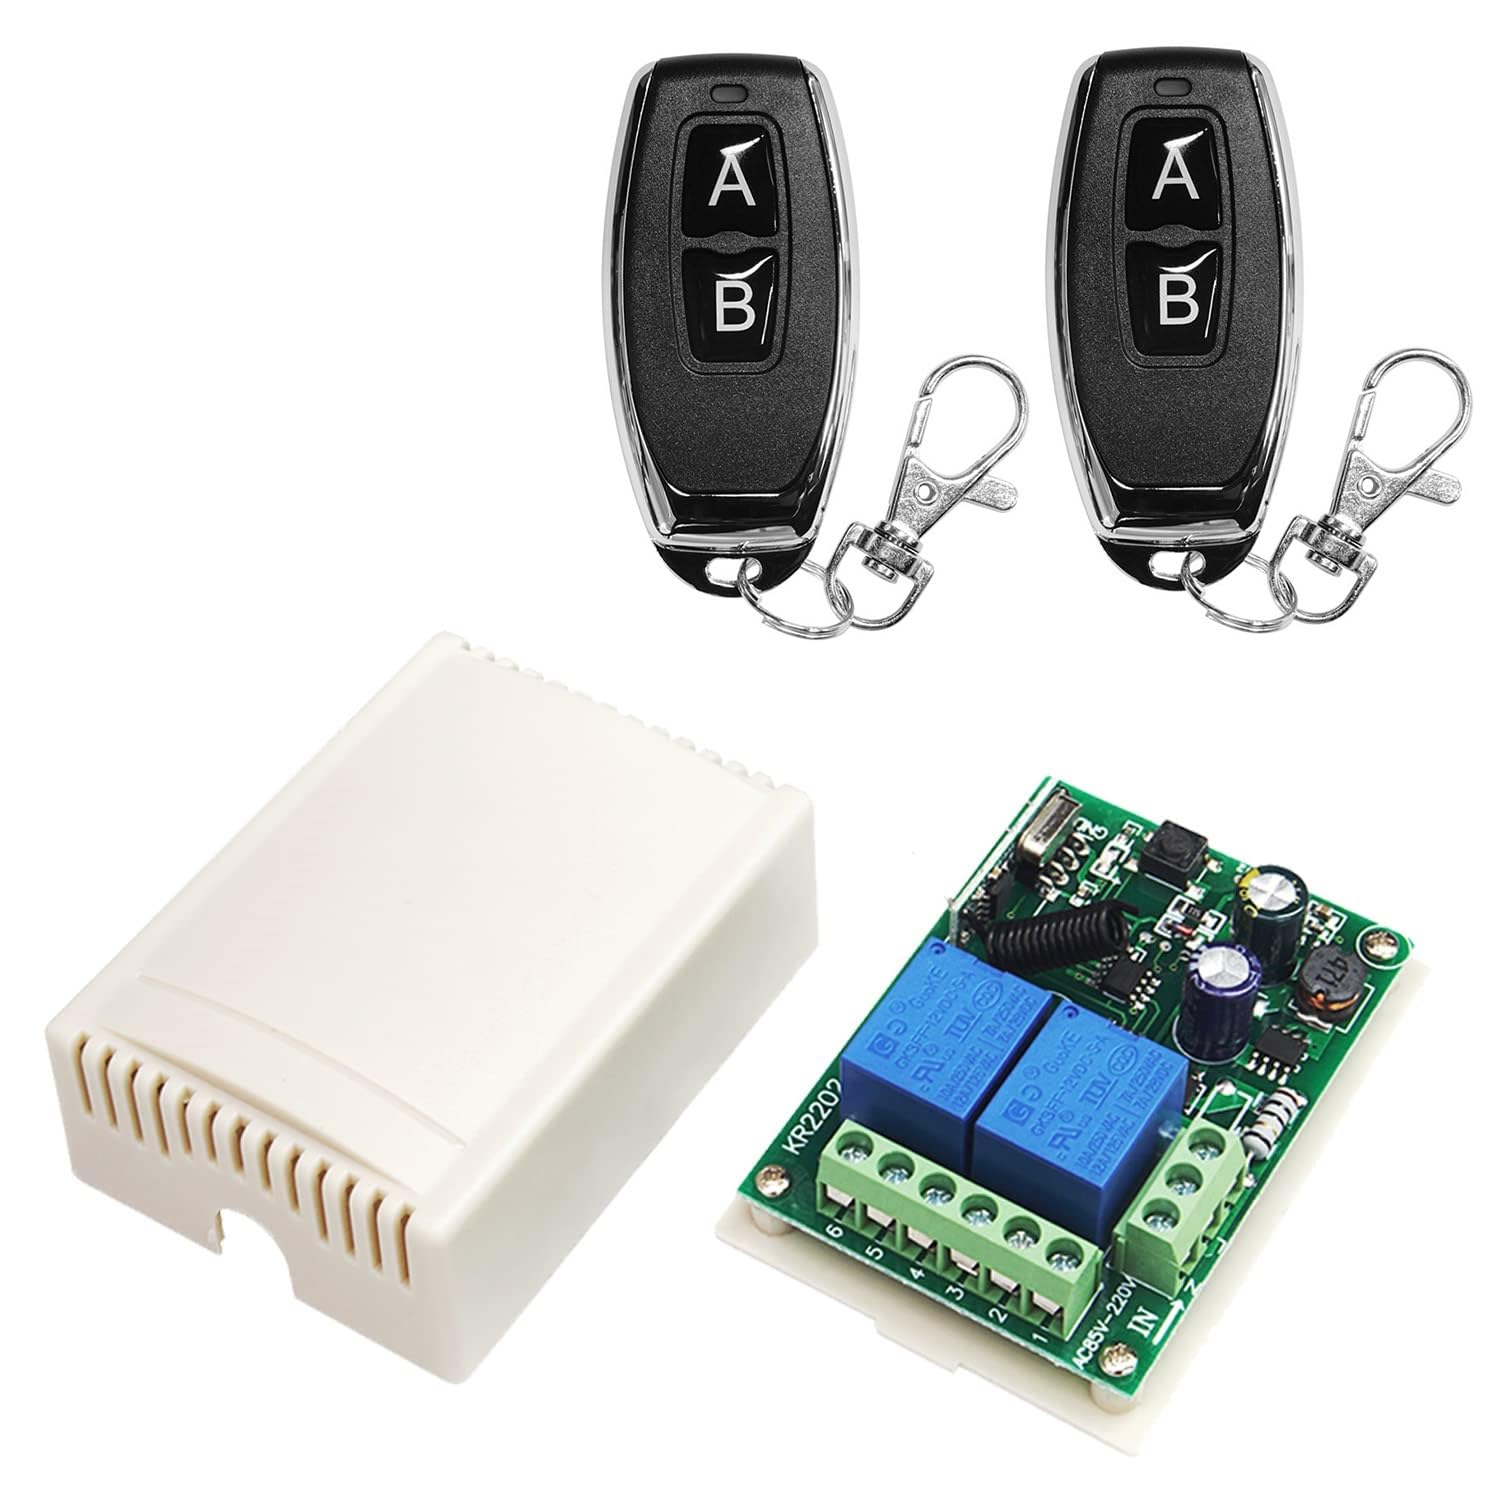
The QIACHIP KR2202 is a universal 2-channel wireless RF remote control relay switch designed for controlling various household electronic equipment. It supports AC voltages from 85V to 250V and can handle a maximum current of 10A. This device offers flexible functionality with Momentary, Toggle, and Latching working modes, allowing control over two products independently or a single motor for forward and reverse operation. Its signal stability provides a maximum range of up to 164ft/50m without obstacles.
Кључне карактеристике:
- Controls household electronic equipment such as water pump switches, garage doors, rolling shutter doors, sliding doors, curtains, tubular motors, and various small appliances.
- 2-channel design for independent control of two devices or forward/reverse control of a single motor.
- Stable signal transmission with a maximum range of 164ft/50m in open areas.
- Supports Momentary, Toggle, and Latching working modes.
- Применљива волtage range: 85V-250V AC, maximum current: 10A.
2. Детаљи о производу
The QIACHIP KR2202 receiver board features clearly labeled terminals and components for easy identification and wiring. Below is an image detailing the main components of the receiver.

Слика 2.1: Детаљно view of the QIACHIP KR2202 receiver board, highlighting the output volts (1V~250V 10A), antenna, indicator light, learning button, and working volts (AC 85V~250V). Key pins are labeled: NO (Normally Open), COM (Common), NC (Normally Closed).
Идентификација компоненте:
- Излазни волти: 1V~250V, 10A - Indicates the range and maximum current capacity of the output.
- Антена: For receiving RF signals from the remote control.
- Светло индикатора: Provides visual feedback during pairing and operation.
- Learning Button: Used to pair remote controls and set operating modes.
- Working Volts: AC 85V~250V - The power supply range for the receiver.
- NO (Normally Open) Pin: Contact that is open when the relay is de-energized.
- COM (Common) Pin: The common contact for the relay.
- NC (Normally Closed) Pin: Contact that is closed when the relay is de-energized.
3. Подешавање и ожичење
Proper wiring is crucial for the safe and correct operation of the QIACHIP KR2202. Always ensure the power supply is disconnected before performing any wiring. The receiver supports various applications, including AC motors, DC motors, AC lamps, and DC lamps.
3.1. Wiring for AC Motors (e.g., Tubular Motor, Garage Door Motor)
This wiring method is suitable for controlling 110V-220V AC motors, such as those found in garage doors or electric curtains, allowing for forward and reverse rotation.

Слика 3.1.1: Wiring diagram for connecting the KR2202 receiver to an AC tubular motor. The motor's forward and reverse rotation wires (e.g., Black and Brown) connect to the relay's output terminals (L1 and L2), while the common wire (Blue) connects to the neutral line (N). The AC power supply (85V-220V) connects to the IN terminals (N and L) of the receiver.
Видео 3.1.1: Demonstration of the KR2202 Receiver for AC Motors. This video illustrates the wiring and operation of the KR2202 with an AC motor, showing how to control its direction using the remote.
Видео 3.1.2: Demonstration of KR2202 Receiver for 220V Curtain Motor. This video specifically shows the application of the KR2202 with a 220V curtain motor, demonstrating its remote control capabilities for opening and closing curtains.
3.2. Wiring for DC Motors (e.g., DC Linear Actuators)
This method details connecting an external DC power supply to control a DC motor, such as a linear actuator, for bidirectional movement.
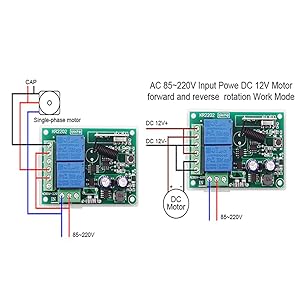
Слика 3.2.1: Wiring diagram for connecting the KR2202 receiver to a DC motor. The DC motor's wires connect to the relay's output terminals (e.g., 5 and 2). The positive pole of the external DC power supply connects to terminals 6 and 3, while the negative pole connects to terminals 1 and 4. The 220V AC power supply for the controller connects to the L and N interfaces.
Видео 3.2.1: Demonstration of KR2202 Receiver for DC Linear Actuators. This video shows the KR2202 controlling a 12V DC linear actuator, illustrating its use in applications requiring precise linear motion.
3.3. Wiring for AC Lamps
This wiring method allows the KR2202 to control two independent AC lights using a shared AC power supply.

Слика 3.3.1: Wiring diagram for connecting the KR2202 receiver to two AC lamps. The live wires of the two lamps connect to interfaces 6 and 3 of the terminal respectively. The neutral wire of the two lamps and the neutral wire of the AC power supply are connected to the N interface of the terminal. The live wires of the AC power supply are connected to the 5, 2, and L interfaces of the terminals respectively.
Видео 3.3.1: KR2202 Wiring Diagrams - AC Lamps. This video provides a visual guide on how to wire the KR2202 to control AC lamps, demonstrating the connections for two separate lights.
3.4. Wiring for DC Lamps
This method shows how to connect an external DC power supply to control two DC lamps.

Слика 3.4.1: Wiring diagram for connecting the KR2202 receiver to two DC lamps. The positive poles of the two lamps connect to terminals 6 and 3 respectively. The negative poles of the two lamps connect to the negative pole of the external DC power supply. The positive pole of the external DC power supply connects to interfaces 5 and 2 respectively. The live wire of the 220V AC power supply is connected to the L interface, and the neutral wire is connected to the N interface, which is responsible for powering the controller.
Видео 3.4.1: KR2202 Wiring Diagram - DC Lamp. This video demonstrates the wiring process for controlling DC lamps with the KR2202 receiver.
Видео 3.4.2: Demonstration of the KR2202 receiver for DC lamps. This video shows the KR2202 in action controlling DC lamps, illustrating the functionality after proper wiring.
4. Operating Modes and Pairing
The QIACHIP KR2202 receiver supports three main operating modes: Momentary, Toggle, and Latching. Each mode offers different control behaviors for your connected devices. Before setting a mode, it is recommended to reset the receiver to clear any previous pairings.
4.1. Resetting the Receiver
To clear all previously paired remote controls and reset the receiver to its factory settings, press the learning button on the receiver board 8 times. The indicator light will flash and then go out, confirming the reset. After a reset, all previously paired remote controls will be invalid and need to be re-paired.
Видео 4.1.1: Causes of Failure and Solutions for the Second Relay. This video demonstrates the reset process by pressing the learning button 8 times, which is essential for troubleshooting pairing issues and preparing the receiver for new mode settings.
4.2. Setting Operating Modes and Pairing
After resetting, follow these steps to set your desired operating mode and pair your remote control. The number of times you press the learning button determines the mode.

Слика 4.2.1: Visual guide for setting Momentary, Toggle, and Latching modes. Each mode requires a specific number of presses on the learning button, followed by pressing the 'A' and 'B' buttons on the remote for successful pairing.
4.2.1. Momentary Mode (Click 1 time)
- понашање: The relay remains active only while the remote button is pressed. Releasing the button deactivates the relay.
- Подешавање:
- Press the learning button on the receiver 1 пут.
- Wait for the indicator light to blink and then turn off.
- Press the 'A' button on your remote control. The indicator light will flash and turn off.
- Press the 'B' button on your remote control. The indicator light will flash and turn off. Pairing is successful.
4.2.2. Toggle Mode (Click 2 times)
- понашање: Pressing the remote button once activates the relay, and pressing it again deactivates it (like a light switch).
- Подешавање:
- Press the learning button on the receiver 2 пута.
- Wait for the indicator light to blink and then turn off.
- Press the 'A' button on your remote control. The indicator light will flash and turn off.
- Press the 'B' button on your remote control. The indicator light will flash and turn off. Pairing is successful.
4.2.3. Latching Mode (Click 3 times)
- понашање: One button activates the relay, and another button deactivates it. This mode is ideal for applications requiring distinct ON/OFF controls, such as motor forward/reverse.
- Подешавање:
- Press the learning button on the receiver 3 пута.
- Wait for the indicator light to blink and then turn off.
- Press the 'A' button on your remote control. The indicator light will flash and turn off.
- Press the 'B' button on your remote control. The indicator light will flash and turn off. Pairing is successful.
5. Пријаве
The QIACHIP KR2202 Wireless RF Remote Control Relay Switch is versatile and can be integrated into various home and industrial automation projects. Its 2-channel design and multiple operating modes make it suitable for a wide range of control tasks.
Уобичајене примене:
- Garage Door Openers: Control the opening and closing of garage doors.
- Electric Curtain Motors: Automate the movement of electric curtains or blinds.
- Системи осветљења: Remotely switch AC or DC lights on/off.
- Water Pump Switches: Control water pumps for irrigation or other uses.
- Rolling Shutter Doors: Operate rolling shutters for security or convenience.
- Мали кућни апарати: Integrate into various small household appliances for remote control.
- ДИИ пројекти: Ideal for custom automation projects requiring wireless control of electrical circuits.
Слика 5.1: Illustration of the QIACHIP KR2202 being used to remotely control a garage door, demonstrating its practical application in home automation.
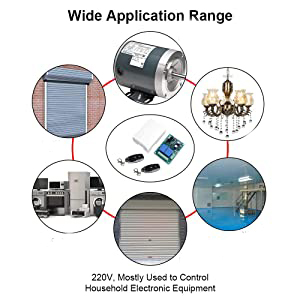
Слика 5.2: Дијаграм приказанasing diverse applications of the KR2202, including garage doors, motors, lighting, various appliances, and industrial equipment, emphasizing its versatility.
КСНУМКС. Решавање проблема
If you encounter issues with your QIACHIP KR2202, particularly with the second relay or pairing, consider the following troubleshooting steps:
6.1. Pairing Issues (e.g., Second Relay Not Responding)
A common issue is the inability to control the second relay or light, even after attempting to pair. This often indicates an incomplete or incorrect pairing process rather than a product defect. Follow these steps for a complete and correct pairing:
- Ресетујте пријемник: Press the learning button on the receiver 8 times. The indicator light will flash and then go out, confirming that all previous pairings have been cleared. Your remote control will no longer be paired.
- Pair the First Button (e.g., 'A'):
- Press the learning button on the receiver једном (for Momentary mode, or the desired number of times for other modes).
- Wait for the indicator light to blink and then turn off.
- Press the 'A' button on your remote control. The indicator light will blink once and turn off. This pairs the 'A' button with the first relay.
- Pair the Second Button (e.g., 'B'):
- Wait again for the indicator light to blink and then turn off (this is crucial after pairing the first button).
- Press the 'B' button on your remote control. The indicator light will blink once and turn off. This pairs the 'B' button with the second relay.
Once both buttons are paired following this sequence, the complete pairing process is finished, and both relays should respond correctly.
Видео 6.1.1: Causes of Failure and Solutions for the Second Relay. This video provides a detailed explanation and demonstration of how to correctly pair both relays to avoid common issues, including the specific steps for resetting and pairing each button sequentially.
7. Спецификације
| Феатуре | Спецификација |
|---|---|
| Бранд Наме | КИАЦХИП |
| Модел | КР2202 |
| Парт Нумбер | KR2202+KT05 |
| Тип конектора | Кроз рупу |
| Контакт материјал | Бакар |
| Тип контакта | Нормално отворен |
| Цуррент Ратинг | 10 Amps |
| Тип монтаже | Монтажа на ДИН шину |
| Оперативни режим | Аутоматски |
| Ватtage | 2500 вати |
| Цоил Волtage | 120 Волтс |
| Максимална струја пребацивања | 10 Amps |
| Макимум Свитцхинг Волtage | 250 Волтс |
| Минимум Свитцхинг Волtage | 110 волти (АЦ) |
8. Гаранција и подршка
For warranty information, technical support, or any questions regarding your QIACHIP KR2202 Wireless RF Remote Control Relay Switch, please refer to the contact information provided with your product packaging or visit the official QIACHIP website. Ensure to have your model number (KR2202) and purchase details available when contacting support.