
1. Безбедносне информације
Please read and understand all safety information and operating instructions before using this multimeter. Failure to follow these instructions may result in electric shock, fire, or damage to the meter.
- Увек се уверите да су мерни каблови правилно повезани и да је прекидач функција подешен на исправан опсег пре него што извршите било какво мерење.
- Не покушавајте да мерите волtages or currents exceeding the maximum rated values for this meter.
- Будите изузетно опрезни када радите са струјним колима под напоном. Висока јачина звукаtagес може бити опасно.
- Never open the meter casing unless specifically instructed for battery or fuse replacement. Ensure test leads are disconnected before opening.
- Замените батерију када се појави индикатор ниске батерије како бисте осигурали тачна очитавања.
- Не користите мерач ако изгледа оштећено или ако је изолација на мерним кабловима оштећена.
Слика 1: Позади view of the Rebel MIE-RB-830 Multimeter, showing the battery compartment cover and a warning label. The label advises removing test leads before opening the case to avoid electrical shock and to install fuses with correct amp/volt ratings. It also indicates the power supply is a 9V battery, type NEDA 1604 9V 6F22.
2. Производ је готовview
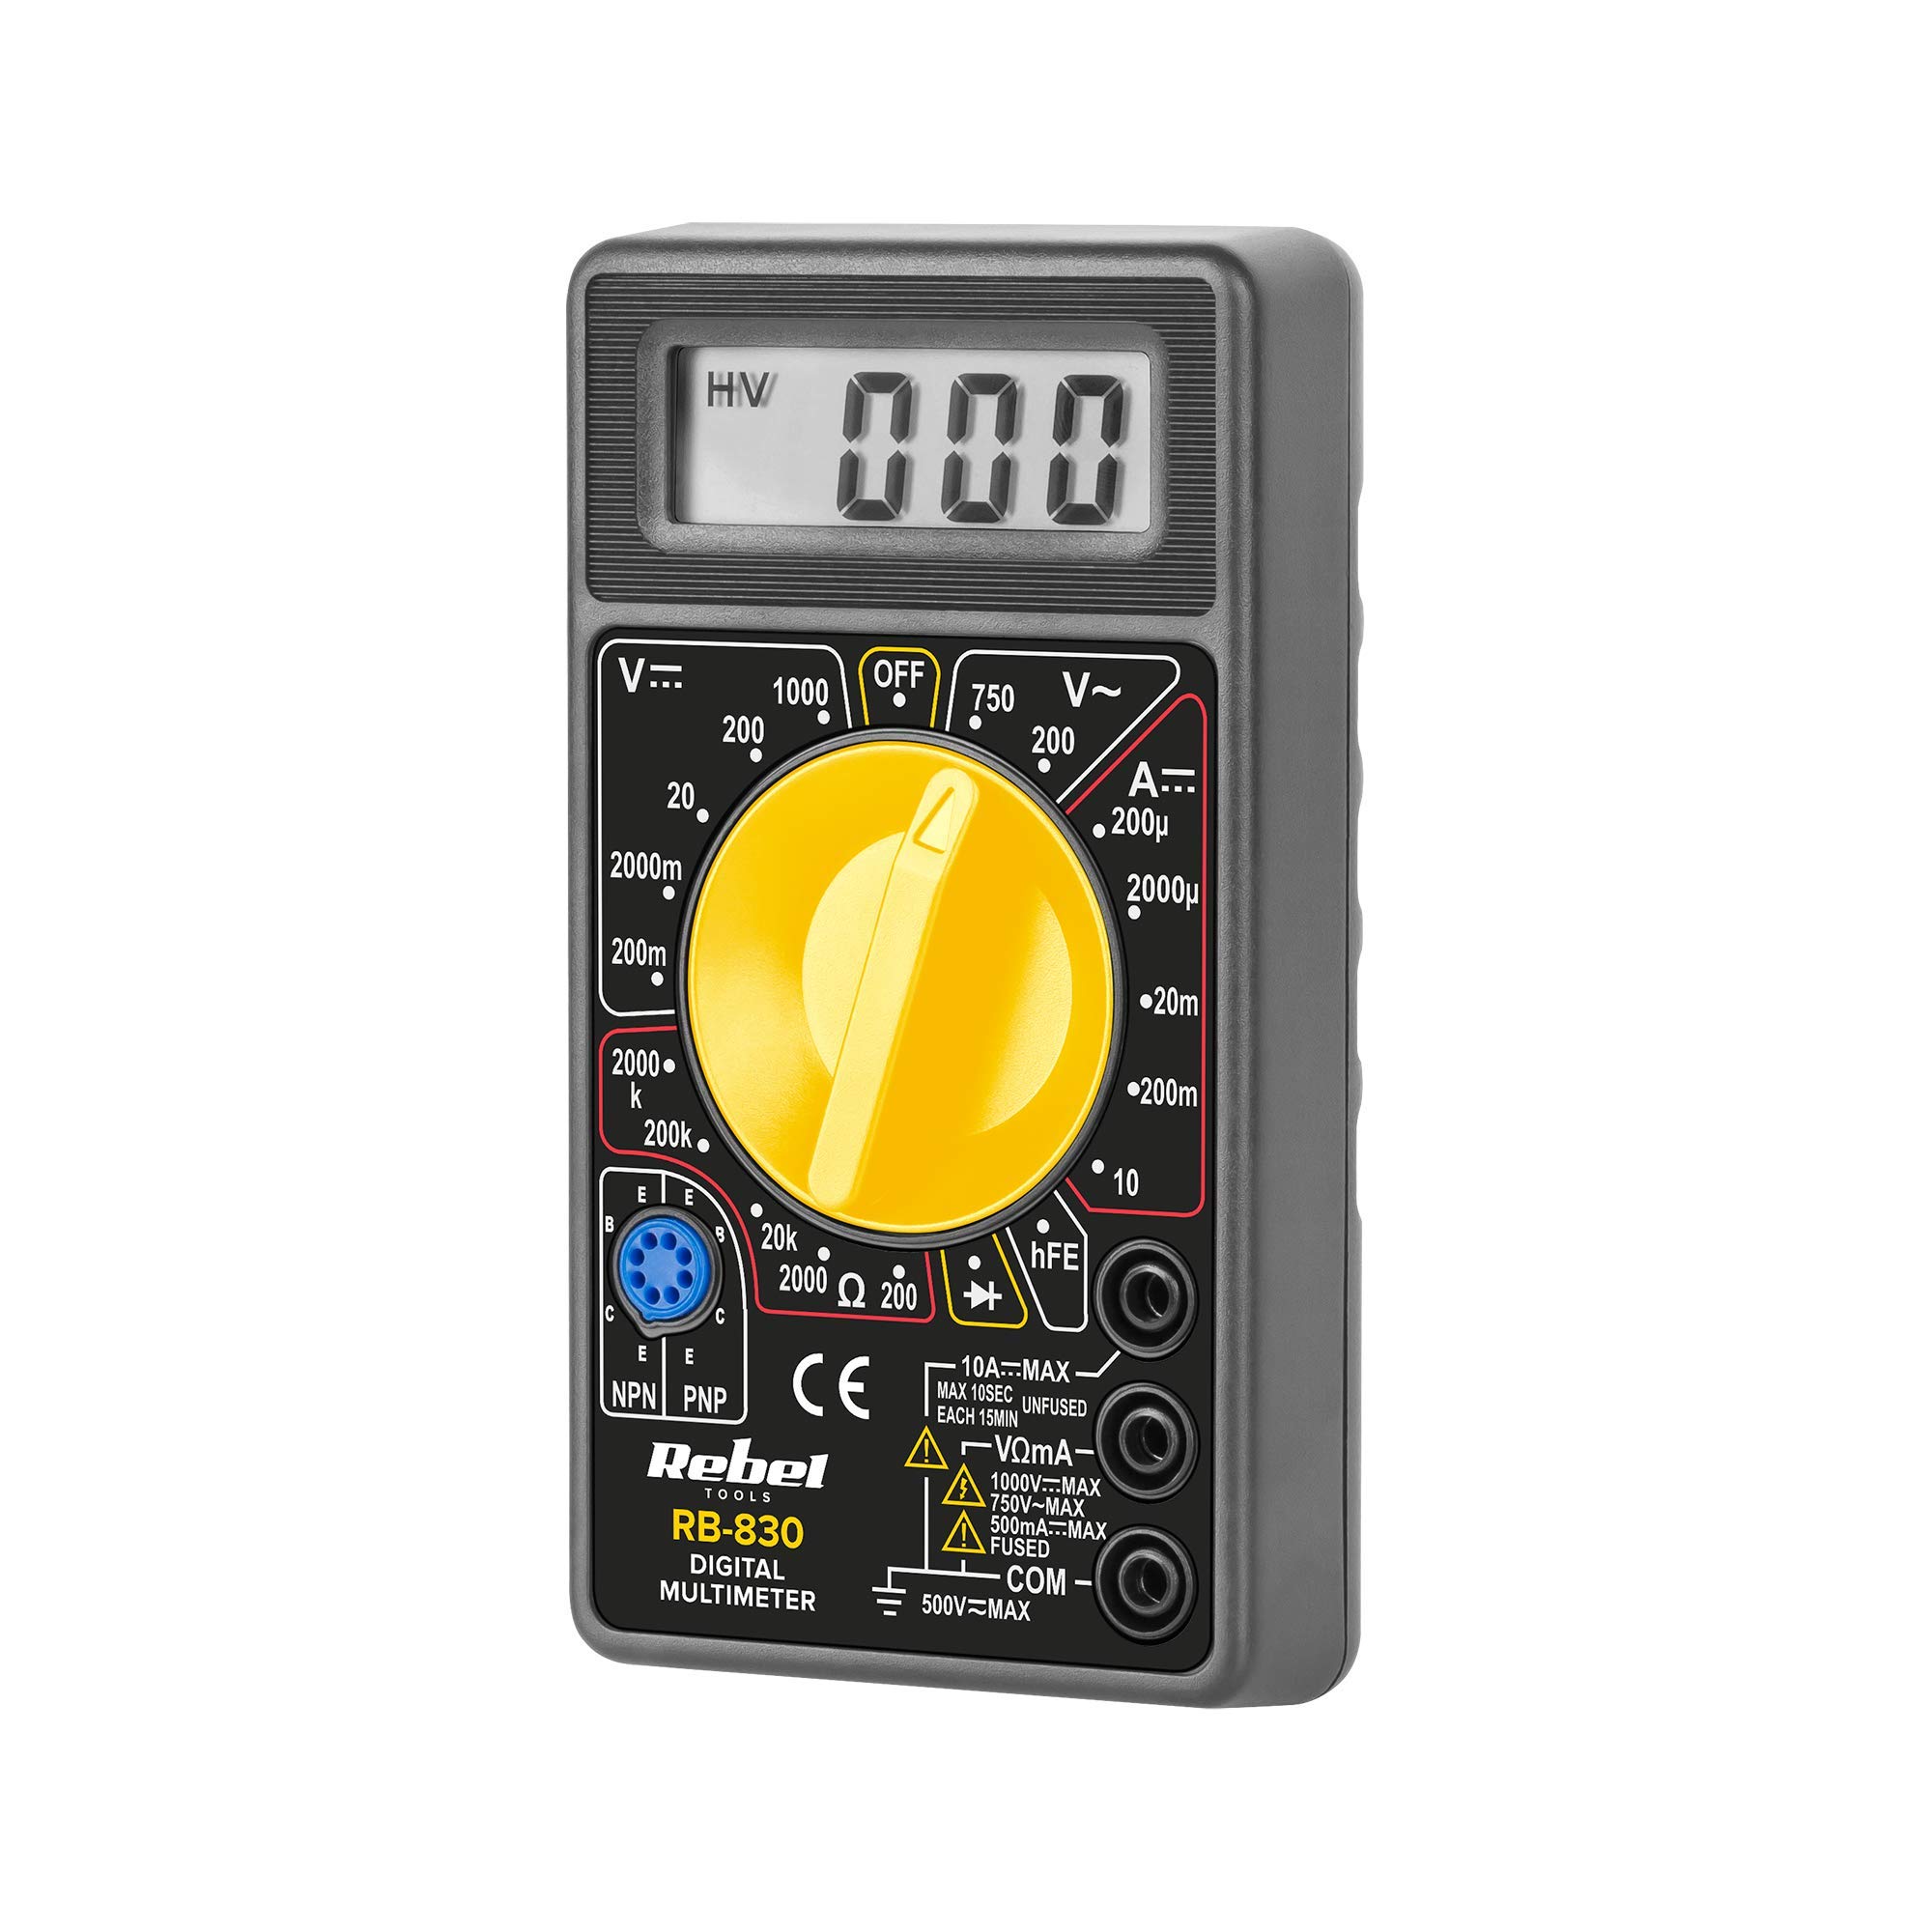
The Rebel MIE-RB-830 is a compact, battery-operated digital multimeter designed for measuring DC/AC voltage, DC current, resistance, diode, and transistor (hFE) values. It is suitable for general electrical testing and troubleshooting.
2.1. Компоненте
- Digital Multimeter Unit
- Тест каблови (црвени и црни)
- 9V Battery (may be included or sold separately)
- Кориснички приручник (овај документ)

Слика 2: The Rebel MIE-RB-830 Digital Multimeter shown with its accompanying red and black test leads. The multimeter features a large LCD display and a rotary function switch.

Слика 3: Цлосе-уп view of the red and black test leads. These leads are essential for connecting the multimeter to the circuit under test.
3. Подешавање
3.1. Инсталација батерије
- Уверите се да је мултиметар искључен и да су сви мерни каблови искључени.
- Locate the battery compartment cover on the back of the meter (refer to Figure 1).
- Одврните завртањ(е) за причвршћивање и пажљиво уклоните поклопац.
- Insert a new 9V battery (NEDA 1604 or 6F22 type), observing the correct polarity (+ and -).
- Вратите поклопац одељка за батерије и причврстите га завртњем (завртњима).
3.2. Повезивање мерних каблова
- Повежите црвена test lead to the "VΩmA" input jack.
- Повежите црна test lead to the "COM" (common) input jack.
- For current measurements exceeding 200mA (up to 10A), connect the red test lead to the "10A" input jack.
4. Упутство за употребу
4.1. Избор функције
Turn the rotary switch to the desired measurement function and range. Always start with a higher range if the approximate value is unknown to prevent overloading the meter.
4.2. Мерење једносмерне струје (DC Vol)tagе (V–)
- Поставите ротациони прекидач на жељену јачину једносмерне струјеtage (V–) range (e.g., 20V, 200V).
- Connect the red test lead to the positive (+) side of the circuit and the black test lead to the negative (-) side.
- Прочитајте књtagе вредност на ЛЦД екрану.
4.3. Меасуринг АЦ Волtagе (V∼)
- Поставите ротациони прекидач на жељену јачину наизменичне струјеtage (V∼) range (e.g., 200V, 750V).
- Спојите мерне каблове преко AC волтаtagе извор.
- Прочитајте књtagе вредност на ЛЦД екрану.
4.4. Мерење једносмерне струје (A–)
Опрез: To measure current, the meter must be connected in series with the circuit. Never connect the meter in parallel with a voltage source when in current mode, as this can damage the meter and the circuit.
- Set the rotary switch to the desired DC Current (A–) range (e.g., 20mA, 200mA, 10A).
- For currents up to 200mA, ensure the red lead is in the "VΩmA" jack. For currents up to 10A, move the red lead to the "10A" jack.
- Отворите коло у којем треба мерити струју и повежите мерач серијски.
- Прочитајте тренутну вредност на ЛЦД екрану.
4.5. Мерење отпора (Ω)
Опрез: Уверите се да је коло или компонента која се тестира искључена из струје пре мерења отпора.
- Set the rotary switch to the desired Resistance (Ω) range (e.g., 200Ω, 2kΩ, 200kΩ).
- Повежите мерне каблове преко компоненте или кола које треба мерити.
- Очитајте вредност отпора на ЛЦД екрану.
4.6. Diode Test (→|–)
- Set the rotary switch to the Diode Test (→|–) position.
- Connect the red test lead to the anode of the diode and the black test lead to the cathode.
- На екрану ће се приказати јачина звука унапредtage drop (typically 0.5V to 0.8V for silicon diodes).
- Замените места водова. Дисплеј би требало да приказује „OL“ (отворена петља) за исправну диоду.
4.7. Transistor (hFE) Test
- Поставите окретни прекидач у положај хФЕ.
- Утврдите да ли је транзистор NPN или PNP.
- Insert the transistor's emitter, base, and collector leads into the corresponding sockets on the hFE test socket.
- Read the hFE (DC current gain) value on the display.
5. Одржавање
5.1. Замена батерије
When the low battery indicator appears on the display, replace the 9V battery as described in Section 3.1. Using a low battery can lead to inaccurate readings.
5.2. Замена осигурача
If the current measurement function stops working, the fuse may need replacement. This operation should only be performed by qualified personnel.
- Уверите се да је мултиметар искључен и да су сви мерни каблови искључени.
- Open the back casing of the meter (this may involve more screws than just the battery compartment).
- Locate the blown fuse and replace it with a fuse of the exact same type and rating (e.g., F200mA/250V for mA range, F10A/250V for 10A range). Refer to the internal markings or specifications for precise fuse ratings.
- Carefully reassemble the meter, ensuring all screws are tightened.
5.3. Чишћење
Обришите бројило огласомamp cloth and mild detergent. Do not use abrasives or solvents. Keep the meter dry.
КСНУМКС. Решавање проблема
| Проблем | Могући узрок | Решење |
|---|---|---|
| Нема дисплеја или блед дисплеј | Празан или празна батерија | Замените 9В батерију. |
| Нетачна очитавања | Low battery; Incorrect range selection; Poor test lead connection | Replace battery; Select appropriate range; Ensure leads are firmly connected. |
| Мерење струје не ради | Blown fuse; Incorrect lead connection for current | Replace fuse (see Section 5.2); Ensure red lead is in "VΩmA" or "10A" jack as appropriate. |
| Приказано је „OL“ (преоптерећење) | Measured value exceeds selected range; Open circuit (for resistance/continuity) | Select a higher range; Check circuit for breaks. |
7. Спецификације
| Меасуремент Фунцтион | Домет | Прецизност |
|---|---|---|
| ДЦ Волtagе (V–) | 200мВ, 2В, 20В, 200В, 1000В | ±(0.5% + 2 цифре) |
| АЦ Волtagе (V∼) | 200В, 750В | ±(1.2% + 10 цифре) |
| DC Current (A–) | 200µA, 2mA, 20mA, 200mA, 10A | ±(1.0% + 2 цифре) |
| Отпор (Ω) | 200Ω, 2kΩ, 20kΩ, 200kΩ, 2MΩ | ±(0.8% + 2 цифре) |
| Диодни тест | Да | Напред волtagе дроп |
| Transistor (hFE) Test | Да | hFE value |
| Повер Суппли | 9V Battery (NEDA 1604 or 6F22) | |
| Дисплаи | 3½ Digit LCD, Max. 1999 | |
| Димензије | Приближно 13.5 к 10 к 4 цм | |
| Тежина | Approx. 107 grams (without battery) | |
| Радна температура | 0°Ц до 40°Ц (32°Ф до 104°Ф) | |
| Температура складиштења | -10°Ц до 50°Ц (14°Ф до 122°Ф) | |
| Безбедносни стандарди | ЦЕ, РоХС |
8. Гаранција и подршка
This Rebel MIE-RB-830 Digital Multimeter is covered by a standard manufacturer's warranty against defects in materials and workmanship. Please refer to the warranty card included with your purchase or contact your retailer for specific warranty terms and conditions.
For technical support or service inquiries, please contact the point of purchase or visit the official Rebel webсајт за контакт информације.