
1. Увод
This manual provides comprehensive instructions for the installation, operation, and maintenance of your SENSTREE WTC200 Wireless Thermostat Plug-in Temperature Controller Outlet. Please read this manual thoroughly before using the device to ensure proper function and safety. Keep this manual for future reference.
2. Производ је готовview
2.1 Укључене компоненте
- Wireless Thermostat Receiver (Plug-in Outlet)
- Бежични даљински управљач
- 2m/6ft NTC Temperature Probe
- Упутство за употребу (овај документ)
- 2 AAA batteries (for remote controller, may be included or required separately)
2.2 Кључне карактеристике
- Бежични рад: Control temperature remotely with the handheld unit.
- High Accuracy Sensor: The temperature is detected automatically by the thermostat outlet or remote.
- Heating & Cooling Modes: Automatically activates or deactivates connected devices based on preset temperatures.
- Дугме за ручно укључивање/искључивање: The plug-in outlet features a manual power button.
- Прекидач јединице температуре: Easily switch between Celsius (℃) and Fahrenheit (℉).
- Програмабилно: Simple two-step setup for heating or cooling applications.
- Аларми за високу/ниску температуру: Provides alerts for temperature deviations.
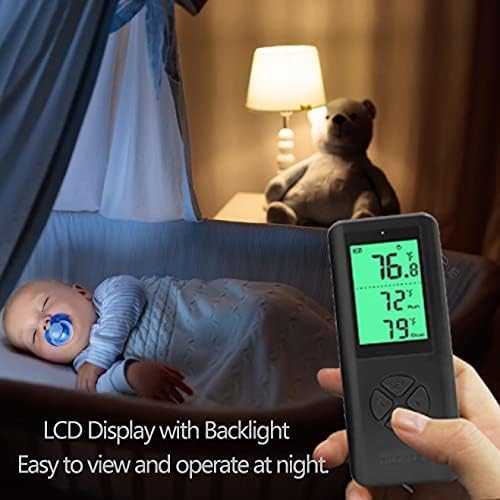
- ЛЦД екран са позадинским осветљењем: Clear digital display for easy reading, even in low light.
2.3 Product Components Visual Guide


3. Упутства за подешавање
3.1 Инсталација батерије даљинског управљача
- Пронађите одељак за батерије на задњој страни даљинског управљача.
- Отворите поклопац одељка за батерије.
- Уметните две ААА батерије, водећи рачуна о исправном поларитету (+/-).
- Затворите поклопац одељка за батерије.
3.2 Connecting the Temperature Probe
- Identify the NTC temperature probe cable.
- Plug the probe's jack into the designated port on the side of the wireless thermostat receiver (plug-in outlet).
- Position the probe in the area where you wish to measure and control the temperature. Ensure it is not obstructed or directly exposed to heat/cold sources that do not represent the ambient temperature.
3.3 Initial Power-Up and Pairing
- Plug the wireless thermostat receiver into a standard 3-prong grounded electrical outlet.
- The remote controller and receiver are designed to automatically pair upon initial power-up. The display on the remote should activate and show temperature readings.
- If the remote does not display readings or connect, ensure batteries are correctly installed and the receiver is powered. Refer to the Troubleshooting section if issues persist.
4. Упутство за употребу
4.1 Распоред даљинског управљача

The remote controller features a digital display and several buttons:
- СЕТ дугме: Користи се за унос и потврђивање подешавања.
- Дугмад горе (▲) / доле (▼): Used to adjust temperature values and navigate menu options.
- Дугме М (режим): Used to switch between heating and cooling modes, and other functions.
4.2 Setting Temperature and Mode
- Изаберите режим: Притисните тастер M button to toggle between Heating (indicated by a flame icon or similar) and Cooling (indicated by a snowflake icon or similar) modes.
- Enter Setting: Притисните тастер СЕТ button once. The target temperature display will begin to flash.
- Подесите температуру: Користите Горе (▲) и Доле (▼) buttons to set your desired target temperature.
- Потврдите подешавање: Притисните тастер СЕТ button again to confirm and save the target temperature. The display will stop flashing.
- The thermostat will now automatically turn on or off the connected device to maintain the set temperature.
4.3 Switching Temperature Units (℃/℉)
To switch between Celsius (℃) and Fahrenheit (℉):
- With the remote display active, press and hold the M button for approximately 3 seconds. The temperature unit on the display will change.
- Release the button once the desired unit is shown.
4.4 High/Low Temperature Alarms
The WTC200 features adjustable high and low-temperature alarms. When the ambient temperature exceeds the high alarm setting or falls below the low alarm setting, the remote controller will emit an audible alert.
- Притисните тастер СЕТ button twice to enter the alarm setting mode.
- Користите Горе (▲) и Доле (▼) buttons to adjust the high-temperature alarm threshold.
- Притисните СЕТ again to switch to the low-temperature alarm threshold.
- Користите Горе (▲) и Доле (▼) buttons to adjust the low-temperature alarm threshold.
- Притисните СЕТ a third time to save and exit the alarm settings.
4.5 Manual ON/OFF on the Outlet
The plug-in outlet receiver has a manual power button. Press this button to manually turn the connected device ON or OFF, overriding the thermostat's automatic control. The remote will reflect the current status.
5. Одржавање
5.1 Чишћење
- Уверите се да је уређај искључен пре чишћења.
- Wipe the surfaces of the remote controller and plug-in outlet with a soft, dry cloth.
- Не користите абразивна средства за чишћење, раствараче или потапајте уређај у воду.
5.2 Замена батерије
When the battery indicator on the remote controller's display shows low power, replace the AAA batteries as described in Section 3.1. Prompt battery replacement ensures continuous and reliable operation.
КСНУМКС. Решавање проблема
| Проблем | Могући узрок | Решење |
|---|---|---|
| Remote display is blank or unresponsive. | Слабе или празне батерије; неправилна инсталација батерија. | Замените ААА батерије, водећи рачуна о исправном поларитету. |
| Thermostat not controlling connected device. | Device not plugged into the outlet; outlet not receiving power; incorrect mode (heating/cooling); temperature settings outside range. | Ensure device is securely plugged into the thermostat outlet. Verify the thermostat outlet is plugged into a live wall socket. Check if the correct mode (heating/cooling) is selected. Adjust target temperature settings. |
| Temperature readings are inaccurate. | Temperature probe is disconnected or improperly placed; probe is damaged. | Ensure the temperature probe is securely connected to the outlet. Reposition the probe away from direct heat/cold sources or drafts. If damage is suspected, contact support. |
| Remote and outlet not communicating. | Ван домета; сметње; проблем са упаривањем. | Move the remote closer to the outlet. Ensure no large metal objects or strong electronic devices are between them. Re-power both units to attempt re-pairing. |
| Аларм се неочекивано оглашава. | Ambient temperature has reached a set high or low alarm threshold. | Check the current temperature and your alarm settings. Adjust alarm thresholds if necessary (refer to Section 4.4). |
7. Спецификације
| Феатуре | Детаљ |
|---|---|
| Бранд | SENSTREE |
| Број модела | ВТЦ200 |
| Тип контролера | Ремоте |
| Тип контроле температуре | Аутоматски |
| Технологија повезивања | РФ (радио фреквенција) |
| Извор напајања | Електрични |
| Волtage | 1.5 Volts (Remote), 100-240 Volts (Outlet) |
| Максимално оптерећење | 14A, 1500W (at 110V), 3000W (at 220V) |
| Дисплаи Типе | Дигитални ЛЦД са позадинским осветљењем |
| Контролни метод | Button Control, Remote |
| Температуре Пробе | 2m/6ft NTC probe |
| Батерије (даљински управљач) | Потребне су 2 ААА батерије |
| Тежина артикла | 8.4 унци |
| Димензије пакета | 4.8 к 4.17 к 2.32 инча |
8. Гаранција и подршка
8.1 Гаранција на производ
The SENSTREE WTC200 Wireless Thermostat Plug-in Temperature Controller Outlet comes with a једногодишња гаранција од датума куповине. Ова гаранција покрива недостатке у материјалу и изради при нормалној употреби. Не покрива штету насталу услед злоупотребе, несреће, неовлашћене модификације или неправилне инсталације.
8.2 Корисничка подршка
For technical assistance, troubleshooting, or warranty claims, please contact SENSTREE customer support. Refer to the product packaging or the official SENSTREE webсајт за најновије контакт информације.