
1. Увод
This manual provides essential instructions for the safe and effective operation, setup, maintenance, and troubleshooting of your AMZCNC Hydraulic Knockout Punch Electrical Conduit Hole Cutter Set, Model 15T(1/2"-4"). Please read this manual thoroughly before using the tool to ensure proper function and to prevent injury or damage.
The AMZCNC Hydraulic Knockout Punch is designed for creating clean, precise holes in various materials such as steel, stainless steel, brass, copper, aluminum (soft alloys only), fiberglass, and plastic. It is ideal for electrical conduit installation and other sheet metal fabrication tasks.
2. Безбедносна упутства
Увек дајте приоритет безбедности при раду са електричним алатима. Непоштовање ових упутстава може довести до озбиљних повреда или материјалне штете.
- Лична заштитна опрема (ЛЗО): Увек носите заштитне наочаре, рукавице и одговарајућу радну одећу.
- Радна област: Уверите се да је ваше радно место чисто, добро осветљено и без нереда. Држите децу и пролазнике подаље.
- Стање алата: Inspect the tool for any damage or leaks before each use. Do not operate a damaged tool.
- Обезбедите радни комад: Always secure the material being punched to prevent movement during operation.
- Хидраулични притисак: Be aware of the hydraulic pressure. Never attempt to disassemble the hydraulic unit under pressure.
- Компатибилност материјала: Only use the punch on materials and thicknesses specified in this manual.
- Правилно руковање: Carry the tool by its handle. Do not carry it by the hose or dies.
3. Садржај пакета
Проверите да ли су све компоненте присутне и неоштећене приликом распакивања.

Image 3.1: Complete AMZCNC Hydraulic Knockout Punch Kit.
- Hydraulic Pump and Punch Head Assembly
- Draw Studs (1 x 3/4"x3/4" and 1 x 7/16"x3/4")
- Die Sets for conduit fitting sizes: 1/2", 3/4", 1", 1-1/4", 1-1/2", 2", 2-1/2", 3", 3-1/2", 4"
- Торбица за ношење

Слика 3.2: Детаљно view of draw studs and opening molds (dies).
4. Производ је готовview и компоненте
Familiarize yourself with the main components of the hydraulic knockout punch.

Image 4.1: Key components of the hydraulic punch head and pump.
- Хидраулична пумпа: Generates the force required for punching. Features a long handle for effective force transfer.
- Punch Head: Connects to the hydraulic pump and holds the dies and draw stud.
- Draw Studs: Threaded rods that pull the punch through the material. Two sizes are included.
- Dies (Punch and Die): The cutting components that create the hole. Available in various sizes.
- 360° Free Rotating Joint: Allows for flexible positioning of the punch head relative to the pump.
- Прекидач: Controls the hydraulic pressure (Work/Reset).
- High Precision Plunger: Internal component of the hydraulic pump.
5. Спецификације
Technical details for the AMZCNC Hydraulic Knockout Punch.
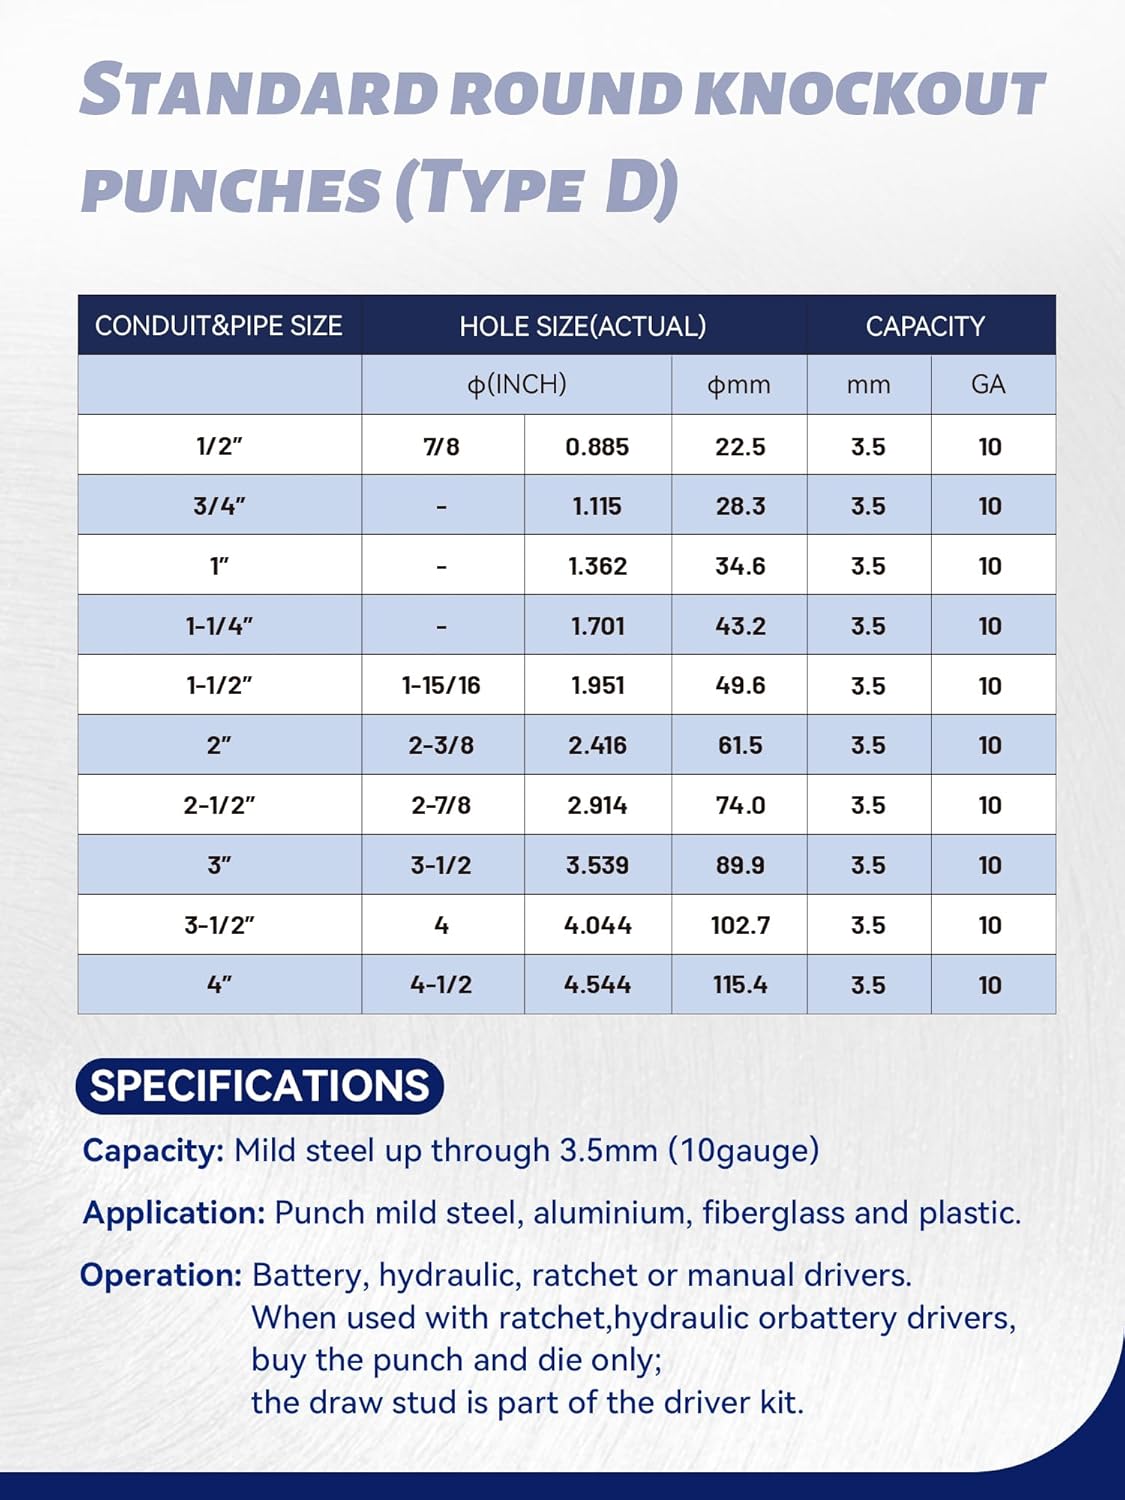
Image 5.1: Standard Round Knockout Punches (Type D) Specifications.
| Спецификација | Детаљ |
|---|---|
| Капацитет пробијања | 15 US TRUE TON |
| Punching Thickness (Steel) | 1/8 inch (10 gauge) |
| Punching Thickness (Stainless Steel) | 1/16 инча |
| Компатибилни материјали | Челик, нерђајући челик, месинг, бакар, алуминијум (само меке легуре), фиберглас, пластика |
| Die Set Sizes | 1/2", 3/4", 1", 1-1/4", 1-1/2", 2", 2-1/2", 3", 3-1/2", 4" |
| Draw Stud Threads | 3/4"-16 (compatible with GREENLEE and other domestic punch tooling) |
| Димензије производа | 17.1"L x 14.2"W x 5.2"H (case dimensions) |
| Тежина артикла | 19.66 килограма (приближно 43.34 фунте) |
| Материјал | легирани челик |
6. Подешавање
Follow these steps to prepare your hydraulic knockout punch for operation.
- Select Dies: Choose the appropriate punch and die set for the desired hole size.
- Select Draw Stud: Select the correct draw stud based on the die size and material thickness.
- Connect Punch Head: Ensure the hydraulic hose is securely connected to both the pump and the punch head. The 360° free rotating joint allows for flexible connection.
- Припремите материјал: Mark the center of the desired hole on your workpiece. Drill a pilot hole large enough to accommodate the draw stud.
7. Упутство за употребу
Perform the following steps to punch a hole in your material.
- Assemble Punch:
- Thread the selected die onto the draw stud.
- Insert the draw stud through the pilot hole in your workpiece.
- Thread the punch onto the draw stud from the opposite side of the workpiece, ensuring the material is sandwiched between the punch and the die.
- Attach the punch head to the draw stud.
- Алат за позиционирање: Ensure the punch and die are correctly aligned with the pilot hole and the workpiece is stable.
- Engage Hydraulic Pump: Turn the switch on the hydraulic pump to the "Work" position.
- Пробијање рупе: Begin pumping the handle of the hydraulic unit. Continue pumping until the punch cleanly cuts through the material. You will feel a release of pressure when the cut is complete.
- Притисак отпуштања: Turn the switch on the hydraulic pump to the "Reset" position to release the hydraulic pressure.
- Remove Punch: Carefully unthread the punch head, punch, and die from the draw stud. Remove the slug from the die.
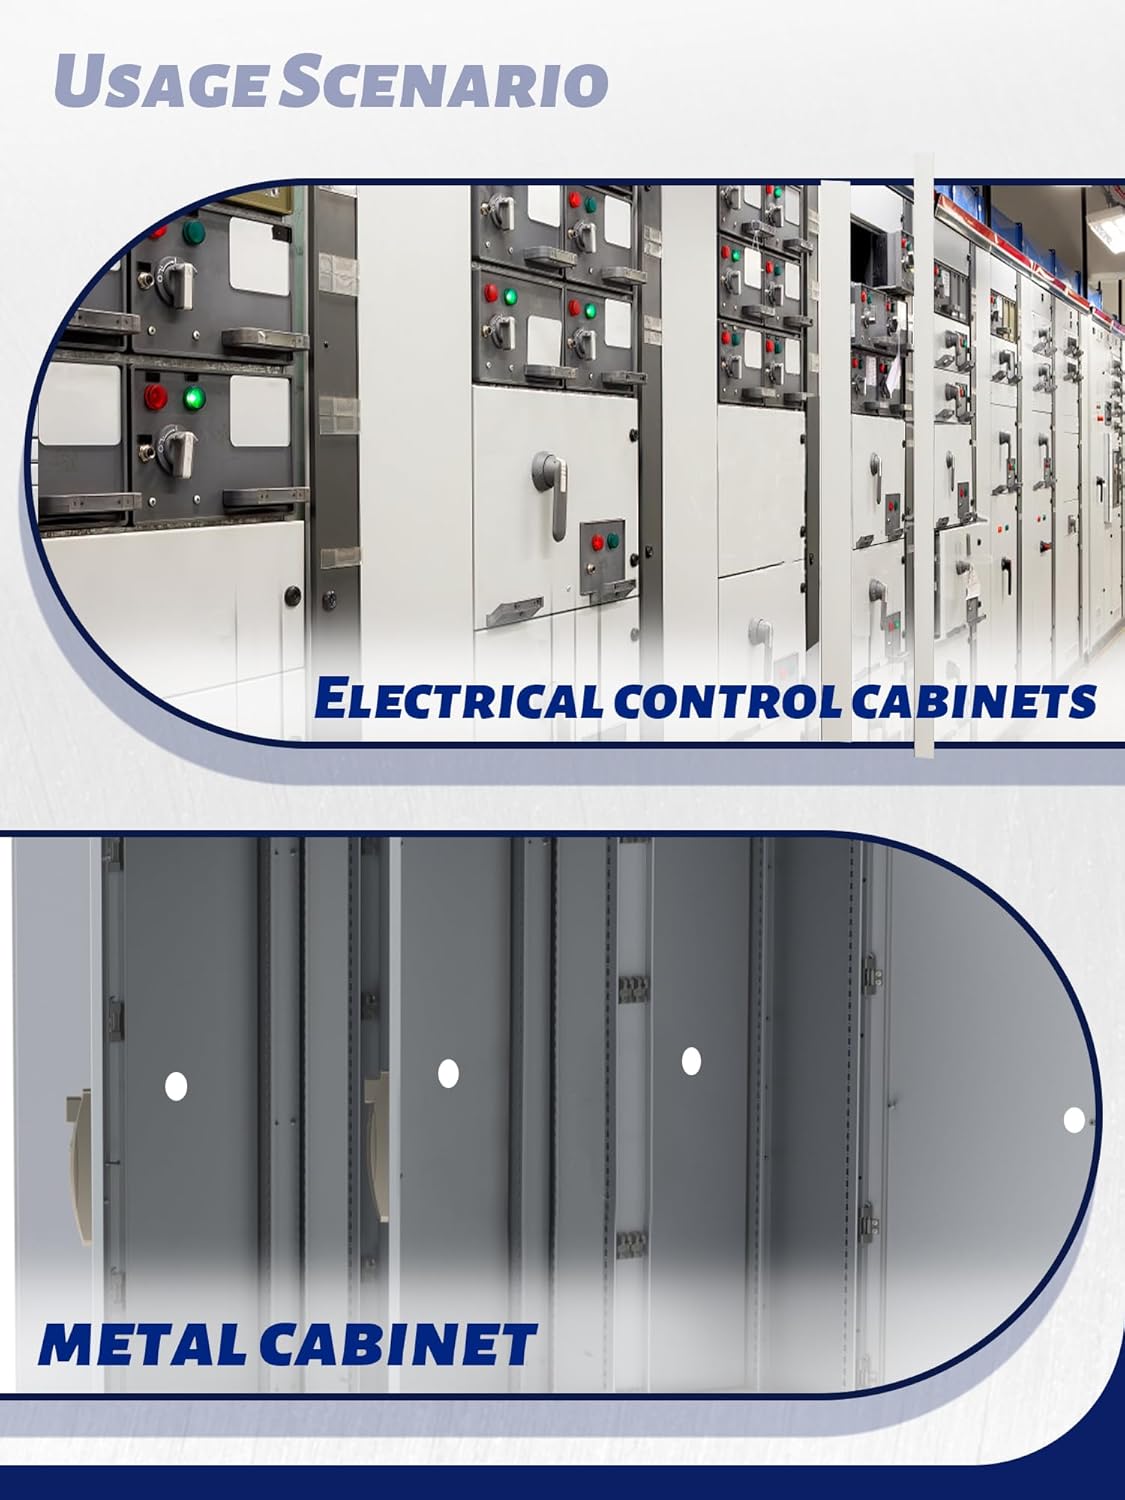
Image 7.1: Application examples in electrical control cabinets and metal cabinets.

Image 7.2: The 360° free rotation joint provides flexibility during operation.
8. Одржавање
Редовно одржавање осигурава дуготрајност и оптималне перформансе вашег алата.
- Чишћење: After each use, clean the punch, dies, and draw studs to remove metal shavings and debris. Use a clean cloth.
- подмазивање: Lightly lubricate the threads of the draw studs and the cutting edges of the dies with machine oil to prevent rust and ensure smooth operation.
- Хидраулична течност: Periodically check the hydraulic fluid level. If low, refill with appropriate hydraulic oil as specified by the manufacturer. Consult a qualified technician if you suspect a hydraulic leak.
- Складиштење: Store the tool and all accessories in the provided carrying case in a dry, clean environment, away from direct sunlight and extreme temperatures.
КСНУМКС. Решавање проблема
Погледајте овај одељак за уобичајене проблеме и њихова могућа решења.
| Проблем | Могући узрок | Решење |
|---|---|---|
| Tool not punching / Insufficient force | Low hydraulic fluid level; Air in hydraulic system; Switch in "Reset" position; Material too thick or hard. | Check and refill hydraulic fluid; Bleed air from system (consult technician); Ensure switch is in "Work" position; Verify material compatibility and thickness against specifications. |
| Oil leak from hydraulic unit | Damaged seals or hose; Loose connections. | Tighten connections; Contact customer support for seal replacement or repair. Do not use if leaking significantly. |
| Punch or die stuck in material | Insufficient pressure release; Material binding. | Ensure switch is fully in "Reset" position; Gently tap the punch/die assembly to loosen (use a soft hammer if necessary, avoid damaging components). |
| Uneven or rough cut | Worn dies; Improper alignment; Material movement. | Replace worn dies; Ensure punch and die are perfectly aligned; Secure workpiece firmly. |
If you encounter issues not listed here or if solutions do not resolve the problem, please contact AMZCNC customer support.
10. Гаранција и корисничка подршка
AMZCNC products are manufactured to high-quality standards. For warranty information, technical assistance, or to order replacement parts, please refer to the contact information provided with your purchase or visit the official AMZCNC webсајту.
AMZCNC Official Store: Visit the AMZCNC Store on Amazon