1. Увод
This manual provides detailed instructions for the installation, operation, and maintenance of the VIVOTEK ND9323P H.265 8-Channel Embedded PoE Network Video Recorder (NVR). Please read this manual thoroughly before using the product to ensure proper and safe operation. Keep this manual for future reference.
2. Безбедносне информације
Observe the following safety precautions to prevent damage to the NVR and to ensure user safety:
- Напајање: Use only the power adapter supplied with the NVR. Ensure the power source matches the NVR's voltagе захтеве.
- вентилација: Do not block any ventilation openings. Install the NVR in a well-ventilated area to prevent overheating.
- Окружење: Avoid exposing the NVR to water, moisture, extreme temperatures, or direct sunlight. Do not place heavy objects on the NVR.
- Сервисирање: Не покушавајте сами да сервисирате овај производ. Све сервисирање препустите квалификованом сервисном особљу.
- Руковање: Handle the NVR with care. Avoid dropping or subjecting it to strong impacts.
3. Садржај пакета
Carefully unpack the box and ensure all items are present and in good condition. If any items are missing or damaged, contact your vendor immediately.
- VIVOTEK ND9323P NVR Unit
- Повер Адаптер
- УСБ миш
- Водич за брзу инсталацију
- Accessory Pack (Screws for HDD installation, Ethernet cable)
- Case (referring to the NVR enclosure itself)
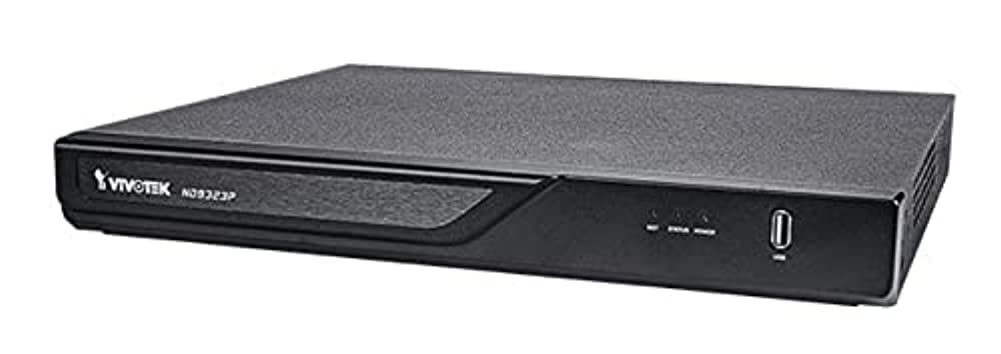
Figure 3.1: VIVOTEK ND9323P NVR unit. This image shows the front panel of the NVR, typically featuring status indicators and USB ports.
4. Производ је готовview
The VIVOTEK ND9323P is an 8-channel embedded Network Video Recorder designed for IP surveillance systems. It supports H.265 video compression for efficient storage and bandwidth usage. With its integrated Power over Ethernet (PoE) ports, it simplifies camera installation by providing both power and data connectivity through a single Ethernet cable.
4.1 Кључне карактеристике
- 8-Channel Video Input
- H.265/H.264 Video Compression
- 8 x 802.3at/af PoE Ports
- Local Display Output (HDMI/VGA)
- Remote Access via VIVOTEK VIVOCloud App or VMS
- Supports up to 16TB HDD storage (HDD not included)
4.2 Предња и задња плоча
Refer to the Quick Installation Guide for detailed diagrams of the front and rear panels, indicating ports and indicators.
- Предњи панел: Power LED, HDD LED, Network LED, USB ports.
- Задња плоча: Power input, LAN port, PoE ports (1-8), HDMI output, VGA output, Audio I/O, USB ports.
5. Подешавање
5.1 Инсталација чврстог диска (опционо)
The NVR does not typically include a pre-installed hard drive. Follow these steps to install a 3.5-inch SATA hard drive:
- Одврните и уклоните горњи поклопац НВР-а.
- Connect the SATA data and power cables from the NVR to the hard drive.
- Причврстите чврсти диск на кућиште NVR-а помоћу приложених вијака.
- Вратите горњи поклопац и причврстите га завртњима.
Напомена: Ensure the NVR is powered off and unplugged before installing or removing a hard drive.
5.2 Физичке везе
- Повежите камере: Connect your IP cameras to the NVR's PoE ports (1-8) using Ethernet cables. The NVR will provide power and network connectivity to the cameras.
- Повежите се на мрежу: Connect the NVR's LAN port to your local network router or switch using an Ethernet cable.
- Повежи екран: Повежите монитор на HDMI или VGA излазни порт NVR-а.
- Повежите миш: Прикључите УСБ миш у један од УСБ портова НВР-а.
- Укључено: Прикључите адаптер за напајање на улаз за напајање NVR-а, а затим га укључите у утичницу. NVR ће се аутоматски укључити.
5.3 Почетна конфигурација
Upon first boot, the NVR will guide you through a setup wizard on the connected monitor:
- Избор језика: Одаберите жељени језик.
- Подешавање лозинке: Create a strong password for the administrator account. This is crucial for security.
- Подешавања мреже: Configure network settings (DHCP or Static IP). DHCP is recommended for most home users.
- Време и датум: Подесите исправну временску зону, датум и време.
- Иницијализација чврстог диска: If you installed a new hard drive, the NVR will prompt you to format it. Confirm to proceed. Упозорење: Formatting will erase all data on the drive.
- Camera Search and Add: The NVR will automatically search for connected VIVOTEK cameras. Select and add them to the NVR.
- завршити: Complete the wizard to access the NVR's live view.
6. Управљање NVR-ом
6.1 Accessing the NVR
You can access and manage the NVR through various methods:
- Локални екран: Directly via the connected monitor and USB mouse.
- Web Прегледач: Enter the NVR's IP address into a web претраживач на рачунару повезаном на исту мрежу.
- VIVOTEK VIVOCloud App: Download the mobile app for remote viewинг и менаџмент.
- VIVOTEK VAST 2 VMS: For advanced management and multi-NVR systems.
6.2 Уживо View
Уживо view displays real-time video feeds from all connected cameras. You can switch between single-camera view, мрежа са више камера view, and customize the display layout.
6.3 Подешавања снимања
Конфигуришите распореде и режиме снимања за сваку камеру:
- Континуирано снимање: Записи 24/7.
- Снимање детекције покрета: Снима само када се детектује кретање.
- Планирано снимање: Records during specific time periods.
- Снимање догађаја: Records based on external triggers or alarms.
Access these settings through the NVR's main menu: Configuration > Recording > Schedule.
6.4 Репродукција
То реview снимљено фооtage:
- Из главног менија изаберите Репродукција.
- Изаберите камеру(е) и распон датума/времена који желите да снимитеview.
- Use the timeline and playback controls (play, pause, fast forward, rewind) to navigate through the footage.
6.5 Event Management and Notifications
Configure the NVR to respond to events such as motion detection, camera tampering, or network disconnection. The NVR can send email notifications, trigger alarms, or start recording.
Access these settings via: Configuration > Event.
7. Одржавање
7.1 Ажурирања фирмвера
Regularly check for and install firmware updates to ensure optimal performance, security, and access to new features. Firmware can be updated via the NVR's web interface or local display menu: Configuration > System > Firmware Upgrade.
Опрез: Do not power off the NVR during a firmware upgrade. This can cause permanent damage.
7.2 Управљање чврстим диском
Monitor the health of your hard drive(s) and ensure sufficient storage space. The NVR will automatically overwrite the oldest recordings when the disk is full, based on your settings.
Access HDD status and settings via: Configuration > Storage > HDD Management.
7.3 Чишћење
Keep the NVR unit clean and free from dust. Use a soft, dry cloth for cleaning. Do not use liquid cleaners or aerosols.
КСНУМКС. Решавање проблема
This section addresses common issues you might encounter with your VIVOTEK ND9323P NVR.
8.1 No Video Display on Monitor
- Проверите каблове: Уверите се да је HDMI/VGA кабл безбедно повезан и са NVR-ом и са монитором.
- Улаз монитора: Verify the monitor is set to the correct input source (HDMI/VGA).
- NVR Power: Confirm the NVR is powered on and its power LED is illuminated.
8.2 Cameras Not Showing Up / No Image
- ПоЕ веза: Ensure cameras are properly connected to the NVR's PoE ports. Check if the PoE port LEDs on the NVR are active.
- Снага камере: If not using PoE, ensure cameras are receiving power from their own power adapters.
- Мрежна повезаност: Verify the NVR and cameras are on the same network segment if not directly connected via PoE.
- Статус камере: Check the camera's own status indicators.
- NVR Camera Management: Иди на Configuration > Camera > Camera Management to ensure cameras are added and enabled. Try rescanning for cameras.
8.3 Cannot Access NVR via Web Бровсер
- ИП адреса: Confirm the NVR's IP address is correct and that your computer is on the same network.
- Мрежни кабл: Ensure the NVR's LAN port is connected to your network.
- заштитни зид: Temporarily disable your computer's firewall to check if it's blocking access.
- Компатибилност претраживача: Use a recommended web прегледач (нпр. Chrome, Firefox).
8.4 Заборављена лозинка
If you forget the administrator password, you may need to perform a factory reset. Refer to the VIVOTEK support website or contact technical support for the specific procedure for your model, as this often involves a physical reset button or a specific utility.
9. Спецификације
The following table lists the key specifications for the VIVOTEK ND9323P NVR:
| Феатуре | Спецификација |
|---|---|
| Број модела | НДКСНУМКСП |
| Бранд | ВИВОТЕК |
| Број канала | 8 |
| Технологија повезивања | Етхернет |
| Компатибилни уређаји | Camera, Mobile Device |
| Видео Цомпрессион | Х.265, Х.264 |
| ПоЕ портови | 8 x 802.3at/af |
| Димензије производа | 19.69 к 19.69 к 11.02 инча |
| Тежина артикла | 0.01 унци |
| Произвођач | Вивотек |
10. Гаранција и подршка
VIVOTEK products are covered by a limited warranty. For detailed warranty terms and conditions, please refer to the warranty card included with your product or visit the official VIVOTEK webсајту.
For technical support, product registration, or to download the latest firmware and software, please visit the VIVOTEK support portal:
VIVOTEK Official Support Webсајту
When contacting support, please have your NVR's model number (ND9323P) and serial number ready.