1. Увод
Thank you for choosing the Vancer Gretxa Wireless Ultralight Gaming Mouse. This manual provides essential information for setting up, operating, and maintaining your new gaming mouse. Please read it thoroughly to ensure optimal performance and longevity of your device.
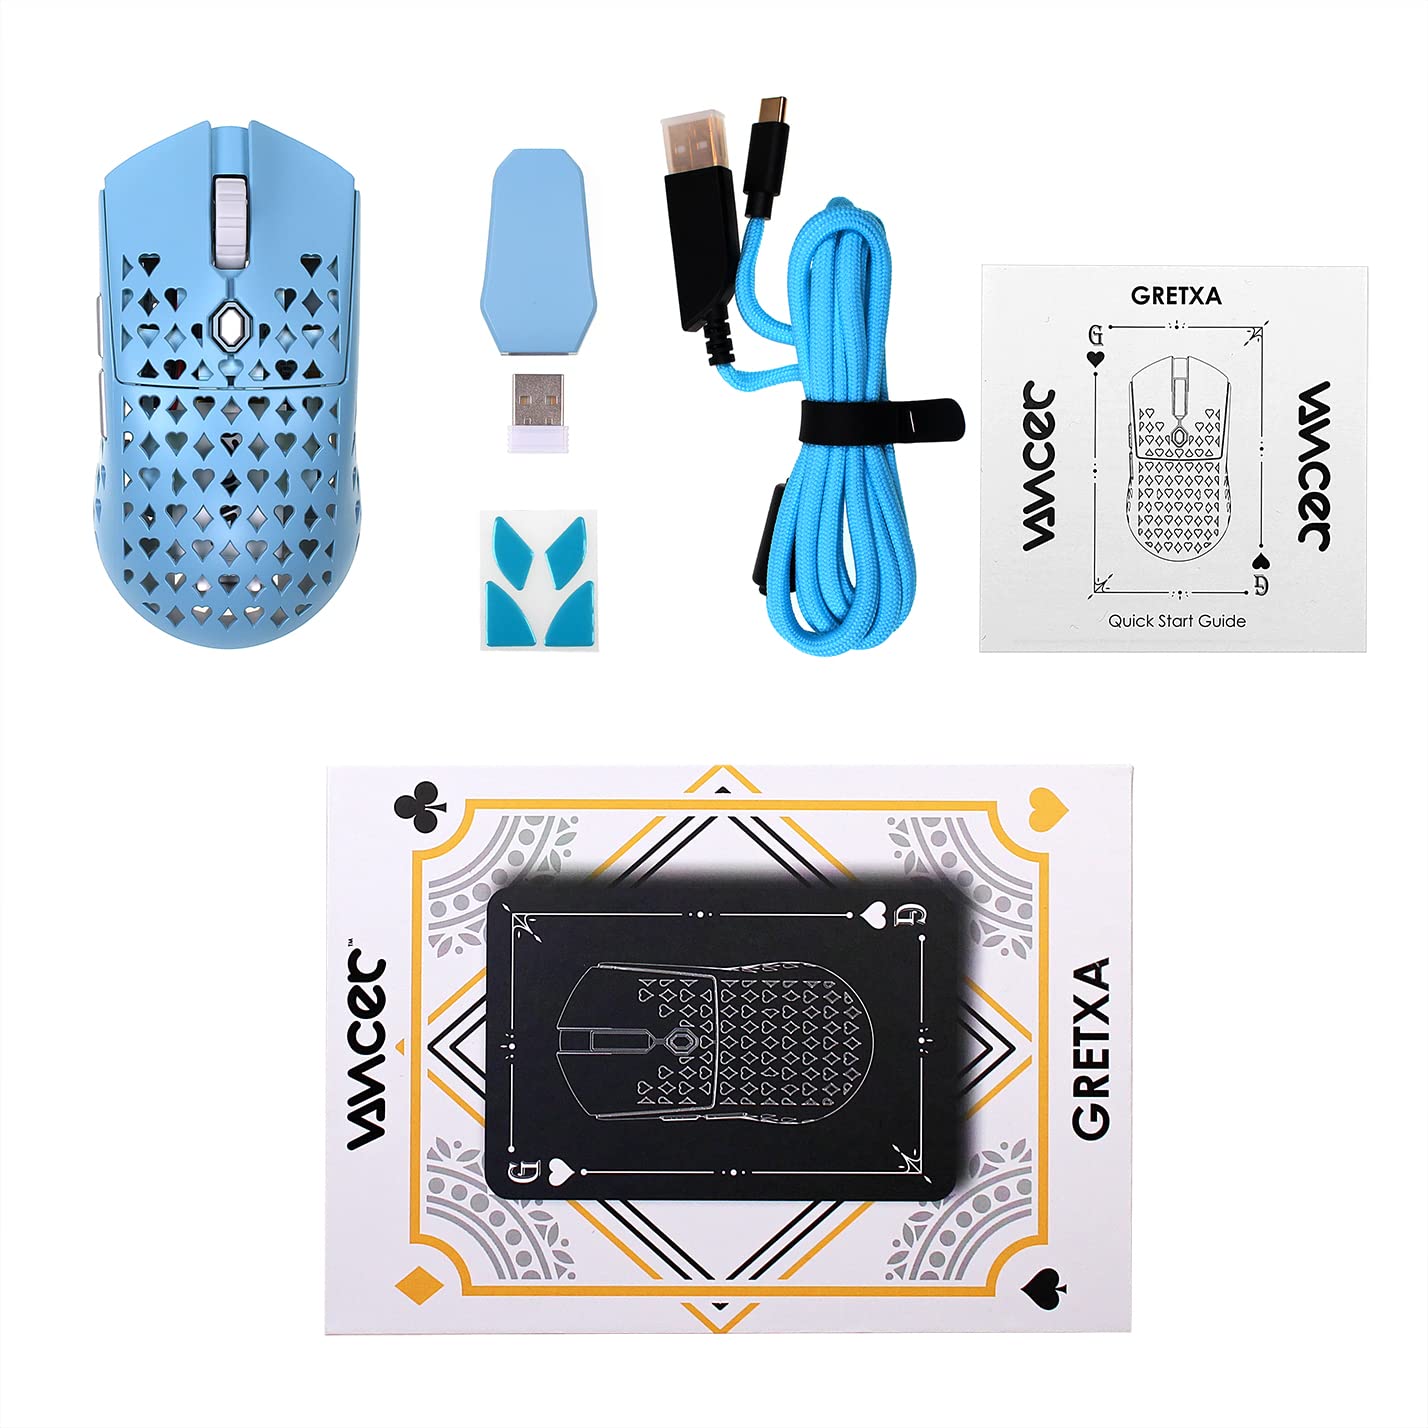
Садржај пакета
The Vancer Gretxa Wireless Ultralight Gaming Mouse package includes the following items:
- Vancer Gretxa Wireless Gaming Mouse
- USB-C to USB-A Charging Cable (Red)
- USB Extension Dongle
- Донгле бежичног пријемника
- Extra Set of PTFE Skates
- Водич за брзи почетак
2. Подешавање
2.1 Connecting the Wireless Receiver
- Locate the wireless receiver dongle.
- Plug the receiver dongle into an available USB-A port on your computer. For optimal signal strength, use the provided USB extension dongle to place the receiver closer to the mouse.
- Turn on the mouse using the power switch located on the underside of the mouse.
- Your computer should automatically detect the mouse. No additional drivers are typically required for basic functionality on Windows 10.
2.2 Пуњење миша
The Vancer Gretxa mouse is equipped with a rechargeable Lithium Ion battery.
- Connect the USB-C end of the charging cable to the front port of the mouse.
- Connect the USB-A end of the charging cable to an available USB-A port on your computer or a USB wall adapter.
- The mouse can be used in wired mode while charging.
- A full charge typically takes a few hours. The LED indicator on the mouse will change to indicate charging status (refer to the Quick Start Guide for specific LED behaviors).

2.3 Optional Software Installation
For advanced customization, such as remapping buttons, adjusting DPI steps, or configuring macros, Vancer may provide optional software. Please visit the official Vancer website for the latest software downloads and installation instructions. Note that some features like RGB lighting may be tied to DPI settings.
3. Упутство за употребу
3.1 Основне функције миша
- Леви клик: Примарно дугме за акцију.
- Десни клик: Secondary action button, often for context menus.
- Точак за померање: Scrolls content vertically. Can also be pressed for a middle-click function.
- Бочна дугмад: Typically used for forward/backward navigation in web browsers or customizable functions in games/software.
- Дугме ДПИ: Циклира кроз унапред подешене нивое осетљивости на DPI.

3.2 ДПИ подешавање
The Vancer Gretxa mouse features a dedicated DPI button, usually located behind the scroll wheel or on the underside, to cycle through different sensitivity settings. The default DPI steps are 400, 800, 1800, 3200, 4800, and 6400. Each step may correspond to a different LED color for visual indication. Press the DPI button to switch between these settings to find your preferred sensitivity.
3.3 Подешавање стопе анкетирања
The polling rate determines how often the mouse reports its position to the computer. The Gretxa mouse supports polling rates of 125Hz (8ms), 500Hz (2ms), and 1000Hz (1ms). Higher polling rates generally provide smoother tracking and lower latency. Adjustment of the polling rate is typically done via the optional Vancer software.
3.4 Жични режим
When the USB-C charging cable is connected to the mouse and your computer, the mouse will automatically switch to wired mode. This allows for continuous use even if the battery is depleted, and can be preferred for competitive gaming to eliminate any potential wireless interference.
4. Одржавање
4.1 Чишћење миша
Редовно чишћење помаже у одржавању перформанси и хигијене.
- Екстеријер: Лагано користите меку крпу која не оставља длачице дampИспрати водом или благим раствором за чишћење. Избегавати јаке хемикалије.
- Сензор: Gently clean the optical sensor on the underside of the mouse with a cotton swab or compressed air to remove dust and debris.
- Точак за померање: Use compressed air to clear any dust or particles that may accumulate around the scroll wheel mechanism.
4.2 Replacing PTFE Skates
The Vancer Gretxa mouse comes with high-quality PTFE skates for smooth gliding. Over time, these may wear down. An extra set of PTFE skates is included in your package for replacement.
- Carefully peel off the old PTFE skates using a thin, non-abrasive tool.
- Ensure the surface where the skates were is clean and free of adhesive residue.
- Peel the backing from the new PTFE skates and carefully align them with the recesses on the mouse's underside.
- Чврсто притисните да бисте осигурали правилно приањање.

4.3 Одржавање батерије
- Избегавајте често потпуно пражњење батерије.
- Чувајте миш на хладном и сувом месту када га не користите дуже време.
- Use only the provided charging cable or a certified USB-C cable to prevent damage.
КСНУМКС. Решавање проблема
If you encounter issues with your Vancer Gretxa mouse, please refer to the following common solutions:
| Проблем | Могуће решење |
|---|---|
| Миш не реагује |
|
| Покрет курсора је неправилан или скачкав |
|
| Дугмад или точкић за скроловање не раде |
|
| Лош век трајања батерије |
|
6. Спецификације
Below are the technical specifications for the Vancer Gretxa Wireless Ultralight Gaming Mouse:
| Феатуре | Детаљ |
|---|---|
| Модел | Gretxa |
| Повезивање | 2.4GHz Wireless, USB-C (Wired) |
| Сензор | Пикарт 3370 оптички сензор |
| Тежина | Отприлике 69 г |
| Димензије (Д к Ш к В) | 123 к 62 к 37 мм |
| ДПИ подешавања | 400 / 800 / 1800 / 3200 / 4800 / 6400 (Adjustable) |
| Поллинг Рате | 125Hz / 500Hz / 1000Hz |
| ЛОД (раздаљина узлетања) | 2mm (default), 1mm (adjustable via software) |
| Прекидачи | TTC Gold Switches (V2 improvement) |
| Клизаљке | ПТФЕ |
| Тип батерије | Литијум-јонске батерије (1 укључене) |
| Оперативни систем | Windows 10 (and compatible with other modern OS) |
| Компатибилни уређаји | Персонал Цомпутер |
7. Гаранција и подршка
7.1 Информације о гаранцији
For the most current and detailed warranty information regarding your Vancer Gretxa Wireless Ultralight Gaming Mouse, please refer to the official Vancer website or the warranty card included with your product. Warranty terms and conditions, including duration and coverage, may vary by region and are subject to change by the manufacturer.
7.2 Корисничка подршка
If you require further assistance, have questions not covered in this manual, or need technical support, please visit the official Vancer webсајт. Тамо обично можете пронаћи често постављана питања, преузимања драјвера и контакт информације за корисничку подршку.