BOMAKER Mini WiFi Projector 10''
BOMAKER Mini WiFi Projector 10'' User Manual
Model: Mini WiFi Projector 10''
1. Увод
This manual provides comprehensive instructions for the setup, operation, maintenance, and troubleshooting of your BOMAKER Mini WiFi Projector 10''. Please read this manual thoroughly before using the projector to ensure proper operation and to maximize its lifespan. Keep this manual for future reference.
The BOMAKER Mini WiFi Projector 10'' is a portable 720P HD LCD projector designed for home cinema, gaming, and various multimedia applications. It features WiFi connectivity for smartphone mirroring, multiple input options including HDMI, USB, and AV, and supports projection sizes up to 300 inches.
2. Важне информације о безбедности
Да бисте спречили пожар, струјни удар или повреде, увек се придржавајте следећих мера предострожности:
- Не блокирајте вентилационе отворе. Обезбедите адекватан проток ваздуха око пројектора.
- Не гледајте директно у сочиво пројектора када је укљученоamp је укључено. Јако светло може изазвати оштећење ока.
- Не излажите пројектор киши или влази да бисте избегли струјни удар.
- Користите само адаптер за напајање који се испоручује са пројектором.
- Поставите пројектор на стабилну, равну површину.
- Unplug the projector from the power outlet during lightning storms or when unused for long periods.
- Do not attempt to repair this product yourself. Refer all servicing to qualified service personnel.
3. Садржај пакета
Проверите да ли су све ставке наведене у наставку укључене у ваш пакет:
- 1 x BOMAKER Mini WiFi Projector
- 1 к даљински управљач
- 1 к адаптер за напајање
- 1 к ХДМИ кабл
- КСНУМКС к АВ кабл
- 1 к Упутство за употребу
4. Производ је готовview
Familiarize yourself with the various parts and connections of your projector.

Слика 4.1: Фронт view of the BOMAKER Mini WiFi Projector. This image shows the projector's lens, focus ring, and keystone correction dial, with a smartphone wirelessly connected and displaying content on its screen, illustrating the WiFi mirroring capability.
4.1. Улазно/излазни портови
The projector features a variety of ports for connecting different devices.

Слика 4.2: Позади view of the projector displaying its connectivity options. From left to right, the ports include AV, USB, Audio Out, VGA, HDMI, and Micro SD card slot, allowing for versatile device connections.
- AV порт: Connect to older devices using the included AV cable.
- УСБ порт: За повезивање УСБ дискова за репродукцију медија files.
- Аудио излаз: Повежите екстерне звучнике или слушалице.
- ВГА порт: Connect to computers or laptops with a VGA output.
- ХДМИ порт: Connect to devices like laptops, gaming consoles (PS4), TV sticks, etc.
- Утор за микро СД картицу: Уметните микро СД картицу да бисте репродуковали медије files.
5. Подешавање
КСНУМКС. Постављање
Choose a suitable location for your projector. For optimal viewing, place the projector on a flat, stable surface or mount it. The optimal projection distance is between 8.2 and 11.2 feet (2.5 to 3.4 meters) for a screen size of 30 to 300 inches.
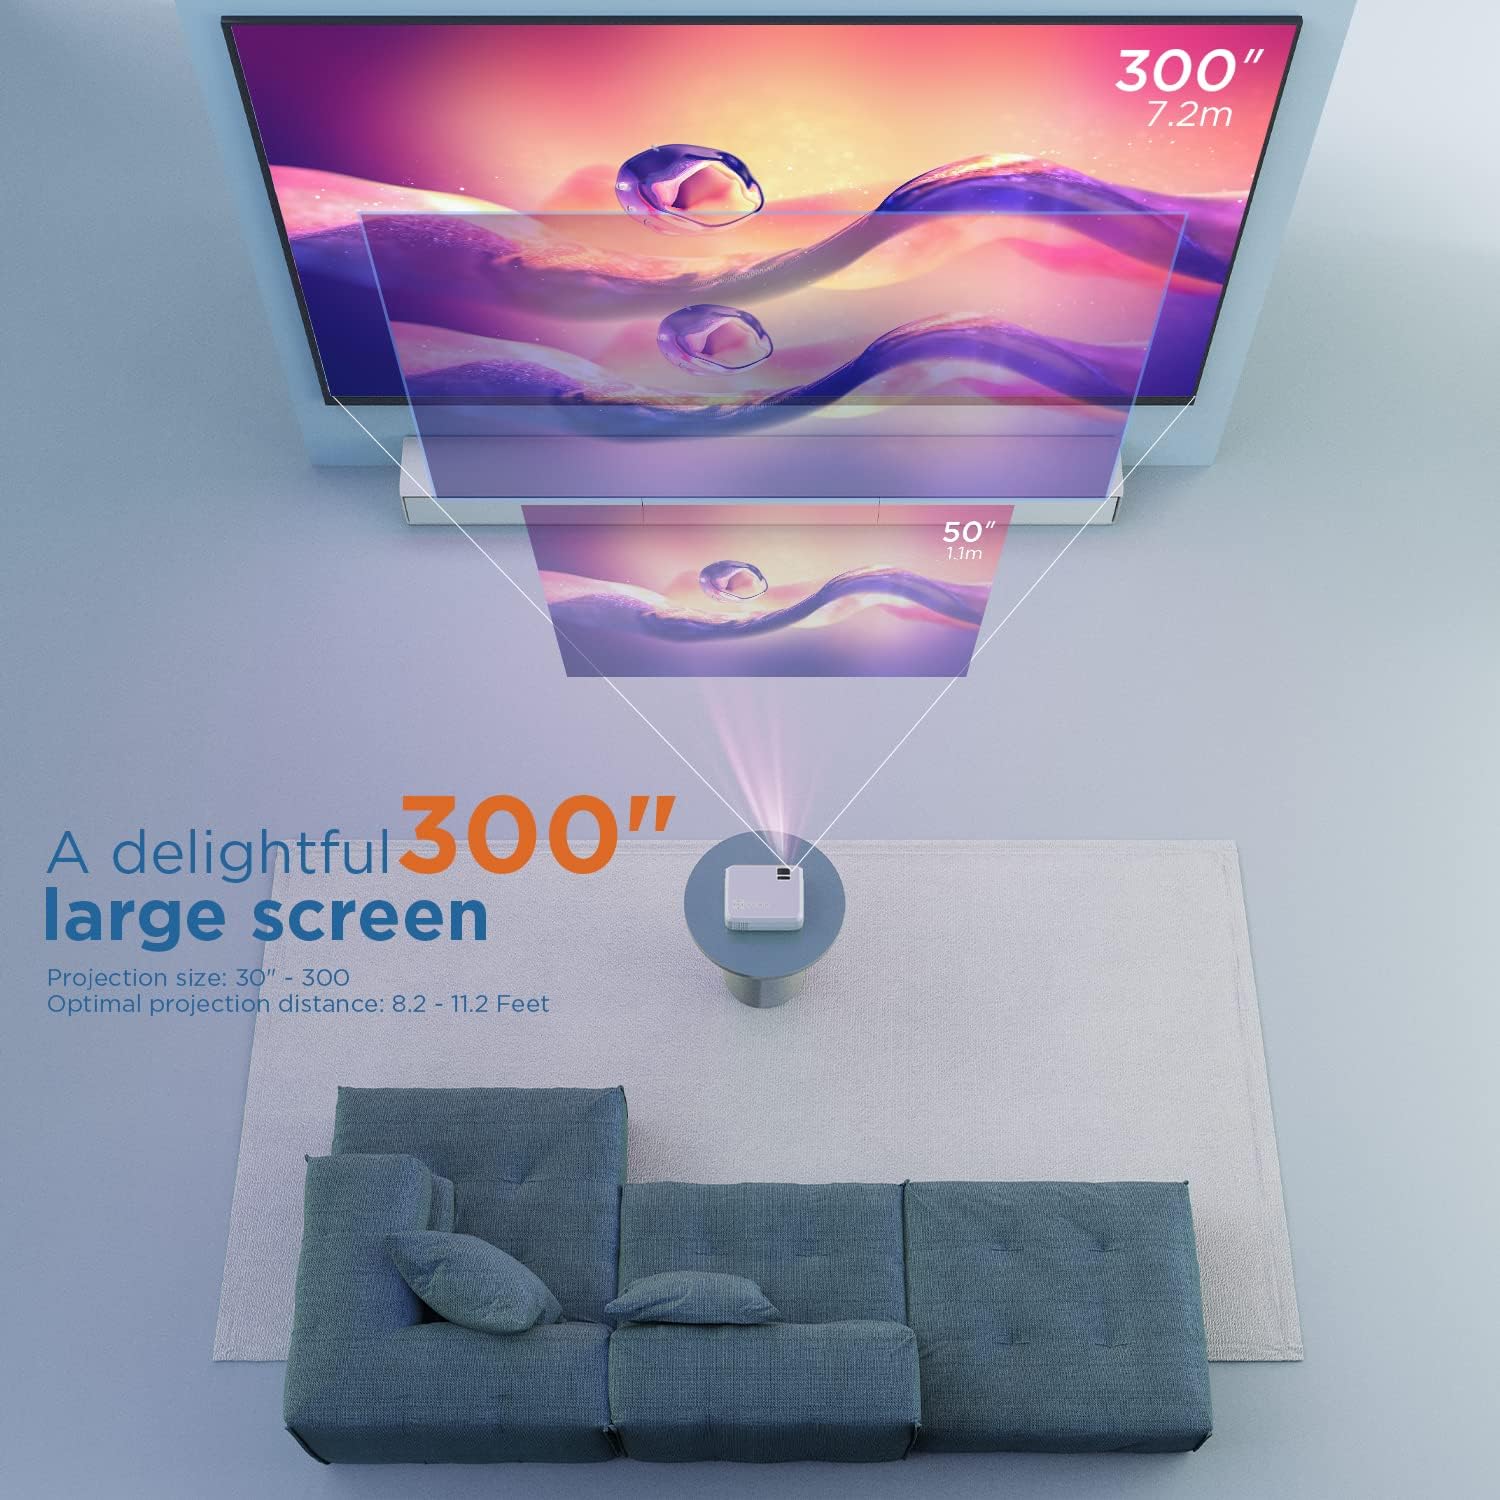
Слика 5.1: Illustration of projection distances and corresponding screen sizes. The image demonstrates how varying the distance between the projector and the screen affects the projected image size, from 50 inches (1.1m) to 300 inches (7.2m).
5.2. Прикључак за напајање
- Прикључите адаптер за напајање на улазни порт за напајање пројектора.
- Укључите адаптер за напајање у зидну утичницу.
- Притисните дугме за напајање на пројектору или даљинском управљачу да бисте га укључили.
5.3. Фокус и корекција Кеистоне
- Фокус: Окрећите прстен за фокусирање на објективу пројектора док слика не постане јасна и оштра.
- Кеистоне: If the projected image appears trapezoidal, adjust the keystone correction dial (usually located near the lens) until the image is rectangular.
6. Упутство за употребу
6.1. Основна операција
- Укључивање/искључивање: Притисните дугме за напајање на пројектору или даљинском управљачу.
- Избор улазног извора: Use the "Source" button on the remote or projector to select the desired input (HDMI, AV, USB, Micro SD, WiFi).
- Подешавање јачине звука: Користите дугмад за јачину звука на даљинском управљачу.
6.2. Повезивање уређаја
The projector supports various connection methods:
6.2.1. ХДМИ веза
Connect your laptop, gaming console (PS4), TV stick (e.g., Roku, Fire TV), or other HDMI-enabled devices using an HDMI cable. Select "HDMI" as the input source.
6.2.2. USB/Micro SD Connection
Insert a USB drive or Micro SD card into the respective port. Select "USB" or "Micro SD" as the input source. The projector will display a menu to browse and play media fileс (фотографије, видео снимци, музика, текст).
6.2.3. AV Connection
Use the included AV cable to connect to devices with AV output. Select "AV" as the input source.
6.2.4. WiFi Mirroring (Smartphone Connection)
The projector supports wireless screen mirroring from smartphones (iOS and Android).
- Select "WiFi" as the input source on the projector.
- Follow the on-screen instructions to connect your smartphone to the projector's WiFi network.
- Once connected, enable screen mirroring/casting feature on your smartphone (e.g., "Screen Mirroring" for iOS, "Smart View" or "Cast" for Android).
- Select the projector from the list of available devices.
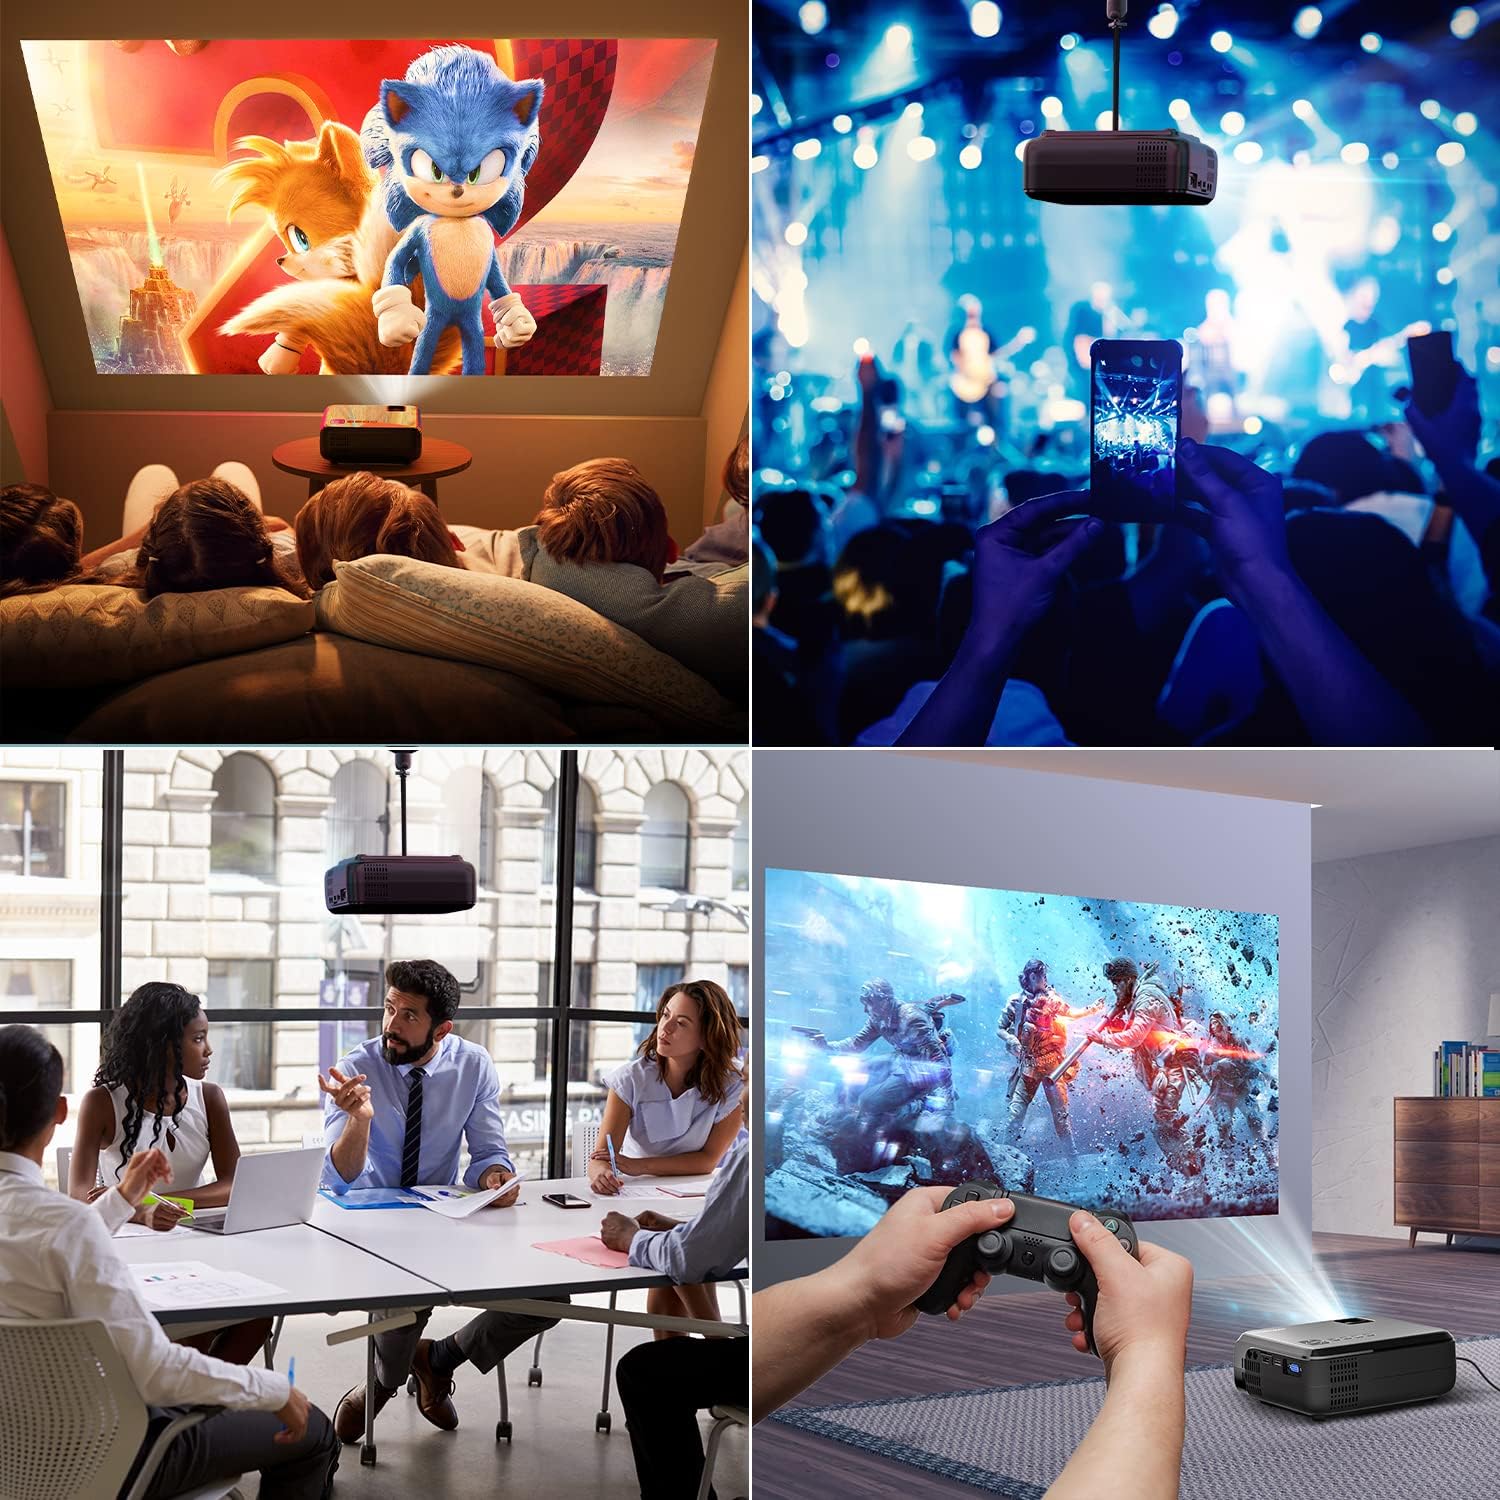
Слика 6.1: This image displays a collage of the projector in different environments: a family watching a movie, a person using a smartphone to control the projector at a concert, a business meeting with a presentation, and a person playing video games. It highlights the versatility of the BOMAKER Mini WiFi Projector for entertainment and professional use.
6.3. Visual Experience
The projector delivers a native 720P HD resolution, ensuring clear and detailed images. It supports 1080P decoding and features a high brightness output for vibrant visuals.
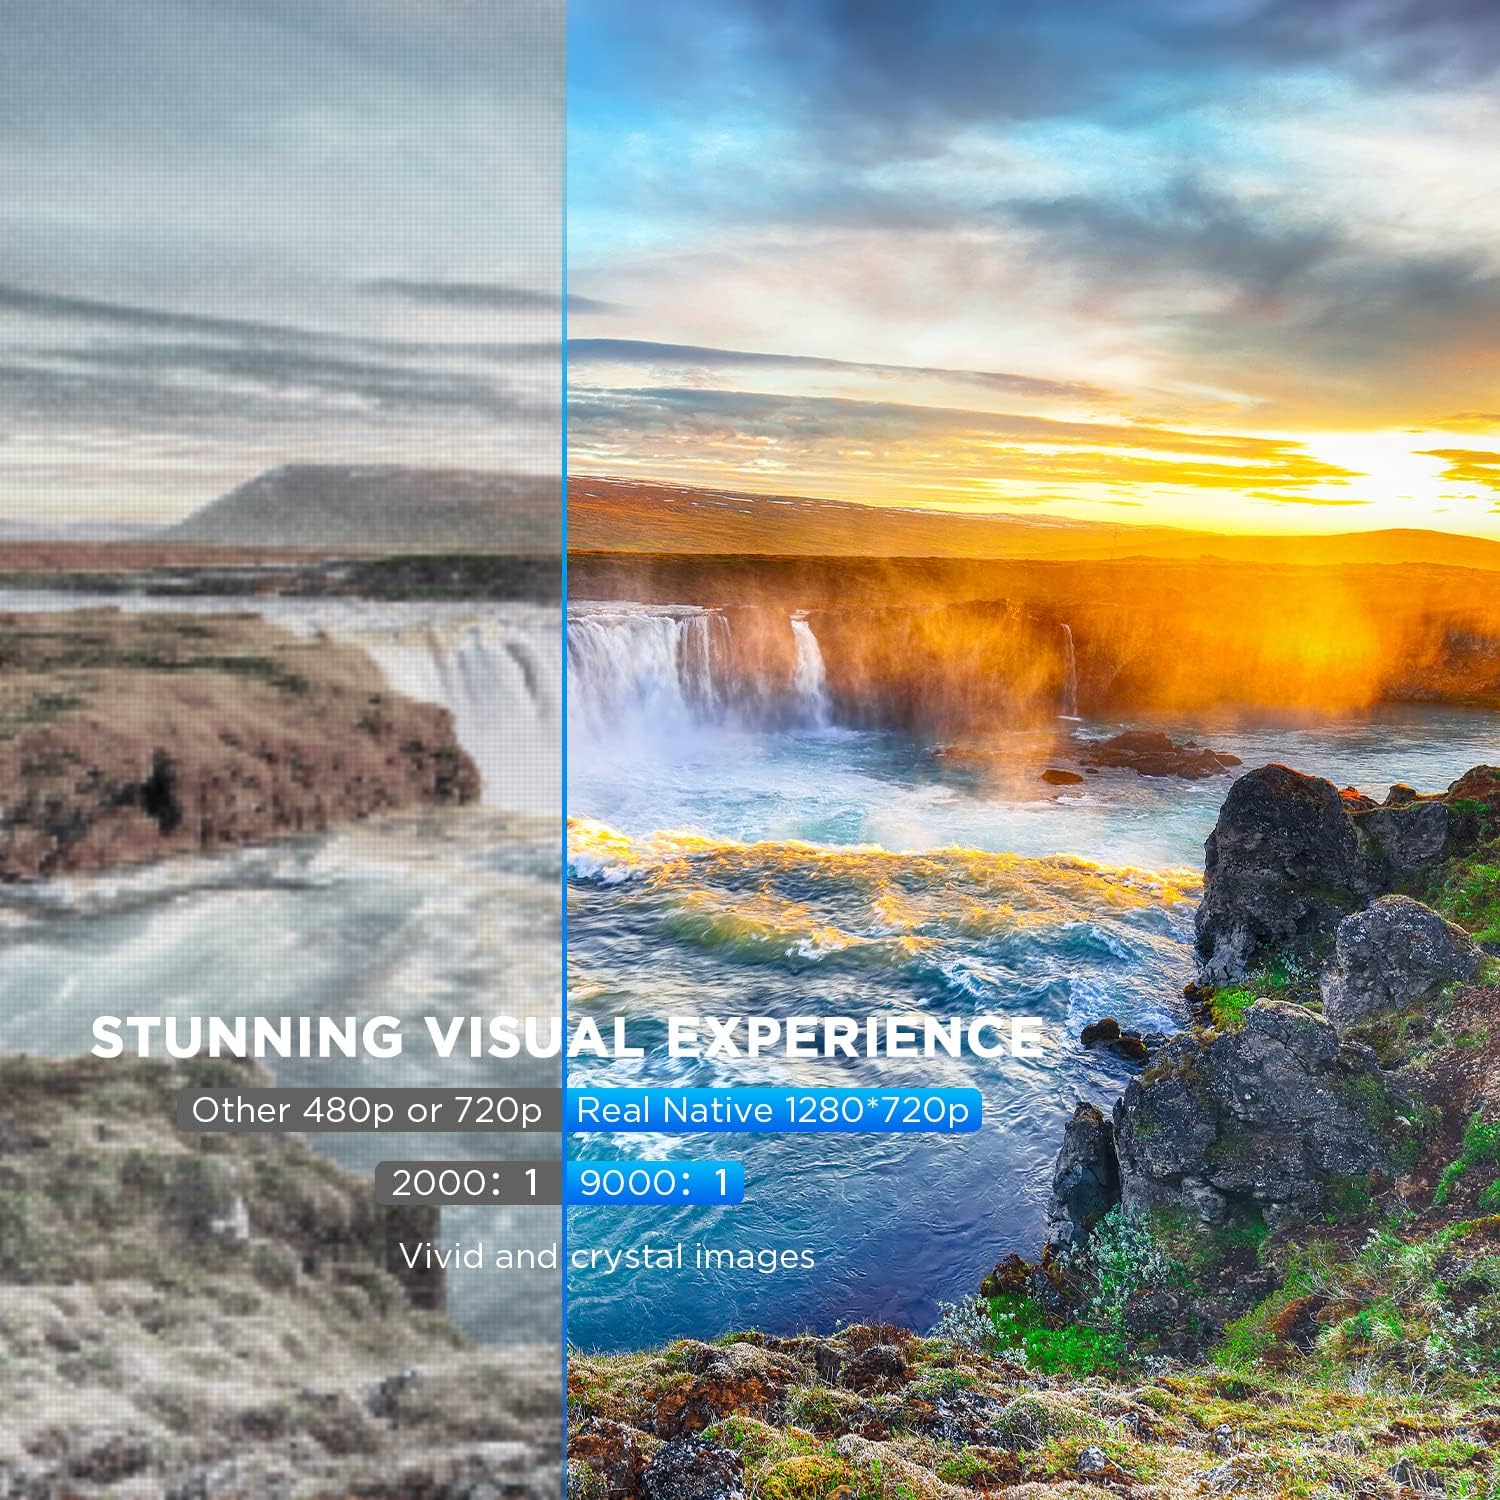
Слика 6.2: A side-by-side comparison demonstrating the difference between standard 480p/720p projection and the projector's real native 1280x720p resolution. The native resolution side shows significantly sharper details and richer colors in a landscape image, emphasizing the "Stunning Visual Experience" and "Vivid and crystal images".

Слика 6.3: This image illustrates the projector's "Crystal Clear Picture with Ultra-low Latency" feature, showing a vibrant, high-definition projection of a car racing scene on a large screen in a living room setting. The text highlights upgraded lens settings for a new visual experience with latency less than 30ms.
7. Одржавање
7.1. Чишћење сочива
Use a soft, lint-free cloth specifically designed for cleaning optical lenses. Do not use abrasive cleaners or solvents. Gently wipe the lens to remove dust or smudges.
7.2. Чишћење кућишта пројектора
Wipe the projector's exterior with a soft, dry cloth. For stubborn dirt, a slightly damp cloth can be used, followed by a dry cloth. Ensure no liquid enters the ventilation openings.
7.3. Складиштење
When not in use, store the projector in a cool, dry place, away from direct sunlight and extreme temperatures. Cover the lens with its cap to protect it from dust.
КСНУМКС. Решавање проблема
Ако наиђете на проблеме са пројектором, погледајте следеће уобичајене проблеме и решења:
| Проблем | Могући узрок | Решење |
|---|---|---|
| Нема слике на екрану | Power cable not connected; incorrect input source; device not powered on. | Check power connection; select correct input source; ensure connected device is on. |
| Слика је мутна | Фокус није подешен; пројектор је преблизу/предалеко од платна. | Подесите прстен за фокусирање; промените положај пројектора. |
| Слика је трапезоидног облика | Keystone correction not adjusted. | Подесите точкић за корекцију трапезоидног искривљења. |
| Нема звука | Volume too low; external speakers not connected; audio settings on source device. | Increase volume; connect external speakers if needed; check audio output settings on source device. |
| WiFi mirroring issues | Incorrect WiFi connection; smartphone mirroring feature not activated. | Ensure correct WiFi network is selected; activate screen mirroring on your smartphone. |
9. Спецификације
| Феатуре | Детаљ |
|---|---|
| Бранд | БОМАКЕР |
| Број модела | Mini WiFi Projector 10'' |
| Резолуција екрана | Native 1280 x 720 (Supports 1080P decoding) |
| Дисплаи Типе | ЛЦД |
| Технологија повезивања | ХДМИ, Ви-Фи |
| Компатибилни уређаји | Smartphone, TV Stick, PS4, Laptop, USB Drive, Micro SD Card |
| Димензије производа | 22Д x 17Д x 9В центиметара |
| Форм Фацтор | Портабле |
| Препоручена употреба | Кућни биоскоп, игре |
| Боја | Бела |
10. Гаранција и подршка
For warranty information or technical support, please refer to the documentation included with your purchase or contact BOMAKER customer service. Details regarding specific warranty periods and support channels are typically provided on the manufacturer's official webсајту или унутар паковања производа.
Ask a question about this manual
Ask about setup, troubleshooting, compatibility, parts, safety, or missing instructions. Manuals+ will review the question and use this page’s manual context to help answer it.