1. Увод
The Beelink SER3 Mini PC is a compact and powerful computing solution designed for a variety of tasks, from business applications and home entertainment to online courses and light gaming. Equipped with an AMD Ryzen 3 3200U processor, 16GB of DDR4 RAM, and a 500GB PCIe SSD, it offers efficient performance in a small form factor. This manual provides essential information for setting up, operating, maintaining, and troubleshooting your Mini PC.

Слика 1: Предња страна view of the Beelink SER3 Mini PC, showcasing its compact design and accessible front ports.
2. Шта је у кутији
Молимо вас да проверите садржај пакета након распакивања како бисте били сигурни да су сви елементи присутни:
- 1 x Mini PC
- 1 к ХДМИ кабл
- 1 к адаптер за напајање
- 1 к Упутство за употребу

Figure 2: Included accessories for the Beelink SER3 Mini PC.
3. Производ је готовview
3.1. External Features and Ports
The Beelink SER3 Mini PC features a sleek, compact design with strategically placed ports for easy connectivity.
Предњи панел:
- Дугме за напајање: Да бисте укључили/искључили уређај.
- УСБ 3.2 портови (к2): За брзи пренос података са компатибилним уређајима.
- Audio Jack (HP&MIC): За слушалице и микрофон.
- CLR CMOS: Button to clear CMOS settings.

Figure 3: Front panel of the Mini PC with power button, USB ports, and audio jack.
Задња плоча:
- ЛАН (РЈ-45): Гигабитни Етернет порт за жичану мрежну везу.
- УСБ 3.2 портови (к2): Додатни брзи УСБ портови.
- HDMI портови (x2): Supports dual 4K@60Hz display output.
- ДЦ Јацк: За повезивање адаптера за напајање.

Figure 4: Rear panel of the Mini PC with network, USB, HDMI, and power input.
3.2. Internal Components
The Mini PC is designed for easy access to its internal components for upgrades and maintenance.
Слика 5: Експлодирао view illustrating the internal structure and components of the Mini PC.
4. Подешавање
- Повежите периферне уређаје: Connect your keyboard, mouse, and monitor(s) to the appropriate USB and HDMI ports.
- Повежите се на мрежу: For wired connection, plug an Ethernet cable into the LAN port. For wireless, ensure your Wi-Fi network is available during initial setup.
- Прикључите напајање: Plug the power adapter into the DC Jack on the rear panel, then connect it to a power outlet.
- Укључено: Press the power button on the front panel to turn on the Mini PC.
5. Упутство за употребу
- Прво покретање: Upon first boot, the system will guide you through the Windows 11 setup process. Follow the on-screen instructions to configure your language, region, network, and user account.
- Укључивање/искључивање: Press the power button once to turn on the device. To shut down, use the standard Windows shutdown procedure (Start Menu > Power > Shut down). A short press on the power button will put the PC to sleep.
- Поново покрени: Use the standard Windows restart procedure (Start Menu > Power > Restart).
- Двоструки екран: Connect up to two monitors via the HDMI ports for extended desktop functionality.
6. Надоградња компоненти
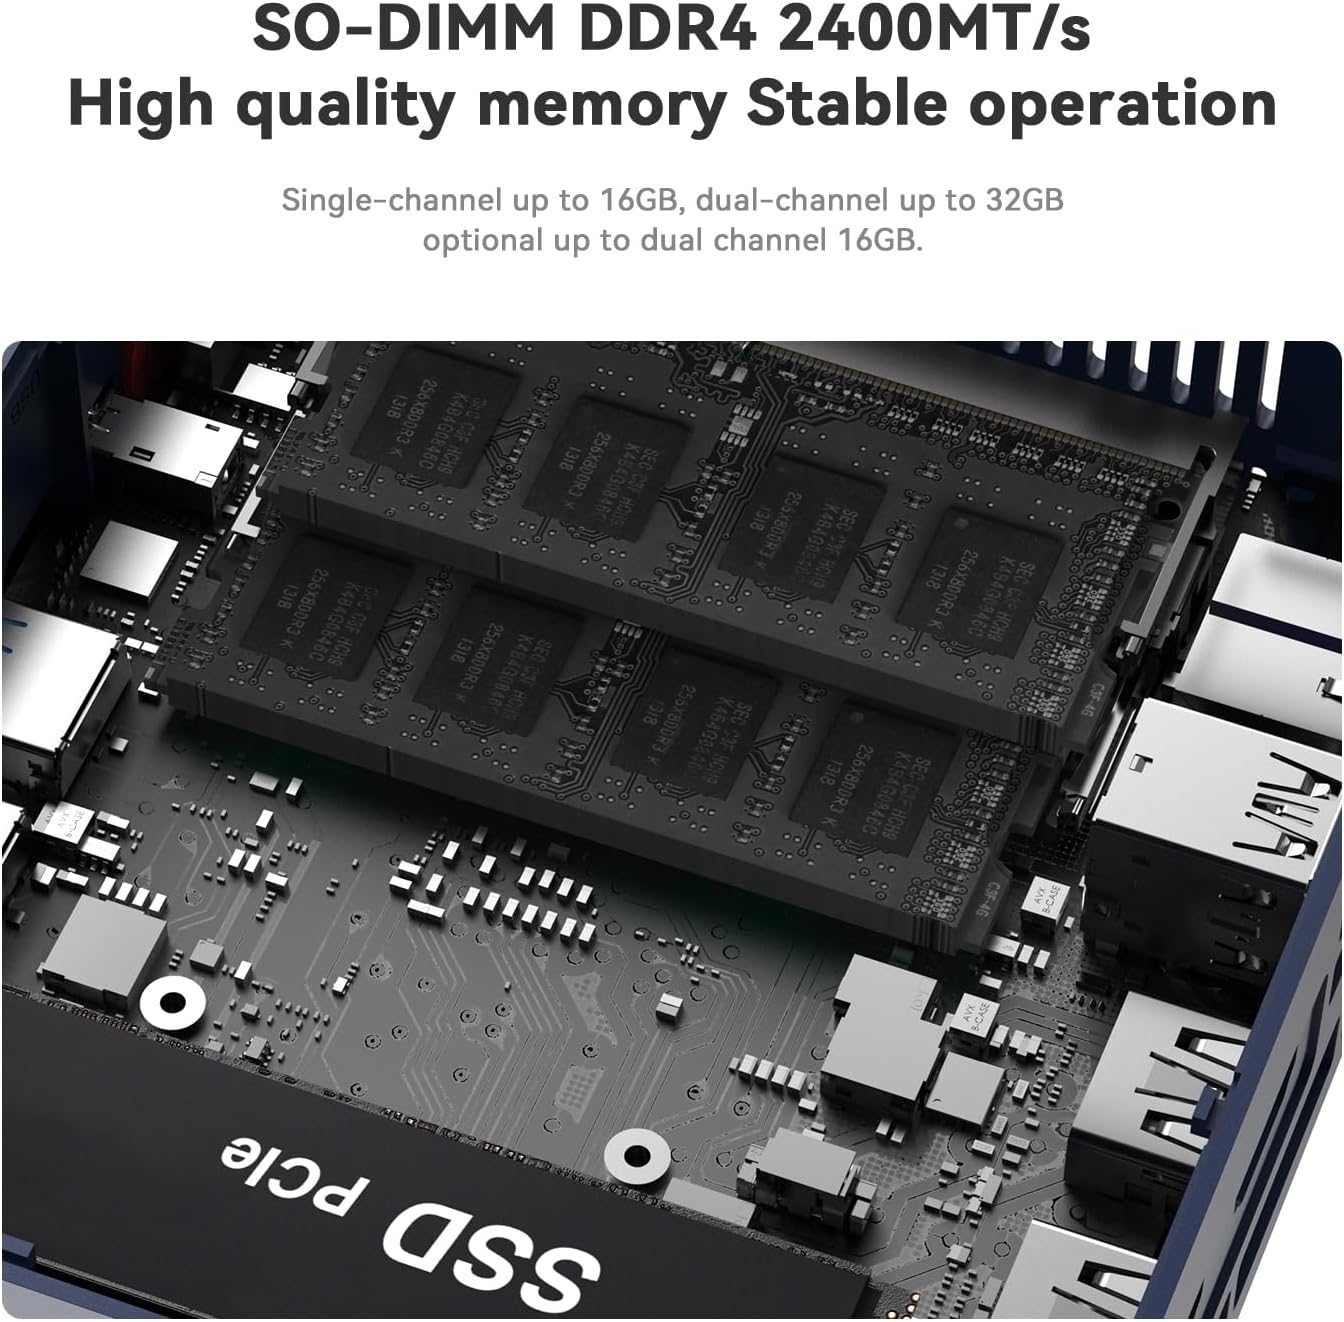
The Beelink SER3 Mini PC allows for easy upgrades of its RAM and storage components.
6.1. RAM Upgrade
The device comes with 16GB DDR4 RAM (2400MHz) and can be upgraded to a maximum of 32GB (2 x 16GB).
6.2. SSD Upgrade
The Mini PC includes a 500GB M.2 PCIe 3.0 x4 (2280) SSD, which can be upgraded to a maximum of 2TB. It also supports adding a 2.5-inch SATA HDD/SSD (up to 2TB).

Figure 6: Internal layout highlighting the M.2 SSD and RAM slots for easy upgrades.
6.3. Upgrade Tutorial Video
For a detailed visual guide on upgrading the SSD, please refer to the official tutorial video:
Video 1: Official tutorial on how to replace the SSD in a Beelink Mini PC.
7. Windows 11 Installation
Your Beelink SER3 Mini PC comes pre-installed with Windows 11 Pro. If you need to reinstall the operating system, follow these general steps:
- Припремите инсталациони медијум: Create a bootable USB drive with Windows 11 installation files using the Microsoft Media Creation Tool.
- Покретање са УСБ-а: Connect the bootable USB drive to the Mini PC. Power on the PC and repeatedly press the designated key (usually F7 or DEL, refer to your specific model's quick start guide) to enter the boot menu. Select your USB drive as the boot device.
- Пратите упутства на екрану: The Windows setup wizard will guide you through the installation process. Choose your language, time, and keyboard settings. Select the custom installation option to manage disk partitions.
- Disk Partitioning: If reinstalling, you may need to delete existing partitions on your SSD before creating new ones for a clean installation. Ensure you back up any important data beforehand.
- Комплетна инсталација: Follow the remaining prompts to complete the Windows 11 installation. The PC will restart several times.
7.1. Windows 11 Installation Tutorial Video
For a visual guide on installing Windows 11, please watch the official tutorial:
Video 2: Official tutorial demonstrating the steps to install Windows 11 on a Beelink Mini PC.
8. Инсталација драјвера
After installing Windows 11, it is crucial to install the correct drivers for optimal performance. While Windows Update may install some drivers automatically, it is recommended to download the latest drivers directly from the Beelink support webсајту.
- Преузмите драјвере: Visit the official Beelink support webсајт (www.bee-link.com/support). Navigate to the 'Drivers & Downloads' section.
- Locate Your Model: Тражи 'SER3' or your specific model number to find the relevant drivers.
- Преузмите и инсталирајте: Download all necessary drivers (e.g., chipset, graphics, Wi-Fi, Bluetooth, audio). Unzip them if necessary and follow the installation instructions provided with each driver package. Restart your PC after installing all drivers.
9. Спецификације
| Феатуре | Спецификација |
|---|---|
| Бранд | Беелинк |
| Назив модела | Beelink SER3 |
| ЦПУ модел | AMD Ryzen 3 3200U (2C/4T, до 3.5 GHz) |
| Грапхицс Цопроцессор | Radeon Vega 3 Graphics (3core 1200 MHz) |
| РАМ меморија | 16GB DDR4 2400MHz (Upgradeable to 32GB) |
| Хард Диск | 500GB M.2 PCIe 3.0 x4 (2280) SSD (Upgradeable to 2TB) |
| Додатно складиште | Supports 2.5" SATA HDD/SSD (up to 2TB) |
| Оперативни систем | Виндовс 11 Про |
| Бежично повезивање | WiFi6 (802.11ac), Bluetooth 5.2 |
| ЛАН | 1000M Gigabit Ethernet |
| Видео Оутпут | 2 x HDMI (4K@60Hz Dual Display) |
| УСБ портови | 4 к УСБ 3.2 |
| Аудио Порт | 1 x Audio Jack (HP&MIC) |
| Метод хлађења | Fan, Large fan and dual heat conduction tube |
| Димензије | 124к113к42мм |
КСНУМКС. Решавање проблема
If you encounter any issues with your Beelink SER3 Mini PC, please refer to the following general troubleshooting tips:
- Нема напајања: Уверите се да је адаптер за напајање безбедно повезан и са рачунаром и са исправном утичницом. По потреби покушајте са другом утичницом.
- Без приказа: Check all HDMI cable connections. Ensure your monitor is set to the correct input source. Try a different HDMI cable or monitor.
- Систем не реагује: Press and hold the power button for 10 seconds to force a shutdown, then restart the PC. If the issue persists, try clearing the CMOS settings using the CLR CMOS button on the front panel (refer to the quick start guide for location).
- Проблеми са мрежом: For wired connections, check the Ethernet cable and router. For Wi-Fi, ensure the network is available and you have the correct password. Update Wi-Fi drivers if needed.
- Проблеми са драјверима: If devices are not working correctly, ensure all drivers are installed and up-to-date from the official Beelink support webсајту.
11. Гаранција и подршка
Beelink is committed to providing excellent after-sales service for your Mini PC.
- гаранција: Your Beelink SER3 Mini PC comes with a 3-year warranty.
- техничка подршка: We offer lifetime technical support.
- Сервис након продаје: 24/7 after-sales service is available.
If you have any questions or require assistance, please do not hesitate to contact us. We are 100% guaranteed to solve your problems.
11.1. How to Contact Us Video
For information on how to reach our support team, please watch the following video:
Video 3: Official guide on contacting Beelink customer support.