Увод
This manual provides detailed instructions for the setup, operation, and maintenance of your Dcorn DMR-07 7-inch HDMI Digital Microscope. Designed for a wide range of applications, from coin inspection to circuit board repair, this microscope offers up to 1300X magnification and a 16MP camera for clear, detailed viewing. Please read this manual thoroughly before using the device to ensure proper functionality and longevity.
Садржај пакета
Проверите да ли су све ставке наведене у наставку укључене у ваш пакет:
- 7-inch LCD Display Microscope
- Метална база
- Метални сталак
- 3 Guidebooks (e.g., A Guide to Coin Collection, How to Solder)
- Бежични даљински управљач
- ХДМИ кабл
- 32ГБ ТФ картица
- Лигхт Барриер
- Поклон кутија
- Extension Tube (4.7 inches)
- пуњач
- Кориснички приручник (овај документ)

Сетуп
1. Assembling the Stand and Microscope
- Attach the metal stand to the metal base. Secure it firmly using the provided knob.
- Mount the microscope unit onto the adjustable bracket on the metal stand. Ensure it is securely fastened.
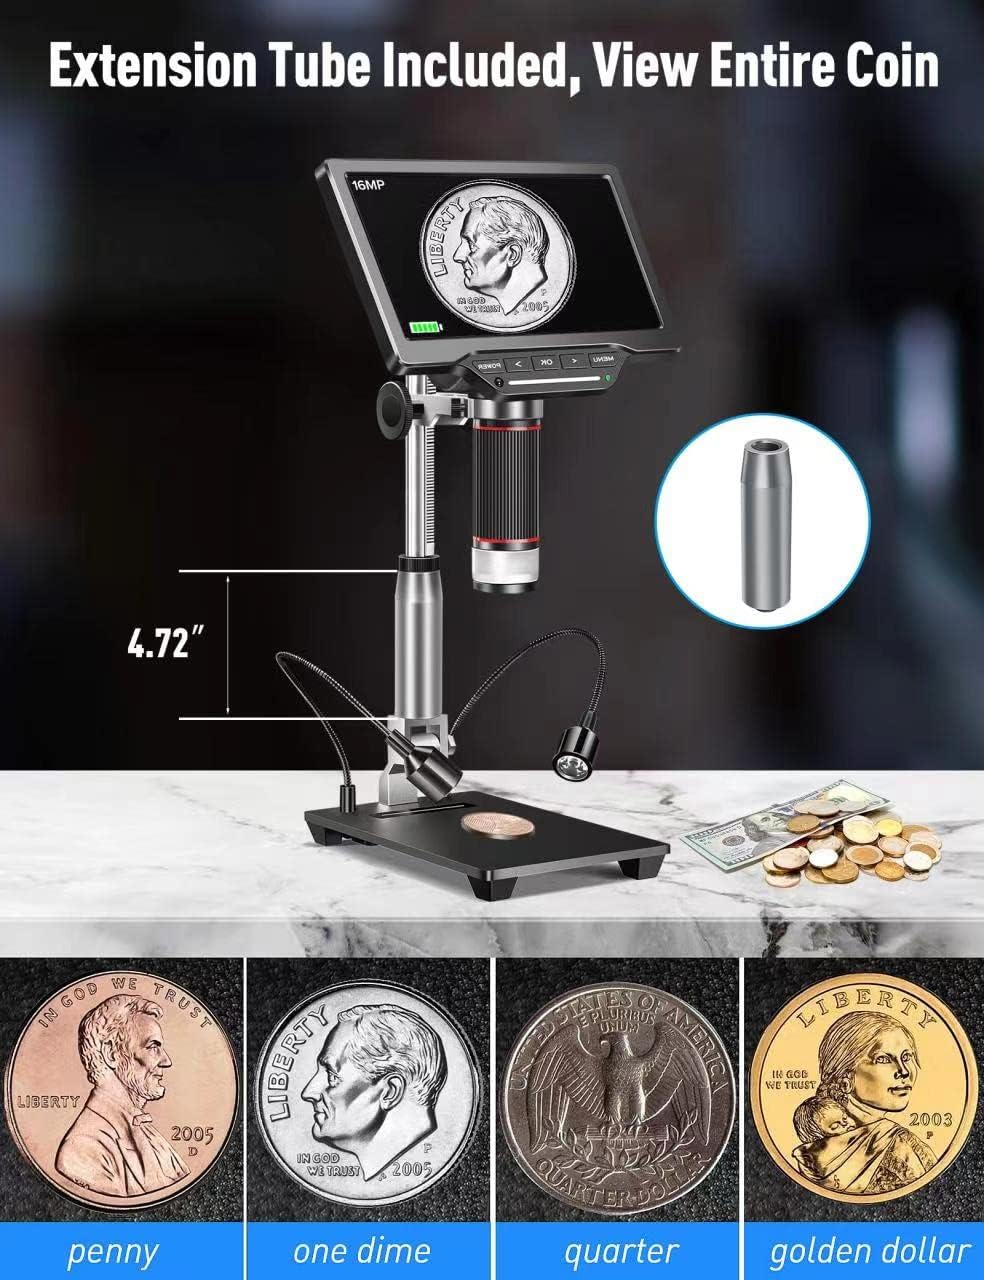
- If extended working distance is required, insert the 4.7-inch extension tube between the microscope lens and the main body. This allows for a wider field of view, ideal for observing entire coins.
2. Connecting External LED Lights
The two external LED lights provide additional illumination for your specimens. Connect the Type-C end of the light cables to the USB output ports on the microscope base.
3. Укључивање
Connect the power adapter to the microscope and a power outlet. Press the 'POWER' button on the microscope to turn it on. The 7-inch LCD display will illuminate.
4. Video: How to Install
Видео 1: A step-by-step guide demonstrating the physical assembly of the Dcorn DMR-07 Digital Microscope, including attaching the stand, microscope unit, and optional extension tube.
Упутство за употребу
1. Басиц Viewинг анд Фоцусинг
- Place the specimen on the observation platform.
- Adjust the height of the microscope unit using the knob on the stand until the specimen appears on the screen.
- Rotate the focus wheel on the microscope body to achieve a clear and sharp image.

2. Adjusting LED Lights
The microscope features built-in LEDs and two adjustable side lights. The side lights are controlled via touch-sensitive areas on the base.
- Уграђене ЛЕД диоде: These provide primary illumination.
- Side Lights: Touch the designated areas on the base to turn the side lights on/off and adjust their brightness. These are useful for reducing glare and enhancing contrast on reflective surfaces.
3. Video: 10 LEDs - Touch Control
Видео 2: Demonstration of the touch-controlled 10 LED lighting system on the Dcorn DMR-07 Digital Microscope.
4. Снимање фотографија и видео записа
The microscope supports capturing still images and recording video footage directly to the included 32GB TF card.
- Use the 'OK' button on the microscope or the corresponding button on the wireless remote control to capture a photo or start/stop video recording.
- Navigate through the menu using the arrow buttons to select photo/video mode and adjust settings like resolution.


5. Connecting to PC and TV
The microscope offers HDMI and USB output for viewing on larger screens.
- ХДМИ излаз: Connect the provided HDMI cable from the microscope's HD port to an HDMI input on a TV or monitor. This provides a direct, high-quality display.
- УСБ излаз: Connect the provided USB cable from the microscope's USB port to a computer. The microscope can function as a UVC (USB Video Class) device, allowing you to view the live feed using standard camera software on your computer (Windows/Mac compatible).

6. Video: How to Connect to a PC
Видео 3: A guide demonstrating how to connect the Dcorn DMR-07 Digital Microscope to a PC and view живи феед.
Одржавање
- Чишћење сочива: Use the provided cleaning cloth or a soft, lint-free cloth to gently wipe the lens. For stubborn smudges, use a lens cleaning solution designed for optical devices.
- Чишћење екрана: Wipe the LCD screen with a soft, dry cloth. Avoid using abrasive cleaners or solvents.
- Општа нега: Keep the microscope in a clean, dry environment. Avoid exposing it to extreme temperatures, humidity, or direct sunlight. When not in use, store it in its original packaging or a protective case.
Решавање проблема
- Нема напајања: Ensure the power adapter is securely connected to both the microscope and a working power outlet. Check if the power button is pressed.
- Замућена слика: Adjust the focus wheel on the microscope body. Ensure the specimen is within the working distance of the lens. Clean the lens if necessary.
- No Image on External Display (HDMI/USB): Verify that the cables are correctly connected. For USB connection, ensure appropriate camera software is running on your computer and the microscope is selected as the input device.
- Светла не раде: Check the connections of the external LED lights to the base. For touch-controlled lights, ensure you are touching the correct activation area.
- Cannot Capture Photos/Videos: Ensure the 32GB TF card is properly inserted and has sufficient free space. Check the menu settings to confirm the correct mode is selected.
Спецификације
| Феатуре | Спецификација |
|---|---|
| Модел | ДМР-07 |
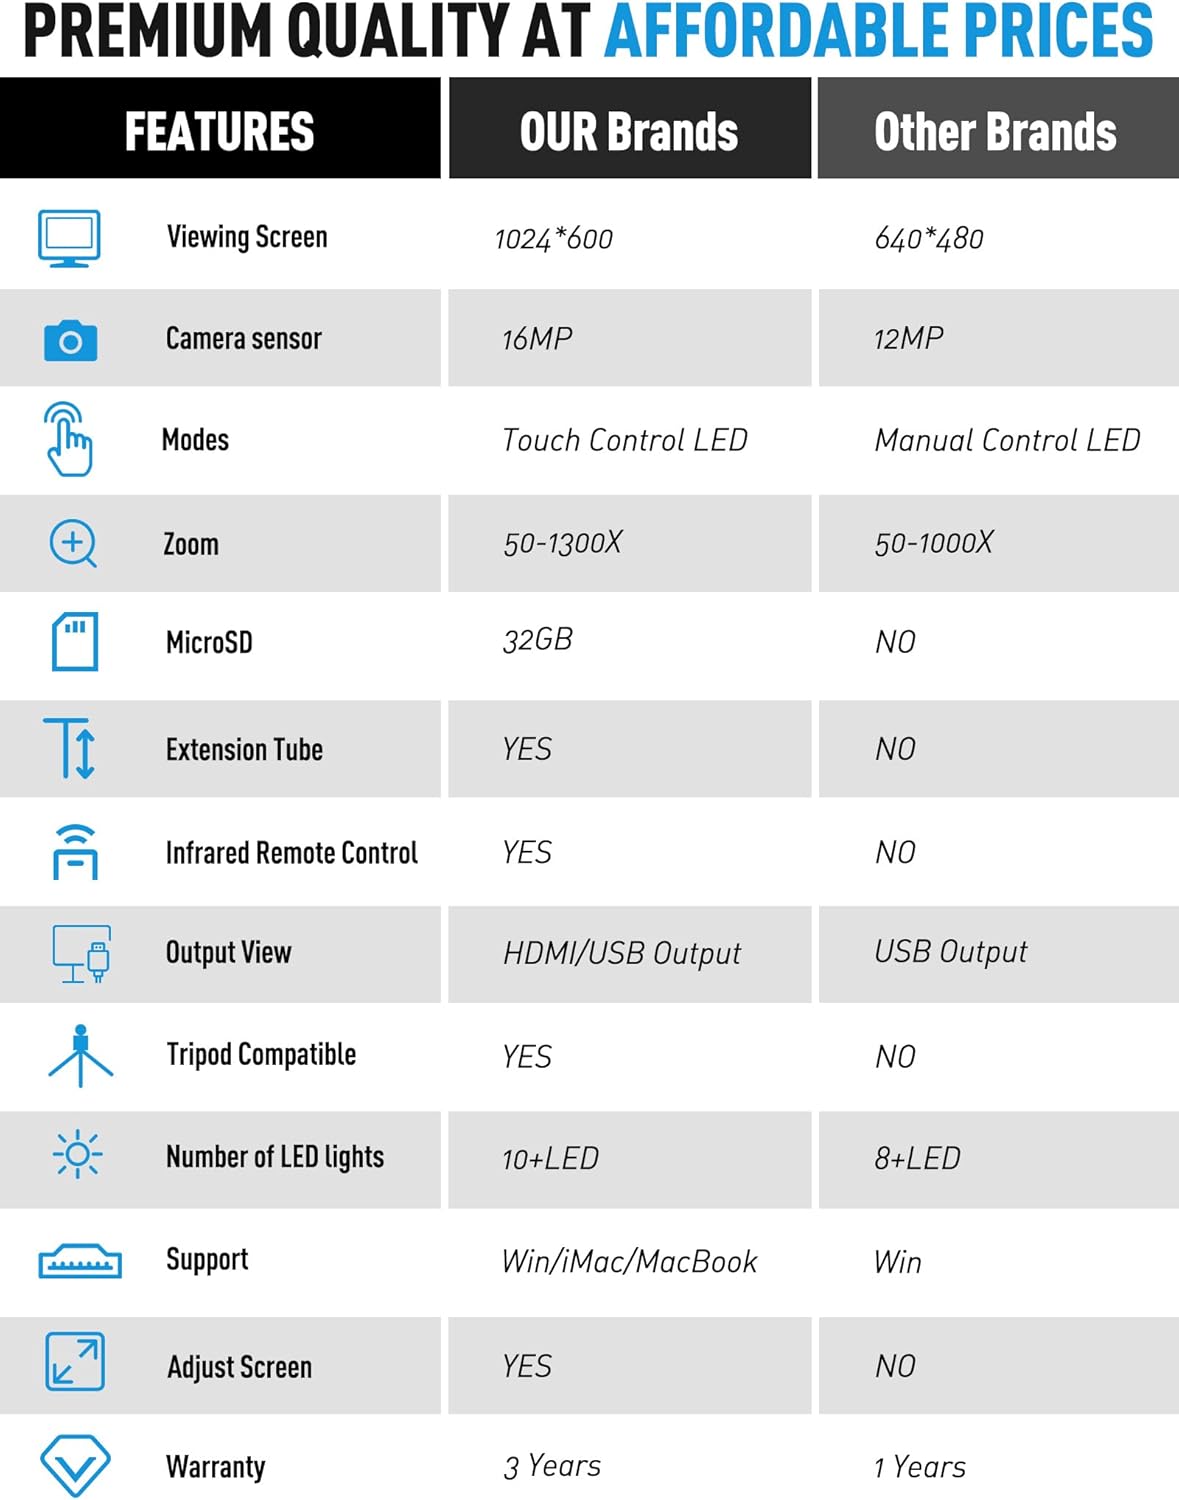
| Величина екрана | 7-инчни ЛЦД |
| Сензор камере | 16МП |
| Увећање | До 1300Кс |
| Извор светлости | LED (Built-in & Touch Control Side Lights) |
| Излаз | ХДМИ, УСБ |
| Складиштење | MicroSD (32GB TF card included) |
| Ектенсион Тубе | 4.7-inch included |
| Ремоте Цонтрол | Wireless Infrared Remote Control |
| Компатибилни уређаји | Лаптоп, лични рачунар, телевизор |
| Подршка за оперативни систем | Виндовс, Мац |
| Боја | Сребро |
| Тежина артикла | 4.46 фунти |
| Димензије пакета | 11.18 к 10.94 к 3.86 инча |
Информације о гаранцији
The Dcorn DMR-07 Digital Microscope comes with a 3 година гаранције од датума куповине. Ова гаранција покрива производне недостатке и гарантује да производ испуњава наведене стандарде перформанси. Молимо вас да сачувате доказ о куповини за потребе подношења захтева за гаранцију.
Корисничка подршка
For any questions, technical assistance, or support regarding your Dcorn DMR-07 Digital Microscope, please contact our customer support team:
Емаил: суппорт@дцорнус.цом