
1. Увод
The Ricoh M 320 is a high-productivity, low-maintenance multifunction device designed for printing, copying, and scanning in workspaces with limited space. This system offers easy monitoring and management of print history, device settings, and network protocols. Featuring a 5 GHz Wi-Fi interface, it ensures a stable wireless connection by reducing bottlenecks. Its compact design makes it suitable for various office environments. Setup and operation are designed to be straightforward. The integrated scan and copy functions facilitate easy digitization and sharing of documents. The all-in-one toner cartridge is high-capacity and simple to replace. Full support is provided for Windows, Mac, and Linux operating systems, with both 2.4 GHz and 5 GHz WLAN capabilities.
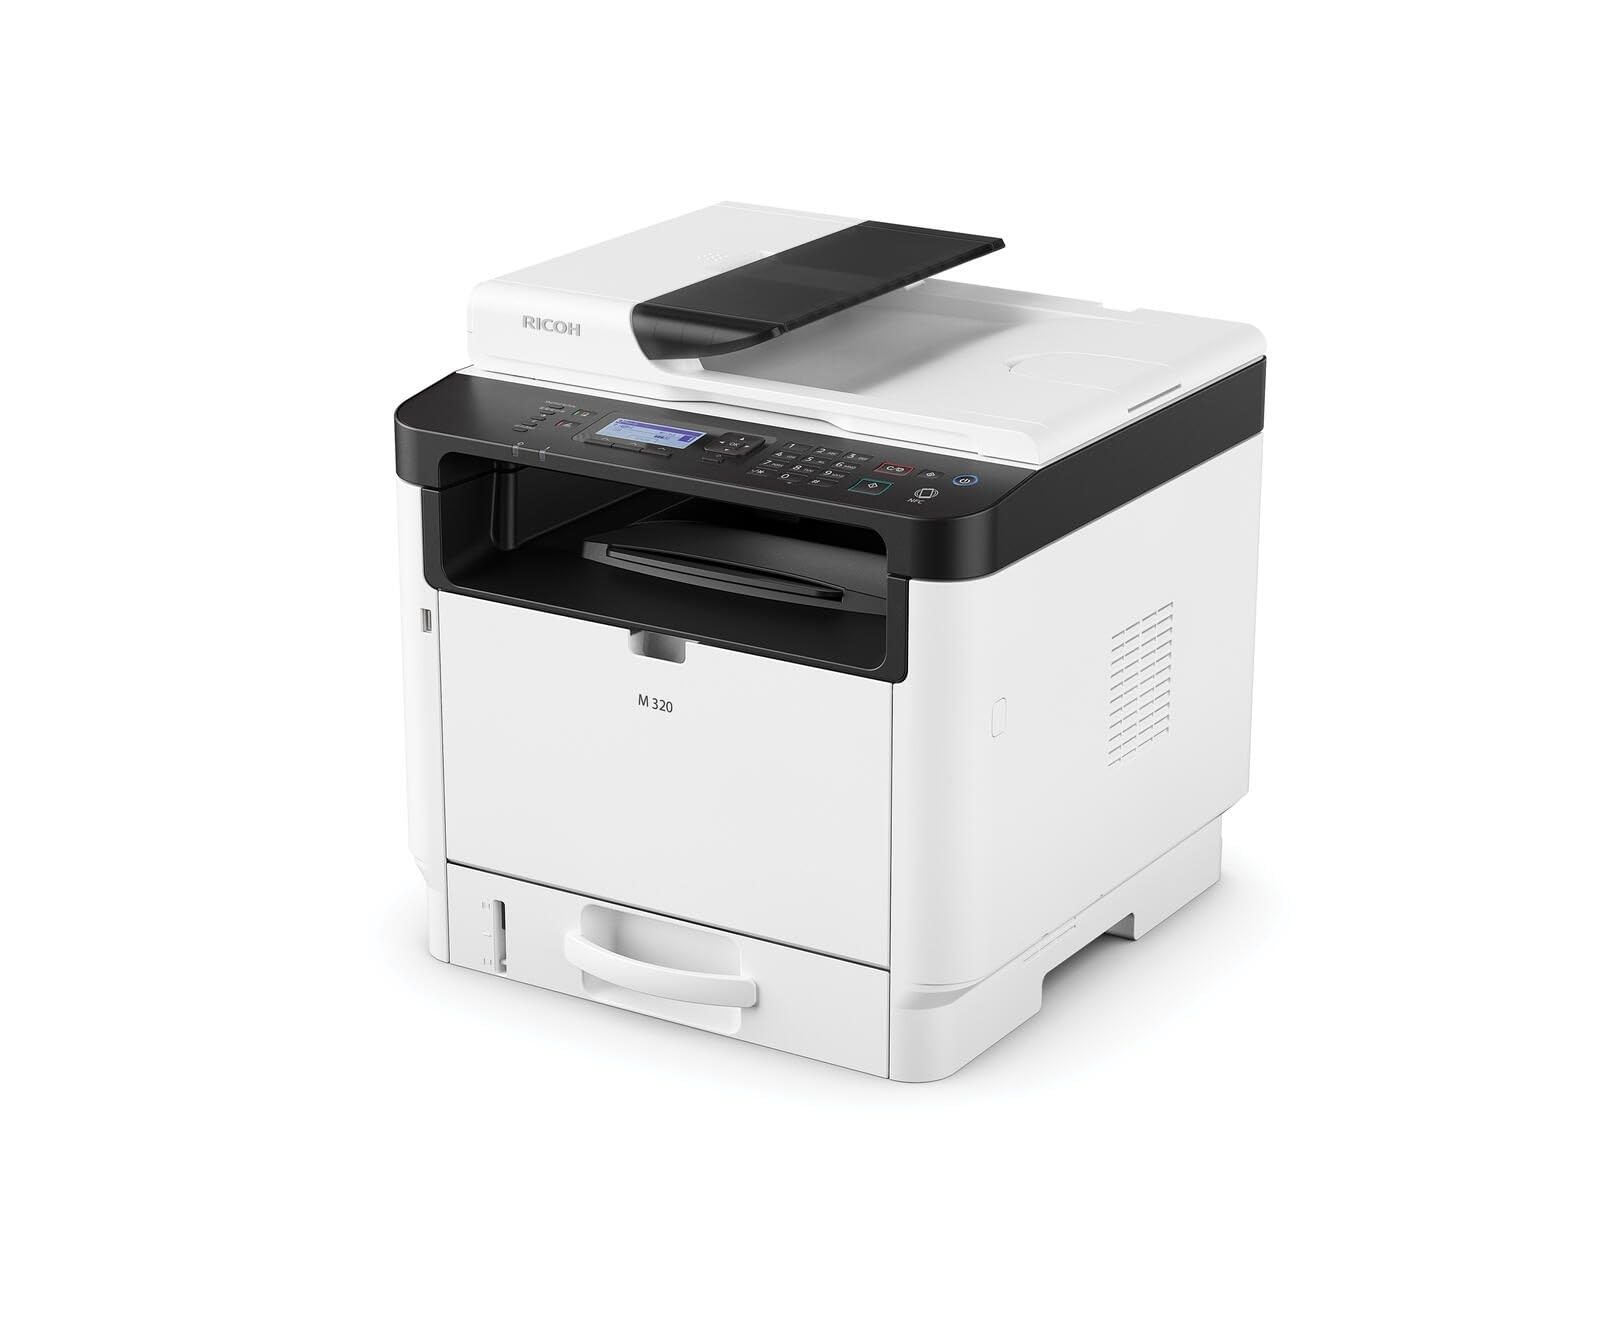
Figure 1: Ricoh M 320 Multifunction System. This image displays the compact design of the Ricoh M 320, highlighting its main components including the paper tray and control panel.
1.1 Шта је у кутији
Проверите да ли су све ставке присутне у пакету:
- Ricoh M 320 Multifunction System
- Повер Цабле
- Стартер кертриџ са тонером
- Водич за подешавање
- ЦД са софтвером (може да варира у зависности од региона)
2. Подешавање
2.1 Распакивање и постављање
- Извадите штампач из амбалаже.
- Уклоните све заштитне траке и материјал за паковање са спољашњости и унутрашњости штампача.
- Поставите штампач на стабилну, равну површину са одговарајућом вентилацијом. Обезбедите довољно простора око штампача за рад и одржавање.
2.2 Прикључак за напајање
- Connect the power cable to the printer's power input.
- Укључите други крај кабла за напајање у уземљену електричну утичницу.
- Притисните дугме за напајање да бисте укључили штампач.
2.3 Инсталација кертриџа са тонером
- Отворите предњи поклопац штампача.
- Carefully remove the new toner cartridge from its packaging and gently shake it horizontally several times to distribute the toner evenly.
- Insert the toner cartridge into the printer until it clicks into place.
- Затворите предњи поклопац.
2.4 Уметање папира
- Извуците лежиште за папир.
- Adjust the paper guides to match the size of the paper you are loading (up to A4).
- Убаците гомилу папира у лежиште, водећи рачуна да буде равна и да не прелази линију за максимално пуњење.
- Пажљиво вратите лежиште за папир у штампач.
2.5 Мрежна веза
The Ricoh M 320 supports both Ethernet and Wi-Fi connectivity.
Етхернет веза:
- Повежите Етернет кабл са мрежног рутера или пребаците га на Етернет порт на задњој страни штампача.
- The printer will automatically attempt to obtain an IP address.
Wi-Fi Connection (2.4 GHz / 5 GHz):
- On the printer's 4-line LCD display, navigate to the Network Settings menu.
- Select "WLAN Setup" or "Wi-Fi Setup".
- Изаберите своју Wi-Fi мрежу са листе доступних мрежа.
- Enter the Wi-Fi password (WPA/WPA2 key) using the control panel.
- Confirm the settings. The printer will connect to the network.
2.6 Инсталација драјвера и софтвера
To use all functions of the Ricoh M 320, install the necessary drivers and software on your computer.
- Windows/Mac/Linux: Insert the provided software CD into your computer's CD/DVD drive and follow the on-screen instructions. Alternatively, download the latest drivers and utilities from the official Ricoh support webсајту.
- Mobile Devices (iOS/Android): Download the Ricoh Smart Device Connector app from your device's app store to enable mobile printing and scanning. The printer supports AirPrint and Mopria.
3. Руковање штампачем
3.1 Штампање докумената
- Отворите документ који желите да одштампате на рачунару или мобилном уређају.
- Изаберите „Штампај“ из менија апликације (нпр. File > Штампа).
- Choose "Ricoh M 320" as your printer.
- Adjust print settings such as number of copies, paper size, and duplex printing (automatic duplex is supported).
- Кликните на „Штампај“.
The printer offers high-quality black and white printing at 1200 x 1200 dpi. Maximum print speed for black and white is 13 pages per minute, and for color is 4.5 pages per minute.
3.2 Копирање докумената
- Place the document face-down on the scanner glass or face-up in the Automatic Document Feeder (ADF). The ADF supports up to 35 sheets.
- На контролној табли штампача изаберите „Копирај“.
- Use the navigation buttons to adjust settings such as number of copies (up to 35 per run), copy quality, and zoom.
- Притисните дугме „Старт“ да бисте започели копирање.
3.3 Скенирање докумената
Documents can be scanned to a computer or mobile device.
- Поставите документ на стакло скенера или у ADF.
- On your computer, open the scanning software (e.g., Ricoh Scan Utility) or use the "Scan" function from the Ricoh Smart Device Connector app on your mobile device.
- Select "Ricoh M 320" as the scanner.
- Choose scan settings such as resolution (up to 1200 x 1200 dpi), color mode, and destination folder.
- Покрените скенирање.
3.4 Mobile Printing and Scanning
The Ricoh M 320 supports mobile printing and scanning via AirPrint, Mopria, and the Ricoh Smart Device Connector app.
- AirPrint (iOS): Ensure your iOS device is connected to the same Wi-Fi network as the printer. Open the document or photo, tap the share icon, and select "Print". Choose the Ricoh M 320.
- Mopria (Android): Ensure your Android device has the Mopria Print Service installed and is connected to the same Wi-Fi network. Open the document or photo, tap the menu icon, and select "Print". Choose the Ricoh M 320.
- Ricoh Smart Device Connector App: Use the dedicated app for advanced mobile printing, scanning, and device management features.
4. Одржавање
4.1 Замена кертриџа са тонером
When the toner level is low, a message will appear on the printer's display. Use only genuine Ricoh standard laser toner cartridges.
- Уверите се да је штампач укључен.
- Отворите предњи поклопац штампача.
- Пажљиво извуците искоришћени кертриџ са тонером.
- Unpack the new toner cartridge and gently shake it horizontally several times.
- Уметните нови кертриџ са тонером у штампач док не кликне на своје место.
- Close the front cover. The printer will calibrate the new cartridge.
4.2 Чишћење штампача
Редовно чишћење помаже у одржавању квалитета штампе и продужава век трајања штампача.
- Екстеријер: Обришите спољашње површине меком, дamp, крпа која не оставља влакна. Не користите абразивна средства за чишћење или раствараче.
- Стакло скенера: Gently clean the scanner glass with a soft, lint-free cloth moistened with glass cleaner. Ensure no residue remains.
- Ентеријер: Periodically open the front cover and gently remove any paper dust or toner residue with a dry, lint-free cloth. Avoid touching the drum unit.
КСНУМКС. Решавање проблема
This section addresses common issues you might encounter with your Ricoh M 320.
5.1 Уобичајена питања и решења
- Штампач не реагује:
- Check if the printer is powered on and connected to the power outlet.
- Verify network connectivity (Ethernet cable or Wi-Fi signal).
- Restart the printer and your computer/mobile device.
- Уверите се да је инсталиран и изабран исправан управљачки програм за штампач.
- Заглављивање папира:
- Искључите штампач и искључите га.
- Open all covers and carefully remove any jammed paper, pulling in the direction of the paper path.
- Уверите се да је папир правилно учитан и да није изгужван или оштећен.
- Close all covers and restart the printer.
- Лош квалитет штампе:
- Проверите ниво тонера у кертриџу и замените га ако је низак.
- Ensure you are using genuine Ricoh toner cartridges.
- Clean the interior of the printer, especially around the drum unit (refer to maintenance section).
- Adjust print quality settings in your printer driver.
- Скенер не ради:
- Ensure the printer is connected to the network and recognized by your computer/mobile device.
- Restart the scanning application and the printer.
- Verify that the scanner glass and ADF are clean.
- Проблеми са Ви-Фи везом:
- Уверите се да је лозинка за Ви-Фи исправно унета.
- Check if the printer is within range of your Wi-Fi router.
- Restart your Wi-Fi router and the printer.
- Try connecting to the 2.4 GHz band if experiencing issues with 5 GHz, or vice-versa.
For more detailed troubleshooting, refer to the comprehensive user manual available on the Ricoh support webсајту.
6. Спецификације
| Феатуре | Спецификација |
|---|---|
| Назив модела | M 320 (9P01749) |
| Функције | Print, Copy, Scan (3-in-1 Multifunction) |
| Технологија штампања | Ласер |
| Штампани излаз | Color (Note: Primarily a mono laser printer, color output refers to specific elements or capabilities) |
| Максимална резолуција штампања (црно-бело) | 1200 к 1200 дпи |
| Максимална резолуција штампања (у боји) | 1200 к 1200 дпи |
| Max Print Speed (B&W) | 13 странице у минути |
| Максимална брзина штампања (у боји) | 4.5 странице у минути |
| Време излаза прве странице | 4.62 секунди |
| Дуплек Принтинг | Аутоматски |
| Тип скенера | Аутоматски механизам за увлачење докумената (АДФ) |
| Капацитет АДФ-а | 35 листова |
| Резолуција скенера | 1200 к 1200 дпи |
| Max Copies per Run | 35 |
| Повезивање | Ethernet, Wi-Fi (2.4 GHz / 5 GHz) |
| Подршка за мобилно штампање | AirPrint, Mopria, Ricoh Smart Device Connector App |
| Компатибилни оперативни системи | Виндоус, Мек, Линукс, иОС, Андроид |
| Максимална величина папира | A4 |
| Капацитет улазног листа | 35 листова |
| Капацитет излазног листа | 35 листова |
| Дисплаи Типе | ЛЦД са 4 реда |
| Цомпатибле Цартридге | Ricoh standard laser toner cartridges |
| Тежина артикла | 21 килограма |
7. Гаранција и подршка
7.1 Ограничена гаранција
The Ricoh M 320 Multifunction System comes with a limited warranty. Please refer to the warranty documentation included with your product or visit the official Ricoh webсајт за детаљне услове и одредбе, укључујући период покрића и процедуре сервисирања. Сачувајте доказ о куповини за потребе гаранције.
7.2 Корисничка подршка
For technical assistance, product inquiries, or service requests, please contact Ricoh customer support.
- Подршка на мрежи: Visit the official Ricoh support website for FAQs, driver downloads, and digital manuals.
- Телефонска подршка: Contact numbers for your region can be found on the Ricoh webсајту.
When contacting support, please have your product model (M 320) and serial number ready.