1. Увод
This manual provides detailed instructions for the installation, operation, and maintenance of your PGST PG103-4G Wireless Home Security Alarm System. This advanced system offers comprehensive protection for your home or business, featuring WiFi, GSM, and 4G connectivity, smart home integration with Alexa and Google Assistant, and a user-friendly interface. Please read this manual thoroughly before using the system to ensure proper functionality and safety.
2. Садржај пакета
Upon unpacking, please verify that all the following components are included in your package:
- PGST PG103-4G Main Alarm Panel
- ПИР детектор покрета
- Door/Window Sensors (multiple units)
- Remote Controls (2 units)
- РФИД Tags (КСНУМКС јединице)
- Жичана сирена
- Повер Адаптер
- Монтажни хардвер
- Упутство за употребу

This image displays the full contents of the PGST PG103-4G alarm system kit, including the central control panel, a passive infrared (PIR) motion detector, several magnetic door/window sensors, two remote controls, two RFID key fobs, and the necessary power and mounting accessories.
3. Кључне карактеристике
The PGST PG103-4G system is designed with advanced features for robust home security:
- Multi-Network Connectivity: Supports WiFi, GSM, and 4G for reliable communication and remote control.
- Интерфејс прилагођен кориснику: 2.4-inch TFT display with real-time status, date, and clock.
- Интеграција паметне куће: Компатибилно са Amazon Alexa и Google Assistant за гласовну контролу.
- даљински управљач: Arm and disarm via SMS, voice calls, or the dedicated mobile application.
- Прошириви систем: Supports up to 100 wireless detectors, remote controls, and RFID cards.
- Двосмерни гласовни интерфон: Communicate directly through the main panel.
- Заказано активирање/деактивирање: Automate security routines based on your daily schedule.
- Анти-Тampер Аларм: Alerts if the main unit or sensors are tampеред витх.
- Low Battery & Power Failure Alerts: Notifies you of critical power status.
- СОС функција: Dedicated emergency button for immediate assistance.
4. Водич за подешавање
4.1 Инсталација главне табле
- Прикључак за напајање: Connect the main alarm panel to a power outlet using the provided adapter. The panel has a built-in backup battery for power outagес.
- Уметање СИМ картице (опционо): If using GSM/4G features, carefully insert a compatible SIM card into the designated slot on the side of the main panel. Ensure it clicks into place.
- Монтажа: Choose a central location in your home, away from direct sunlight and heat sources. Use the provided mounting hardware to secure the panel to a wall at an accessible height.

This image shows the main control panel of the PGST alarm system, highlighting its modern design and digital display. It serves as the central hub for all security operations.
4.2 Преузимање апликације и повезивање
- Преузми апликацију: Тражи 'Smart Life' or 'Tuya Smart' in your smartphone's app store (iOS or Android) and install it.
- Регистрација/Пријава: Направите налог или се пријавите на свој постојећи налог.
- Додај уређај: Follow the in-app instructions to add your PGST PG103-4G alarm panel. Ensure your phone is connected to a 2.4GHz Wi-Fi network during the pairing process.

This image illustrates the intelligent alarm host, which is the main panel of the PGST system. It features a clear display showing system status, time, and temperature, along with a numeric keypad for operation.
4.3 Pairing Sensors
The system supports various wireless sensors. Follow these general steps to pair them:
- Уђите у режим упаривања: On the main panel, navigate to the 'Sensor Pairing' or 'Add Device' menu.
- Активирајте сензор: For door/window sensors, separate the two parts. For PIR detectors, trigger motion. The panel will confirm successful pairing.
- Name Sensor: Assign a descriptive name (e.g., 'Front Door', 'Living Room PIR') to each sensor for easy identification.
- Инсталирајте сензоре: Mount door/window sensors on frames ensuring the two parts are aligned and within 1cm when closed. Install PIR detectors in corners or high traffic areas, avoiding direct heat sources or windows.

This image shows a PGST door sensor installed on a window frame. When the window is opened, separating the two magnetic parts of the sensor, an alarm is triggered, providing immediate notification of unauthorized access.

This image displays the PGST PIR (Passive Infrared) motion detector, which offers 110-degree detection and high sensitivity. It is designed to alert users to abnormal movement within its detection range.
5. Упутство за употребу
5.1 Активирање и деактивирање
Систем се може активирати или деактивирати помоћу неколико метода:
- Главни панел: Enter your password and press the 'Arm' or 'Disarm' button.
- даљински управљач: Press the 'Arm' or 'Disarm' button on your remote.
- Мобилна апликација: Use the 'Smart Life' or 'Tuya Smart' app to remotely arm or disarm the system.
- Заказано активирање/деактивирање: Set specific times for the system to automatically arm or disarm.
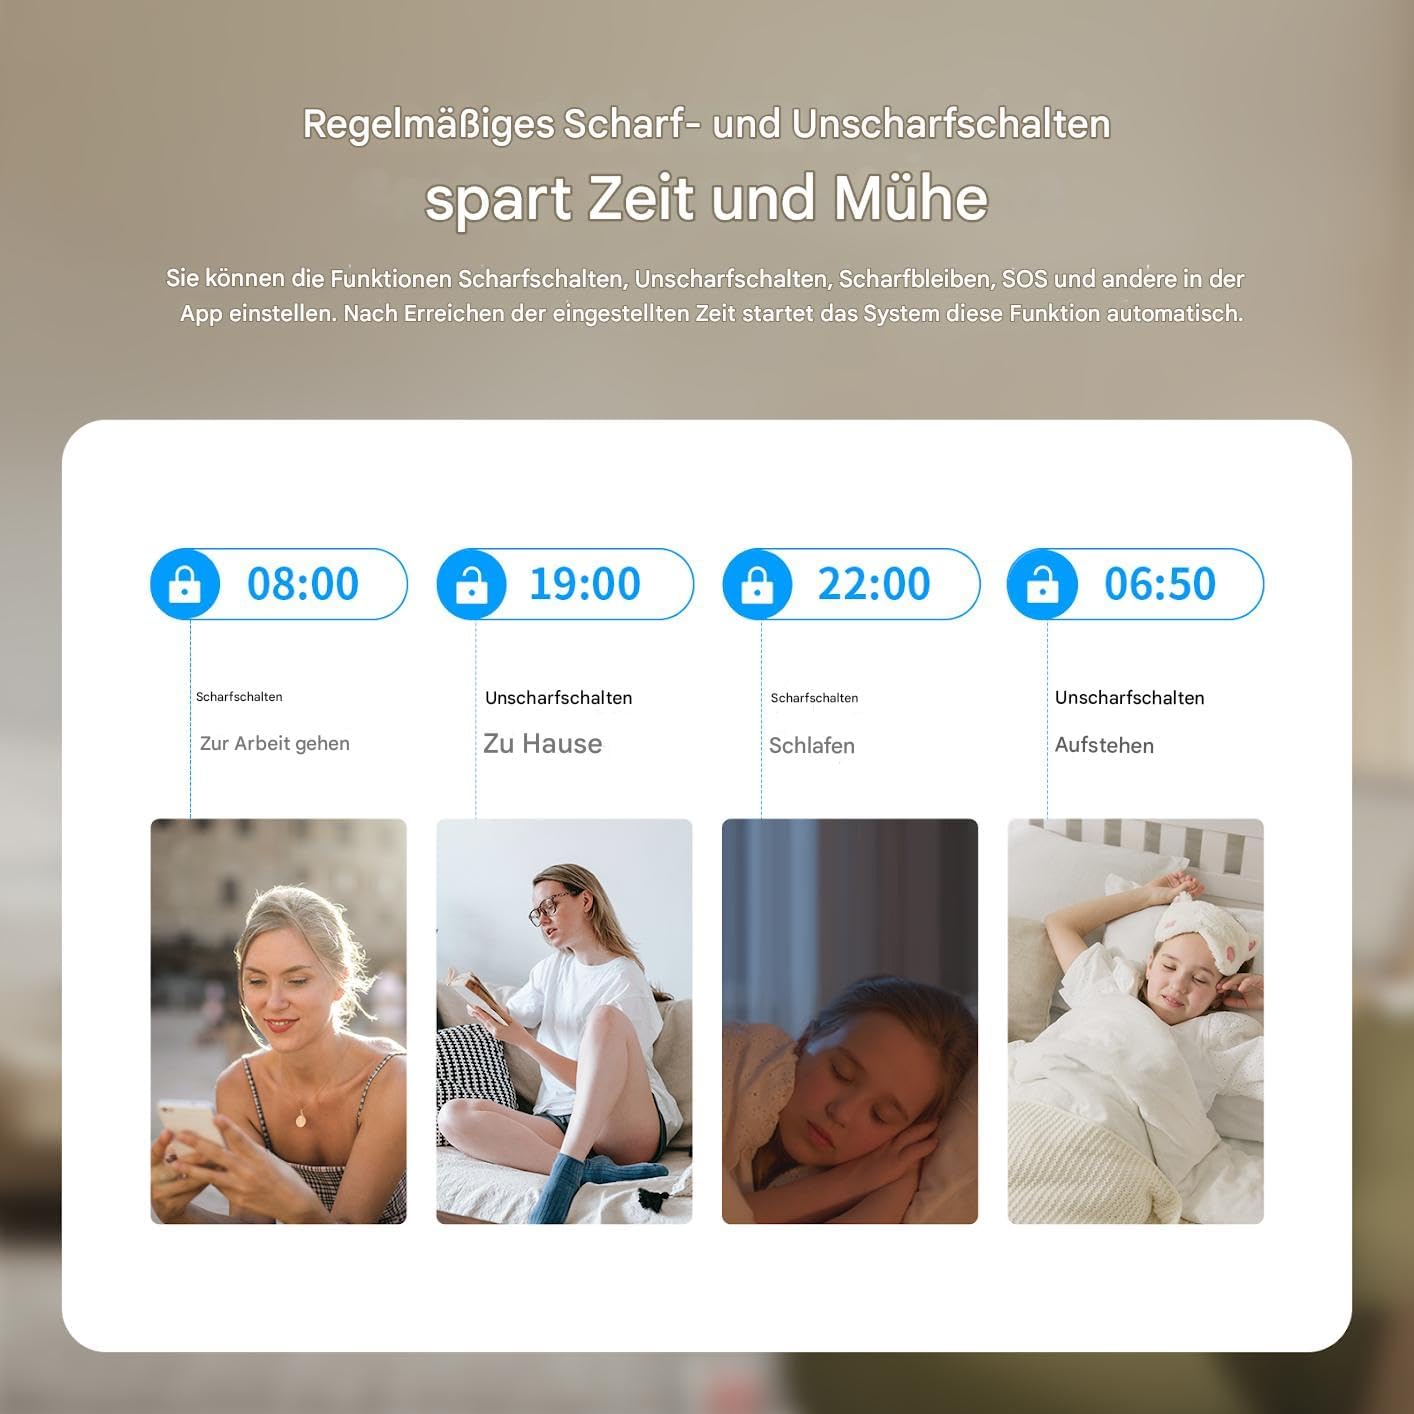
This graphic illustrates the convenience of setting regular schedules for arming and disarming your PGST alarm system, such as arming when leaving for work and disarming upon returning home, or arming at bedtime and disarming in the morning.
5.2 Управљање гласом
Integrate your PGST system with smart assistants for hands-free control:
- Амазон Алека: Enable the 'Smart Life' or 'Tuya Smart' skill in the Alexa app and link your account. You can then use commands like "Alexa, arm my home security."
- Гоогле помоћник: Link your 'Smart Life' or 'Tuya Smart' account in the Google Home app. Use commands such as "Hey Google, disarm the alarm."

This image demonstrates the voice control capability of the PGST alarm system, showing a user disarming the system using an Alexa voice command, highlighting its compatibility with smart home platforms.
5.3 Двосмерна гласовна комуникација
The main panel supports two-way voice calls, allowing you to communicate with individuals at home directly through the alarm system.

This image illustrates the two-way voice communication feature of the PGST alarm panel, enabling interaction between a remote user via phone and someone near the panel, such as a child playing at home. It also highlights app push notifications and SMS capabilities.
5.4 СОС функција
In case of an emergency, press the SOS button on the main panel or remote control. The system will immediately trigger an alarm and notify pre-set emergency contacts.

This image depicts a person activating the SOS function by pressing the dedicated button on a remote control, signifying the immediate emergency alert capability of the PGST alarm system.
6. Одржавање
6.1 Управљање батеријом
The main panel has a built-in lithium-polymer battery for backup power. Sensors are typically battery-powered. The system will notify you of low battery levels for both the main unit and connected sensors.
- Главни панел: Ensure the main panel is always connected to power. The backup battery provides temporary operation during power outagес.
- Батерије сензора: Replace sensor batteries promptly when low battery alerts are received to ensure continuous protection. Refer to individual sensor manuals for specific battery types and replacement procedures.

This image illustrates the PGST alarm panel's built-in battery feature, indicating its ability to provide alerts for low battery status and power blackouts, ensuring continuous operation even during power interruptions.
6.2 Чишћење
Wipe the main panel and sensors with a soft, dry cloth. Avoid using abrasive cleaners or solvents, which can damage the devices.
КСНУМКС. Решавање проблема
Ако наиђете на проблеме са вашим PGST алармним системом, погледајте следеће уобичајене проблеме и решења:
| Проблем | Могући узрок | Решење |
|---|---|---|
| Систем се не повезује на Wi-Fi | Нетачна лозинка за Wi-Fi, мрежа од 5 GHz, слаб сигнал | Ensure correct 2.4GHz Wi-Fi network and password. Move panel closer to router. Restart router and panel. |
| Сензори се не упарују | Sensor too far, low battery, not in pairing mode | Bring sensor closer to panel. Replace sensor battery. Ensure panel is in pairing mode. |
| Лажни аларми | Improper sensor placement, pets, drafts | Adjust PIR sensor sensitivity. Reposition sensors away from direct heat or moving objects. Ensure doors/windows are fully closed. |
| No GSM/4G connection | SIM card not inserted correctly, no signal, expired plan | Reinsert SIM card. Check SIM card balance and plan. Move panel to an area with better cellular reception. |
| App control issues | App not updated, network issues, incorrect account linking | Update the app. Check phone's internet connection. Relink your Smart Life/Tuya account. |
If the problem persists, please contact PGST customer support for further assistance.
8. Спецификације
| Феатуре | Детаљ |
|---|---|
| Број модела | ПГ103-4Г |
| Технологија повезивања | WiFi, GSM, 4G |
| Дисплаи | 2.4-инчни ТФТ екран |
| Извор напајања | AC Powered with Lithium-Polymer Backup Battery |
| Компатибилни уређаји | Паметни телефон, таблет (преко апликације Smart Life/Tuya) |
| Контролни метод | Voice, App, Remote Control, Keypad |
| Метод инсталације | Самолепљиви / Зидни носач |
| Тип упозорења | Audio Only (Siren) |
| Димензије производа | 32 к 18 к 10 цм; 900 грама |
| Произвођач | ПГСТ |
9. Гаранција и подршка
PGST products are designed for reliability and performance. For warranty information, please refer to the documentation included with your purchase or visit the official PGST website. If you require technical assistance, troubleshooting, or have questions about your PGST PG103-4G system, please contact PGST customer support through the contact information provided on their webсајт или вашу платформу за куповину.