
1. Увод
This manual provides detailed instructions for the installation, operation, and maintenance of your Kessil AP9X LED Aquarium Light System. This system includes the Kessil AP9X LED Aquarium Light, the Kessil AP9X Mounting Arm, and the Extended Slide Bar. Please read this manual thoroughly before use to ensure proper setup and optimal performance.
2. Безбедносне информације
Увек се придржавајте следећих мера предострожности како бисте спречили повреде или оштећење производа:
- Do not immerse the light fixture or power supply in water.
- Уверите се да кабл за напајање није оштећен или прегњечен.
- Искључите напајање пре него што извршите било какво одржавање или инсталацију.
- Чувати ван домашаја деце.
- Operate the light in a well-ventilated area to prevent overheating.
- Do not look directly into the LEDs when the light is on, as it may cause eye strain.
3. Садржај пакета
Проверите да ли су све ставке присутне у вашем пакету:
- Kessil AP9X LED Aquarium Light
- Kessil AP9X Mounting Arm
- Extended Slide Bar
- Повер Адаптер
- Монтажни хардвер
4. Подешавање
4.1 Mounting Arm Installation
The Kessil AP9X Mounting Arm is designed for secure attachment to your aquarium. Attach the mounting arm to the back rim of your aquarium using the provided clamps. Ensure the arm is stable and securely fastened before proceeding.

Image 1: Kessil AP9X Light mounted on the arm with the extended slide bar.
4.2 Extended Slide Bar Installation
If your tank is wider, attach the Extended Slide Bar to the Kessil AP9X Mounting Arm. This accessory extends the reach of the mounting arm by up to 8 inches, allowing for optimal light placement over tanks up to 36 inches wide. Slide the bar into the designated slot on the mounting arm and secure it with the provided fasteners.
4.3 AP9X Light Installation
Carefully attach the Kessil AP9X LED Light fixture to the end of the mounting arm (or extended slide bar). The light's lightweight design allows for easy installation. Ensure the light is firmly secured and can swivel as desired to adjust the light angle and minimize shadows.

Слика 2: Доња страна view of the Kessil AP9X LED Aquarium Light, showing the cooling fan and branding.
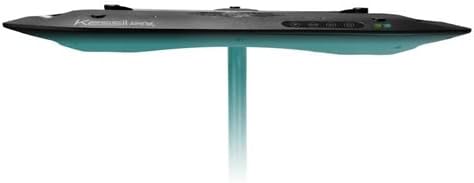
Слика 3: Бочни професионалацfile of the Kessil AP9X LED Aquarium Light, highlighting its slim design.
4.4 Прикључак за напајање
Connect the power adapter to the Kessil AP9X light fixture, then plug the adapter into a suitable power outlet. Ensure all connections are secure before powering on the device.
5. Упутство за употребу
5.1 Wi-Fi Connectivity and App Control
The Kessil AP9X features built-in Wi-Fi for advanced control via the Kessil app. Download the official Kessil app from your device's app store. Follow the in-app instructions to connect your AP9X light to your home Wi-Fi network. The app provides detailed control over light intensity, color spectrum, and scheduling.
5.2 Основни рад
Once connected, use the Kessil app to turn the light on or off and adjust the overall intensity. The light can also be controlled via onboard buttons for basic functions if app control is not desired.
5.3 Напредне функције
Utilize the app to access advanced features such as the Violet Channel, which enhances coral coloration and growth. Create custom lighting schedules to simulate natural day-night cycles and seasonal changes for your aquarium inhabitants.
6. Одржавање
6.1 Чишћење
Regularly clean the light fixture to ensure optimal performance and longevity. Disconnect power before cleaning. Use a soft, damp cloth to wipe the exterior of the light. Do not use abrasive cleaners or solvents. Ensure the cooling fan is free from dust and debris.
КСНУМКС. Решавање проблема
If you encounter issues with your Kessil AP9X, refer to the following common solutions:
- Светло се не укључује: Check power connections and ensure the outlet is functional. Verify the power adapter is correctly connected.
- Проблеми са Ви-Фи везом: Ensure your router is within range and functioning correctly. Restart the light and your mobile device. Re-attempt the connection process in the Kessil app.
- Dim or inconsistent light: Clean the light fixture to remove any dust or salt creep that may obstruct light output. Check app settings for intensity levels.
- прегревање: Ensure the light's cooling fan is not obstructed and the fixture is in a well-ventilated area.
8. Спецификације
| Феатуре | Детаљ |
|---|---|
| Модел | АП9Кс |
| Бранд | Кесил |
| Тип извора светлости | ЛЕД |
| Потрошња енергије | 180 Ваттс |
| Coverage (Mixed Reef) | 4 фт к 2 фт |
| Coverage (SPS Reef) | 3 фт к 2 фт |
| Контролни метод | App (Wi-Fi), Onboard Buttons |
| Повезивање | Уграђени Ви-Фи |
| Боја | Црно |
| Материјал | Метал |
| Тежина артикла | 8.8 фунти |
| Укључене компоненте | AP9X Light, Mounting Arm, Extended Slide Bar |
| УПЦ | 681565298073 |
9. Гаранција и подршка
Kessil products are designed for reliability and performance. For warranty information, please refer to the documentation included with your purchase or visit the official Kessil website. For technical support, troubleshooting assistance, or replacement parts, please contact Kessil customer service through their official channels.