
1. Увод
This manual provides essential information for the proper installation, configuration, and operation of your Teltonika RUT951 4G LTE Router. The RUT951 is a robust industrial cellular router designed for professional applications, offering reliable internet connectivity via 4G LTE, Wi-Fi, and Ethernet. It features dual-SIM support for network redundancy and is powered by RutOS, providing advanced customization and security features.
2. Производ је готовview
2.1 Кључне карактеристике
- Dual-SIM 4G LTE cellular connectivity for reliable network access.
- Integrated Wi-Fi (802.11b/g/n) for local wireless networking.
- Four Ethernet interfaces (3x LAN, 1x WAN) for wired connections.
- Powered by RutOS for advanced customization, automation, and security.
- Robust design suitable for various IoT and industrial scenarios.
2.2 Садржај пакета
The standard package for the Teltonika RUT951 router typically includes:
- Teltonika RUT951 Router Unit
- Повер Адаптер
- 2 x Mobile Antennas (SMA)
- 2 x Wi-Fi Antennas (RP-SMA)
- Етхернет Цабле
- Водич за брзи почетак
2.3 Router Layout
Familiarize yourself with the router's ports, indicators, and slots.
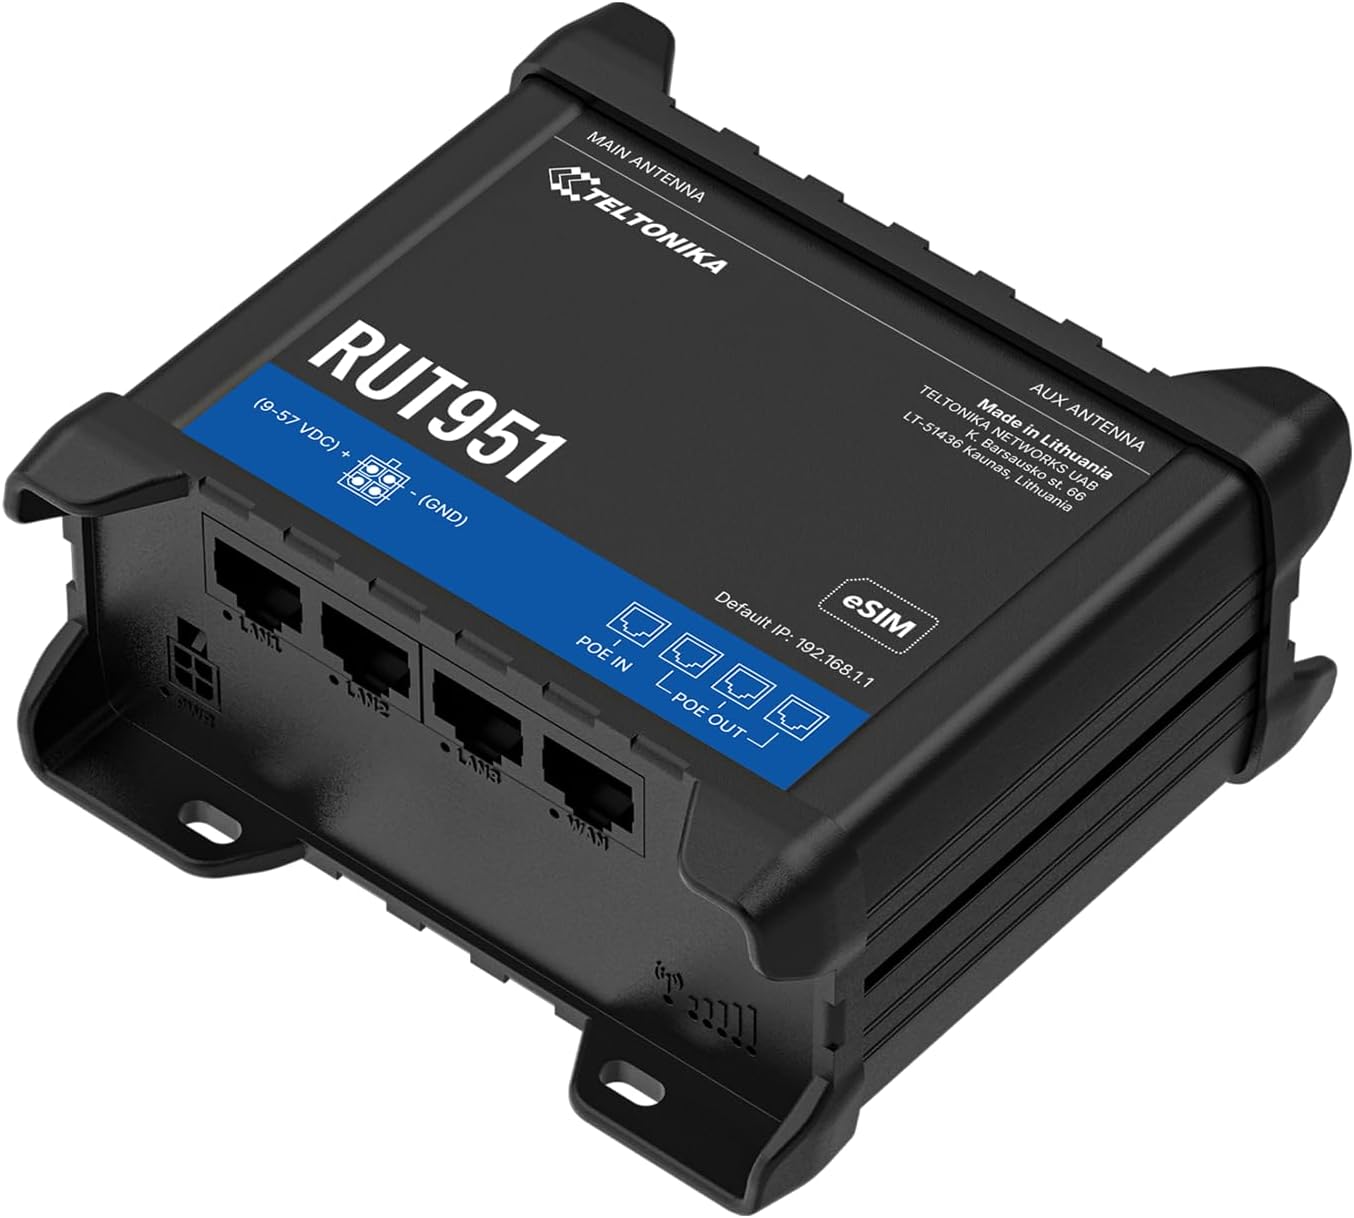
Слика 1: Фронт view of the Teltonika RUT951 router, showing the model name and general design.

Слика 2: Detailed diagram illustrating the various ports and indicators on the Teltonika RUT951 router, including mobile and Wi-Fi antenna connectors, SIM slots, Ethernet ports, power socket, and LED indicators.
- Mobile AUX Antenna Connector (SMA female): For secondary mobile antenna.
- Mobile MAIN Antenna Connector (SMA female): For primary mobile antenna.
- SIM1 / SIM2 Slots: За уметање СИМ картица мобилних телефона.
- Ресет: To restore factory settings or reboot.
- Wi-Fi Antenna Connectors (RP-SMA female): For Wi-Fi antennas.
- Утичница: За повезивање адаптера за напајање.
- ЛАН Етхернет портови: За повезивање локалних мрежних уређаја.
- WAN Ethernet порт: For connecting to an external network (e.g., fiber modem).
- ЛЕД диоде за јачину мобилног сигнала: Indicate cellular signal strength.
- Mobile Connection Status LED: Indicates cellular connection status.
- ЛАН ЛЕД диоде: Indicate activity on LAN ports.
- ВАН ЛЕД: Indicates activity on the WAN port.
3. Упутства за подешавање
3.1 Инсталација СИМ картице
- Locate the SIM card slots (SIM1 and SIM2) on the top panel of the router.
- Using a SIM ejector tool or a paperclip, gently press the small button next to the SIM slot to open it.
- Insert your activated Mini-SIM card(s) into the slot(s) with the gold contacts facing down and the notched corner oriented correctly.
- Push the SIM tray back into the router until it clicks into place.

Слика 3: Врх view of the RUT951, highlighting the SIM card slots and antenna connectors.
3.2 Повезивање антене
- Screw the two mobile antennas onto the SMA connectors labeled 'MOBILE' (MAIN and AUX) on the top panel.
- Screw the two Wi-Fi antennas onto the RP-SMA connectors labeled 'WIFI' on the top panel.
- Ensure all antennas are securely tightened for optimal signal reception.
3.3 Прикључак за напајање
- Connect the provided power adapter to the power socket on the router.
- Укључите други крај адаптера за струју у одговарајућу утичницу.
- The router will power on automatically. Observe the power LED indicator.

Слика 4: Дно view of the RUT951, showing the Ethernet ports and power input.
3.4 Етхернет веза
To connect a device directly to the router:
- Connect one end of an Ethernet cable to any of the LAN ports (LAN1, LAN2, LAN3) on the router.
- Connect the other end of the Ethernet cable to your computer or network device.
- If you are using the router as a WAN gateway, connect your external modem (e.g., fiber modem) to the WAN port.
4. Упутство за употребу
4.1 Initial Access to WebUI
- Ensure your computer is connected to the router via Ethernet or Wi-Fi. The default Wi-Fi SSID and password can be found on the router's label.
- Отвори а web прегледач и унесите подразумевану ИП адресу: 192.168.1.1
- Биће вам затражени подаци за пријаву. Подразумевано корисничко име је админ. The default password is also админ (or as specified on the router's label).
- Upon first login, you will be guided through a setup wizard to change the default password and configure basic settings.
4.2 Конфигурација мреже
After initial login, you can configure various network settings through the WebУИ:
- WAN подешавања: Configure your cellular (4G LTE) connection, including APN settings, or set up the Ethernet WAN port.
- ЛАН подешавања: Manage the local network IP address range and DHCP server.
- Ви-Фи подешавања: Change Wi-Fi SSID, password, security protocols, and channel settings.
- Дуал сим: Configure failover or load balancing between the two SIM cards for continuous connectivity.
- ВПН: Set up various VPN protocols for secure remote access.
5. Одржавање
5.1 Ажурирања фирмвера
Regularly updating the router's firmware is crucial for security, performance, and new features. Firmware updates can be performed via the WebUI under the 'System' or 'Firmware' section. Always download firmware from the official Teltonika Networks webсајту.
5.2 Ресетовање на фабричка подешавања
Ако наиђете на сталне проблеме или заборавите своје податке за пријаву, можете извршити фабричко ресетовање:
- With the router powered on, locate the RESET button (refer to Figure 2).
- Press and hold the RESET button for approximately 10 seconds until all LEDs flash.
- Отпустите дугме. Рутер ће се поново покренути са фабричким подразумеваним подешавањима.
КСНУМКС. Решавање проблема
- Нема интернет везе:
- Check SIM card insertion and activation.
- Проверите подешавања АПН-а у WebУИ.
- Ensure mobile antennas are securely connected.
- Проверите ЛЕД диоде за јачину мобилног сигнала.
- Wi-Fi не ради:
- Ensure Wi-Fi is enabled in the WebУИ.
- Проверите везе са Wi-Fi антеном.
- Verify Wi-Fi SSID and password.
- Не могу приступити WebУИ:
- Ensure your device is connected to the router (Ethernet or Wi-Fi).
- Проверите ИП подешавања вашег рачунара (требало би да буде подешено да аутоматски добија ИП адресу).
- Покушајте да обришете кеш меморију прегледача или да користите други прегледач.
- Perform a factory reset if you suspect incorrect IP configuration or forgotten password.
7. Спецификације
| Феатуре | Спецификација |
|---|---|
| Бранд | Телтоника |
| Назив модела | РУТ951 |
| Технологија повезивања | Wi-Fi, 4G LTE, 3G, 2G |
| Стандард бежичне комуникације | 802.11б, 802.11г, 802.11н |
| Класа фреквенцијског опсега | Дуал-Банд |
| Број портова | 4 (3x ЛАН, 1x ВАН) |
| Пропусни опсег LAN порта | 100 Мбпс |
| Брзина преноса података | 150 Megabits Per Second (Max Upstream) |
| Оперативни систем | РутОС |
| Тежина артикла | 287 грама |
| Волtage | 30 Волтс |
| Сигурносни протокол | WPS (and others via RutOS) |
| Покривеност | Dual SIM network redundancy |
8. Безбедносне информације
- Користите само адаптер за напајање који сте добили уз уређај.
- Не излажите уређај води, влази или екстремним температурама.
- Избегавајте постављање уређаја у близини извора топлоте или на директном сунцу.
- Обезбедите одговарајућу вентилацију како бисте спречили прегревање.
- Do not attempt to open or modify the device. This will void the warranty.
- Dispose of the device and its accessories responsibly according to local regulations.
9. Гаранција и подршка
The Teltonika RUT951 router comes with a standard manufacturer's warranty. For detailed warranty terms and conditions, please refer to the documentation included with your product or visit the official Teltonika Networks website. For technical support, firmware downloads, and additional resources, please visit the Teltonika Networks support portal or contact your vendor.