
1. Увод
The Geevon TX19-1 Wireless Outdoor Remote Sensor is designed to accurately measure and transmit outdoor temperature and humidity data to a compatible Geevon weather station. This sensor operates wirelessly, providing convenient placement options for optimal environmental monitoring. Please read this manual carefully before using the sensor to ensure proper setup and operation.
2. Производ је готовview
The TX19-1 sensor is a compact, pre-calibrated unit that communicates with a main weather station via a 433 MHz wireless signal. It is designed for outdoor use, providing essential environmental data.

Слика 2.1: Geevon TX19-1 Wireless Outdoor Remote Sensor. This image shows the front view of the white, rectangular sensor with a small red indicator light and ventilation slots.
3. Садржај пакета
- 1 x Geevon TX19-1 Wireless Outdoor Remote Sensor
- Напомена: Потребне су 2 x AAA батерије и нису укључене у пакет.
4. Подешавање
4.1 Инсталација батерије
- Пронађите одељак за батерију на задњој страни сензора.
- Отворите поклопац одељка за батерије.
- Insert two (2) new AAA batteries, ensuring correct polarity (+ and -).
- Добро затворите поклопац одељка за батерије.

Слика 4.1: Battery compartment for the wireless remote sensor. This image illustrates the back of the sensor with the battery cover open, showing the placement of two AAA batteries.
4.2 Избор канала
The TX19-1 sensor supports up to three channels (CH1, CH2, CH3) to allow multiple sensors to be used with a single weather station. Select a channel using the switch inside the battery compartment or on the back of the sensor. Ensure the selected channel matches the channel setting on your main Geevon weather station.
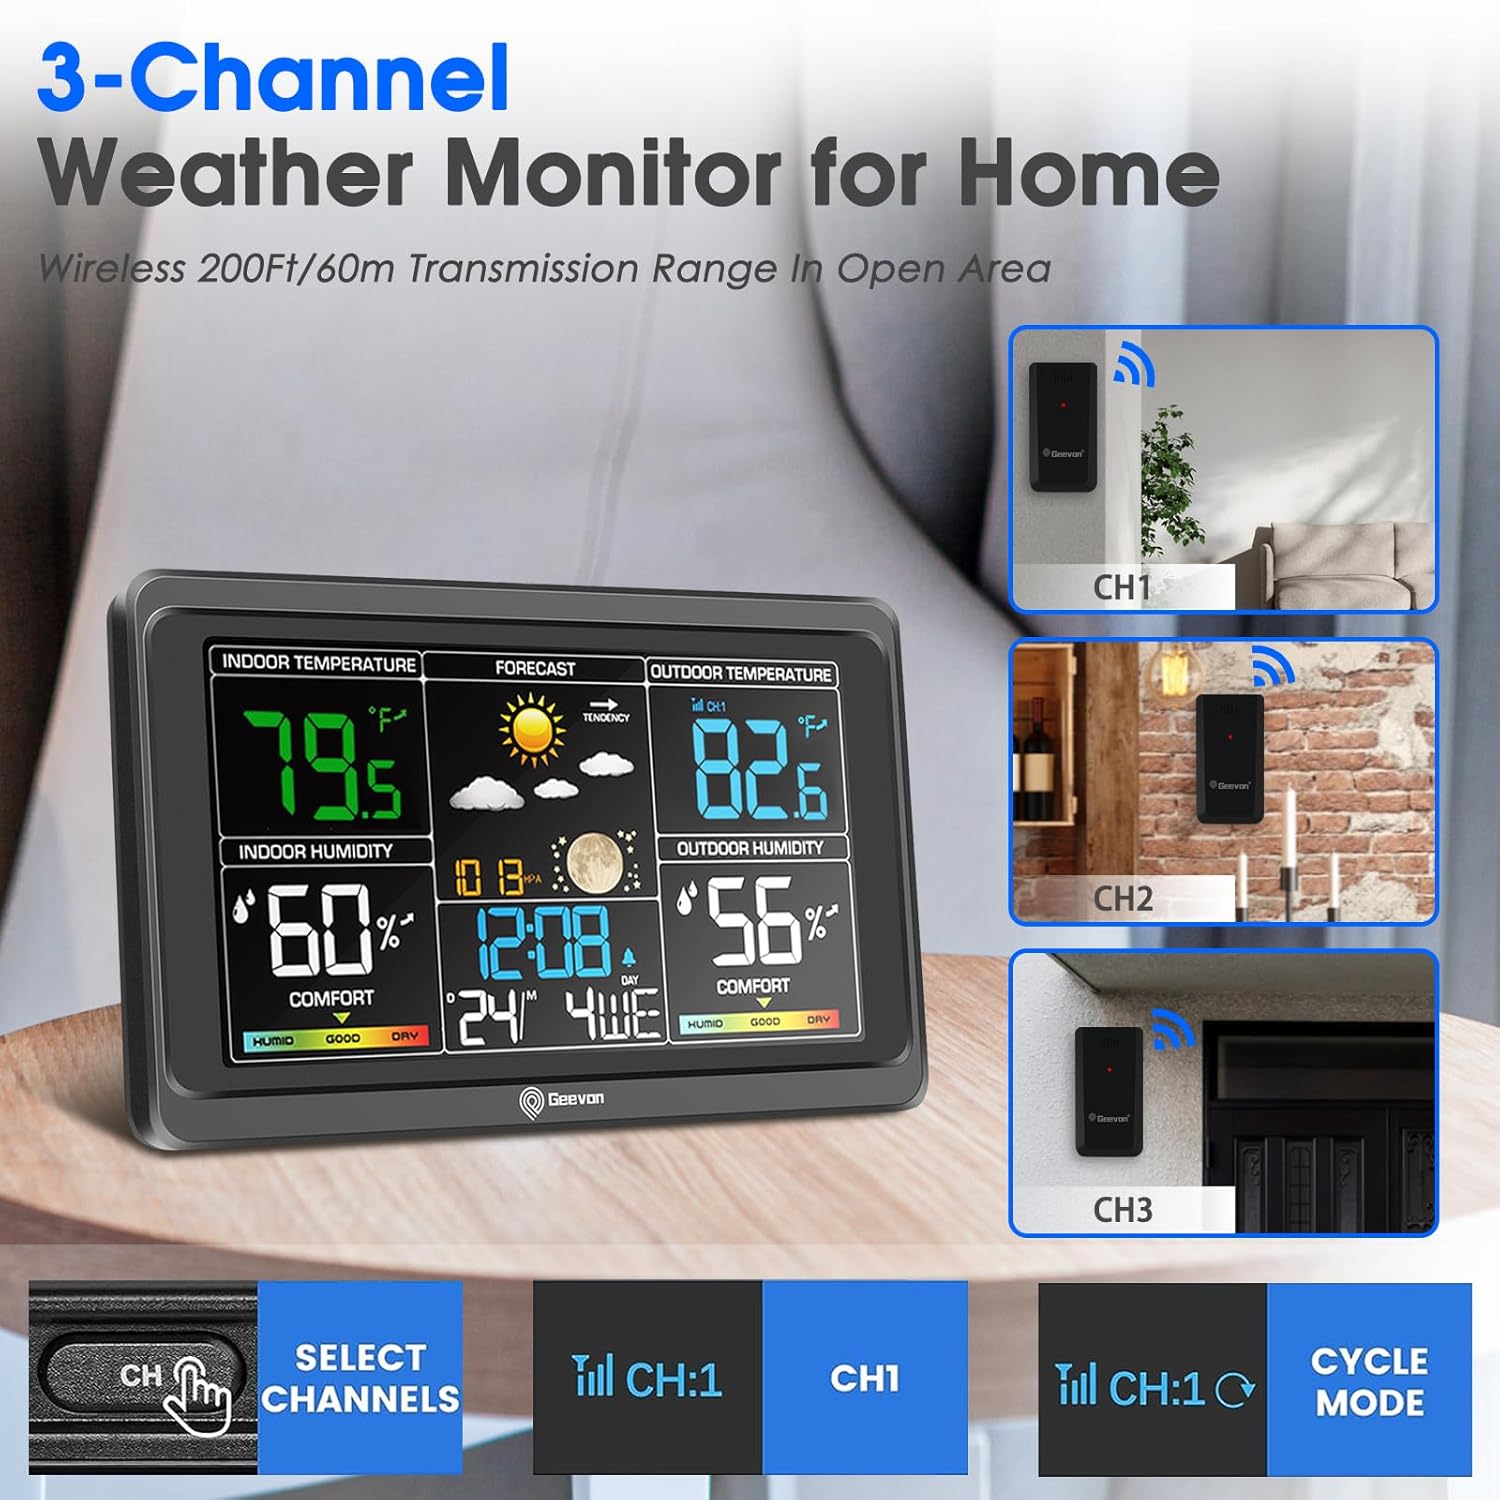
Слика 4.2: Example of a 3-channel weather monitor setup. This image shows a main weather station display and three remote sensors labeled CH1, CH2, and CH3, indicating channel selection capability.
4.3 Постављање сензора
- Mount the sensor vertically in a shaded area to avoid direct sunlight, which can cause inaccurate temperature readings.
- Ensure the sensor is protected from direct rain and snow.
- Place the sensor within the effective transmission range (up to 60 meters or 200 feet in open areas) of your main weather station. Walls and obstacles can reduce this range.
- Avoid placing the sensor near large metal objects, electronic devices, or sources of heat/cold that could interfere with readings or transmission.
5. Упутство за употребу
Once batteries are installed and a channel is selected, the sensor will automatically begin transmitting temperature and humidity data. The red LED indicator on the front of the sensor will flash briefly when data is being transmitted.
- Пренос података: The sensor transmits data periodically (e.g., every 30-60 seconds) to the main weather station.
- Опсег: The wireless transmission range is approximately 60 meters (200 feet) in an open area. This range may be reduced by walls, floors, and other obstructions.
- Display on Main Unit: Refer to your main Geevon weather station's manual for instructions on how to view and interpret the data received from the TX19-1 sensor.
6. Одржавање
- Замена батерије: Replace batteries when the low battery indicator appears on your main weather station, or if the sensor stops transmitting data. Always use new AAA batteries.
- Чишћење: Обришите спољашњост сензора меком крпомamp cloth. Do not use abrasive cleaners or immerse the sensor in water.
- Заштита животне средине: Ensure the sensor remains protected from extreme weather conditions, direct water exposure, and prolonged direct sunlight to maximize its lifespan and accuracy.
КСНУМКС. Решавање проблема
- No Data Transmission / Sensor Not Working:
- Check if batteries are installed correctly and are not depleted. Replace with new AAA batteries.
- Ensure the sensor's channel (CH1, CH2, or CH3) matches the channel selected on your main weather station.
- Verify the sensor is within the effective transmission range of the main unit. Reduce distance if necessary.
- Проверите да ли постоје потенцијални извори сметњи (нпр. други бежични уређаји, велики метални предмети).
- If the sensor was recently exposed to extreme temperatures, allow it to stabilize at ambient temperature.
- Нетачна очитавања:
- Ensure the sensor is placed in a shaded area, away from direct sunlight or heat sources.
- Verify the sensor is not exposed to direct moisture.
- Проблеми са компатибилношћу:
- The Geevon TX19-1 sensor uses a specific proprietary protocol. It may not be compatible with older Geevon weather stations (e.g., those designed for TX10-2 or TX18 sensors) or weather stations from other brands. Confirm compatibility with your main unit's specifications.
8. Спецификације
| Број модела | ТКС19-1 |
| Димензије (Д к Ш к В) | КСНУМКС к КСНУМКС к КСНУМКС цм (КСНУМКС к КСНУМКС к КСНУМКС инча) |
| Тежина | 28.35 grams (1 ounce) |
| Извор напајања | 2 к ААА батерије (нису укључене) |
| Технологија повезивања | 433 МХз бежични |
| Материјал | Пластика |
| Прецизност температуре | ±1 °Ц |
| Посебне карактеристике | Pre-calibrated, Wireless |
| Upper Nominal Temperature | 60 степени Целзијуса |
| Наменска употреба | Outdoor Temperature and Humidity Monitoring |

Слика 8.1: Dimensions of the Geevon TX19-1 sensor. This image shows the sensor alongside a main weather station display, with key dimensions indicated for both units.
9. Гаранција и подршка
Specific warranty information for the Geevon TX19-1 Wireless Outdoor Remote Sensor is not provided in the product details. For warranty claims or technical support, please contact Geevon customer service directly or refer to the documentation provided with your main Geevon weather station.
You may also visit the official Geevon website for further assistance or product information. Look for contact details on the product packaging or the main weather station manual.