
1. Увод
Thank you for choosing the TORCHSTAR 3CCT LED Barn Light. This manual provides essential information for the safe and efficient installation, operation, and maintenance of your new outdoor lighting fixture. Please read these instructions thoroughly before installation and retain them for future reference.
2. Шта је у кутији
Пре него што наставите са инсталацијом, проверите да ли су све компоненте присутне и неоштећене.
- TORCHSTAR 3CCT LED Barn Light Fixture
- Mounting Hardware (screws, plastic anchors, wire nuts)
- Упутство за употребу
3. Спецификације
| Број модела | 89468 |
| Бранд | ТОРЦХСТАР |
| Потрошња енергије | 40В/60В/80В по избору |
| Луминоус Флук | 4800лм (40В), 7200лм (60В), 9600лм (80В) |
| Температура боје | 3000K (Warm White), 4000K (Neutral White), 5000K (Cool White) Selectable |
| Волtage | КСНУМКС-КСНУМКСВ АЦ |
| Беам Англе | 130° |
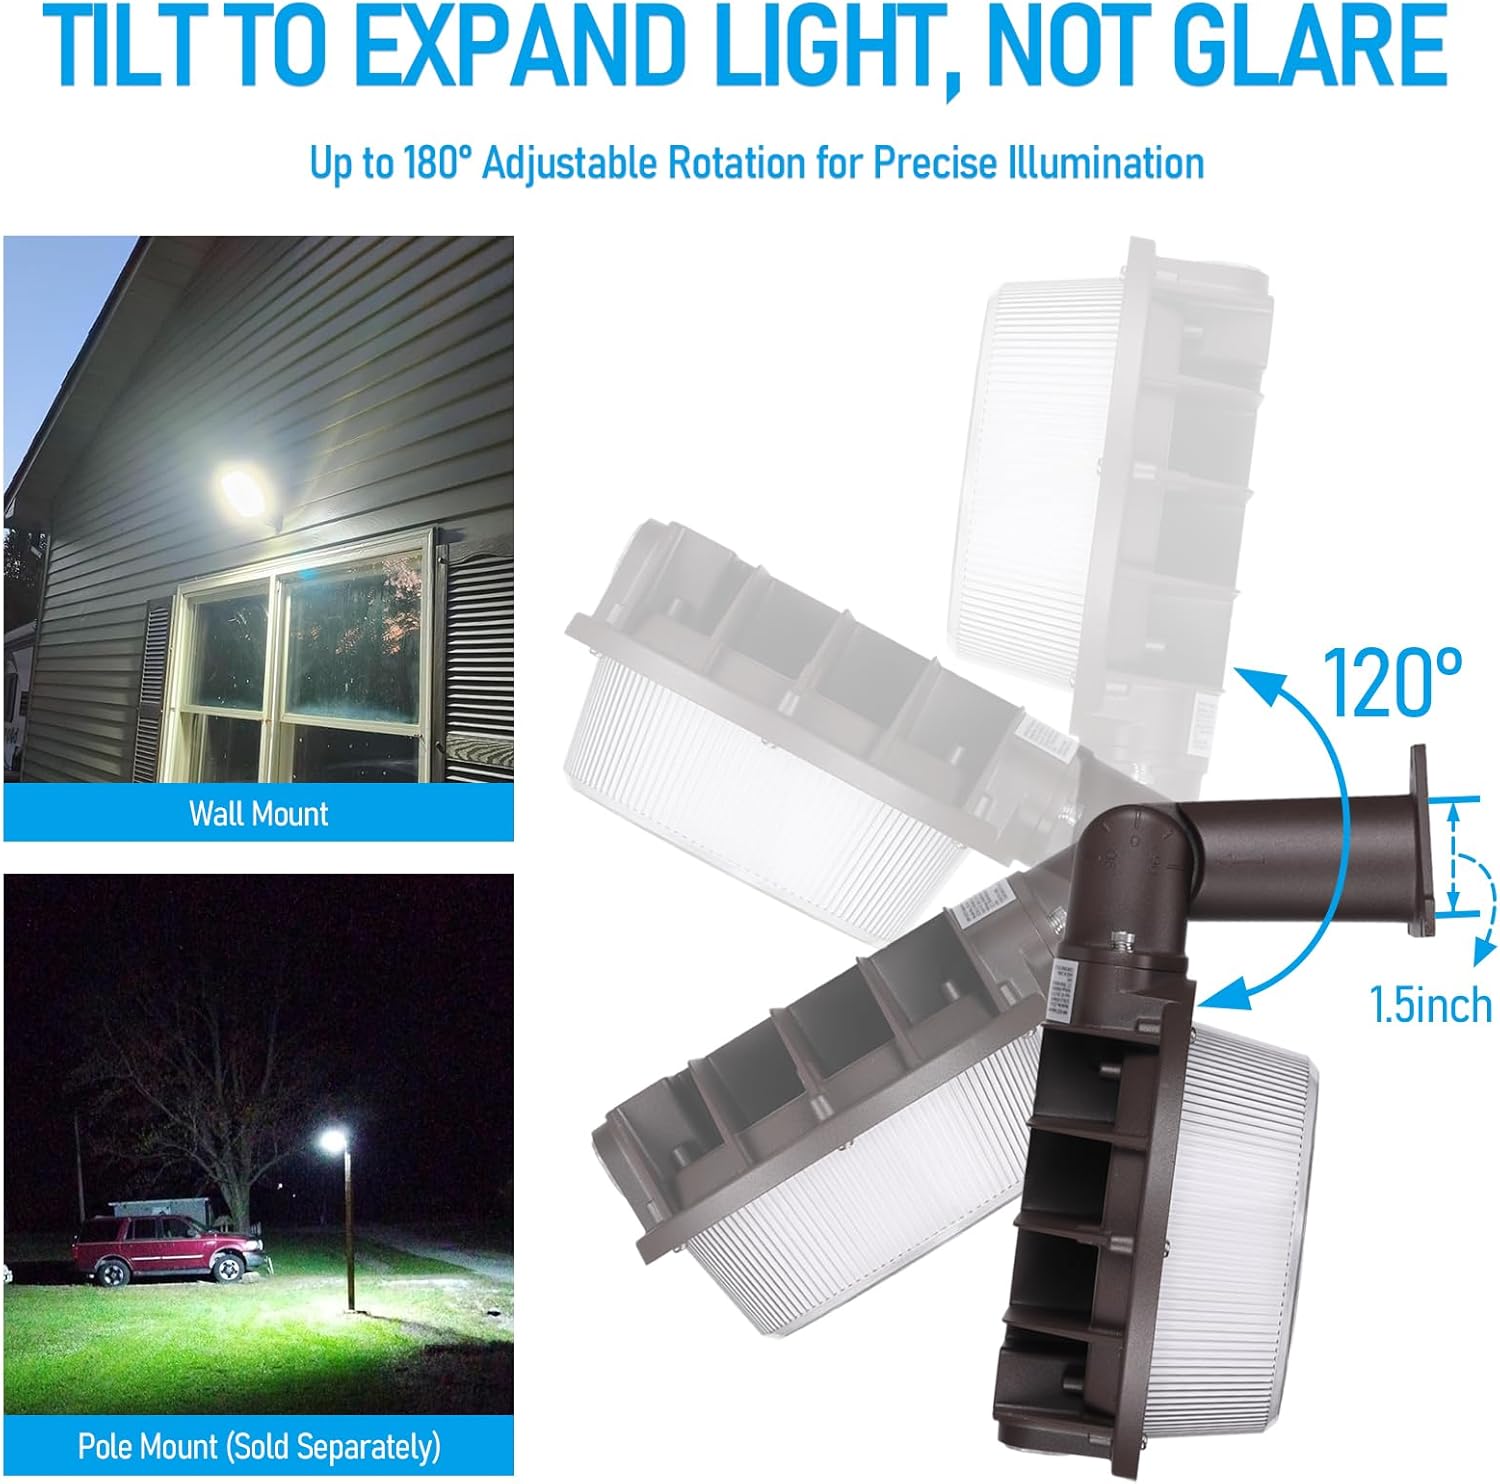
| Подесива глава | Up or down by 120° |
| Водоотпорна оцена | ИП65 |
| Материјал | Алуминијумско кућиште |
| Животни век | 50,000 сата |
| Цертификати | ЕТЛ Листед |
4. Подешавање и инсталација
Важно: Ensure power is turned off at the circuit breaker before installation. If you are unsure about electrical wiring, consult a qualified electrician.
4.1 Опције монтаже
The TORCHSTAR LED Barn Light supports both wall mount and pole (tenon) mount installations.

4.2 Упутства за ожичење
- Повежите црна жица од уређаја до усијана/жарена жица из вашег напајања.
- Повежите бела жица од уређаја до неутрална жица из вашег напајања.
- Повежите зелена жица од уређаја до жица за уземљење из вашег напајања.
- Secure all connections with appropriate wire nuts and ensure they are properly insulated.
4.3 Suggested Mounting Height
For optimal light distribution, it is recommended to mount the fixture at a maximum height of 25 feet.

5. Упутство за употребу
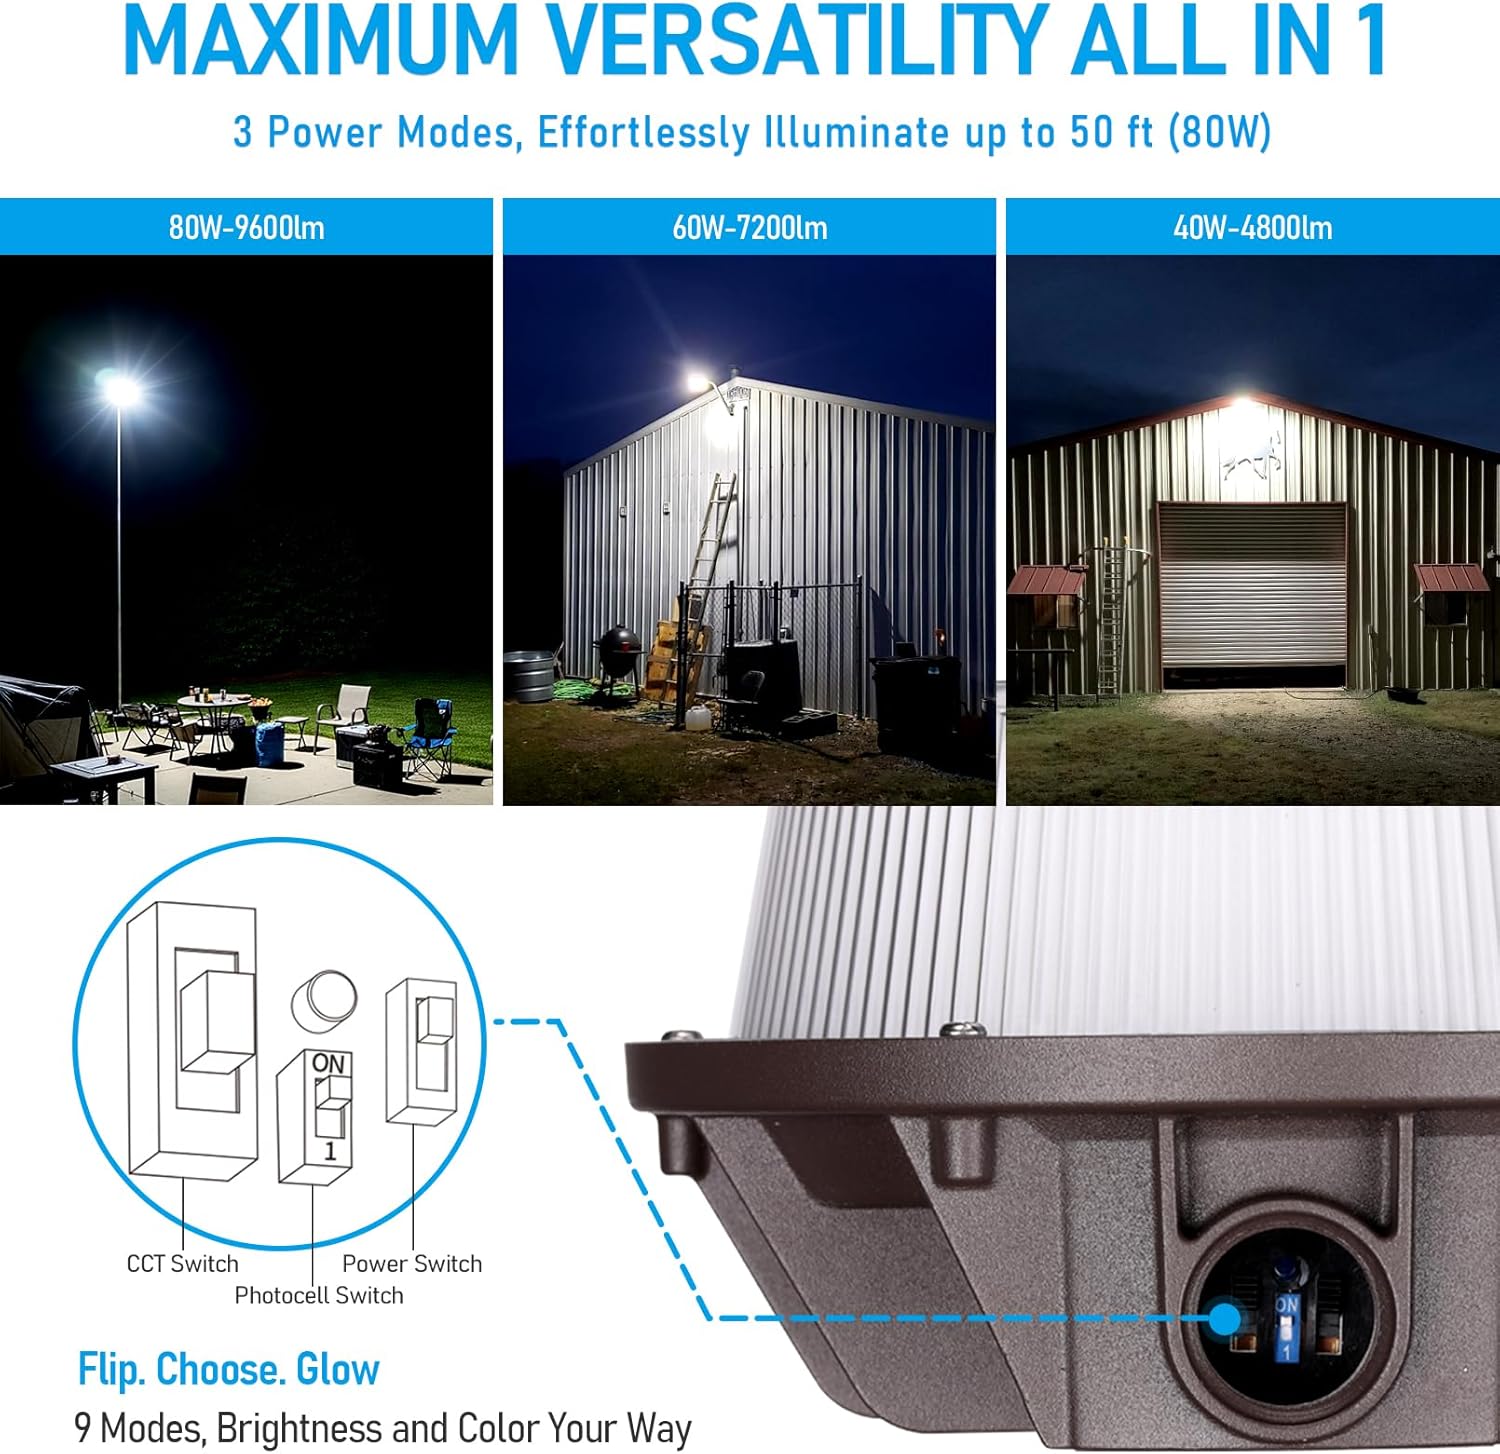
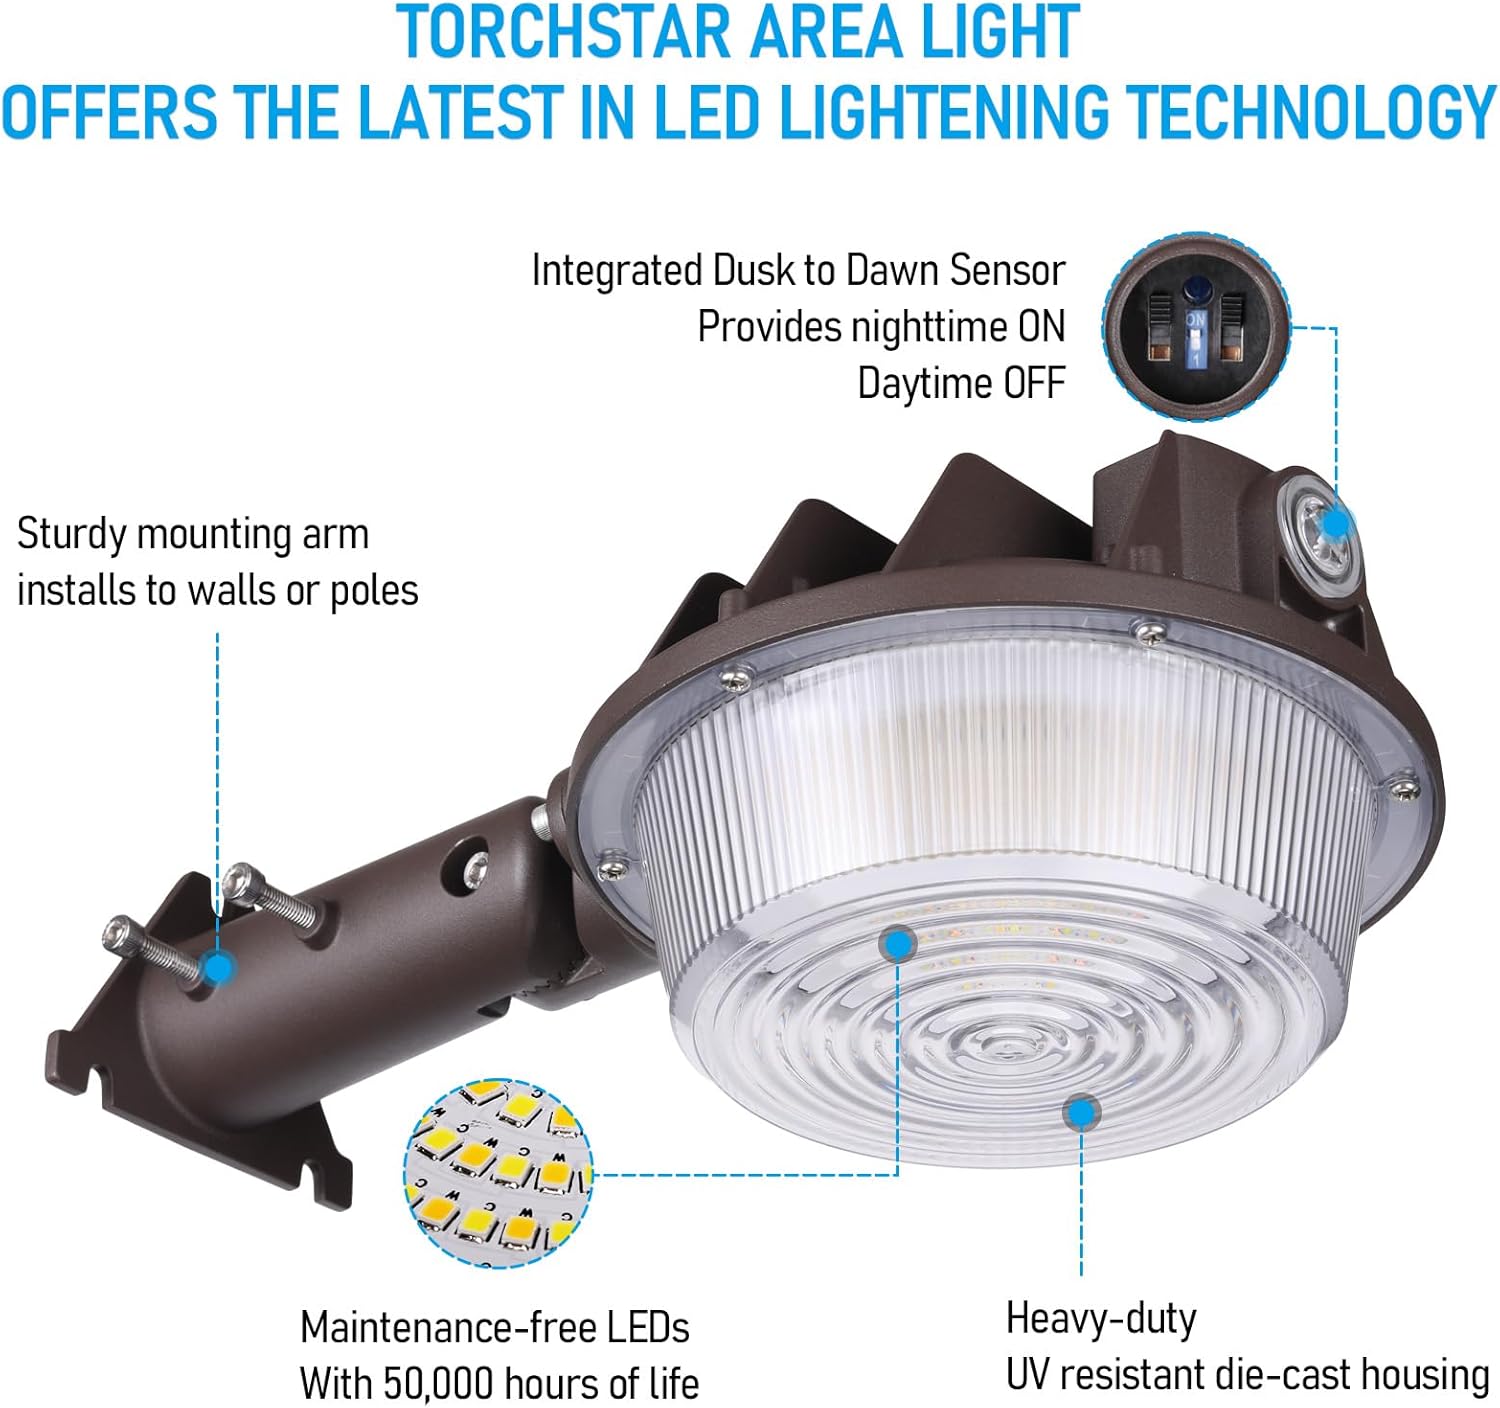
The TORCHSTAR LED Barn Light features adjustable wattage, selectable color temperature, and a dusk-to-dawn photocell for automated operation.
5.1 Adjustable Wattagе и температура боје
The fixture allows you to select between 40W, 60W, or 80W power consumption and 3000K, 4000K, or 5000K color temperatures. These settings are typically adjusted via internal switches on the fixture before final installation or by accessing the fixture if already installed. Refer to the product diagram for switch locations.

5.2 Dusk-to-Dawn Operation
The integrated photocell sensor automatically detects ambient light levels. The light will turn on at dusk and turn off at dawn, providing energy-efficient operation without manual intervention.
6. Одржавање
The TORCHSTAR LED Barn Light is designed for long-term, maintenance-free operation. The durable aluminum housing is corrosion and rust-resistant. Periodically clean the lens with a soft, damp cloth to ensure optimal light output. Do not use abrasive cleaners or solvents.
7. Водич за решавање проблема
If the fixture fails to operate properly, use the guide below to diagnose and correct the problem:
- Verify that power is turned on at the switch and breaker box.
- Проверите да ли је уређај правилно ожичен.
- Test that line voltagе је тачно.
- Test if the photocell works properly. The photocell is designed to turn on at low light levels.
- If the light does not come on or stay on, test the photocell by covering it. If it's operating properly, the light should come on.
- Shine a flashlight into the photocell. The light should go off.

8. Видео снимци производа
9. Гаранција и подршка
Овај производ долази са а 3 година гаранције from the date of purchase. TORCHSTAR is committed to providing lifelong customer service. For any questions, issues, or warranty claims, please contact TORCHSTAR customer support through their official channels.