Zgrmbo F500
Zgrmbo F500 Digital Wall Clock Instruction Manual
Модел: Ф500
Производ је завршенview
The Zgrmbo F500 Digital Wall Clock features a large, clear display with 4-inch digits, making it easy to read from a distance. It supports various time formats, auto-dimming, and includes a time memory function to retain settings during power outages. This clock is designed for versatile placement, suitable for both wall mounting and tabletop use.

Image: Zgrmbo F500 Digital Wall Clock with its dimensions and key features highlighted.
Кључне карактеристике
- 4-inch Huge Clear Digits: For easy readability from up to 20 feet away.
- Auto-Dimming Mode: Automatically adjusts brightness based on time of day (100% from 07:00-19:00, 60% from 19:00-23:00, 25% from 23:00-07:00).
- Standard/Military Time Format: Easily switch between 12-hour and 24-hour formats.
- Подршка за летње рачунање времена (DST): Convenient function for time adjustments.
- Time Memory Function: Built-in CR2302 battery retains time settings during power interruptions.
- Разноврстан пласман: Can be wall-mounted or placed on a tabletop using integrated stands.
- Hidden Cable Winder Bracket: For neat cable management when wall-mounted.

Image: Visual representation of the clock's main features including large digits, time/date display, DST, auto-brightness, alarm, and time memory.
Сетуп
Садржај пакета
- 1 x Zgrmbo F500 Digital Wall Clock
- 1 x CR2302 Battery (for memory backup)
- КСНУМКС к УСБ напојни кабл
- 1 к Упутство за употребу
Напомена: A USB power adapter is not included and must be self-supplied. The CR2302 battery is for retaining settings during power loss, not for powering the clock continuously.
Почетни кораци подешавања
- Инсталирајте резервну батерију (опционо, али се препоручује): Open the battery compartment on the back of the clock and insert the CR2302 coin cell battery. This ensures your settings are saved if power is interrupted.
- Прикључите напајање: Plug the provided USB power cable into the clock's USB port and connect the other end to a USB power source (e.g., USB adapter, computer USB port, power bank). The clock will power on.
- Подесите време и датум: Refer to the 'Operating Instructions' section for detailed steps on setting the time, date, and other preferences.

Image: Visual guide for installing the backup battery, connecting the power, and setting the time.
Опције монтаже
- Положај стола: The clock features two hidden standing brackets on the back. Simply open these brackets to place the clock on any flat surface like a desk or nightstand.
- Монтажа на зид: The clock has double wall-hung hole designs. Use appropriate wall anchors and screws (not included) to securely mount the clock. The hidden cable winder bracket helps manage the power cable for a clean look.

Слика: Позади view of the clock detailing wall-mount holes, standing brackets, and cable management.

Image: The clock demonstrating its use as a desk or nightstand clock with its standing brackets.
Упутство за употребу
Контроле и дугмад
The clock features control buttons on its sides for easy adjustment:
- СЕТ дугме: Used to enter setting mode for time, date, and other functions.
- +/- Дугмад: Used to adjust values (increase/decrease) during setting mode, and to switch time formats.
- LIGHT/DIMMER Button: Used to adjust display brightness or activate auto-dimming mode.
- Дугме АЛАРМ: Used to set and activate/deactivate the alarm.
- Ресет: Used to reset the clock to factory settings.

Image: Close-up of the clock's side buttons for setting various functions.
Подешавања времена и датума
- Време подешавања: Press the 'SET' button repeatedly until the hour digits flash. Use the '+/-' buttons to adjust the hour. Press 'SET' again to move to minutes, then adjust with '+/-'. Continue for year, month, and date.
- Switching Time Format (12/24 Hour): Press the '+/-' button (short press) to toggle between standard (12-hour with AM/PM indicator) and military (24-hour) time formats.
- Alternating Time and Date Display: Long press the '-' button to switch between displaying only the time or alternating between time and date.
- Blinking Colon: Long press the '+' button to turn the blinking colon between the hour and minute digits on or off.
- Летње рачунање времена (ДСТ): Long press the 'SET' button to activate or deactivate DST. When activated, 'DST' will appear on the display.
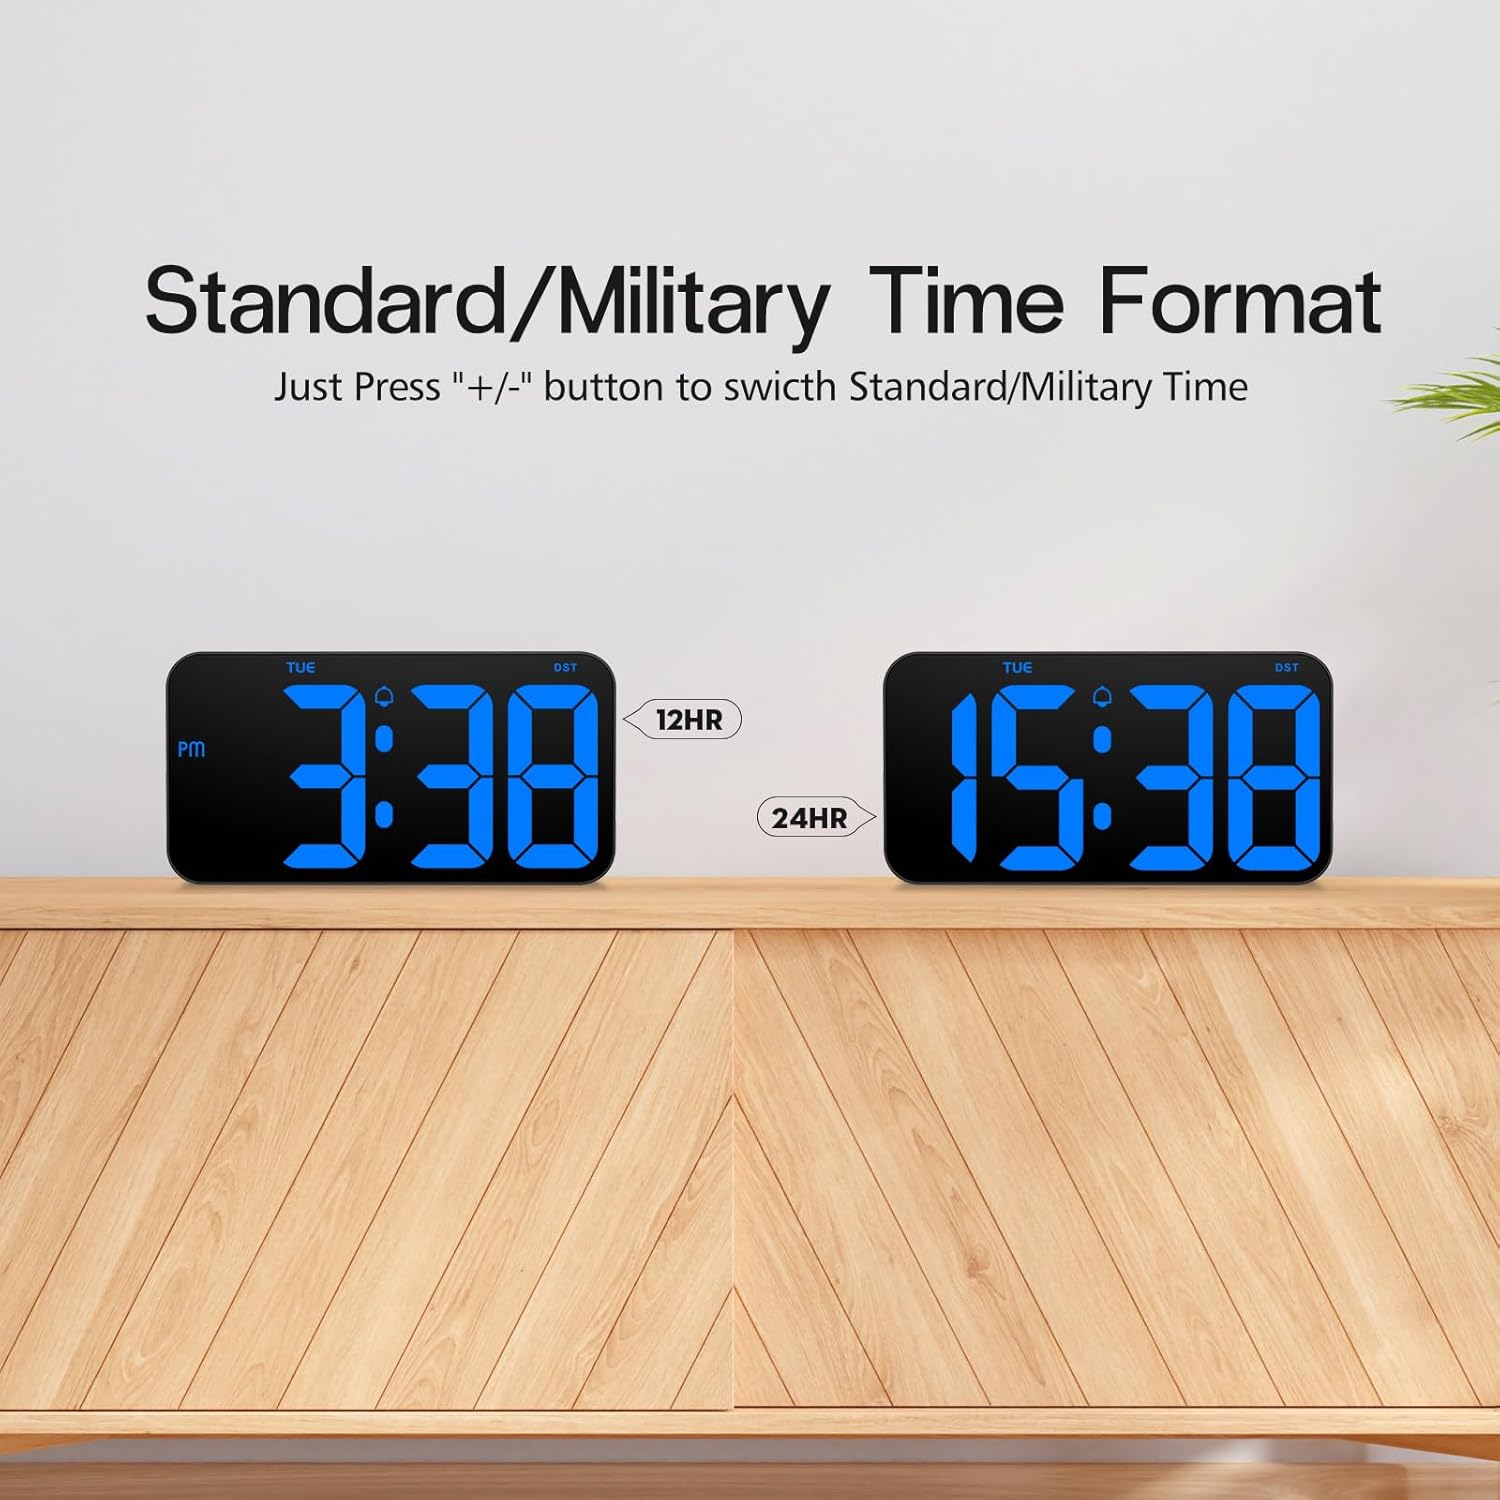
Image: Comparison of the clock displaying time in 12-hour and 24-hour formats.
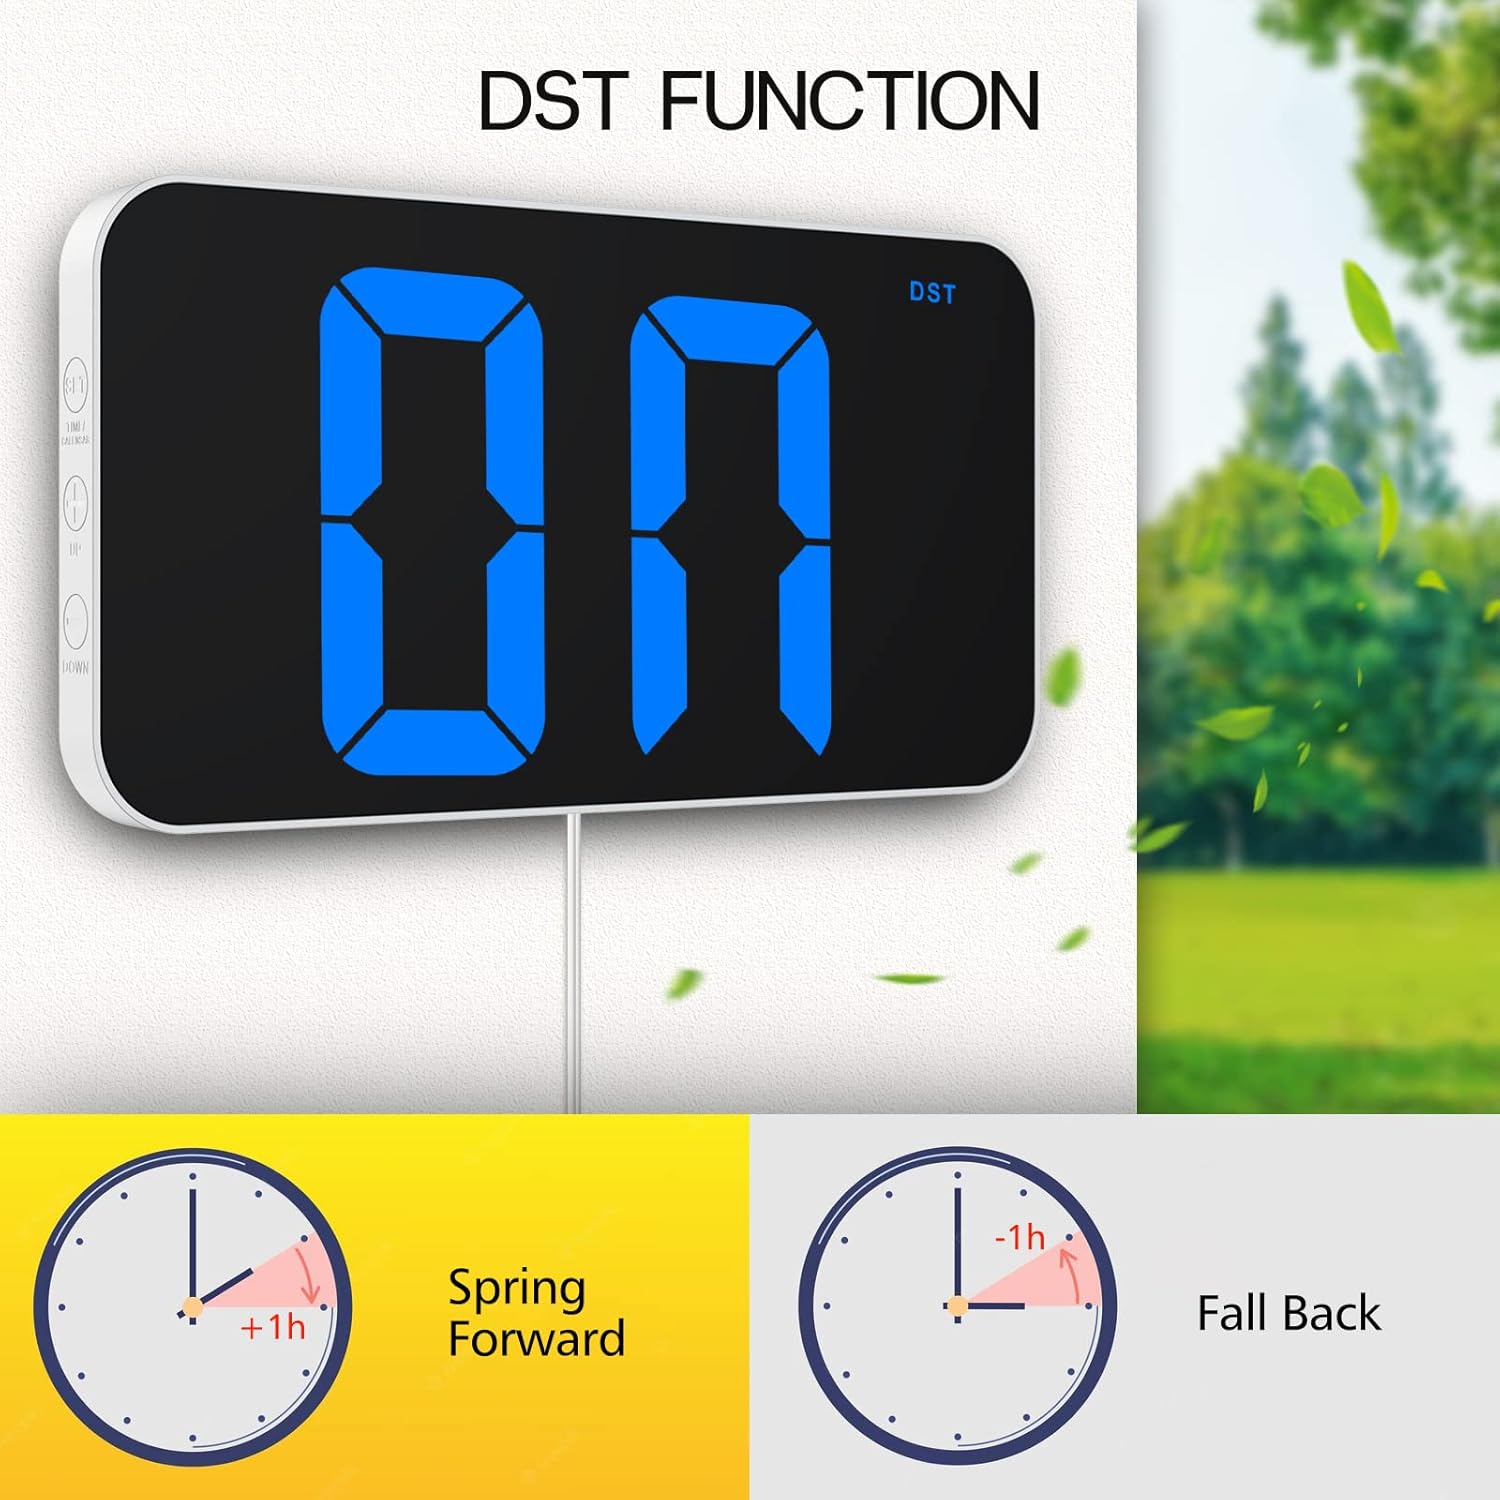
Image: Demonstration of the Daylight Saving Time (DST) function.

Image: The clock displaying the current date.
Дисплаи Бригхтнесс
- Auto-Dimming Mode: Long press the 'LIGHT' button to activate the auto-dimming feature. The clock will automatically adjust its brightness: 100% from 07:00-19:00, 60% from 19:00-23:00, and 25% from 23:00-07:00.
- Manual Brightness Adjustment: Short press the 'LIGHT' button to cycle through different brightness levels (e.g., 100%, 80%, 60%, 20%, 0%).

Image: Visual explanation of custom brightness and the auto-dimming schedule.

Image: The clock displaying dim brightness suitable for nighttime viewинг.
Функција аларма
- Подешавање аларма: Press the 'ALARM' button. The alarm time digits will flash. Use the '+/-' buttons to set the desired alarm hour and minutes. Press 'ALARM' again to confirm.
- Активирање/деактивирање аларма: Short press the 'ALARM' button to toggle the alarm on or off. An alarm icon will appear on the display when active.
- Фреквенција аларма: The alarm can be set to run on specific days (e.g., Monday-Friday, Monday-Saturday, or every day). Refer to the detailed manual for specific button combinations to set alarm frequency.
Одржавање
- Чишћење: Wipe the clock's surface with a soft, dry cloth. Avoid using abrasive cleaners or solvents.
- Замена батерије: If the clock consistently loses its settings after a power outage, the CR2302 backup battery may need to be replaced. Open the battery compartment on the back and replace with a new CR2302 battery.
Решавање проблема
- Clock does not turn on: Ensure the USB power cable is securely connected to both the clock and a working USB power source.
- Clock loses time/settings after power outage: Verify that the CR2302 backup battery is correctly installed and has sufficient charge. This battery is for memory retention, not continuous power.
- Display is too bright or too dim: Press the 'LIGHT' button to adjust manual brightness levels. If auto-dimming is active, long press the 'LIGHT' button to deactivate it or adjust its settings.
- Cannot switch between 12/24 hour format: Ensure you are using a short press on the '+/-' button.
- Аларм се не оглашава: Check if the alarm is activated (alarm icon visible). Verify the alarm time is set correctly.
- Date is incorrect: Enter setting mode using the 'SET' button and adjust the year, month, and date as needed.
Спецификације
| Феатуре | Детаљ |
|---|---|
| Број модела | Ф500 |
| Бранд | Згрмбо |
| Димензије | 10.25" Ш x 5.3" В |
| Дисплаи Типе | Дигитал |
| Извор напајања | Електрични са каблом (УСБ) |
| Материјал | Акрилонитрил Бутадиен Стирен (АБС), Пластика |
| Тежина артикла | 15.8 унци |
| Посебне карактеристике | Adjustable Brightness, Alarm, Auto Dimmable, Daylight Saving, Large Display |
Видео снимци производа
Zgrmbo F500 Digital Clock User Sharing
Video: A detailed user sharing video demonstrating the features and functionality of the Zgrmbo F500 Digital Clock, including brightness settings, time and date display, and physical attributes.
Zgrmbo F500 Digital Clock Overview
Видео: Сажет прегледview of the Zgrmbo F500 Digital Clock, showcasing its design and primary functions.
Гаранција и подршка
Zgrmbo provides an 18-месечна гаранција for this product and a Политика поврата од 45 дана. For any questions, concerns, or support needs, please feel free to contact Zgrmbo customer service through Amazon.
Ask a question about this manual
Ask about setup, troubleshooting, compatibility, parts, safety, or missing instructions. Manuals+ will review the question and use this page’s manual context to help answer it.