1. Увод
The iDatalink Maestro KIT-MUS2 is a comprehensive dash and wiring kit designed to facilitate the installation of a Pioneer modular receiver in specific 2015-2023 Ford Mustang models that originally came equipped with a 4.2" LCD screen. This kit, when used in conjunction with an iDatalink Maestro RR or RR2 interface module (sold separately), enables the seamless integration of a Pioneer modular-style receiver that features an iDatalink serial port.
The kit includes a replacement dash panel with a texture and finish engineered to match your factory dash. It also provides a vehicle-specific wiring harness and interchangeable panels to accommodate Pioneer modular receivers with 7", 8", or 9" screens. This system ensures retention of various factory features, enhancing the functionality of your new audio system.
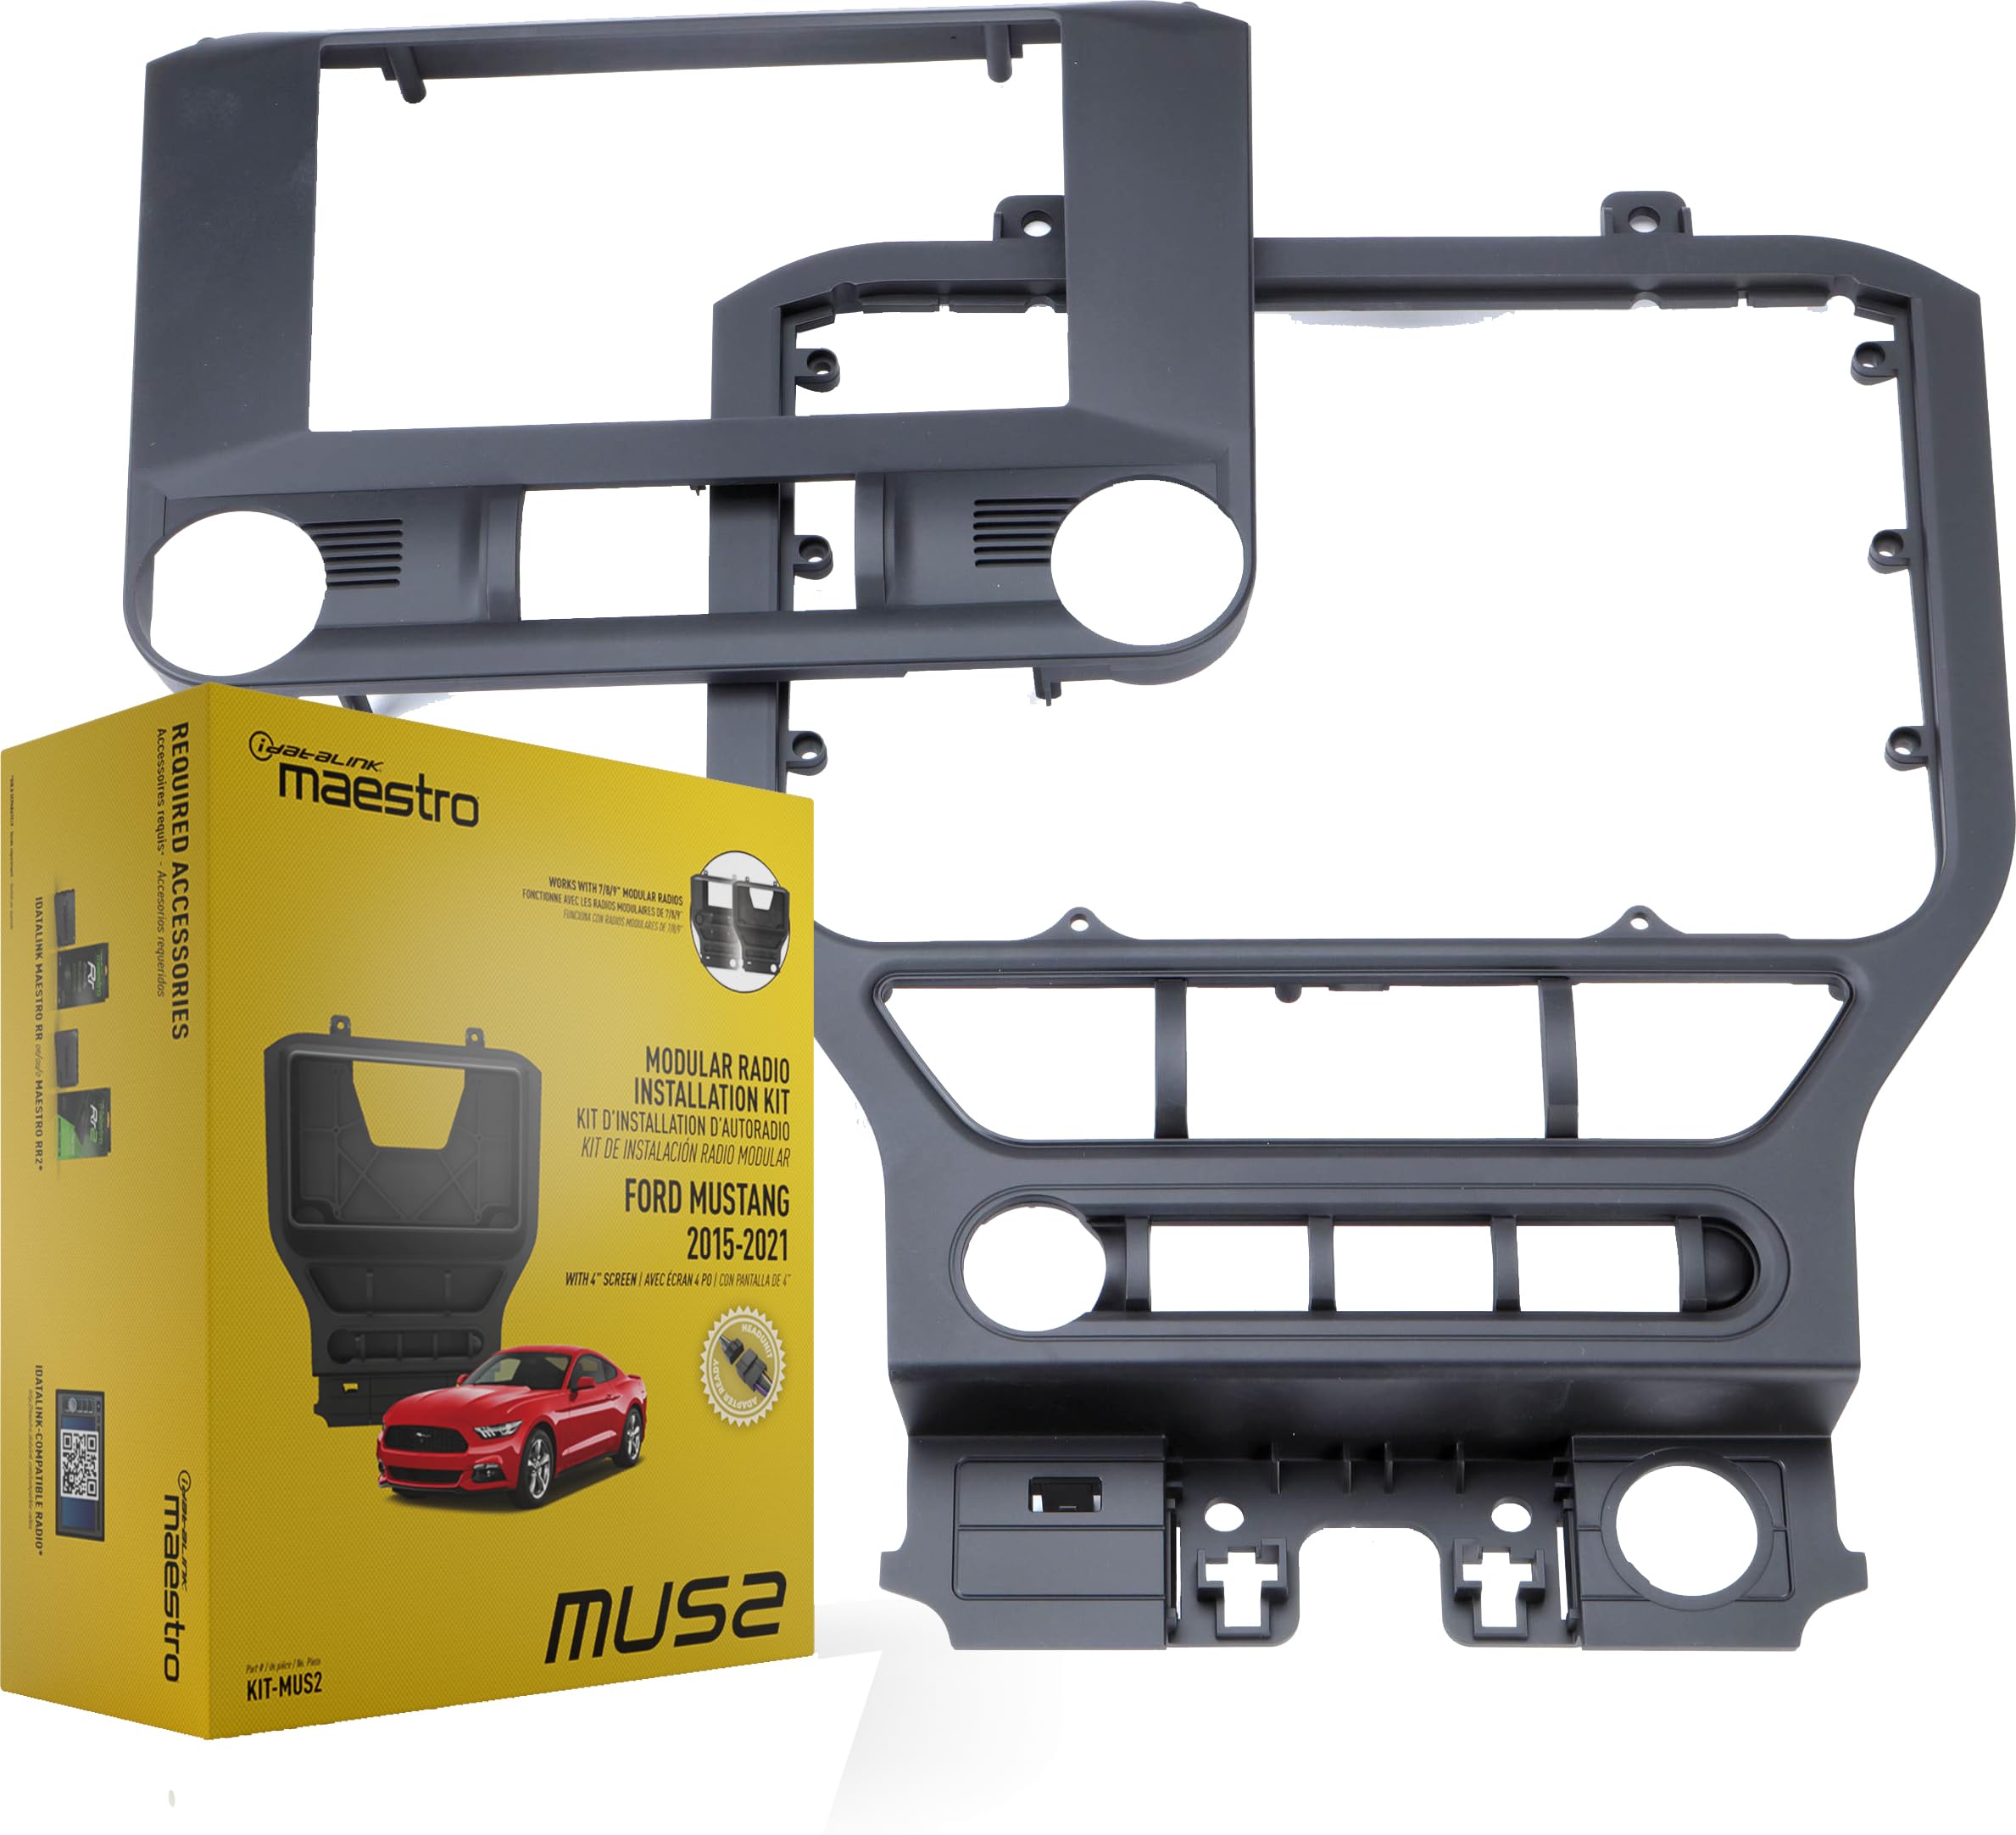
Слика 1.1: Готовоview of iDatalink Maestro KIT-MUS2 components and a chart indicating vehicle coverage for Ford Mustang models from 2015 to 2023 with a 4.2" LCD display.
2. Шта је у кутији
Verify that all components listed below are present in your KIT-MUS2 package:
- iDatalink Maestro KIT-MUS2 Dash and Wiring Kit owner's manual
- Кућиште монитора
- Trim-ring
- Trim-panel
- Предњи носач
- Задњи држач
- Vehicle harness
- Антенски адаптер
- УСБ сноп
- OBDII кабл
- "A"-harness
- "C"-harness
- 2 Заграде
- Cover-panel
- 6 машинска завртња
- 6 Long self-tapping screws
- 12 Short self-tapping screws
- 4 Speed-clips
- 2 Васхерс
- Шаблон за изрезивање
- Водич за брзи почетак
3. Компатибилност
3.1 Компатибилност возила
- Направите: Форд
- Модел: Мустанг
- године: 2015-2023
- Factory Requirement: Equipped with a factory 4.2" LCD screen.
3.2 Head Unit Compatibility
This kit is designed for use with specific Pioneer modular receivers that feature a 7", 8", or 9" touchscreen monitor and an iDatalink serial port. Compatible models include:
- Pioneer DMH-C2550NEX
- Pioneer DMH-C5500NEX
- Pioneer DMH-WC5700NEX
- Pioneer DMH-WC600NEX
4. Потребно за инсталацију
The following items are essential for a complete installation and are sold separately:
- iDatalink Maestro RR or RR2 Interface Module: This module is critical for retaining factory features and integrating the new receiver with your vehicle's electronics.
- iDatalink ACC-HU-PIO1 Installation T-Harness (Pioneer): This harness is highly recommended for direct connection to compatible Pioneer head units, simplifying the wiring process. If this T-Harness is not used, the 20-pin black connector from the KIT-MUS2 harness must be removed, and individual wires spliced directly to the aftermarket radio's corresponding wires.
5. Подешавање и инсталација
This section outlines the general steps for installing the iDatalink Maestro KIT-MUS2. Refer to the detailed owner's manual included with your kit and the Maestro RR/RR2 module for specific wiring diagrams and programming instructions.
5.1 Кораци пре инсталације
- Искључите батерију: Увек искључите негативни терминал акумулатора возила пре почетка било каквих електричних радова.
- Remove Factory Components: Carefully remove the factory radio and dash panel from your Ford Mustang. Consult your vehicle's service manual for specific removal procedures.
- Prepare Maestro Module: Program your iDatalink Maestro RR or RR2 module using the Weblink Updater tool on a computer, following the instructions provided with the module.
5.2 Kit Assembly and Wiring
- Assemble Dash Kit: Attach the appropriate interchangeable panel (7", 8", or 9") to the KIT-MUS2 dash panel to match your Pioneer modular receiver's screen size. Use the provided screws and brackets.
- Повежите каблове: Connect the vehicle-specific wiring harness from the KIT-MUS2 to your vehicle's factory wiring.
- Integrate Maestro Module: Connect the iDatalink Maestro RR or RR2 module to the KIT-MUS2 harness and the Pioneer receiver's iDatalink serial port.
- Head Unit Connection: If using the ACC-HU-PIO1 adapter harness, connect it between the KIT-MUS2 harness and your Pioneer receiver. If not, carefully splice the KIT-MUS2 harness wires to the corresponding wires on your Pioneer receiver's harness.
- Помоћни прикључци: Connect the antenna adapter, USB harness, and OBDII harness as instructed in the detailed manual. Ensure all navigation outputs (parking brake, reverse, and VSS [Vehicle Speed Sense]) are correctly wired to the Pioneer receiver if it has navigation capabilities.

Image 5.1: The iDatalink Maestro KIT-MUS2 dash kit configured for a 7-inch Pioneer modular receiver.

Image 5.2: The iDatalink Maestro KIT-MUS2 dash kit configured for an 8-inch Pioneer modular receiver.
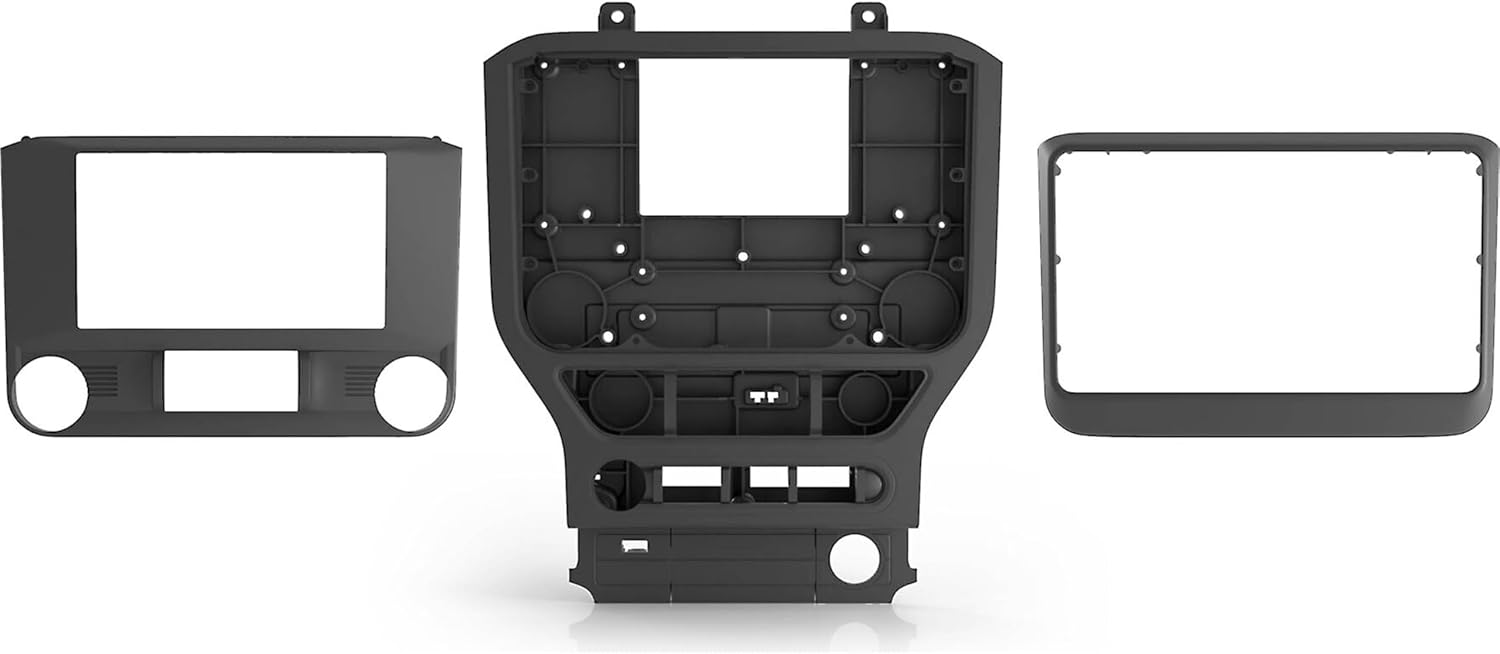
Image 5.3: The iDatalink Maestro KIT-MUS2 dash kit configured for a 9-inch Pioneer modular receiver.
5.3 Након инсталације
- Поново повежите батерију: Поново спојите негативни терминал акумулатора возила.
- Тест функционалност: Before fully reassembling the dash, test all functions of the new Pioneer receiver and verify that all retained factory features are working correctly.
- Завршна скупштина: Secure the new dash panel and receiver into place.
6. Оперативне карактеристике
The iDatalink Maestro KIT-MUS2, in conjunction with the Maestro RR/RR2 module and a compatible Pioneer receiver, allows for the retention and enhancement of various vehicle features:
6.1 Retained Factory Features
- Фабрика Ampдизалица: Retains the factory premium audio amplifier (including Sony & THX systems) with turn-on, fader, gain adjustment, DSP settings, and speed-compensated volume.
- Контроле на волану: Factory steering wheel controls are retained, offering two function buttons and expandable radio functions.
- Vehicle Settings: Access and modify factory vehicle settings directly through the compatible aftermarket head unit's touchscreen.
- Secondary Vehicle Display: The secondary vehicle display (if factory equipped) is retained, showing audio and hands-free information.
- Advanced Camera Features:
- Factory backup camera is retained with dynamic parking guidelines and park assist chimes (a chime speaker is included). The aftermarket head unit must have a composite video rearview улаз камере.
- The factory 360 camera feature is also retained (if factory equipped).
- If an aftermarket front camera (sold separately) is added to an iDatalink compatible head unit with multiple camera inputs, the vehicle's factory auto camera switching feature is retained.
- USB Port Retention: The included USB retention harness allows you to retain the vehicle's factory USB port. For Apple CarPlay and Android Auto operation, the new car stereo should have a high-amperage charging port (1.5A or greater).
- RAP & Warning Chimes: The vehicle's Retained Accessory Power (RAP) and Warning Chimes are retained.
6.2 Додатне карактеристике
The system also provides additional vehicle information and performance monitoring capabilities:
- Подаци о возилу: Displays Tire Pressure, Battery Voltage, allows reading/resetting Engine Codes, and shows Door Open Status with warnings.
- Мерила: Provides selectable Performance Gauges and "Track Pack" Gauges, along with the ability to read/reset Check Engine Codes.

Image 6.1: An installed Pioneer modular receiver displaying vehicle information, including tire pressure, within the Ford Mustang dashboard.

Image 6.2: An installed Pioneer modular receiver displaying various performance gauges within the Ford Mustang dashboard.
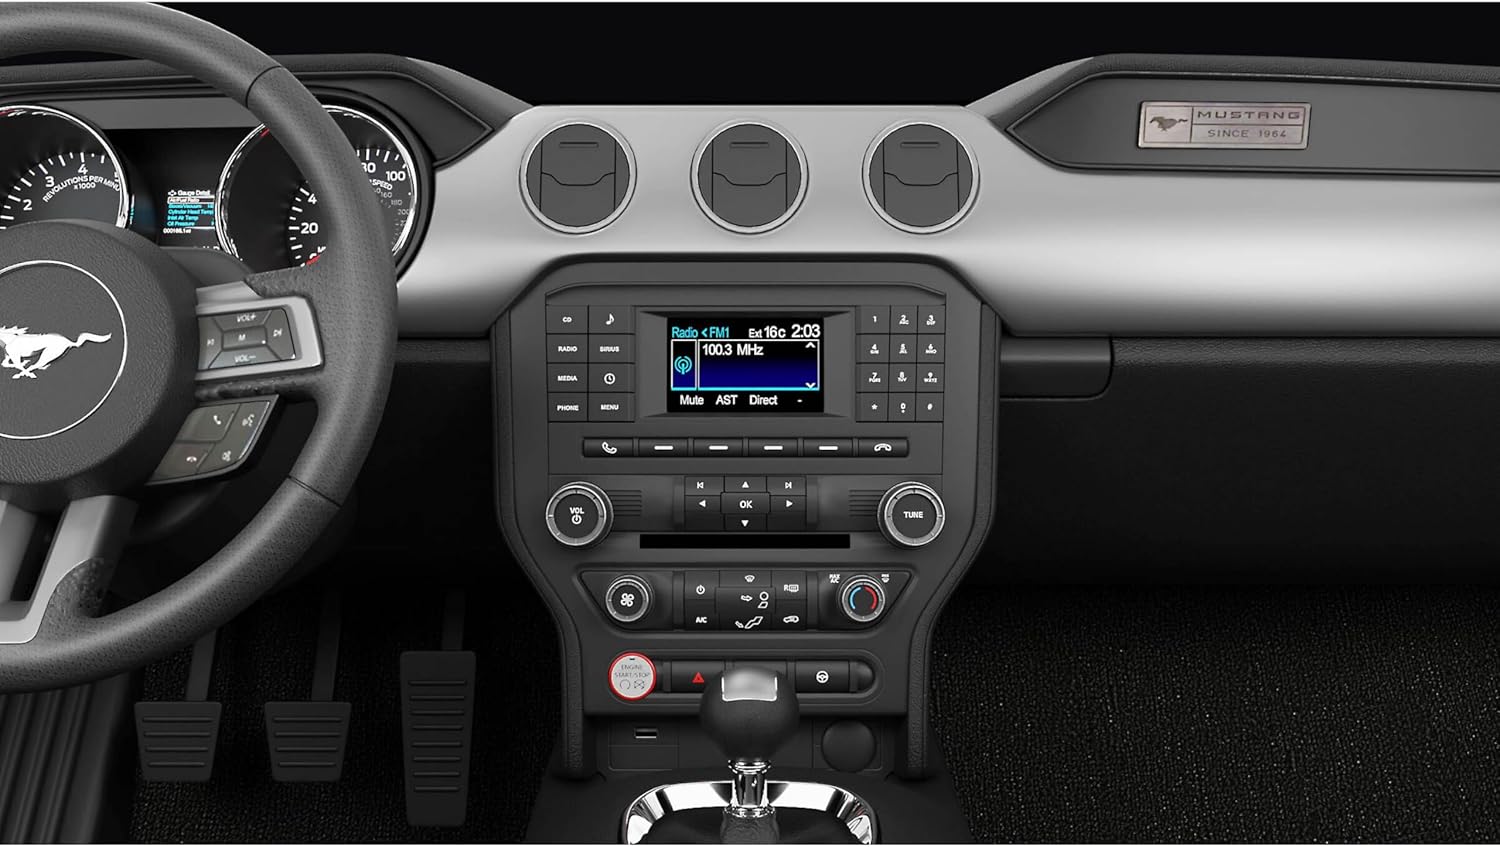
Image 6.3: An installed Pioneer modular receiver displaying the radio interface within the Ford Mustang dashboard.
7. Одржавање
The iDatalink Maestro KIT-MUS2 is designed for durability and requires minimal maintenance. Follow these general guidelines:
- Чишћење: Use a soft, dry cloth to clean the dash panel. Avoid abrasive cleaners or solvents that could damage the finish.
- Везе: Periodically check all wiring connections to ensure they remain secure, especially after significant vehicle vibrations or impacts.
- Фирмвер: Ensure your iDatalink Maestro RR/RR2 module has the latest firmware by visiting the iDatalink website and using the Weblink Updater tool. This can improve compatibility and performance.
- Receiver Maintenance: Refer to your Pioneer modular receiver's owner's manual for specific cleaning and maintenance instructions for the head unit itself.
КСНУМКС. Решавање проблема
Ако наиђете на проблеме након инсталације, размотрите следеће уобичајене кораке за решавање проблема:
- Нема напајања за пријемник:
- Check all power and ground connections from the KIT-MUS2 harness to the Pioneer receiver.
- Verify vehicle fuses and the fuse on the Pioneer receiver.
- Ensure the Maestro RR/RR2 module is properly connected and programmed.
- Нема звука:
- Confirm that the factory amplifier is turning on. Check connections to the ampлифиер.
- Verify speaker wiring from the KIT-MUS2 harness to the Pioneer receiver.
- Check audio settings on the Pioneer receiver.
- Factory Features Not Retained (e.g., Steering Wheel Controls, Camera):
- Ensure the Maestro RR/RR2 module is correctly programmed for your specific vehicle and Pioneer receiver model.
- Verify all data connections between the KIT-MUS2, Maestro module, and Pioneer receiver.
- Check the settings on your Pioneer receiver to enable or configure retained features.
- Проблеми са приказом:
- Ensure the video cable for the backup camera (if applicable) is securely connected to the Pioneer receiver's composite video input.
- Check the display settings on the Pioneer receiver.
For persistent issues, consult the detailed troubleshooting guide in the iDatalink Maestro RR/RR2 module manual or contact iDatalink technical support.
9. Спецификације
- Број модела: KIT-MUS2
- Тежина артикла: Отприлике 2.99 фунти
- Димензије производа: Приближно 14 x 8 x 18 cm (димензије паковања)
- Компатибилност возила: Ford Mustang 2015-2023 (with factory 4.2" LCD)
- Head Unit Compatibility: Pioneer modular receivers (7", 8", 9" screens) with iDatalink serial port
- Outputs Provided: Navigation (Parking Brake, Reverse Light, VSS), 12V/15A Accessory Power, Illumination Output
10. Информације о гаранцији
The iDatalink Maestro KIT-MUS2 comes with a 1-годишња гаранција произвођача. This warranty covers defects in materials and workmanship under normal use. Please retain your proof of purchase for warranty claims. For specific terms and conditions, refer to the warranty documentation included with your product or visit the iDatalink official webсајту.
11. Подршка
For technical assistance, installation questions, or warranty inquiries, please contact iDatalink customer support:
- iDatalink Webсајт: Visit the official iDatalink website for product information, firmware updates, and support resources.
- Контакт информације: Refer to the contact section on the iDatalink website or the owner's manual for phone numbers and email support.
Always ensure you have your product model number (KIT-MUS2) and proof of purchase available when contacting support.


