Zgrmbo DS-6626
Zgrmbo 16-inch Digital Wall Clock User Manual
Модел: ДС-6626
1. Увод
Thank you for choosing the Zgrmbo 16-inch Digital Wall Clock. This manual provides detailed instructions for setting up, operating, and maintaining your new clock. Please read this manual thoroughly before use to ensure proper function and longevity of the product.

Image 1.1: Zgrmbo 16-inch Digital Wall Clock with its various display features.
2. Садржај пакета
Молимо вас да проверите пакет за следеће ставке:
- Zgrmbo 16-inch Digital Wall Clock (Model DS-6626)
- Ремоте Цонтрол
- УСБ кабл за напајање
- Wall Adapter (USB to AC)
- CR2032 Battery (for memory function)
- Mounting Pegs/Screws
- Монтажни образац
- Упутство за употребу
3. Карактеристике производа
- Велики ЛЕД екран: 16.2-inch screen with 4.25-inch jumbo digits for clear visibility from a distance.
- Мултифункционални екран: Shows time, date, indoor temperature, and day of the week.
- даљински управљач: Conveniently adjust settings, brightness, alarms, and timers.
- Подесива осветљеност: 10-level manual brightness adjustment and an auto-brightness mode that adapts to ambient light.
- Штоперица и тајмер: Integrated functions for various timing needs.
- Функција меморије: Built-in CR2032 battery preserves time and settings during power outages (display turns off during battery backup).
- Флексибилна монтажа: Designed for wall mounting with multiple cable routing options.
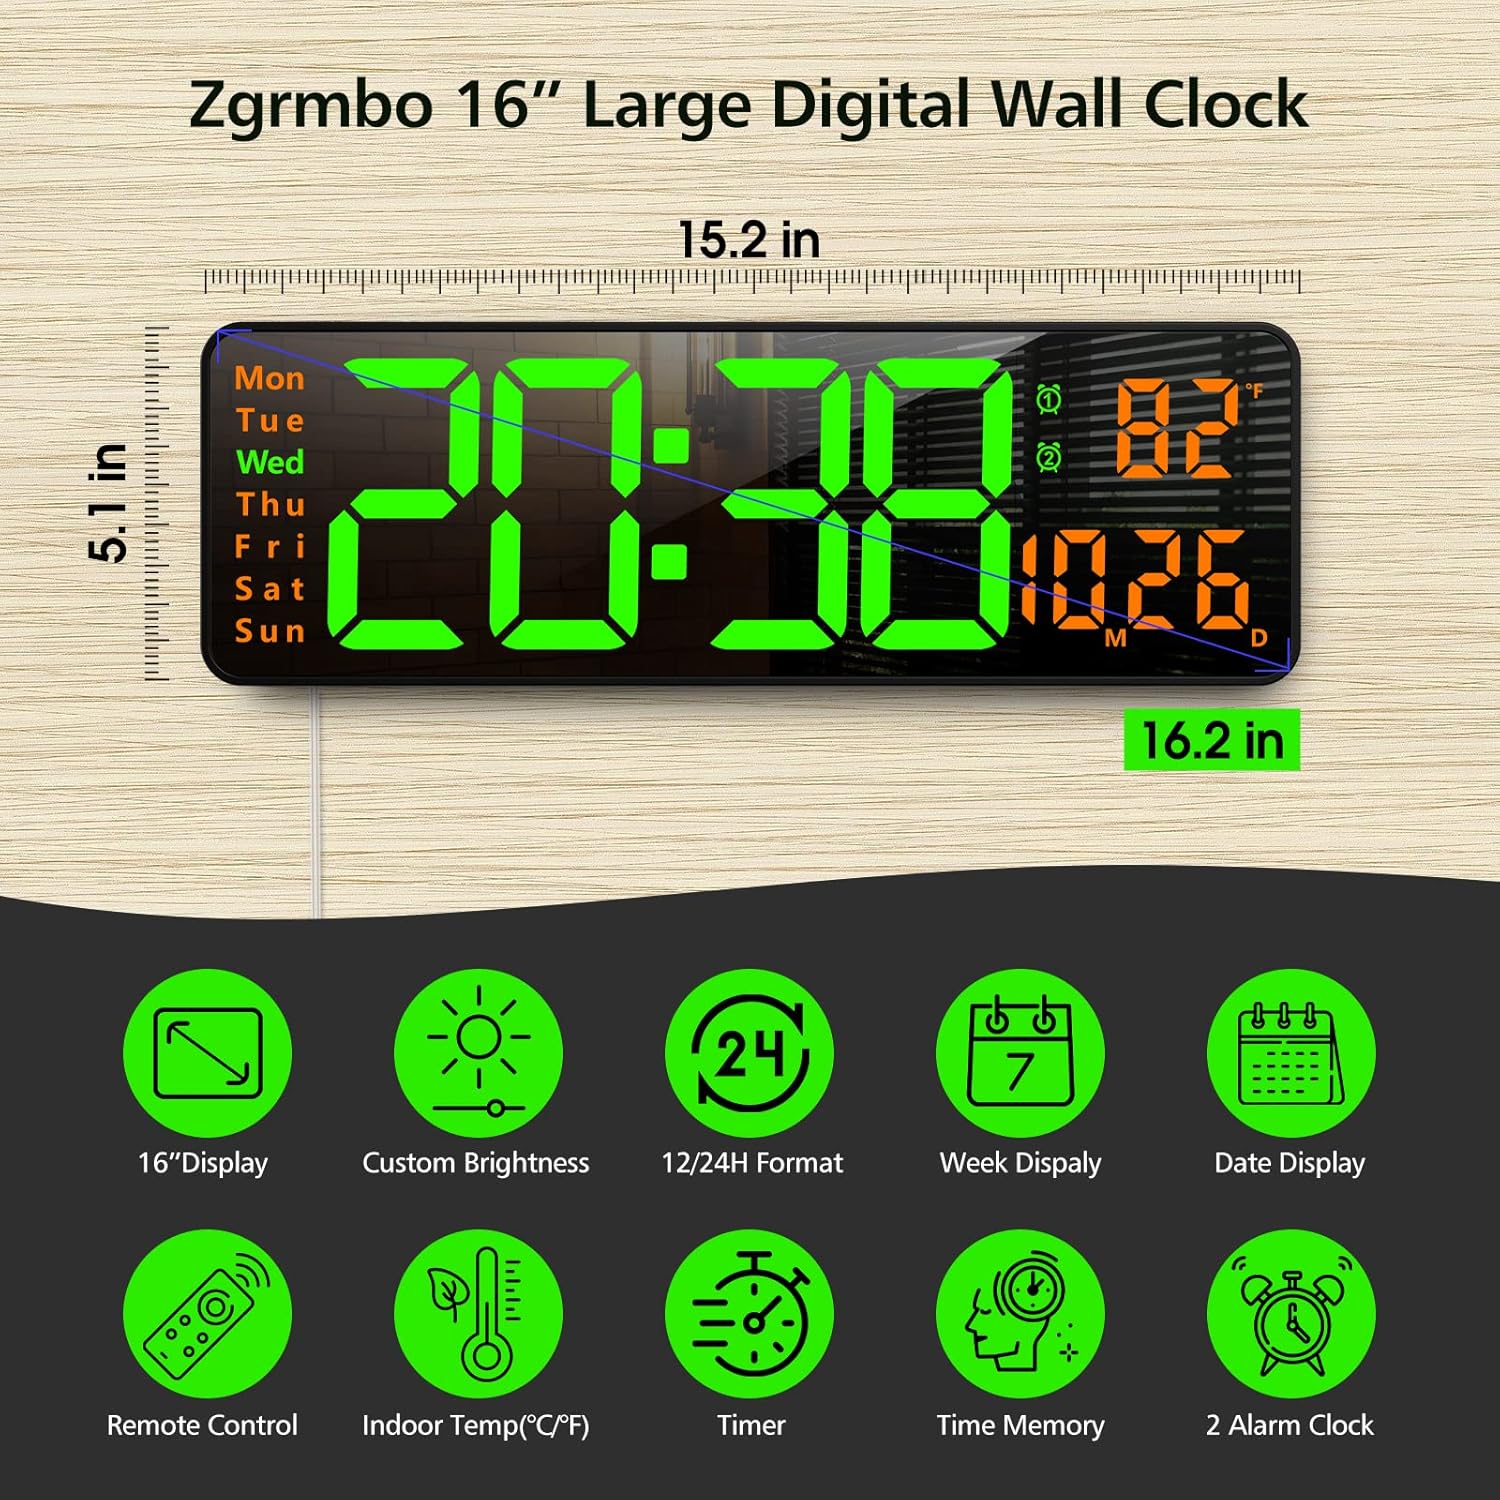
Слика 3.1: Готовоview of the clock's dimensions and primary features.
4. Подешавање
4.1. Прикључак за напајање
- Insert the CR2032 battery into the battery compartment on the back of the clock. This battery maintains settings during power interruptions.
- Connect the USB power cable to the clock and then to the provided wall adapter.
- Plug the wall adapter into a standard electrical outlet. The clock display will illuminate.
4.2. Монтажа на зид
The clock can be easily mounted on a wall using the provided template and hardware.
- Select a desired location on the wall.
- Use the mounting template to mark the positions for the mounting pegs/screws.
- Install the mounting pegs/screws into the marked positions.
- Align the keyhole slots on the back of the clock with the installed pegs/screws and slide the clock into place.
- Route the power cable through one of the designated cutouts on the back of the clock to ensure it lies flush against the wall. Excess cable can be wrapped around the designated area on the back of the clock.
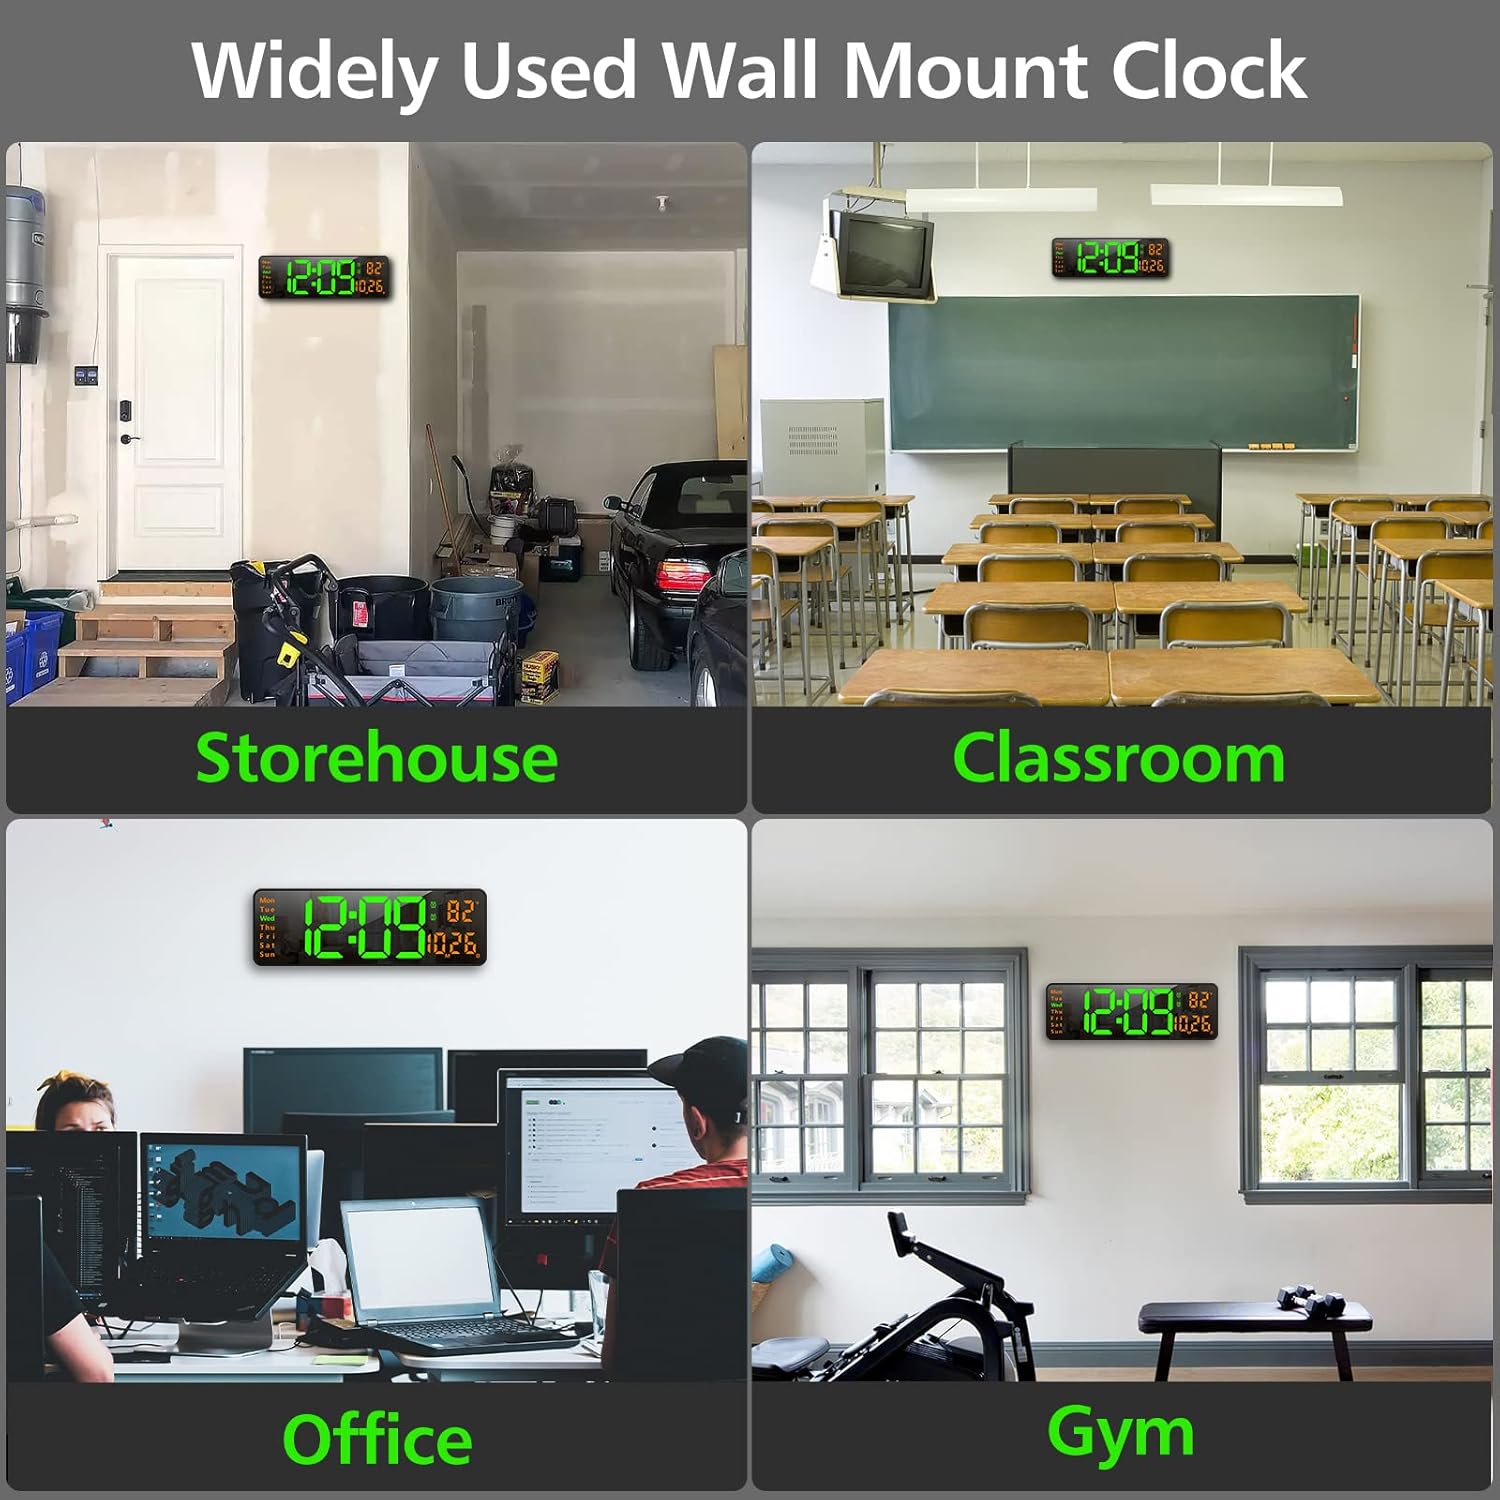
Слика 4.1: Примерamples of the clock mounted in different environments.
5. Упутство за употребу
The clock can be operated using the remote control or the buttons on the back of the unit.
5.1. Даљинско управљањеview
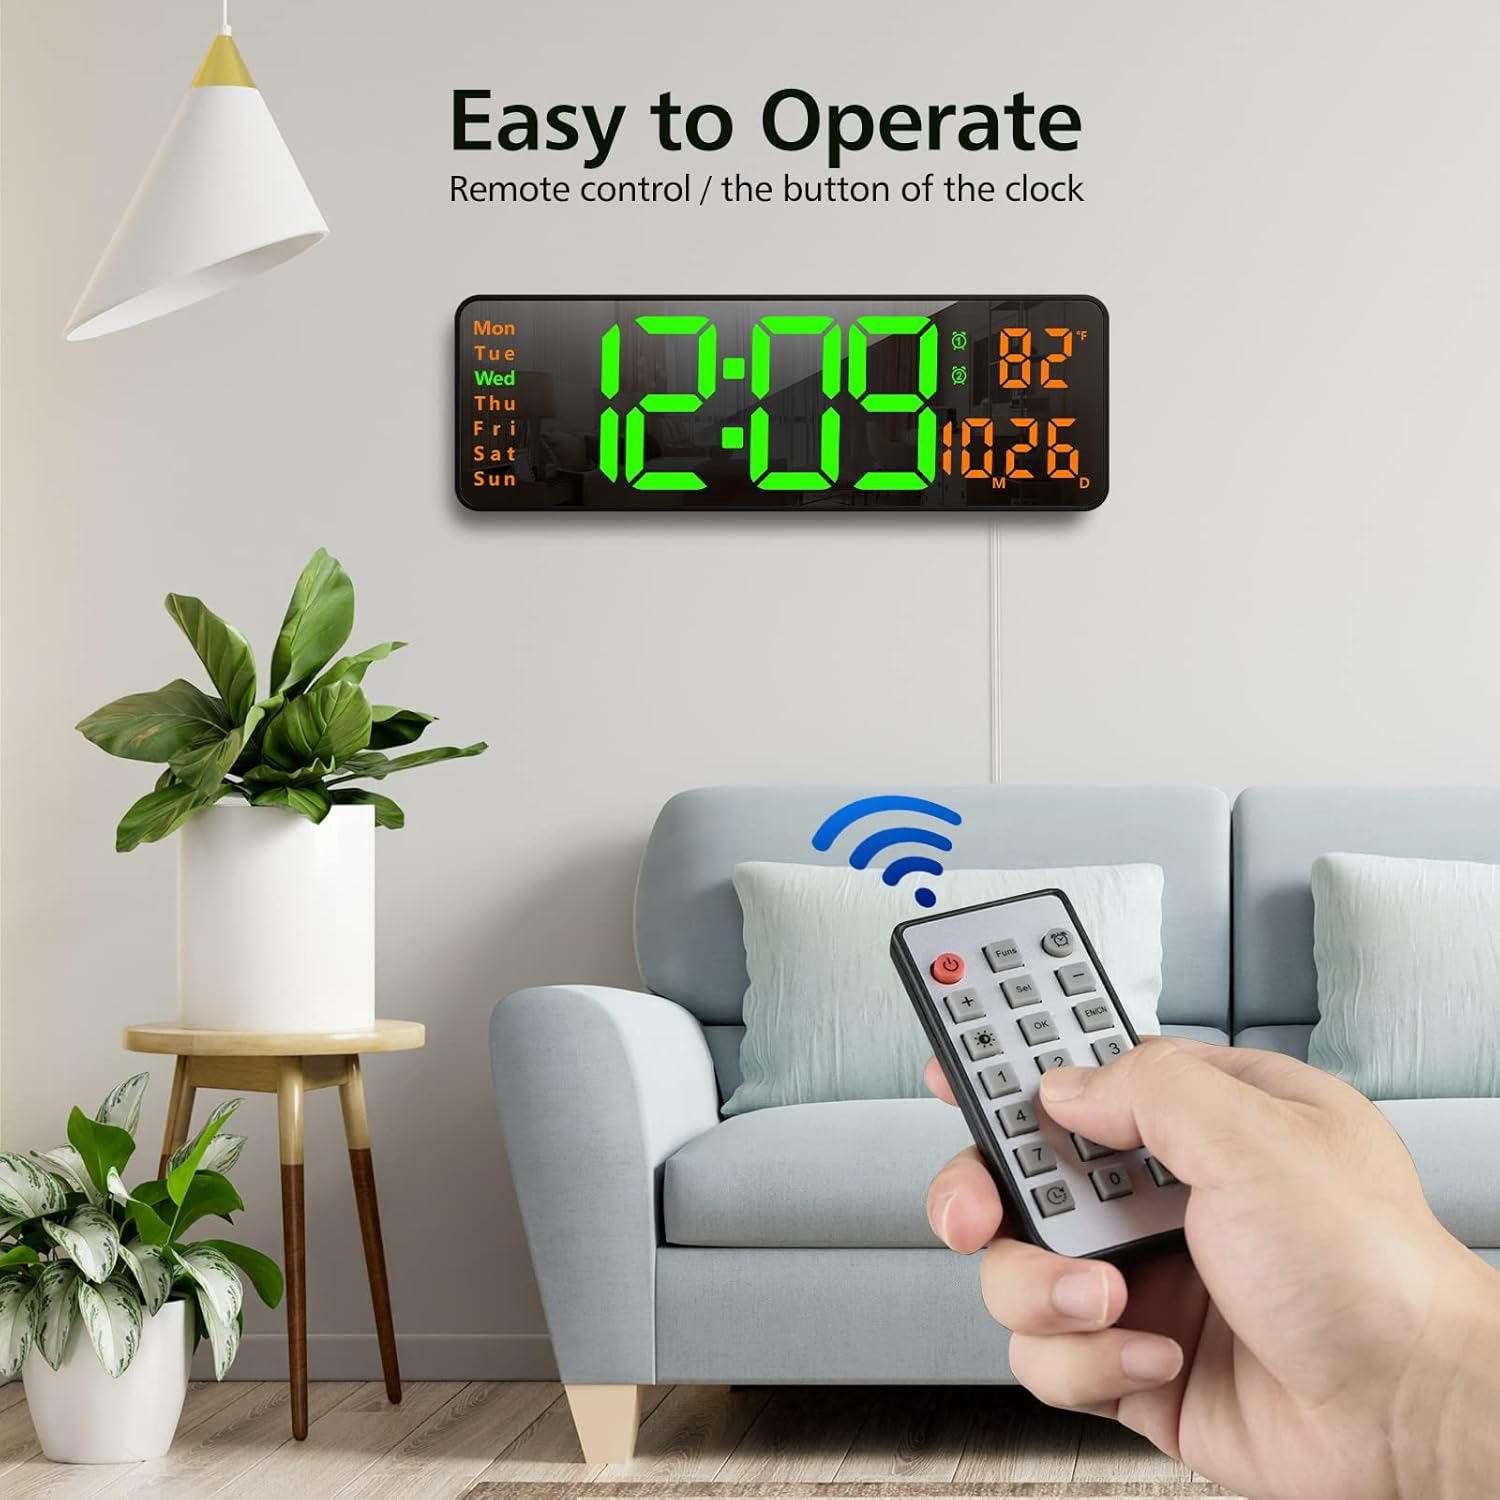
Image 5.1: Using the remote control to operate the clock.
- Дугме за напајање: Укључује/искључује екран.
- Funs Button: Cycles through various functions (e.g., time, date, temperature display modes).
- Дугме за аларм: Приступа подешавањима аларма.
- Подесите дугме: Enters setting mode for time, date, etc.
- +/- Дугмад: Adjust values up or down during setting.
- Brightness Button (Lightbulb icon): Cycles through brightness levels or activates auto-brightness.
- Дугме ОК: Потврђује изборе.
- Дугмад са бројевима (0-9): For direct input of time/date values.
- Timer Buttons (Clock icons): Activates and controls the timer/stopwatch functions.
5.2. Подешавање времена и датума
- Press the 'Set' button on the remote control. The time display will start flashing.
- Use the '+/-' buttons to adjust the hour. Press 'Set' again to confirm and move to minutes.
- Adjust minutes using '+/-' buttons. Press 'Set' to confirm.
- Наставите овај поступак да бисте подесили годину, месец и дан.
- After setting the date, you may be prompted to select 12-hour or 24-hour format. Use '+/-' and 'Set' to choose.
- The clock will automatically exit setting mode after a few seconds of inactivity or by pressing 'OK'.
5.3. Подешавање осветљености
The clock offers 10 levels of brightness and an automatic adjustment mode.
- Press the 'Brightness' button (lightbulb icon) on the remote control once to cycle through manual brightness levels (L-01 to L-10).
- Press the 'Brightness' button twice quickly to activate the auto-brightness mode (L-AU). The clock will then adjust its brightness based on ambient light conditions.

Image 5.2: Visual representation of the 10-level brightness adjustment and auto-brightness feature.
5.4. Подешавање аларма
The clock supports up to two alarms.
- Press the 'Alarm' button (clock icon) on the remote control. The alarm time will flash.
- Use the '+/-' buttons to set the desired alarm hour. Press 'Set' to confirm.
- Use the '+/-' buttons to set the desired alarm minutes. Press 'Set' to confirm.
- Repeat for the second alarm if needed.
- To activate/deactivate an alarm, press the 'Alarm' button repeatedly until the alarm indicator (1 or 2) appears/disappears next to the temperature display.
5.5. Using the Timer/Stopwatch
The clock features both a countdown timer and a stopwatch function.
- Тајмер: Press the 'Timer' button (clock with arrow down icon) on the remote. Use the number buttons to input the desired countdown time (e.g., 10 for 10 minutes). Press 'OK' to start. Press 'OK' again to pause/resume. Long press 'Timer' to reset.
- Штоперица: Press the 'Timer' button (clock with arrow up icon) on the remote. Press 'OK' to start. Press 'OK' again to pause/resume. Long press 'Timer' to reset.

Image 5.3: The digital timer function in use.
6. Одржавање
- Чишћење: Use a soft, dry cloth to clean the display and body of the clock. Avoid abrasive cleaners or solvents.
- Замена батерије: The CR2032 battery for the memory function should be replaced periodically (e.g., every 1-2 years) to ensure settings are retained during power outagес.
- Складиштење: If storing the clock for an extended period, unplug it from power and remove the CR2032 battery. Store in a cool, dry place.
КСНУМКС. Решавање проблема
| Проблем | Могући узрок | Решење |
|---|---|---|
| Приказ сата је искључен. | Нема струје, нема струјеtage, or remote control power button pressed. | Ensure power cable is securely plugged in. Check power outlet. Press the power button on the remote. |
| Подешавања се губе након нестанка струјеtage. | CR2032 memory battery is dead or not installed. | Install or replace the CR2032 battery. |
| Даљински управљач не ради. | Remote battery is dead or plastic tab not removed. | Remove the plastic tab from the remote battery compartment. Replace the remote control battery. |
| Нетачно очитавање температуре. | Sensor interference or unit not calibrated. | Ensure the clock is not near heat sources or direct sunlight. The temperature sensor is for indoor ambient temperature. |
8. Спецификације
- Бренд: Згрмбо
- Модел: ДС-6626
- Тип приказа: Дигитал ЛЕД
- Величина екрана: 16.2 инча (дијагонала)
- Висина цифре: 4.25 inches (time digits)
- Димензије производа: 15.2" Ш x 5.1" В
- Извор напајања: Електрични са каблом (УСБ)
- Резервна батерија: 1x CR2032 (for memory function)
- Материјал: Пластика, ЛЕД
- Тип монтаже: Валл Моунт
- Посебне карактеристике: Adjustable Brightness, Alarm, Large Display, Timer, Stopwatch, Date, Week, Temperature.
9. Гаранција и подршка
Zgrmbo offers an 18-месечна гаранција for this product, along with a Политика поврата од 45 дана. For any questions, technical support, or warranty claims, please contact Zgrmbo customer service through your purchase platform or visit the official Zgrmbo store page.
We are committed to providing high-quality products and excellent customer service. Your satisfaction is our priority.
Ask a question about this manual
Ask about setup, troubleshooting, compatibility, parts, safety, or missing instructions. Manuals+ will review the question and use this page’s manual context to help answer it.