
AMZCNC HT-1930Blue-U
AMZCNC Hydraulic Crimping Tool HT-1930Blue-U
Упутство за употребу
1. Увод
This manual provides essential instructions for the safe and effective operation, setup, maintenance, and troubleshooting of your AMZCNC HT-1930Blue-U Hydraulic Crimping Tool. Please read this manual thoroughly before using the tool to ensure proper function and to prevent injury or damage.
2. Безбедносне информације
УПОЗОРЕЊЕ: Непоштовање ових безбедносних упутстава може довести до озбиљних повреда или материјалне штете.
- Always wear appropriate personal protective equipment (PPE), including safety glasses and gloves, when operating the tool.
- Уверите се да је радни простор чист, добро осветљен и без препрека.
- Do not operate the tool if it is damaged or malfunctioning. Contact customer support for assistance.
- Држите руке и прсте даље од чељусти за кримповање током рада.
- Do not exceed the maximum operating pressure or attempt to crimp materials outside the specified range (16mm, 20mm, 25mm, 32mm U-contour).
- Store the tool in its case in a dry, secure location away from children and unauthorized users.
- Only use original AMZCNC replacement parts and accessories.
3. Производ је готовview
The AMZCNC HT-1930Blue-U is a professional hydraulic crimping tool designed for creating secure connections on composite and plastic pipes using U-contour fittings. It features a robust hydraulic system and interchangeable crimping dies.
3.1 Компоненте
- Hydraulic Crimping Tool Body: Main unit containing the hydraulic pump and handles.
- Crimping Head: Detachable head where the dies are inserted.
- матрице за пресовање: Interchangeable U-contour dies (16mm, 20mm, 25mm, 32mm).
- Release Valve/Dial: Mechanism to release hydraulic pressure and reset the tool.
- Торбица за ношење: За складиштење и транспорт алата и прибора.

Figure 1: AMZCNC HT-1930Blue-U Hydraulic Crimping Tool Kit
This image displays the complete AMZCNC HT-1930Blue-U hydraulic crimping tool set, including the main tool, four U-contour crimping dies (16mm, 20mm, 25mm, 32mm), and a sturdy black carrying case for organized storage and transport.

Figure 2: U-Type Crimping Die Compatibility
This table illustrates the different U-type crimping die sizes included (16mm, 20mm, 25mm, 32mm) and their compatibility with various composite and plastic pipe systems. It also shows the resulting crimp contour and an example of a compatible pipe fitting.
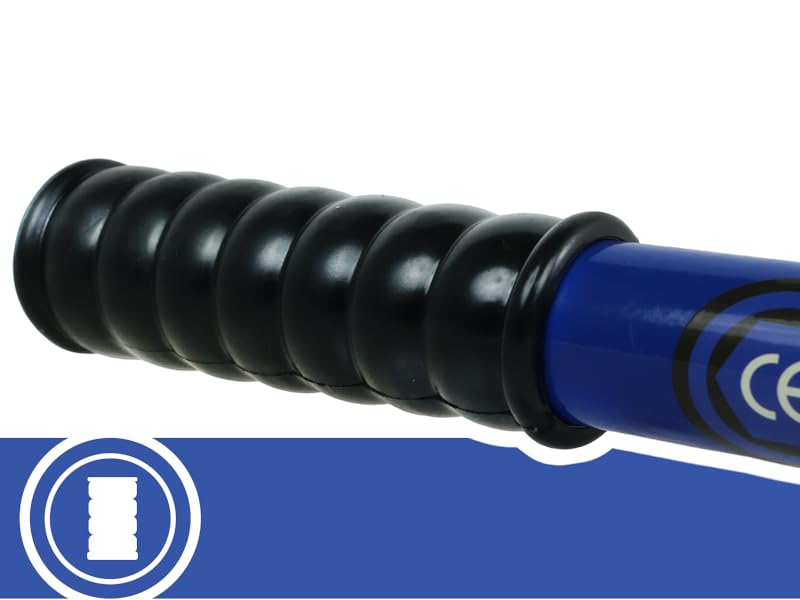
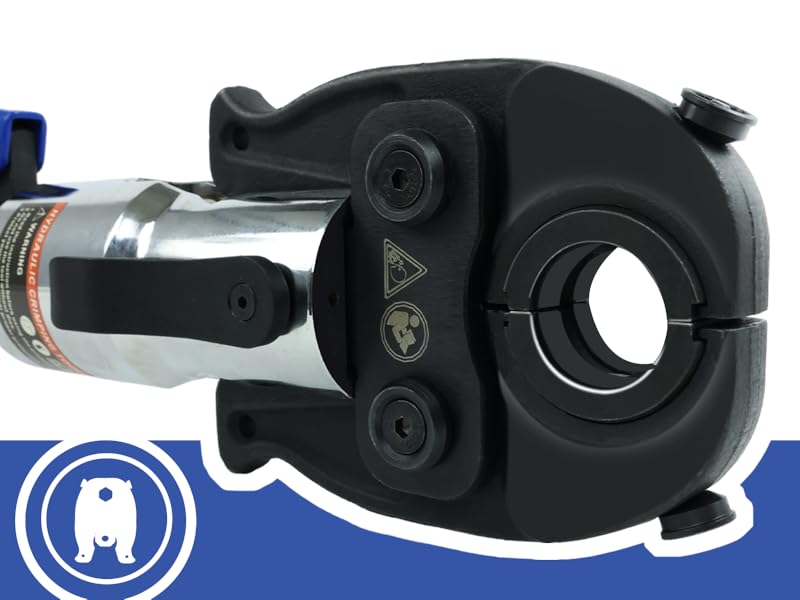
Figure 3: Crimping Head Detail
Детаљно view of the crimping head, highlighting the robust construction and the mechanism for holding the interchangeable U-contour dies securely during the crimping process.
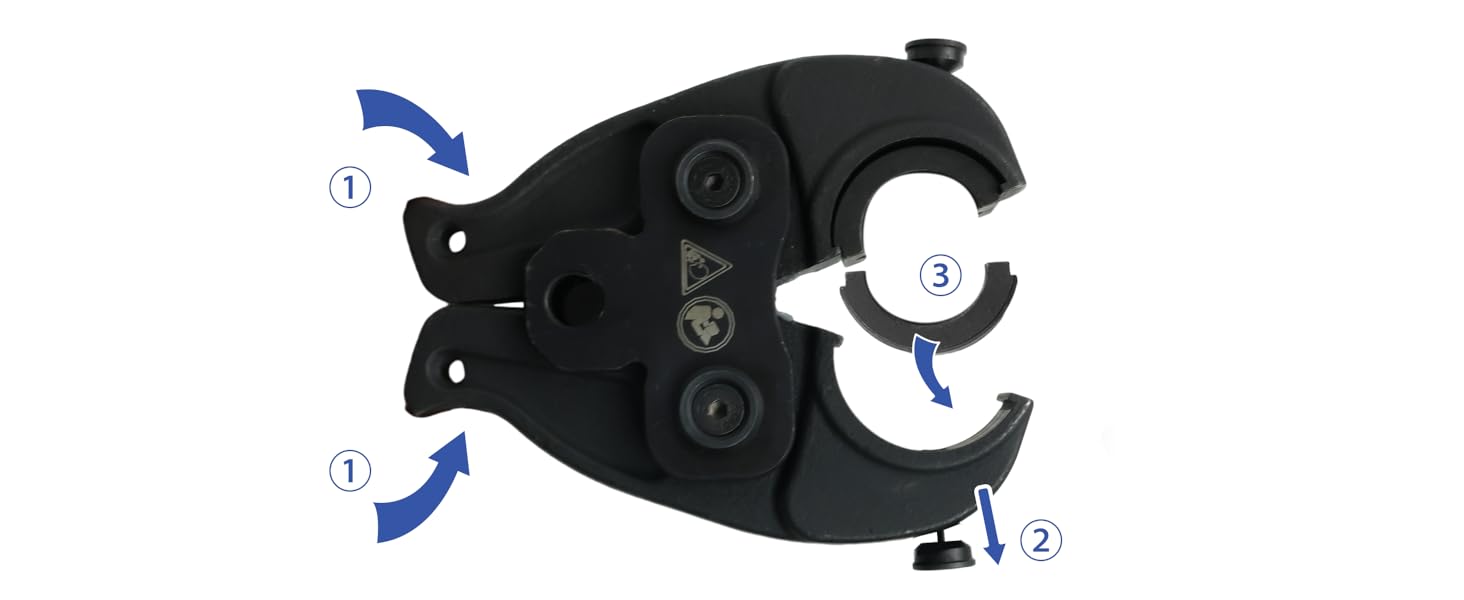
Figure 4: Hydraulic Release Dial
This image shows the hydraulic release dial, clearly marked for 'Work' and 'Reset' positions. This dial controls the hydraulic pressure, allowing for crimping and releasing the tool after a connection is made.
4. Спецификације
| Феатуре | Спецификација |
|---|---|
| Број модела | HT-1930Blue-U |
| Crimping Contour | U-тип |
| Die Sizes Included | 16 мм, 20 мм, 25 мм, 32 мм |
| Максимални радни притисак | 80 kN (approx. 8 tons) |
| Материјал | Alloy Steel, Aluminum Alloy |
| Тежина алата | 5.73 килограма |
| Димензије (упаковано) | 43.5 к 23.2 к 9.7 цм |
| Материјал ручке | Alloy Steel, Ergonomic |
| Апликација | Industrial or construction environments for composite and plastic pipe systems |
5. Подешавање
5.1 Распакивање и преглед
- Carefully remove the tool and all accessories from the carrying case.
- Inspect the tool for any signs of damage during shipping. Do not use if damaged.
- Familiarize yourself with all components as described in Section 3.1.
5.2 Installing Crimping Dies
- Select the appropriate U-contour crimping die size (16mm, 20mm, 25mm, or 32mm) for your pipe fitting.
- Ensure the tool's hydraulic pressure is fully released by turning the release dial to the 'Reset' position. The crimping head should be open.
- Open the crimping head jaws by pulling the release pin or lever (if present) and spreading the jaws.
- Insert the selected crimping dies into the designated slots within the crimping head. Ensure they are seated correctly and securely.
- Close the crimping head jaws until they lock into place.
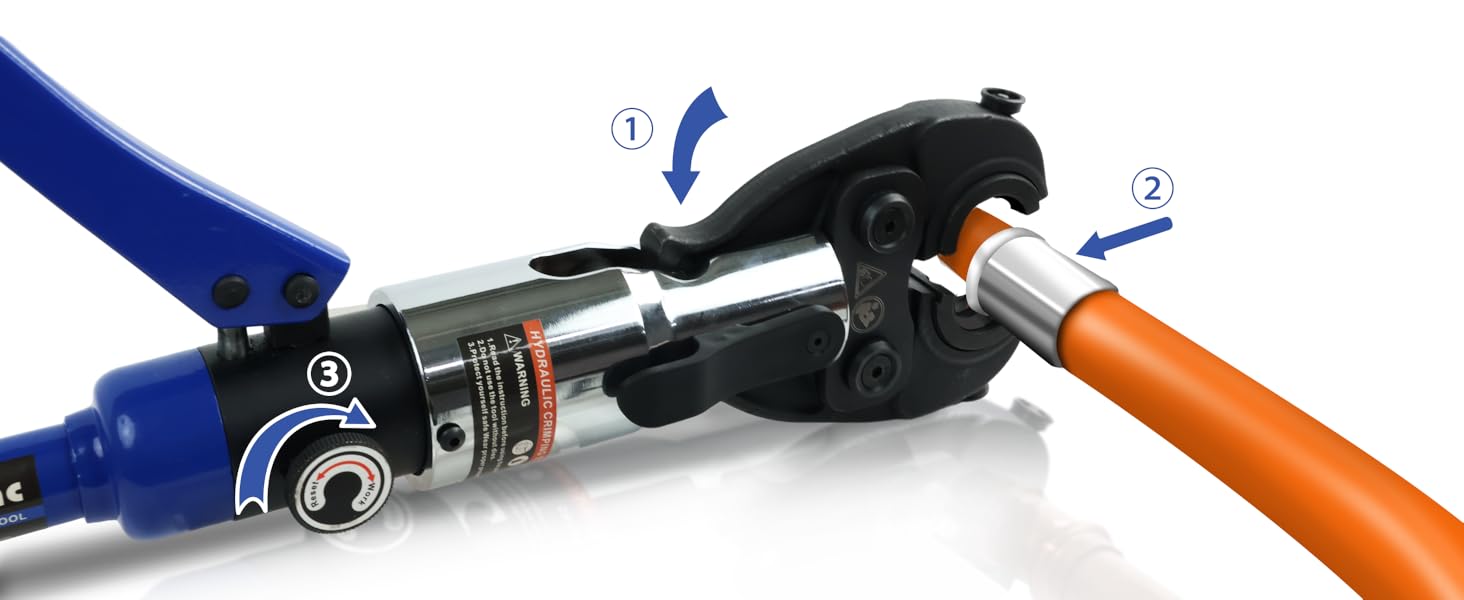
Figure 5: Inserting Crimping Dies
This diagram illustrates the process of opening the crimping head and correctly inserting the U-contour dies into their respective positions before closing the head for operation.
6. Упутство за употребу
6.1 Preparing the Pipe and Fitting
- Cut the pipe to the required length, ensuring a clean, straight cut.
- Deburr the pipe ends to remove any sharp edges.
- Slide the pipe fitting onto the pipe, ensuring it is fully seated and aligned.
6.2 Performing a Crimp
- Ensure the correct crimping dies are installed and the crimping head is securely closed.
- Turn the hydraulic release dial to the 'Work' position to engage the hydraulic pump.
- Position the crimping head around the pipe fitting, ensuring the dies are centered over the fitting's crimping collar.
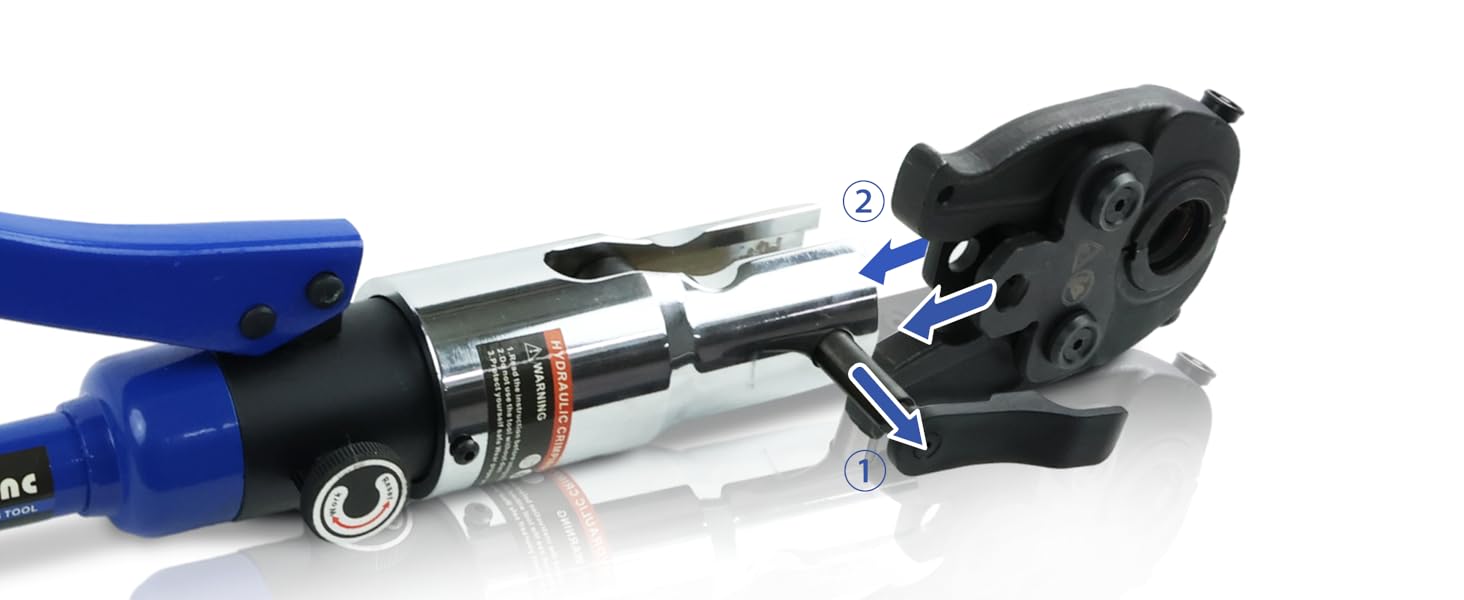
Figure 6: Positioning for Crimp
This image demonstrates the correct placement of a pipe and fitting within the crimping jaws, ensuring the fitting's collar is properly aligned with the U-contour dies before initiating the crimping action.
- Begin pumping the handles of the tool repeatedly. You will feel resistance as the dies close and apply pressure to the fitting.
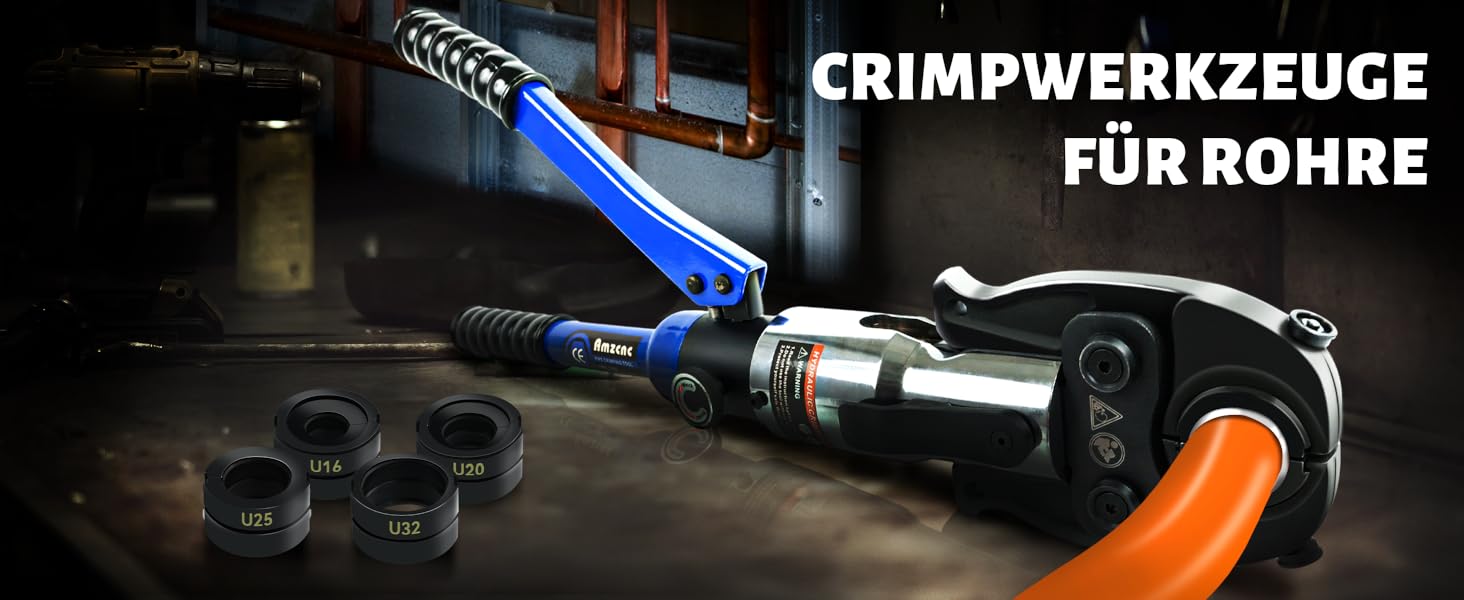
Figure 7: Pumping the Handles
This illustration shows the user repeatedly squeezing the tool's handles to activate the hydraulic pump, which gradually closes the crimping dies around the pipe fitting.
- Continue pumping until the dies are fully closed and the crimp is complete. The tool may make a clicking sound when maximum pressure is reached. Visually inspect the crimp to ensure it is uniform and secure.
6.3 Релеasing the Tool
- Once the crimp is complete, turn the hydraulic release dial to the 'Reset' position. This will release the hydraulic pressure, allowing the dies to open.
- Remove the crimped pipe and fitting from the tool.
Слика 8: Релеasing the Crimp
This image depicts the final step of the crimping process, where the hydraulic pressure is released, the dies open, and the securely crimped pipe fitting is removed from the tool.
7. Одржавање
7.1 Чишћење
- After each use, wipe down the tool and dies with a clean, dry cloth to remove any dirt, dust, or debris.
- Ensure the crimping dies are free from any residue that could affect future crimps.
7.2 Подмазивање
- Periodically apply a light coat of machine oil to the moving parts of the crimping head and the die slots to ensure smooth operation and prevent corrosion.
- Do not over-lubricate, as excess oil can attract dirt.
7.3 Складиштење
- Always store the tool and dies in the provided carrying case when not in use.
- Store in a cool, dry place, protected from direct sunlight and extreme temperatures.
КСНУМКС. Решавање проблема
8.1 Incomplete Crimp
- Узрок: Insufficient pumping or incorrect die selection.
- решење: Ensure the handles are pumped until the dies are fully closed and maximum pressure is reached. Verify that the correct die size is used for the fitting.
8.2 Tool Not Releasing
- Узрок: Release dial not fully turned to 'Reset' position.
- решење: Ensure the release dial is completely turned to the 'Reset' position to release hydraulic pressure.
8.3 Цурење уља
- Узрок: Seal wear or damage.
- решење: If oil leakage occurs, discontinue use immediately and contact customer support for repair or replacement. Do not attempt to repair the hydraulic system yourself.
9. Гаранција и подршка
9.1 Информације о гаранцији
The AMZCNC HT-1930Blue-U Hydraulic Crimping Tool comes with a једногодишња гаранција from the date of purchase. This warranty covers manufacturing defects and material faults under normal use. For warranty claims or service, please contact the seller or AMZCNC customer support.
9.2 Корисничка подршка
For any questions, technical assistance, or to order replacement parts, please refer to the contact information provided by your retailer or visit the official AMZCNC website. Please have your model number (HT-1930Blue-U) and purchase date available when contacting support.
Ask a question about this manual
Ask about setup, troubleshooting, compatibility, parts, safety, or missing instructions. Manuals+ will review the question and use this page’s manual context to help answer it.