staniot Standard Kit
staniot SecCube 3 WiFi Alarm System User Manual
Comprehensive guide for setup, operation, and maintenance of your staniot SecCube 3 Wireless Smart Home Security System.
1. Introduction and System Overview
The staniot SecCube 3 WiFi Alarm System is a comprehensive smart home security solution designed for ease of use and robust protection. This 9-piece kit includes a base station, door/window sensors, a remote control, and RFID tags, offering multiple ways to manage your home security.
Key features of the system include:
- Powerful WiFi Security System: The SecCube 3 base station features a minimalist design with powerful functionality, including a multi-function button for quick arming and a security light to indicate device status.
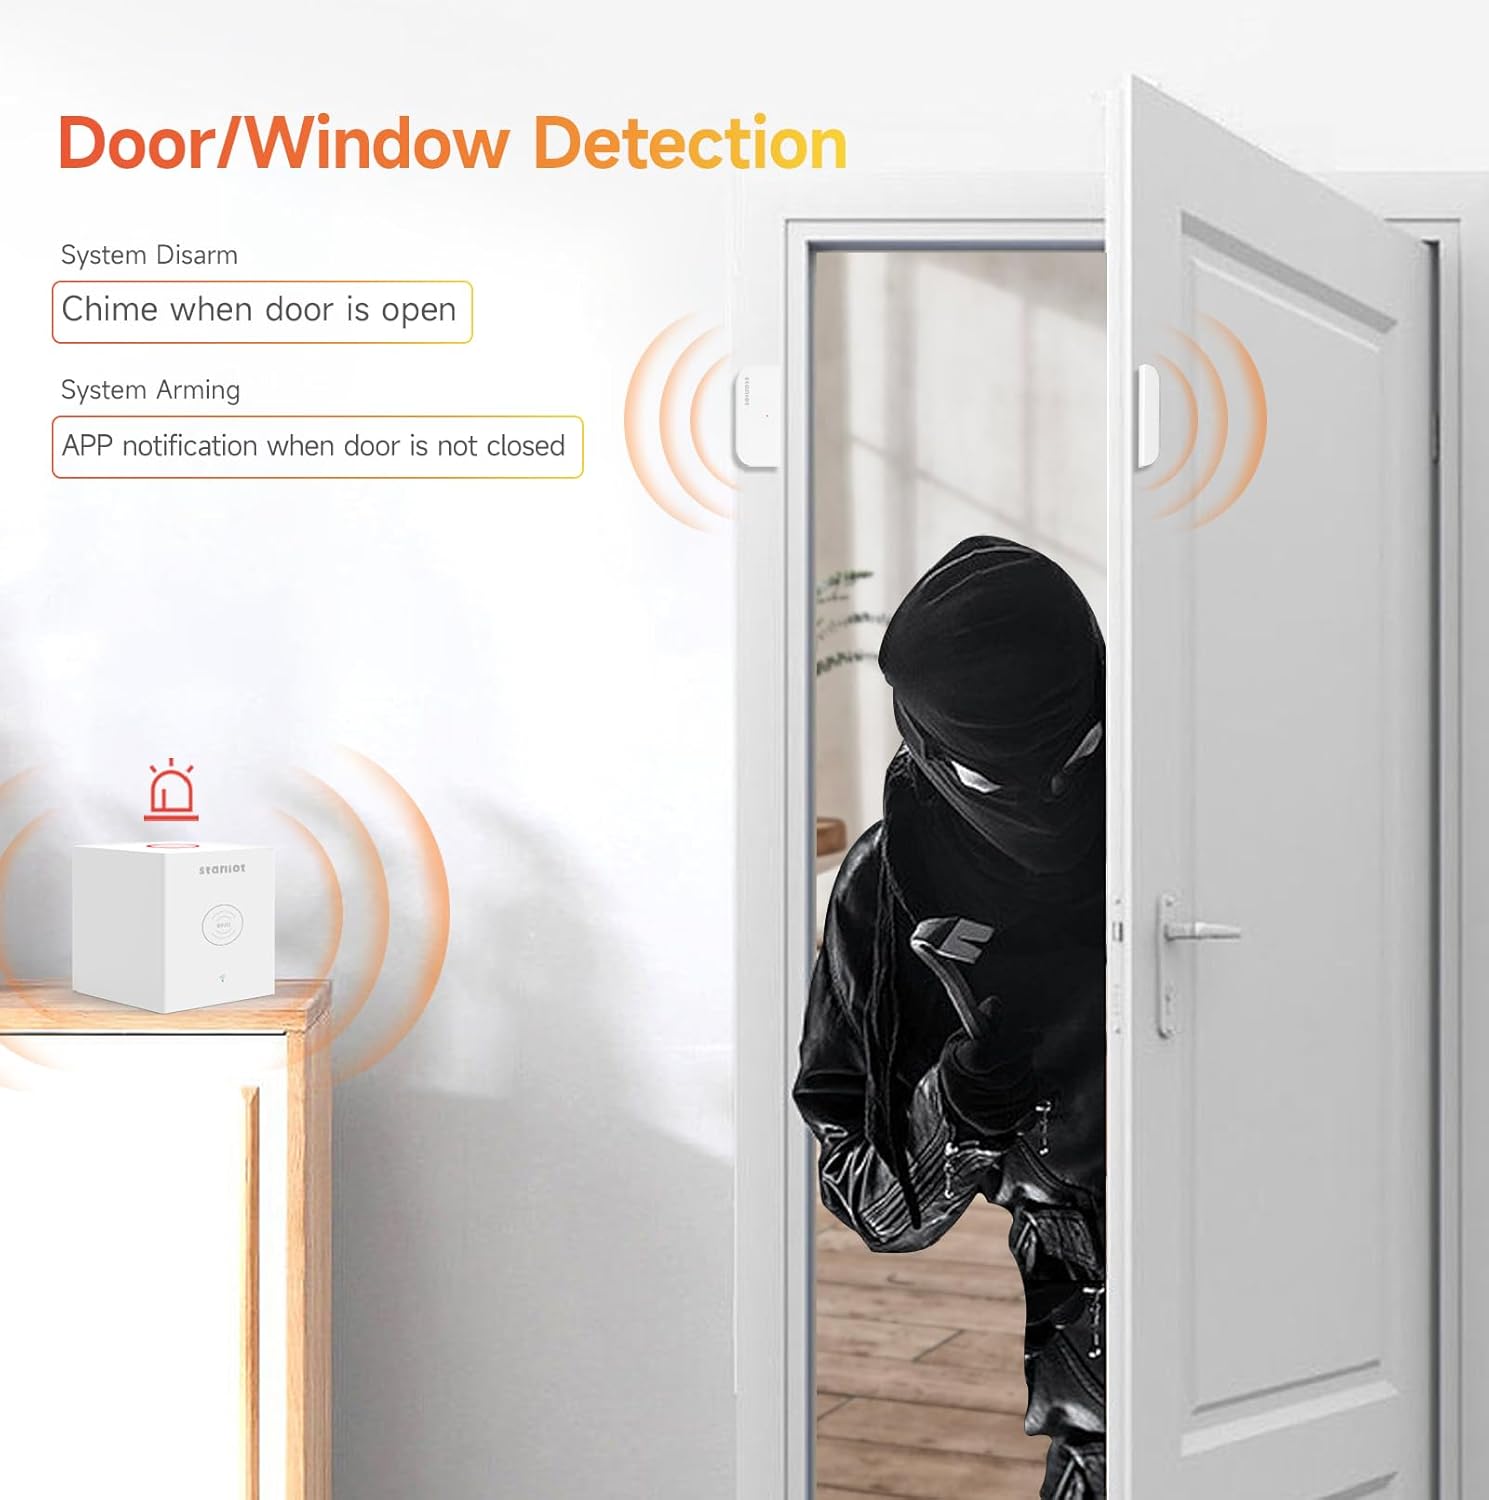
- Door Window Security Protection: Equipped with long battery life door and window alarm sensors to guard each entrance. Features door chimes when doors open, ideal for child safety and general home security.
- RFID/Remote Quick Arm/Disarm: User-friendly design allows arming/disarming by touching an RFID tag to the designated area on the base station or using the remote control. The remote also includes an SOS alarm function for emergencies.
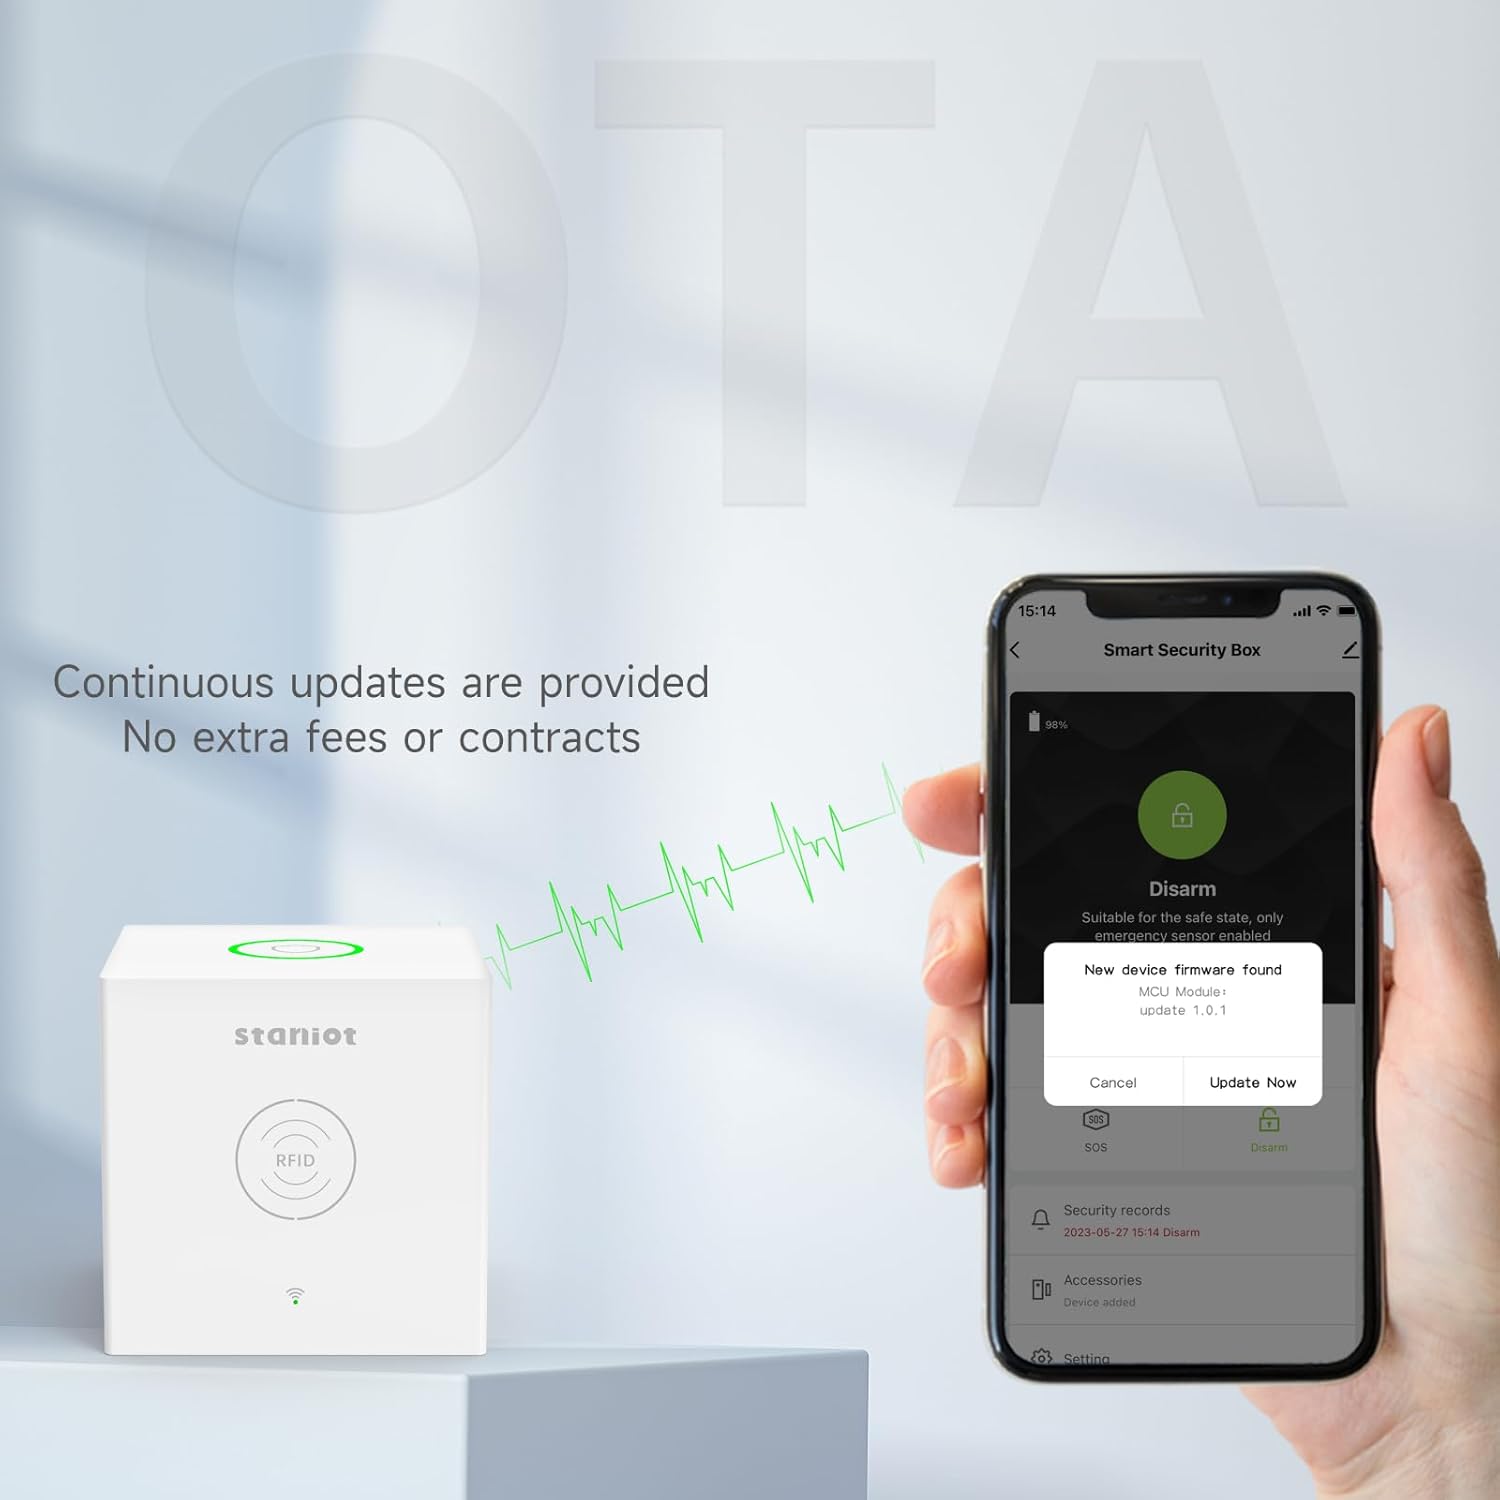
- ОТА онлајн надоградња: The system supports Over-The-Air (OTA) updates, ensuring continuous improvement and problem resolution without extra fees or subscriptions.
- Instant APP Notifications: Manage the system, add accessories, and modify settings via the dedicated app. Receive instant notifications on your phone when alarms are triggered or doors/windows are opened. (Supports 2.4GHz Wi-Fi networks only).
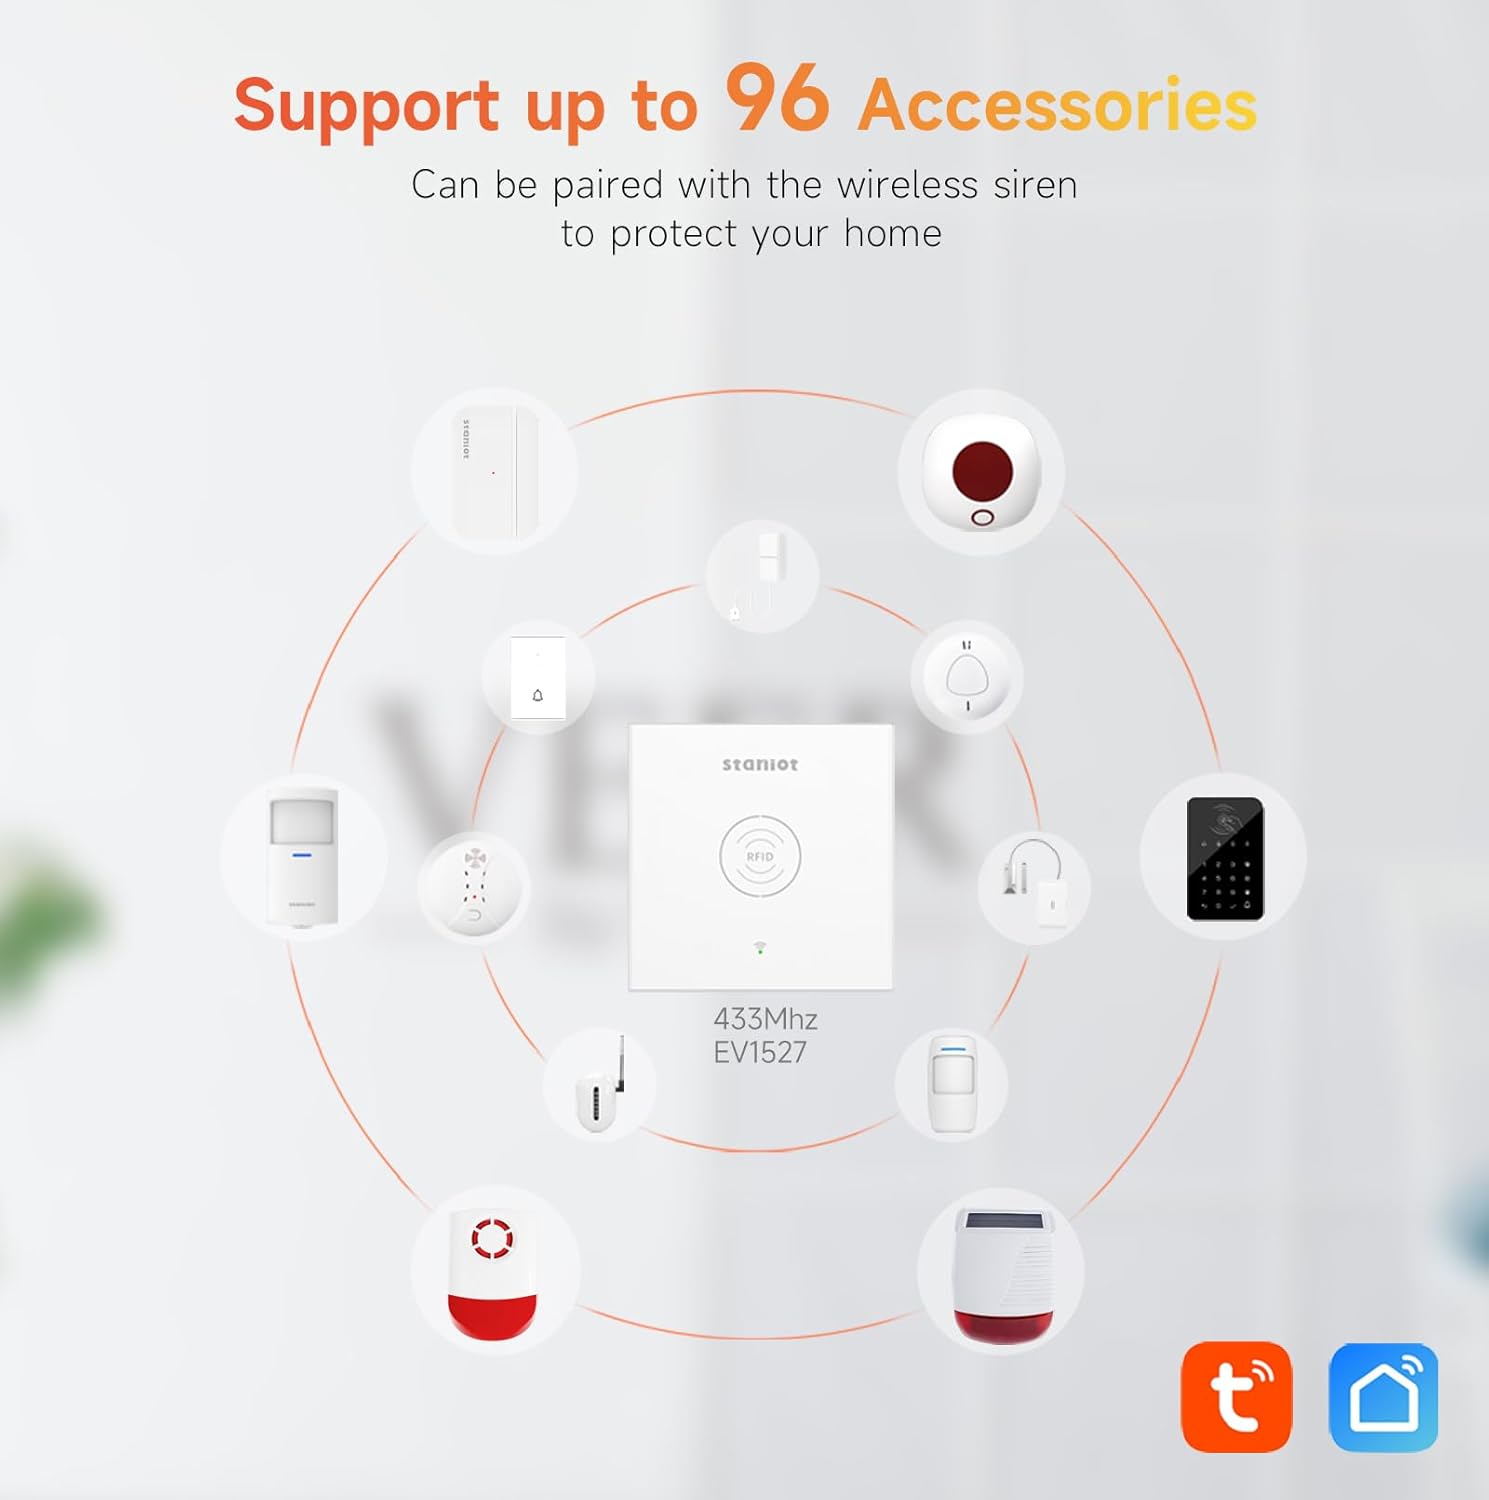
- Customizable DIY Alarm System: Expand your system by adding up to 96 accessories, including motion sensors, wireless sirens, smoke detectors, and alarm keypads, for 24/7 home protection.
- Компатибилно са Алексом и Гугл асистентом: Arm and disarm the alarm system using voice commands after setting up integration in the app.
- Мала потрошња енергије: The base station requires constant AC power connection. A built-in backup battery provides power for approximately 12 hours during emergencies.

2. Садржај пакета
Upon opening your staniot SecCube 3 WiFi Alarm Kit, please verify that all the following components are included:
- SecCube 3 Alarm Base Station × 1
- Door Contact Sensor × 4
- Даљински управљач × 1
- РФИД Tag × 3
- User Manual × 1 (This document)

3. Водич за подешавање
3.1 Почетно укључивање
Connect the SecCube 3 Alarm Base Station to an AC power outlet using the provided adapter. The base station must always be connected to AC power for normal operation. The built-in backup battery is for emergency use only.
3.2 Преузимање и упаривање апликације
Download the official staniot app from your smartphone's app store. Follow the in-app instructions to pair the base station with your Wi-Fi network. Ensure your Wi-Fi network is 2.4GHz, as 5GHz networks are not supported.
3.3 Инсталација сензора
The door contact sensors are designed for easy installation. Use the self-adhesive backing to attach the main sensor unit to the door or window frame and the smaller magnetic component to the moving part of the door or window. Ensure the two parts are aligned and close to each other when the door/window is closed.
КСНУМКС РФИД Tag and Remote Control Setup
The included RFID tags and remote control are pre-paired with the base station for immediate use. No additional setup is required for these components.

3.5 Интеграција гласовног асистента (Alexa/Google Assistant)
To enable voice control, open the staniot app and navigate to the integration settings. Follow the prompts to link your staniot account with your Amazon Alexa or Google Assistant account. Once linked, you can use voice commands to arm and disarm your system.

4. Упутство за употребу
4.1 Наоружавање и разоружавање система
Систем се може активирати или деактивирати помоћу неколико метода:
- Base Station Button: Press the multi-function button on top of the base station once to toggle between Away Arm and Home Arm modes.
- РФИД Tag: Touch an authorized RFID tag to the designated area on the base station to quickly arm or disarm the system.
- даљински управљач: Use the dedicated buttons on the remote control for Away Arm, Home Arm, Disarm, and SOS functions.
- Мобилна апликација: Use the staniot app to remotely arm or disarm the system from anywhere.
- Гласовна команда: If integrated with Alexa or Google Assistant, use voice commands to arm or disarm the system.

4.2 СОС аларм
In an emergency, long-press the multi-function button on the base station or the SOS button on the remote control to trigger an immediate alarm. The alarm sound can be silenced via the app if desired.
4.3 Notifications and Door Chimes
When the system is armed and an alarm is triggered, you will receive instant notifications on your smartphone via the staniot app. Door/window sensors can also be configured to produce a chime sound when opened, even when the system is disarmed, providing an alert for entries and exits.
4.4 Adding Additional Accessories
The staniot SecCube 3 system supports up to 96 additional accessories. To add new sensors or devices, open the staniot app and follow the instructions for adding new accessories. This allows for a highly customizable security setup tailored to your needs.
5. Одржавање
5.1 Напајање
Ensure the base station remains connected to its AC adapter at all times. The internal backup battery is designed for short-term power outages (approximately 12 hours) and is not intended for continuous operation.
5.2 Sensor Battery Life
The door contact sensors are equipped with long-life batteries. The staniot app will notify you when a sensor's battery is low, indicating it's time for replacement.
5.3 Ажурирања фирмвера (OTA)
The system receives continuous Over-The-Air (OTA) firmware updates to improve performance, add features, and resolve any issues. You will be prompted within the app when an update is available. It is recommended to install these updates to ensure optimal system functionality.
КСНУМКС. Решавање проблема
- System Not Connecting to Wi-Fi: Ensure your Wi-Fi network is 2.4GHz. The system does not support 5GHz networks. Verify your Wi-Fi password and signal strength.
- Нема обавештења о апликацијама: Check your phone's notification settings for the staniot app to ensure notifications are enabled. Verify that the base station has a stable internet connection.
- Base Station Power Issues: Confirm the AC adapter is securely plugged into both the base station and a working power outlet. Remember, the base station requires constant AC power; the backup battery is for temporary use during outagес.
- Сензор се не активира: Check the alignment of the two parts of the door/window sensor. They should be close enough when the door/window is closed. Replace the sensor battery if indicated by the app.
- Даљински управљач/RFID Tag Не ради: Ensure the remote control battery is not depleted. For RFID tags, ensure you are touching the tag to the designated RFID area on the base station.
If you encounter any persistent issues not covered here, please refer to the "Customer Service" section for support.
7. Спецификације
| Феатуре | Детаљ |
|---|---|
| Бранд | станиот |
| Број модела | Стандард Кит |
| Димензије производа | 8 к 8 к 8 цм |
| Тежина артикла | 400 г |
| Боја | Бела |
| Извор напајања | Цордед Елецтриц |
| Волtage | 5 Волтс |
| Метод инсталације | Self-Adhesive Desktop placement |
| Плуг Проfile | УК Плуг |
| Цертифицатион | ЦЕ, УКЦА |
| Укључене компоненте | SecCube 3 Alarm Base Station, Entry Sensor×4, RFID Tag×3, Remote Control×1 |
| Батерије укључене | Yes (1 Lithium Ion battery for base station) |
| Тип батерије | Литхиум Ион |
| Компатибилни уређаји | Smartphone (2.4GHz Wi-Fi only), Alexa, Google Assistant |
8. Корисничка служба и подршка
Customer recognition and support are our primary goals. If you encounter any problems with your staniot SecCube 3 WiFi Alarm System, please do not hesitate to contact us first. We are committed to providing prompt assistance and resolving any issues you may experience as soon as possible.
For support, please visit the official staniot webсајт или погледајте контакт информације које се налазе на паковању производа.
Ask a question about this manual
Ask about setup, troubleshooting, compatibility, parts, safety, or missing instructions. Manuals+ will review the question and use this page’s manual context to help answer it.