1. Увод
The Tecmojo 6U Wall Mount Network Cabinet is designed to securely store, organize, and protect 19-inch EIA-compliant rack equipment in various environments such as classrooms, retail spaces, and offices where floor space is limited. Constructed from high-quality cold-rolled steel, this cabinet offers robust durability and features a built-in cooling fan to prevent equipment overheating. Its lockable mesh door and side panels ensure the security of your valuable IT infrastructure.
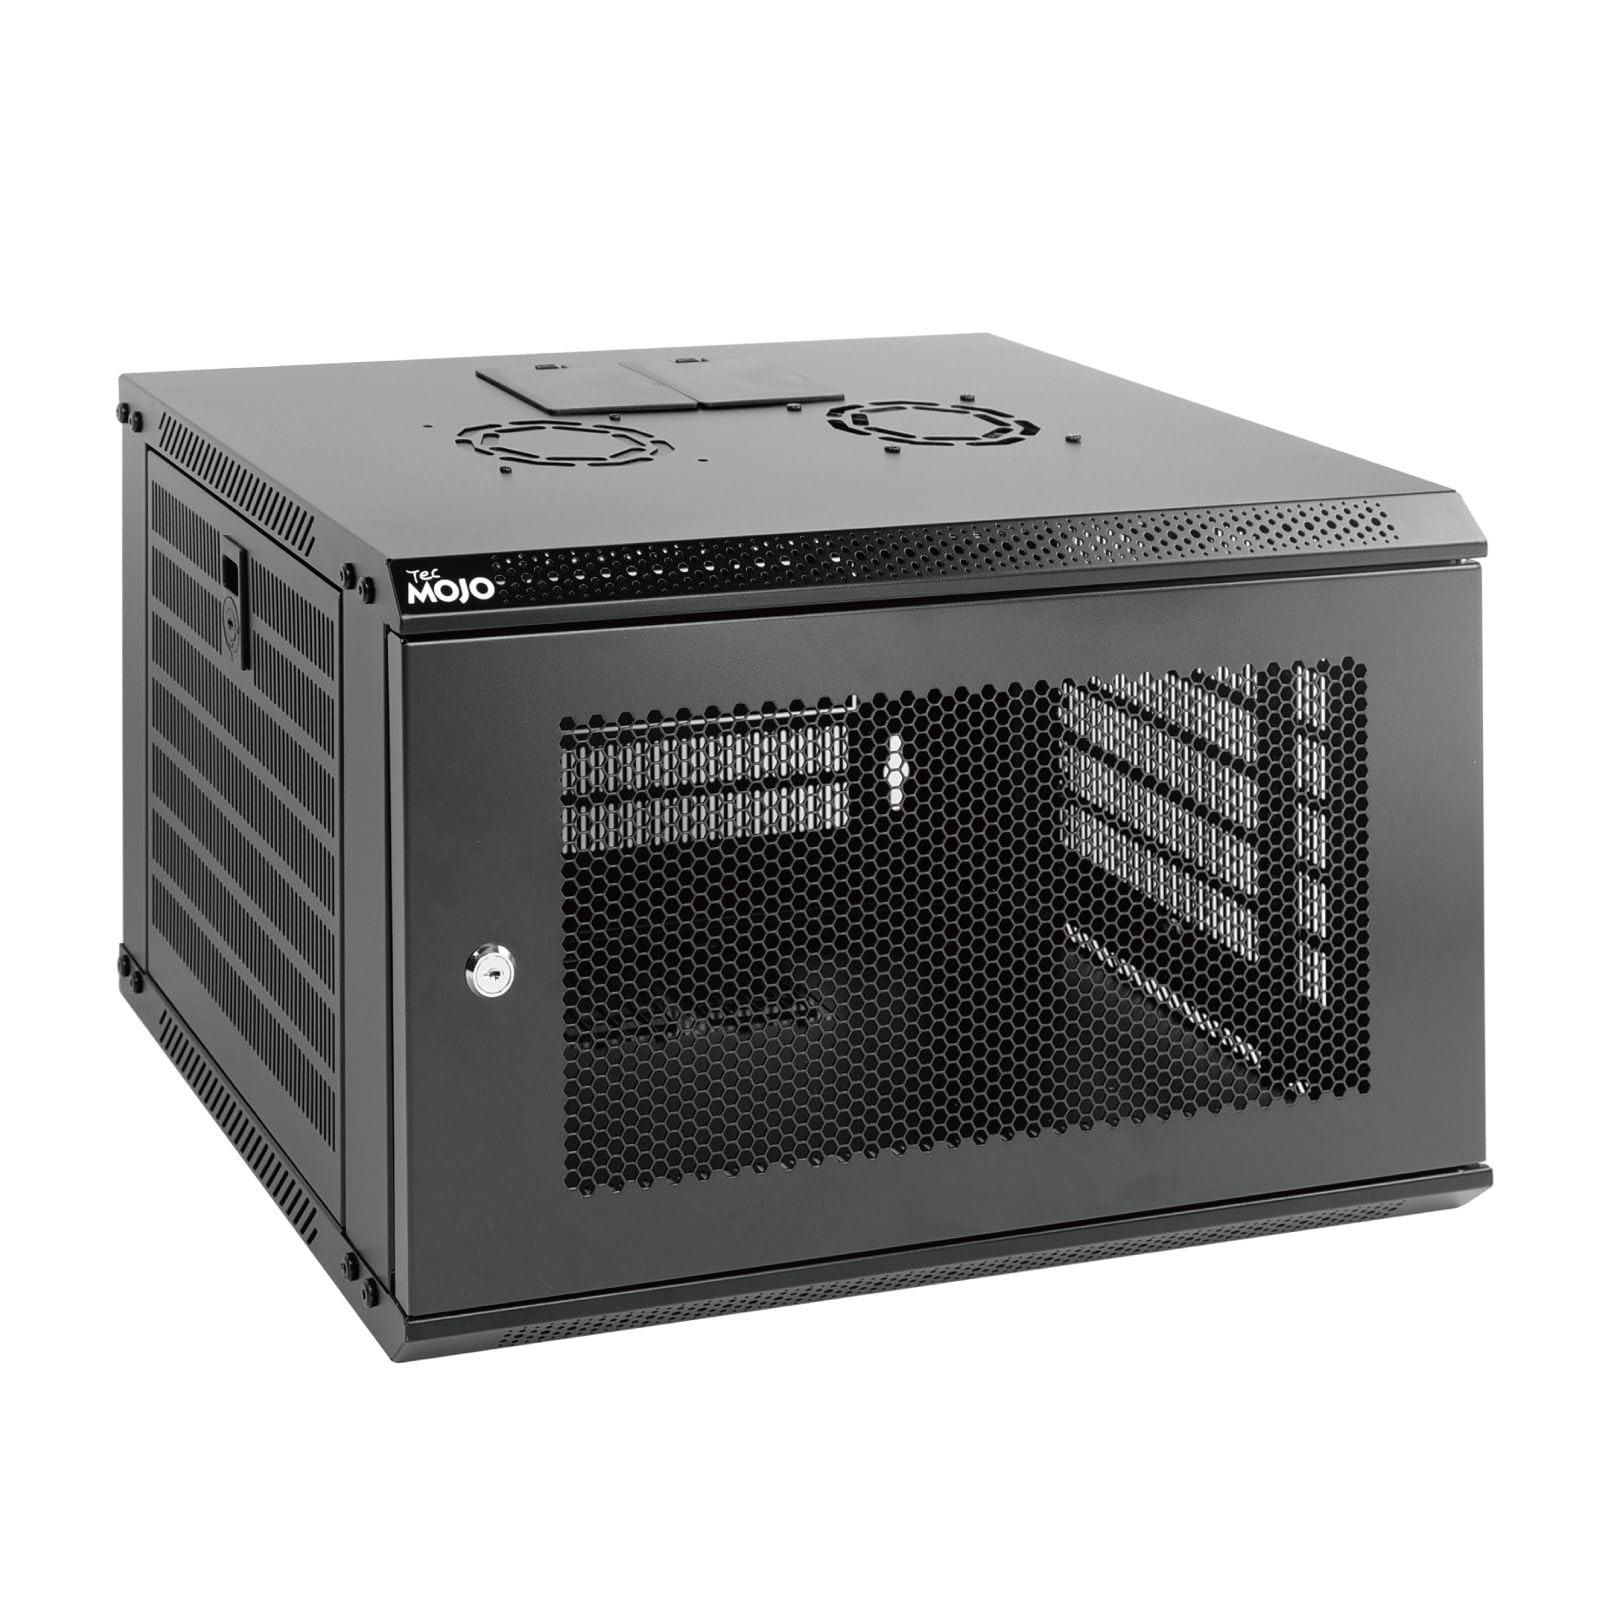
Image: Tecmojo 6U Wall Mount Network Cabinet, front-side view.
2. Компоненте производа
Пре почетка склапања, проверите да ли су све доле наведене компоненте присутне у вашем паковању. Ако неки делови недостају или су оштећени, обратите се корисничкој подршци.

Image: All components included in the Tecmojo 6U Wall Mount Network Cabinet package.
- Cabinet Frame Components (Top, Bottom, Side Panels, Front Door)
- Монтажне шине
- Cooling Fan (with power cable)
- Keys (2 sets for locks)
- 10-32 Screws (x10)
- 10-32 Cage Nuts (x10)
- Хардвер за монтажу на зид
- Упутство за употребу
3. Подешавање и инсталација
The Tecmojo 6U Wall Mount Network Cabinet is shipped flat-packed and requires simple assembly. Follow these general guidelines for setup and installation.
3.1 Скупштина
- Распакујте све компоненте и распоредите их на чисту, равну површину.
- Assemble the main frame of the cabinet using the provided screws and fasteners. Ensure all connections are secure.
- Install the mounting rails inside the cabinet. These rails are fully adjustable and feature numbered U positions for easy equipment placement.
- Attach the cooling fan to the designated top panel opening.
- Install the mesh front door and side panels. The front door is reversible and can be installed to swing open from either the left or right side to suit your preference.
3.2 Монтажа на зид
The cabinet is designed for secure wall mounting. Use the provided mounting template and hardware.
- Identify a suitable wall location, ensuring it can support the cabinet's weight plus the weight of your equipment (up to 110 lbs / 50 kg).
- Use the mounting hole drilling template to mark the drilling points on the wall. The mounting holes are spaced 16 inches apart to align with standard wall stud placement.
- Drill pilot holes and install the appropriate wall anchors or screws into the wall studs.
- Carefully lift the cabinet and align its mounting holes with the installed hardware on the wall. Secure the cabinet firmly to the wall.
- Ensure the cabinet is level and stable before installing any equipment.
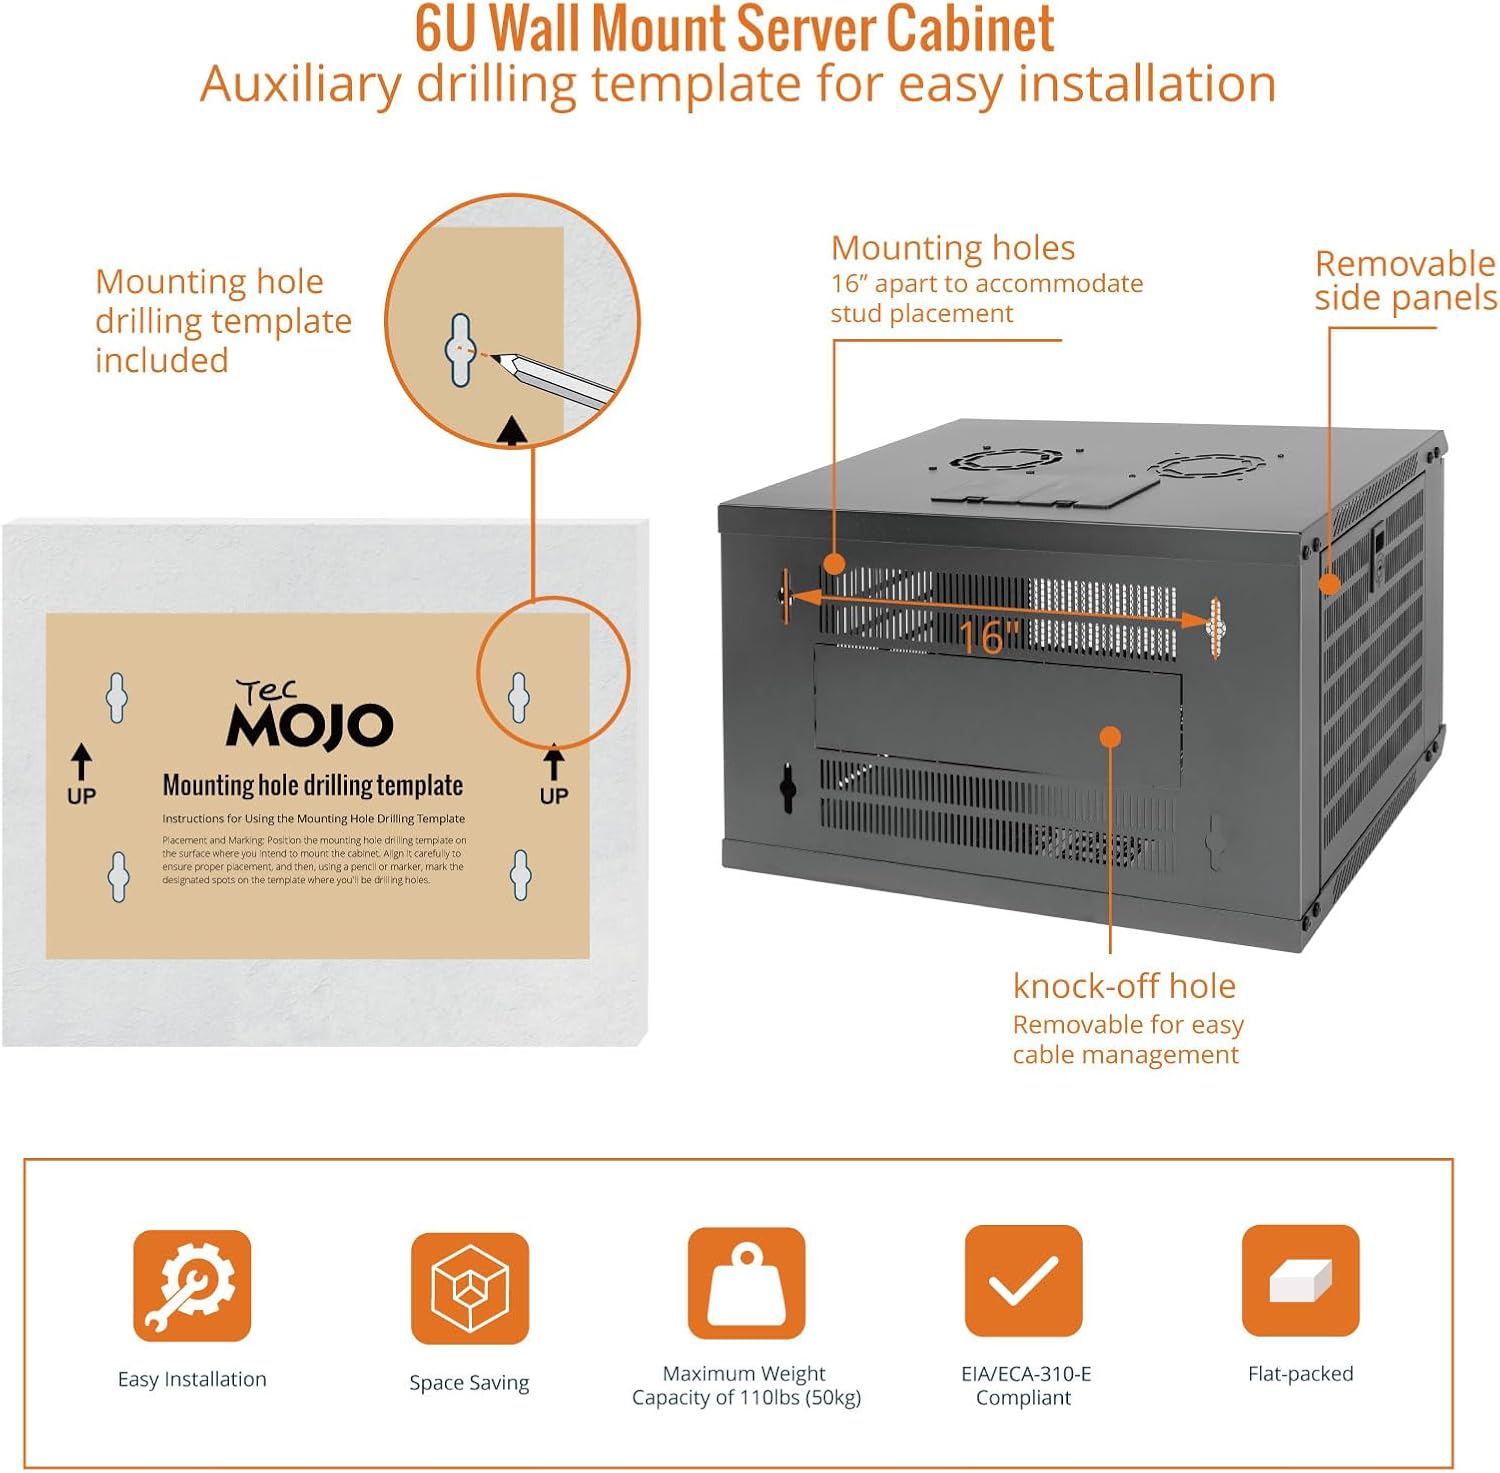
Image: Wall mounting template and details on mounting holes and removable side panels for installation.
3.3 Equipment Installation and Cable Management
- Install your 19-inch rack-mountable equipment onto the adjustable mounting rails using the provided 10-32 screws and cage nuts.
- Utilize the removable top and bottom panels, as well as the knock-off holes, for efficient cable routing and management.
- Connect the cooling fan's power cable to an appropriate power source.

Image: Internal structure and components, showing maximum mountable depth, versatile rack rails, and grounding stud.
4. Упутство за употребу
Operating the Tecmojo 6U Wall Mount Network Cabinet involves managing access and ensuring proper cooling for your equipment.
4.1 Приступ и безбедност
- The front mesh door and side panels are lockable. Use the provided keys to secure your equipment and prevent unauthorized access.
- To open the front door, unlock it and swing it open. The reversible design allows the door to open from either side, providing flexibility in tight spaces.
- Side panels can be removed for easier access to equipment during installation or maintenance. Ensure they are securely re-attached and locked after use.
4.2 Систем хлађења
- The cabinet includes a built-in top cooling fan designed to increase airflow and prevent overheating of your network equipment.
- Ensure the fan's power cable is connected to a continuous power source for optimal cooling performance.
- The mesh design of the front door also contributes to passive airflow, aiding in heat dissipation.
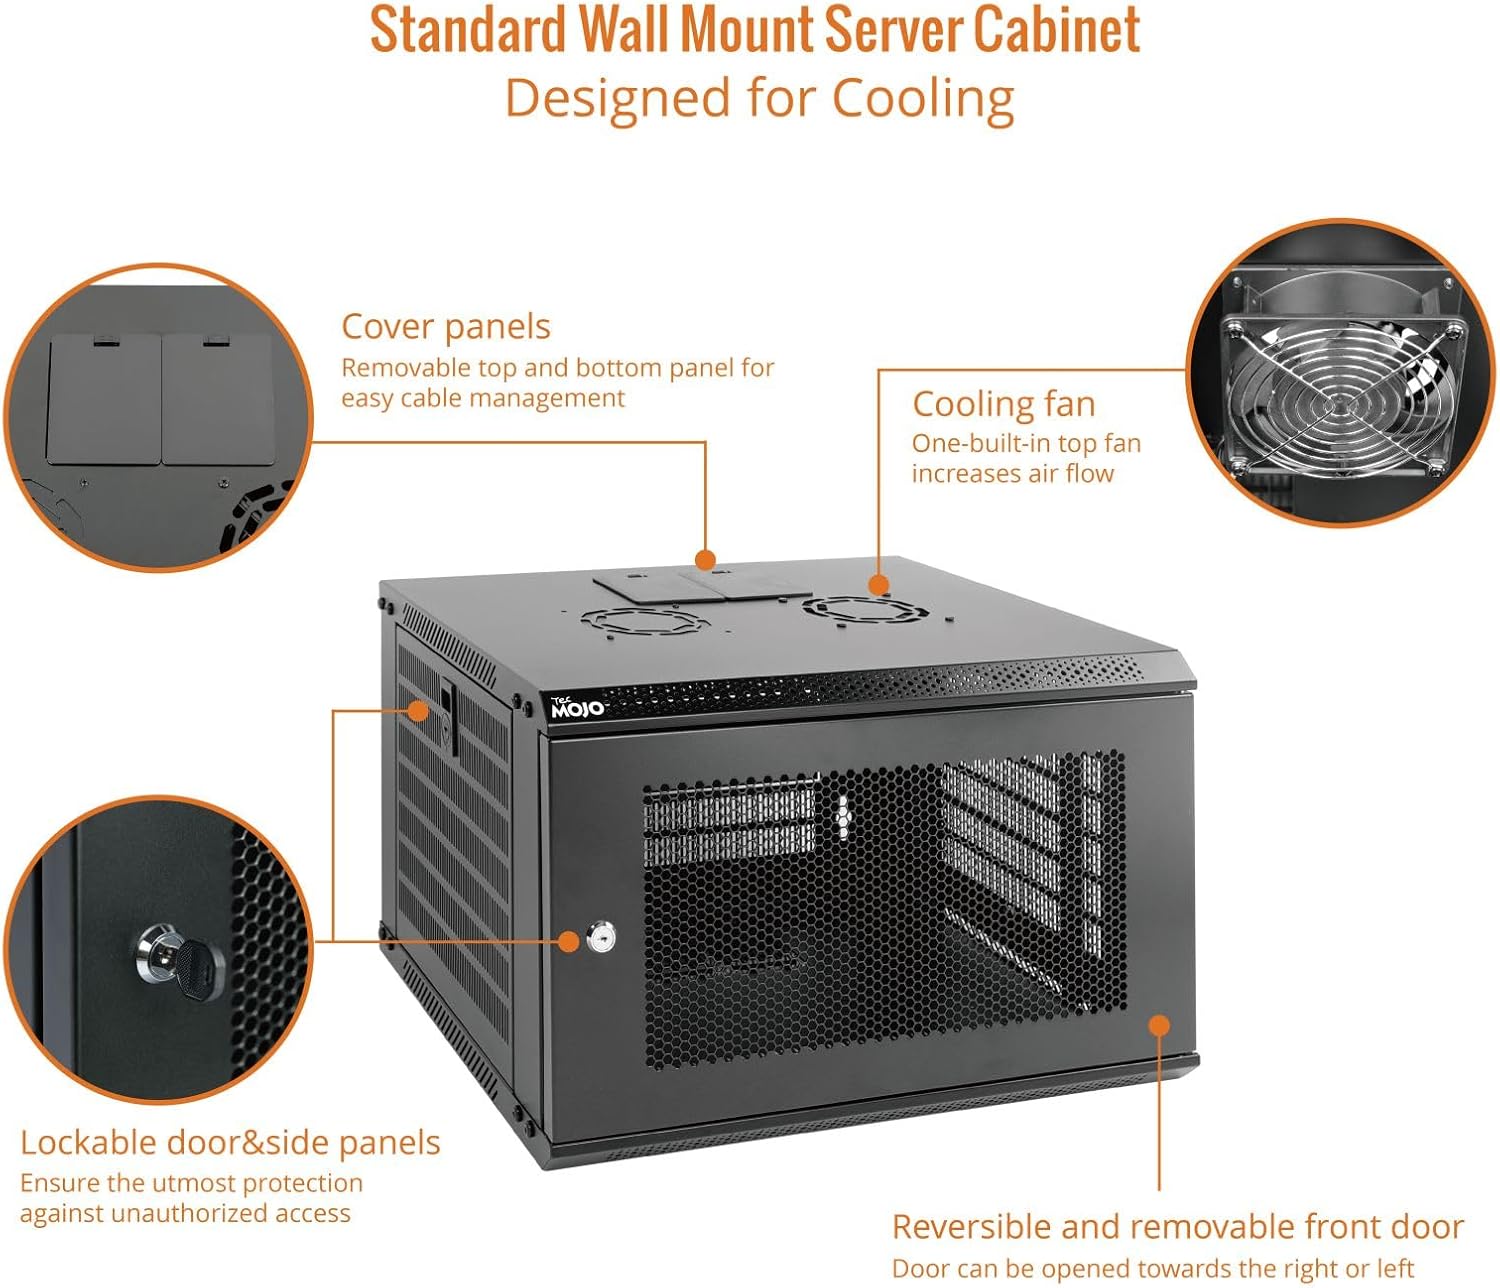
Image: Key features of the cabinet, including the cooling fan, lockable door, and removable panels.
5. Одржавање
Regular maintenance helps ensure the longevity and optimal performance of your Tecmojo 6U Wall Mount Network Cabinet.
- Чишћење: Periodically wipe down the exterior surfaces of the cabinet with a soft, damp крпом. Избегавајте абразивна средства за чишћење или раствараче који би могли оштетити завршну обраду.
- Уклањање прашине: Regularly inspect the mesh door and fan for dust accumulation. Use compressed air or a soft brush to remove dust from the fan blades and mesh to maintain efficient airflow.
- Провера хардвера: Annually, check all screws, bolts, and mounting hardware to ensure they remain tight and secure. Tighten any loose fasteners.
- Lock Inspection: Ensure the door and side panel locks operate smoothly. Lubricate with a small amount of graphite if they become stiff.
- Управљање кабловима: Периодично реview cable routing to ensure cables are not pinched or obstructing airflow. Reorganize as needed.
КСНУМКС. Решавање проблема
This section addresses common issues you might encounter with your network cabinet.
- Опрема за прегревање:
- Ensure the cooling fan is powered on and operating correctly.
- Check for any obstructions to airflow around the fan or mesh door.
- Verify that the cabinet is not overloaded beyond its recommended weight capacity, which can impede airflow.
- Door Not Closing/Locking Properly:
- Inspect the door hinges and locking mechanism for any physical damage or misalignment.
- Ensure no cables or equipment are obstructing the door's path.
- Check if the cabinet itself is level and securely mounted, as misalignment can affect door closure.
- Loose or Wobbly Cabinet:
- Re-check all wall mounting points and tighten any loose screws or anchors.
- Verify that the wall structure is sound and capable of supporting the cabinet's weight.
- Ensure all internal frame connections are tight.
7. Спецификације
Detailed technical specifications for the Tecmojo 6U Wall Mount Network Cabinet.
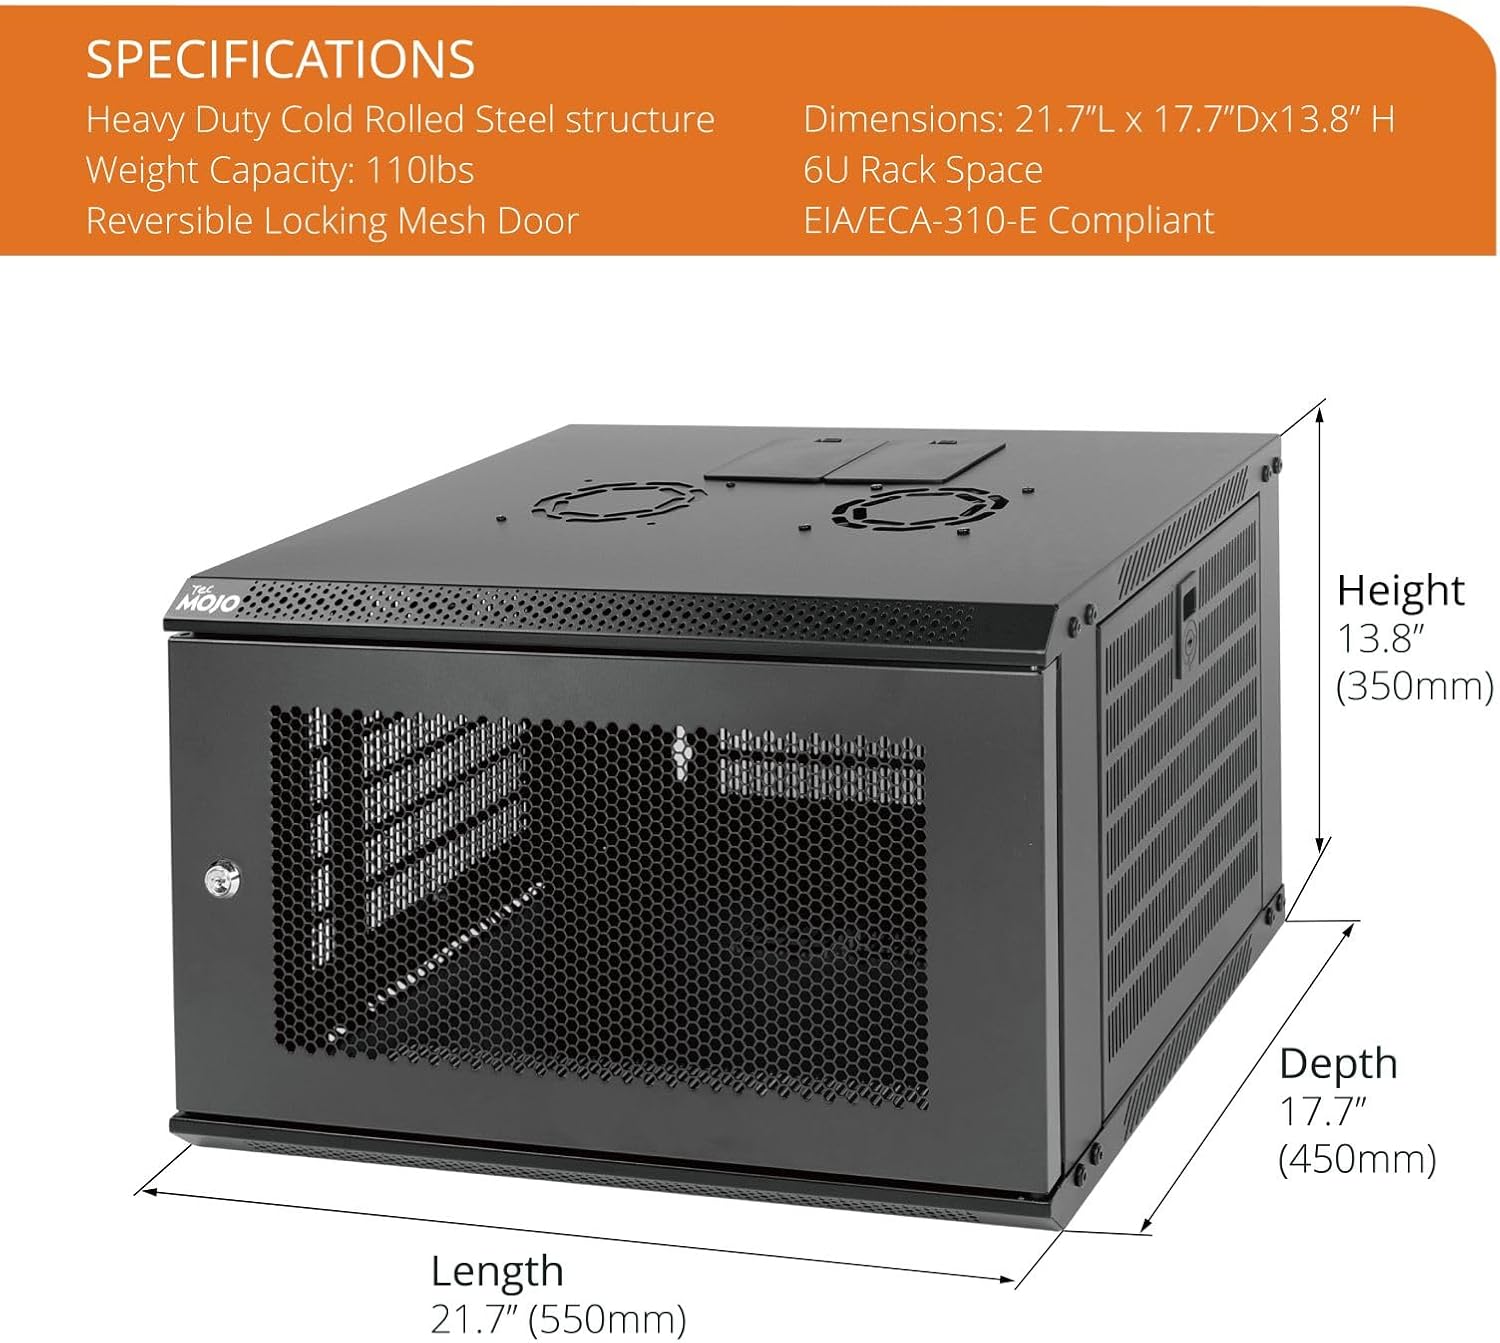
Image: Detailed dimensions and key specifications of the Tecmojo 6U Wall Mount Network Cabinet.
| Феатуре | Детаљ |
|---|---|
| Бранд | Тецмојо |
| Број модела | 11110201Ц |
| Rack Units (U) | 6U |
| Материјал | High-quality Cold-Rolled Alloy Steel |
| Боја | Црно |
| Спољне димензије (Д x Ш x В) | 21.65 к 17.72 к 13.78 инча (55.0 к 45.0 к 35.0 цм) |
| Internal Mountable Depth | 14.2 инча (360 мм) |
| Тежина Капацитет | 110 фунти (50 кг) |
| Врата Тип | Reversible Lockable Mesh Door |
| Хлађење | 1x Built-in Top Fan |
| Размак монтажних рупа | 16 inches (for wall studs) |
| Усклађеност | EIA/ECA-310-E, PCI, HIPAA |
| Тежина производа | 29.5 фунти (13.4 кг) |
8. Информације о гаранцији
Specific warranty details for the Tecmojo 6U Wall Mount Network Cabinet may vary by region and retailer. Please refer to the product packaging, the official Tecmojo website, or your point of purchase for comprehensive warranty terms and conditions.
9. Корисничка подршка
For technical assistance, troubleshooting guidance, or any other inquiries regarding your Tecmojo 6U Wall Mount Network Cabinet, please contact Tecmojo customer service. Contact information can typically be found on the product packaging or the official Tecmojo webсајту.