1. Увод
This manual provides detailed instructions for the installation, operation, and maintenance of your CP PLUS 4MP Wi-Fi Floodlight Camera, model CP-F42A. Please read this manual thoroughly before using the product to ensure proper functionality and safety. This camera combines high-resolution video surveillance with integrated floodlighting for enhanced security.
2. Безбедносне информације
- Ensure the power supply matches the camera's requirements.
- Не покушавајте да растављате или модификујете камеру.
- Install the camera in a location where it is protected from extreme weather conditions, although it has an IP54 rating, direct exposure to heavy rain or prolonged submersion is not recommended.
- Keep the camera away from heat sources and direct sunlight.
- Пажљиво рукујте камером како бисте избегли физичка оштећења.
- Consult a qualified electrician for installation if you are unsure about electrical wiring.
3. Садржај пакета
Проверите да ли су све ставке присутне у пакету:
- CP PLUS 4MP Wi-Fi Floodlight Camera (CP-F42A)
- Повер Адаптер
- Монтажни вијци и зидни типлови
- Кратки водич (није укључен у овај приручник)
4. Производ је готовview
The CP-F42A is an outdoor Wi-Fi floodlight camera designed for surveillance and illumination. It features a 4MP sensor for clear video, H.265 video compression for efficient storage, and a 110° viewing angle. The integrated floodlight provides illumination, and the PIR sensor detects motion up to 12 meters.
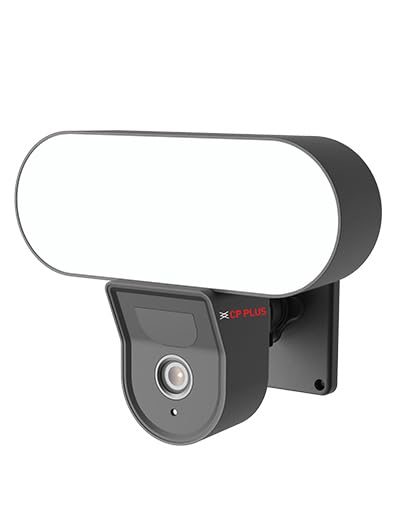
Слика: Фронт view of the CP PLUS 4MP Wi-Fi Floodlight Camera CP-F42A, showing the camera lens and the integrated floodlight panel.
Кључне компоненте:
- Објектив камере: Снима видео од 4MP.
- Floodlight Panel: Обезбеђује осветљење.
- ПИР сензор: Детектује кретање.
- микрофон: За аудио улаз.
- говорник: For two-way audio output.
- Носач: За безбедну инсталацију.
5. Подешавање
5.1 Физичка инсталација
- Изаберите локацију: Изаберите локацију на отвореном са чистим view of the area you wish to monitor and within Wi-Fi range. Ensure the mounting surface is sturdy.
- Означите тачке бушења: Use the mounting bracket as a template to mark the screw holes on the wall.
- Избушене рупе: Избушите пробне рупе на означеним тачкама. Уметните типлове ако се монтира на зид.
- Монтирајте камеру: Secure the mounting bracket to the wall using the provided screws. Attach the camera to the bracket.
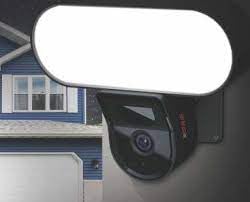
Image: The CP PLUS Floodlight Camera mounted on the exterior of a house, illustrating a typical installation scenario during the day.
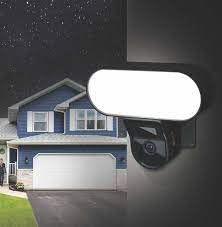
Image: The CP PLUS Floodlight Camera mounted on the exterior of a house at night, with the floodlight illuminated, demonstrating its night-time functionality.
5.2 Прикључак за напајање
Connect the provided power adapter to the camera's power input port and then plug it into a suitable electrical outlet. Ensure the connection is secure and protected from moisture.
5.3 Wi-Fi Connection and App Pairing
- Преузмите апликацију: Тражи the "ezyKam+" app (or the recommended CP PLUS app) on your smartphone's app store (iOS or Android) and install it.
- Креирајте налог: Отворите апликацију и региструјте се за нови налог или се пријавите ако га већ имате.
- Додај уређај: Follow the in-app instructions to add a new device. Select "Floodlight Camera" or a similar option.
- Повежите се на Ви-Фи: The app will guide you through connecting the camera to your home Wi-Fi network. This usually involves scanning a QR code on the camera or entering your Wi-Fi credentials.
- Комплетно подешавање: Once connected, you can name your camera and adjust initial settings.
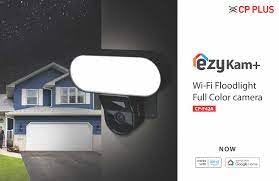
Image: Branding for CP PLUS ezyKam+ Wi-Fi Floodlight Full Color Camera, indicating compatibility with Alexa and Google Home, relevant for app pairing and smart home integration.
6. Упутство за употребу
Access all camera functions through the dedicated mobile application.
6.1 Уживо View
Open the app and select your camera from the device list to view the live video feed. You can pinch to zoom and pan across the image.
6.2 Снимање и репродукција
- Ручно снимање: Tap the record button in the live view да бисте започели/зауставили ручно снимање.
- Снимање догађаја: The camera automatically records when motion is detected. These recordings are stored on the installed microSD card (if any) or cloud storage (subscription may be required).
- Репродукција: Приступ снимљен фооtagкроз одељак „Репродукција“ или „Историја“ у апликацији.
6.3 Детекција покрета и упозорења
Configure motion detection sensitivity and areas within the app settings. When motion is detected, the camera can send push notifications to your phone and trigger recording. The PIR sensor has a detection range of 6-12 meters.
6.4 Floodlight Control
The floodlight can be controlled manually via the app or set to activate automatically upon motion detection during specific times or low-light conditions. Adjust brightness and duration settings in the app.
6.5 Двосмерни аудио
Use the microphone and speaker icons in the live view to communicate with visitors or deter intruders. Press and hold the microphone icon to speak, and release to listen.
6.6 Ноћни вид
The camera features infrared (IR) night vision for clear black-and-white video in low-light conditions and can also utilize the floodlight for full-color night vision when activated. The night vision range is up to 12 meters.
7. Одржавање
7.1 Чишћење
Wipe the camera lens and floodlight panel with a soft, damp крпом да бисте уклонили прашину и прљавштину. Не користите јаке хемикалије или абразивна средства за чишћење.
7.2 Ажурирања фирмвера
Periodically check the app for available firmware updates. Keeping your camera's firmware up-to-date ensures optimal performance and security features.
7.3 Управљање складиштем
If using a microSD card, regularly check its status in the app. Format the card periodically to maintain performance. Back up important recordings before formatting.
КСНУМКС. Решавање проблема
| Проблем | Могуће решење |
|---|---|
| Камера се не укључује. | Check power adapter connection and ensure the outlet is functional. |
| Није могуће повезати се на Ви-Фи. | Ensure the camera is within Wi-Fi range. Verify Wi-Fi password. Try resetting the camera and router. |
| Лош квалитет видеа. | Check Wi-Fi signal strength. Clean the camera lens. Ensure sufficient lighting. |
| Детекција покрета не ради. | Adjust motion detection sensitivity and area settings in the app. Ensure there are no obstructions. |
| Floodlight not activating. | Check floodlight settings in the app. Ensure it's set to activate on motion or during low light. |
9. Спецификације
| Феатуре | Детаљ |
|---|---|
| Број модела | CP-F42A |
| Резолуција | 4MP (Effective Still Resolution: 4 MP) |
| Видео Цомпрессион | H.265, MPEG |
| Viewинг Англе | 110 степени |
| ПИР Дистанце | 6~12 метара |
| Бежична технологија | Ви-Фи |
| Ноћни вид | 12 Meters (Infrared, Night Color) |
| Фраме Рате | 20 кадрова у секунди |
| Оптицал Зоом | 3x |
| Оцена међународне заштите | ИП54 |
| Тип упозорења | Мотион Онли |
| Извор напајања | Цордед Елецтриц |
| Укључене компоненте | Адаптер |
| Димензије (Д к Ш к В) | 20 к 12 к 10 центиметара |
| Тежина артикла | 630 г |
| Унутрашња/спољна употреба | Оутдоор |
| Технологија фото сензора | ЦМОС |
| Препоручена употреба | Home Security, Night Vision |
10. Гаранција и подршка
For warranty information and technical support, please refer to the official CP PLUS webсајт или контактирајте њихову корисничку службу. Сачувајте рачун као доказ о куповини за потребе гаранције.
CP PLUS Official Webсајт: ввв.цпплусворлд.цом