1. Увод
Thank you for choosing the EasySMX T37 Wireless Switch Pro Controller. This manual provides detailed instructions for setting up, operating, maintaining, and troubleshooting your controller. Please read this manual carefully before use to ensure optimal performance and longevity of your device. This controller is compatible with Nintendo Switch, Switch Lite, and Switch OLED consoles.
2. Производ је готовview
The EasySMX T37 is a wireless gamepad designed for an enhanced gaming experience on Nintendo Switch systems. It features an ergonomic design, dual turbo vibration, and 6-axis gyro motion control.

Слика 2.1: Предња страна view of the EasySMX T37 Wireless Switch Pro Controller, showcasing its ergonomic shape and button layout.
3. Подешавање
3.1 Упаривање са Nintendo Switch-ом
- Укључите своју Нинтендо Свитч конзолу.
- У менију ХОМЕ одаберите Контролори > Промените Грип/Ред.
- On the EasySMX T37 controller, press and hold the Дугме СИНЦ (located on the top edge of the controller) for 3 seconds until the LED indicators start flashing rapidly.
- Once the controller is successfully paired, the player LED(s) on the bottom of the controller will light up solid.
3.2 Пуњење контролера
Connect the provided USB-C charging cable to the USB-C port on the controller and the other end to a USB power source (e.g., Switch dock, USB wall adapter, computer USB port). The LED indicators will show charging status and turn off when fully charged.
4. Упутство за употребу
4.1 Основне контроле
The controller features standard button layouts for Nintendo Switch compatibility:
- Дугмад A/B/X/Y: Дугмад за акције.
- Д-Пад: Усмерени унос.
- Леви/десни аналогни штапићи: Movement and camera control.
- Дугмад Л/Д/ЗЛ/ЗР: Дугмад за раме и окидач.
- Дугме ХОМЕ: Returns to the Switch HOME Menu.
- CAPTURE Button: Прави снимке екрана.
- PLUS (+) / MINUS (-) Buttons: Покрени/Изабери функције.

Image 4.1: A user holding the EasySMX T37 controller, demonstrating the comfortable grip and accessible button placement during gameplay.
4.2 Турбо функција
The Turbo function allows for rapid, automatic pressing of a button, useful in action or arcade games.
- Активирајте Турбо: Press and hold the desired action button (A/B/X/Y/L/R/ZL/ZR), then press the Турбо дугме (T button). The button will now auto-fire.
- Подесите турбо брзину: Док држите Турбо дугме, померите Right Analog Stick Up or Down to cycle through three speeds: 5 shots/s, 12 shots/s, and 20 shots/s.
- Деактивирајте Турбо: Repeat the activation step (hold the action button, then press the Turbo button) or press and hold the Турбо дугме for 5 seconds to clear all Turbo settings.
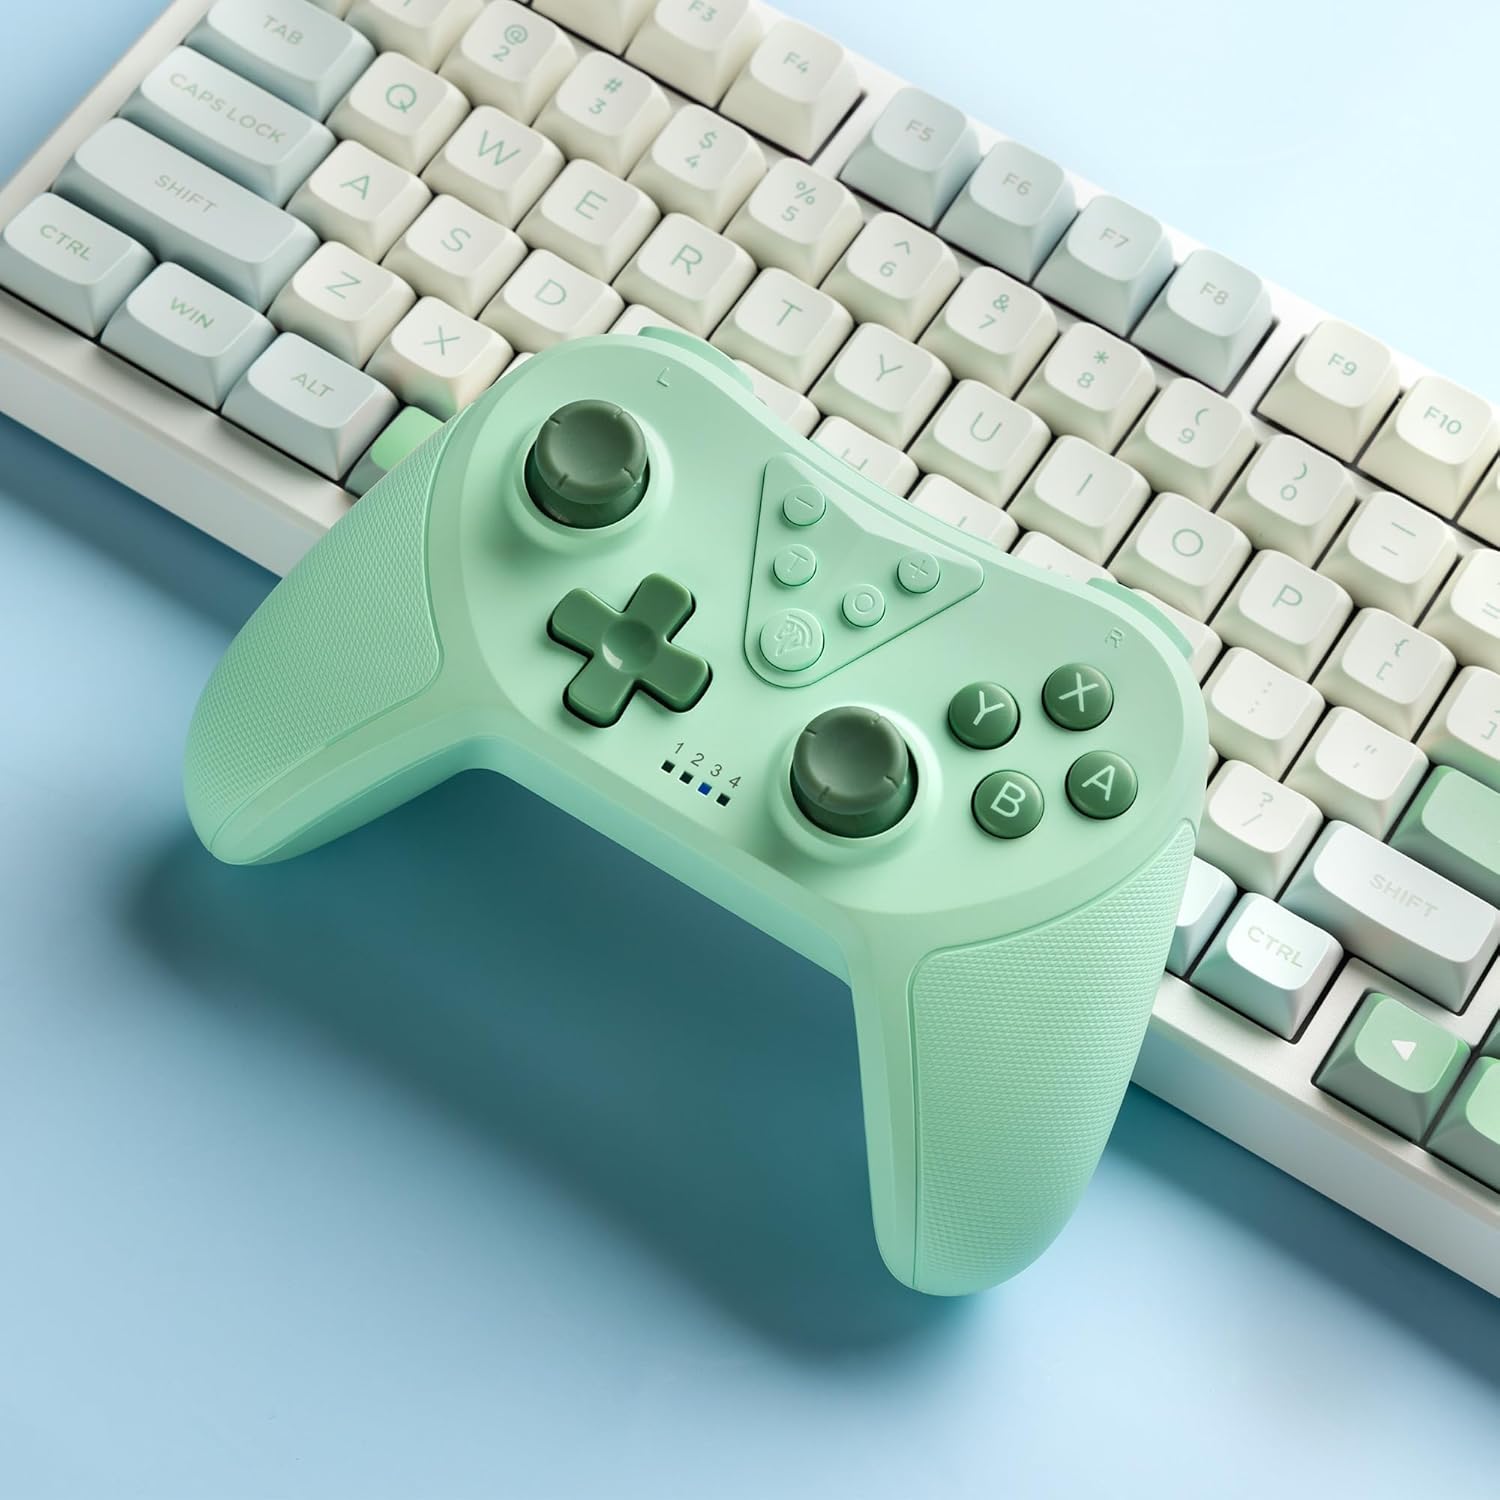
Image 4.2: Illustration of the Turbo function on the EasySMX T37 controller, showing the three adjustable speeds: 5, 12, and 20 shots per second.
4.3 Подешавање вибрација
The controller features dual motors for adjustable vibration feedback, enhancing immersion in games.
- Подесите интензитет вибрације: Притисните и држите Турбо дугме, а затим померите Left Analog Stick Up or Down to cycle through four vibration levels: 0% (off), 30%, 70%, and 100%.

Image 4.3: Visual representation of the Dual Vibration feature on the EasySMX T37 controller, indicating four intensity levels from 0% to 100%.
4.4 Управљање кретањем жироскопа са 6 оса
The built-in 6-axis gyroscope provides precise motion sensing, allowing for intuitive control in games that support motion input.

Image 4.4: Illustration depicting the 6-Axis Gyro Motion Control feature of the EasySMX T37 controller, showing how it interacts with a game on the Nintendo Switch screen.
5. Одржавање
- Чишћење: Користите меку, суву крпу за чишћење контролера. Избегавајте употребу јаких хемикалија или абразивних материјала.
- Складиштење: Чувајте контролер на хладном и сувом месту, даље од директне сунчеве светлости и екстремних температура.
- Одржавање батерије: Да бисте продужили век трајања батерије, избегавајте често потпуно пражњење контролера. Редовно га пуните, чак и ако се не користи дуже време.
- Избегавајте капи: Заштитите контролер од падова и удараца, који могу оштетити унутрашње компоненте.
КСНУМКС. Решавање проблема
6.1 Контролер се не повезује
- Уверите се да је контролер напуњен.
- Verify the Switch console is updated to the latest system version.
- Try re-pairing the controller by following the steps in Section 3.1.
- If issues persist, try resetting the controller by inserting a thin object into the small reset hole (if present, usually on the back) for a few seconds.
6.2 Buttons Unresponsive or Lagging
- Уверите се да је контролер потпуно напуњен.
- Move closer to the Switch console to ensure a strong wireless connection.
- Проверите да ли има физичких препрека или остатака око дугмади.
- Re-pair the controller.
6.3 Контролер се не пуни
- Ensure the USB-C cable is securely connected to both the controller and the power source.
- Покушајте да користите други УСБ-Ц кабл или адаптер за напајање.
- Уверите се да је извор напајања функционалан.
7. Спецификације
- Модел: Т37
- Повезивање: бежични (Блуетоотх)
- Компатибилност: Нинтендо Свитч, Свитч Лајт, Свитч ОЛЕД
- Карактеристике: Dual Turbo Function, Adjustable Vibration, 6-Axis Gyro Motion Control, Ergonomic Design
- Product Identifier (ASIN): B0CTTWN84L
8. Гаранција и подршка
For warranty information, technical support, or further assistance, please refer to the official EasySMX webсајт или директно контактирајте њихову корисничку подршку. Сачувајте рачун о куповини за потребе рекламације у гаранцији.