
MakeSkyBlue 60A-V123+CloudBOX
MakeSkyBlue 60A MPPT Solar Charge Controller with CloudBOX
Model: 60A-V123+CloudBOX User Manual
1. Увод
This manual provides detailed instructions for the installation, operation, and maintenance of your MakeSkyBlue 60A MPPT Solar Charge Controller with CloudBOX. This device is designed to efficiently manage power flow from your solar panels to your battery bank, ensuring optimal charging and system longevity. Please read this manual thoroughly before installation and use to ensure proper function and safety.
2. Безбедносне информације
- Always connect the battery to the charge controller прво, then connect the solar panels. Disconnect in the reverse order.
- Ensure all wiring is correctly polarized (positive to positive, negative to negative). Incorrect wiring can damage the controller and other components.
- Use appropriate wire gauges for your system's current and distance to prevent overheating.
- Инсталирајте контролер у добро проветреном простору, даље од запаљивих материјала и влаге.
- Do not attempt to repair or modify the controller. Contact qualified personnel for service.
- Wear appropriate personal protective equipment (PPE) during installation, including eye protection and insulated gloves.
3. Кључне карактеристике
- МППТ технологија: Advanced Maximum Power Point Tracking algorithm extracts up to 30% more solar energy compared to traditional PWM controllers.
- Аутоматски системски звукtagе Детекција: Automatically identifies 12V, 24V, or 48V battery systems.
- Широка компатибилност са батеријама: Supports Sealed, Gel, AGM, Flooded, and Lithium batteries.
- Integrated CloudBOX: Enables real-time remote monitoring and control via a mobile application (iOS & Android).
- Multi-function LCD Display: Provides cumulative power generation, error codes, temperature, voltage, and current data.
- Intelligent Battery Protection: Guards against overcharging, overvoltagе, и мала волtage to extend battery life.
- Ефикасно хлађење: Features smart cooling mechanisms to maintain optimal operating temperature.
4. Производ је готовview

Слика 1: MakeSkyBlue 60A MPPT Solar Charge Controller with CloudBOX. The image shows the front of the charge controller with its LCD display and control buttons, along with the included CloudBOX module and connecting cable.
4.1 Садржај пакета
- MakeSkyBlue 60A MPPT Solar Charge Controller
- CloudBOX Module
- Connecting Cable for CloudBOX
- Кориснички приручник (овај документ)
4.2 Физички опис
The controller features a robust aluminum casing for durability and heat dissipation. The front panel includes an LCD display and control buttons for configuration and monitoring. Connection terminals for solar panels, batteries, and load are located at the bottom of the unit.

Слика 2: Product dimensions. The image displays the front view of the charge controller with measurements indicating its height (21.65 units), width (14.96 units), and depth (8.66 units).
5. Водич за инсталацију
5.1 Место монтирања
- Mount the controller vertically on a non-flammable surface to allow for proper airflow and cooling.
- Ensure adequate clearance around the unit (at least 6 inches on all sides) for ventilation.
- Avoid direct sunlight, high temperatures, and humid environments.
5.2 Дијаграм ожичења

Слика 3: MPPT Charge Controller Wiring Diagram. This diagram illustrates the correct connection sequence: Solar Panel to Charge Controller, Charge Controller to Battery, and Battery to Inverter/Appliances. Ensure proper polarity for all connections.
5.3 Кораци повезивања
- Повежите батерију: Connect the positive and negative terminals of your battery bank to the corresponding battery terminals on the charge controller (BT+ and BT-). Ensure correct polarity. The controller will automatically detect the battery voltagе (12 В/24 В/48 В).
- Повежите соларне панеле: Connect the positive and negative terminals of your solar panel array to the corresponding PV input terminals on the charge controller (PV+ and PV-). Ensure correct polarity.
- Повежите једносмерно оптерећење (опционо): If using a DC load directly from the controller, connect its positive and negative terminals to the load output terminals (OUT+ and OUT-). Note that the load output is typically for smaller DC loads and may not be present on all models or used in all configurations.
- Connect CloudBOX: Plug the CloudBOX module into the designated communication port on the charge controller.
Важно: Always follow the connection order: Battery > Solar Panel > Load. Disconnect in the reverse order: Load > Solar Panel > Battery.
6. Операција
6.1 ЛЦД екран прекоview
The LCD display provides real-time system status and allows for parameter configuration. Use the 'PROG/ESC', 'UP', 'DOWN', and 'ENTER' buttons to navigate and adjust settings.
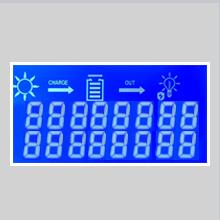
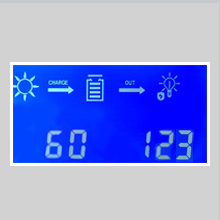
Слика 4: Example LCD screens. These images show various display modes, including icons for solar input, charging status, battery, load output, and numerical values for current and voltage.
6.2 Навигација по екрану
- Press the 'UP' or 'DOWN' buttons to cycle through different display screens, showing parameters like PV voltagе, запремина батеријеtage, charging current, load current, accumulated power, and internal temperature.
- Press 'PROG/ESC' to enter or exit programming mode.
- In programming mode, use 'UP'/'DOWN' to change values and 'ENTER' to confirm.
6.3 Battery Type Settings
The controller supports various battery types. It is crucial to set the correct battery type for optimal charging and battery longevity. The default setting is for lead-acid batteries.

Слика 5: Compatible Battery Types. The image illustrates the charge controller's compatibility with GEL, Flooded, and AGM battery types, indicating its versatility for various solar power setups.
To change battery type:
- Enter programming mode by pressing 'PROG/ESC'.
- Navigate to the battery type setting (often indicated by 'b00' or similar on the LCD).
- Use 'UP'/'DOWN' to select your battery type (e.g., Gel, Flooded, AGM, Lithium). Refer to the controller's specific menu for exact options.
- Press 'ENTER' to confirm your selection.
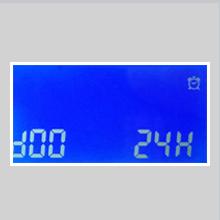
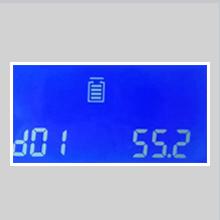
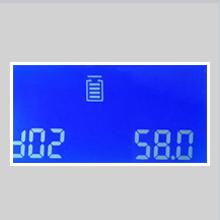
Слика 6: Battery Parameter Settings. These images show LCD screens for adjusting battery-related parameters such as battery type ('b00'), overcharge voltage ('b01'), and charge recovery voltage ('b02').
You can also adjust specific voltage parameters (e.g., overcharging protection voltagе, обнављање пуњења волtagе, ниска волtage disconnect) for fine-tuning, especially for custom lithium battery configurations. Refer to your battery manufacturer's specifications for recommended values.
7. CloudBOX and Mobile App
The included CloudBOX module allows for remote monitoring and control of your solar system via a dedicated mobile application (available for iOS and Android). This feature provides convenience for checking system status, performance data, and adjusting settings from your smartphone or tablet.
7.1 Setup and Connection
- Ensure the CloudBOX is securely connected to the charge controller's communication port.
- Download the official MakeSkyBlue mobile application from your device's app store.
- Follow the in-app instructions to register your device and connect to the CloudBOX. This typically involves scanning a QR code or entering a device ID.
- Ensure your mobile device has an active internet connection for remote access.
7.2 Функције апликације
- View real-time data: PV voltagе, запремина батеријеtage, charging current, load current, power generation.
- Access historical data and performance graphs.
- Receive alerts and notifications for system events or errors.
- Adjust certain controller parameters remotely.
8. Спецификације
| Параметар | Валуе |
|---|---|
| Модел | 60A-V123+CloudBOX |
| Називна струја пуњења | 60А |
| Систем Волtage | 12V/24V/48V Auto-Detect |
| Max PV Array Power (12V Battery) | ≤ 720В |
| Max PV Array Power (24V Battery) | ≤ 1440В |
| Max PV Array Power (48V Battery) | ≤ 2800В |
| PV Array Open Circuit Voltage (Voc) (12V Battery) | 20В-80В |
| PV Array Open Circuit Voltage (Voc) (24V Battery) | 37В-105В |
| PV Array Open Circuit Voltage (Voc) (48V Battery) | 72В-160В |
| Подржани типови батерија | Sealed, Gel, AGM, Flooded, Lithium |
| Оверцхаргинг Протецтион Волtage (12V Battery) | 15В |
| Оверцхаргинг Протецтион Волtage (24V Battery) | 30В |
| Оверцхаргинг Протецтион Волtage (48V Battery) | 60В |
| Limited Current Protection | 61А |
| Радна температура | До 75°Ц |
| Fan-on Temperature | >45°Ц |
| Fan-off Temperature | <40°Ц |
| Дисплаи Типе | ЛЦД |
| Димензије (Д к Ш к В) | Approx. 14.96 x 8.66 x 21.65 inches (based on image) |
| Тежина артикла | 2.9 фунти |
КСНУМКС. Решавање проблема
This section addresses common issues you might encounter with your charge controller.
- Нема дисплеја/Нема напајања:
- Check battery connections and ensure they are secure and correctly polarized.
- Проверите запремину батеријеtage is within the operating range (12V/24V/48V).
- Ensure any inline fuses or circuit breakers are not tripped.
- No Charging from Solar Panels:
- Проверите везе и поларитет соларних панела.
- Verify PV array open circuit voltage (Voc) is within the specified range for your battery system (e.g., 20V-80V for 12V battery).
- Ensure there is sufficient sunlight reaching the panels.
- Check for any shading on the solar panels.
- Battery Not Fully Charging:
- Confirm the correct battery type is selected in the controller settings.
- Check the maximum PV array power. If it's too low for your battery bank, charging will be slow.
- Inspect battery health. Old or damaged batteries may not hold a full charge.
- Overcharging/High Voltage Spike:
- Ensure the battery type and overcharging protection voltage settings are correctly configured for your battery chemistry and voltage.
- If experiencing voltage spikes, especially when batteries reach full charge, verify all connections are robust and consider adding external overvoltage protection if the issue persists. Consult with a qualified solar technician.
- Кодови грешака на екрану:
- Refer to the specific error code displayed on the LCD. Consult the manufacturer's support resources or contact customer service for detailed explanations and solutions for each code.
10. Одржавање
- Редовна инспекција: Периодично проверавајте све спојеве ожичења на чврстоћу и корозију.
- чистоћа: Keep the controller clean and free from dust and debris. Ensure ventilation openings are not blocked.
- Здравље батерије: Monitor your battery bank's health and performance. Ensure proper ventilation for flooded lead-acid batteries.
- Ажурирања фирмвера: Проверите произвођача website or mobile app for any available firmware updates for the controller or CloudBOX.
11. Корисничка подршка
For technical assistance, warranty information, or further inquiries, please contact MakeSkyBlue customer support through their official webсајт или контакт информације које сте добили уз куповину.
Онлине ресурси: Посетите MakeSkyBlue Store on Amazon за информације о производу и ажурирања.
Ask a question about this manual
Ask about setup, troubleshooting, compatibility, parts, safety, or missing instructions. Manuals+ will review the question and use this page’s manual context to help answer it.