
1. Увод
This manual provides detailed instructions for the ACEMIC ST-5 UHF Wireless Saxophone Microphone System. Please read this manual thoroughly before using the product to ensure proper operation and to maximize its performance and longevity.
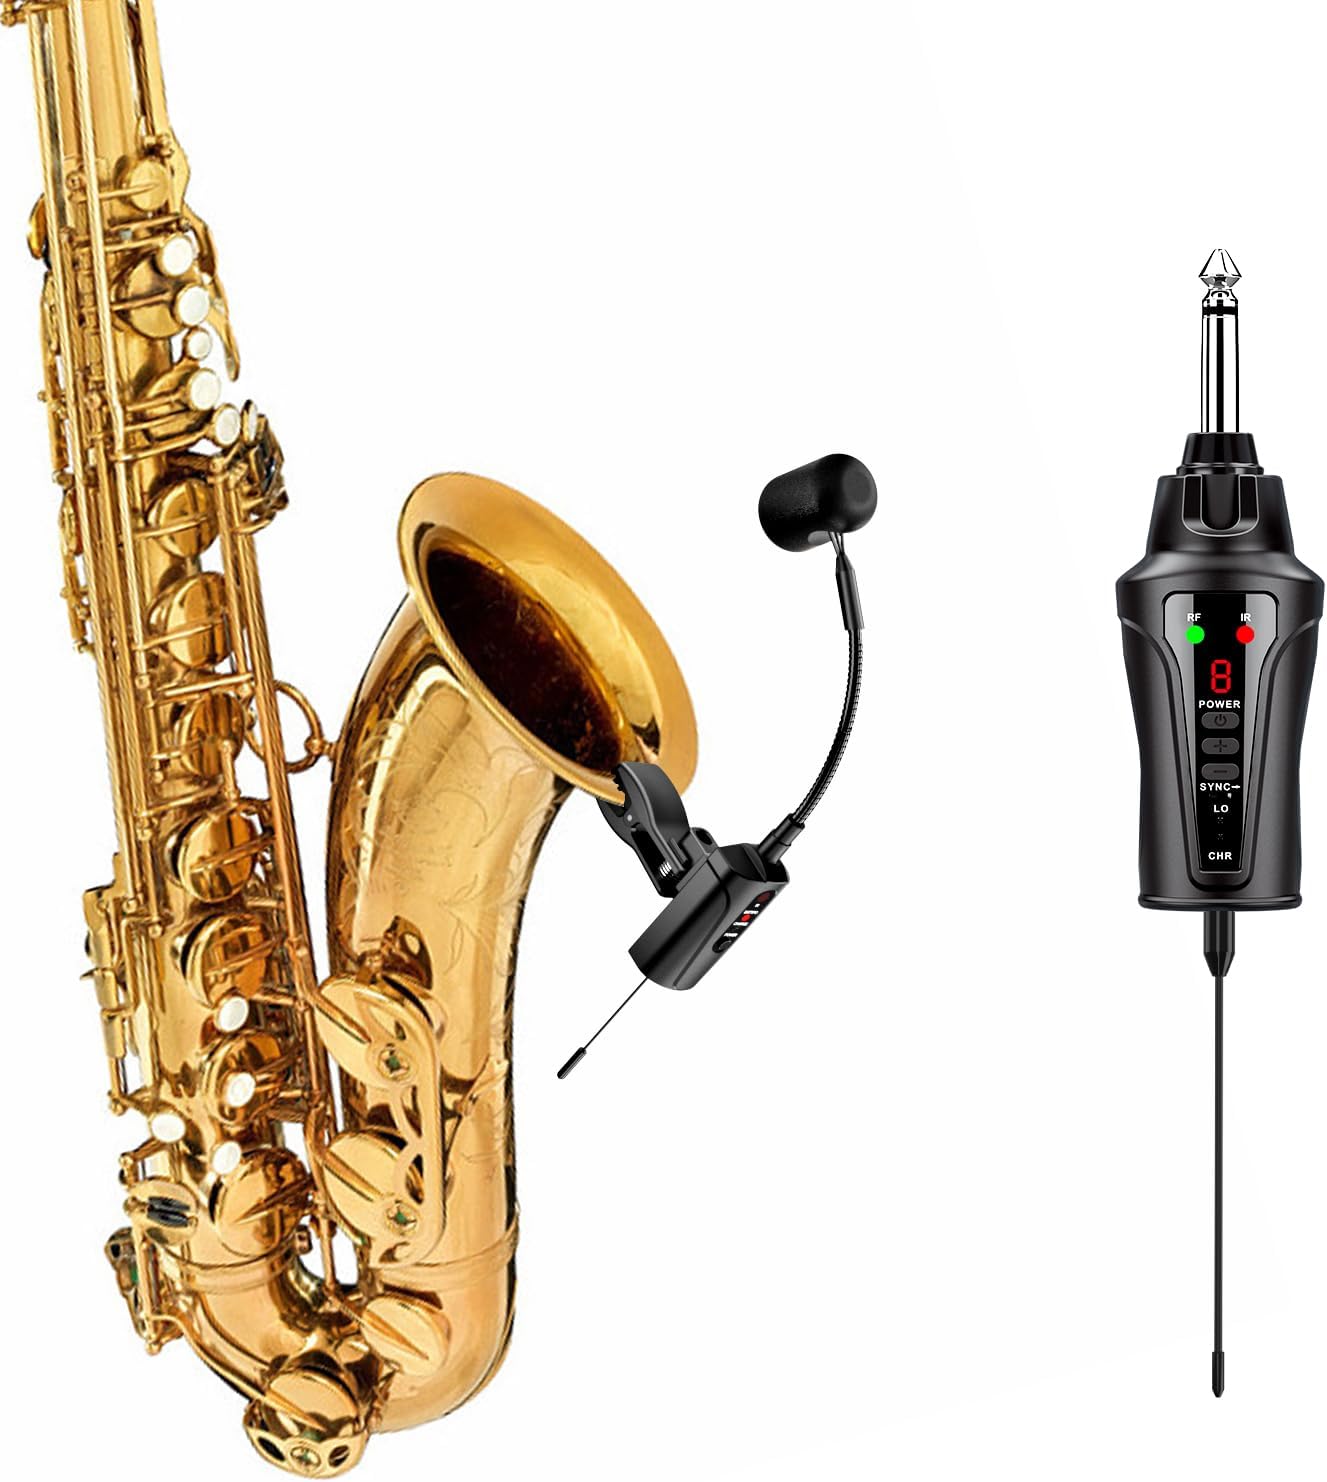
Image 1.1: ACEMIC ST-5 UHF Wireless Saxophone Microphone System components.
2. Садржај пакета
Проверите да ли су све ставке наведене у наставку укључене у ваш пакет:
- 1 x Transmitter (with clip-on microphone)
- 1 к пријемник
- 1 x 2-у-1 USB кабл за пуњење
- 1 x адаптер са 6.35 мм на 3.5 мм
- 1 к торбица за ношење
- 1 к Упутство за употребу

Image 2.1: All items included in the ACEMIC ST-5 package.
3. Карактеристике производа
- UHF Stable Transmission: Utilizes UHF frequency and advanced digital audio transmission for stable, low-latency sound up to 130ft (40m) in open areas. Features infrared automatic pairing and a 48kHz sampлинг рате.
- High-Quality Sound Reproduction: Built-in highly sensitive condenser microphone captures clear and realistic instrument sound.
- 16 Adjustable Channels: Offers 16 preset channels to avoid interference and supports up to 4 systems for simultaneous use.
- Флексибилни дизајн гушчјег врата: Allows for precise microphone positioning with a stable, adjustable gooseneck and a shock-proof clip.
- Дуг век трајања батерије: Built-in rechargeable battery provides up to 6 hours of continuous use after a 2.5 to 3-hour charge.
- Широка компатибилност: Compatible with various active PA systems, active speakers, amplifiers, and audio mixers via 6.35mm or 3.5mm connections.
4. Идентификација компоненте
Familiarize yourself with the transmitter and receiver components:

Image 4.1: Detailed diagram of the transmitter and receiver components.
Компоненте предајника:
- Кондензаторски микрофон: Captures audio from the instrument.
- Флексибилни гуски врат: Allows for precise microphone positioning.
- Instrument Clip: Securely attaches the transmitter to the instrument.
- IR Sync Button: Initiates infrared pairing with the receiver.
- Power/Low Power Indicator: Shows power status and low battery warning.
- Индикатор пуњења: Светли током пуњења.
- Дугме за напајање: Укључује/искључује предајник.
- Антена: За бежични пренос сигнала.
- Интерфејс за пуњење: УСБ-Ц порт за пуњење.
Компоненте пријемника:
- 6.35mm Plug: Connects to audio input devices.
- РФ индикатор: Shows radio frequency signal status.
- Дигитални екран: Shows current channel number.
- Дугме за напајање: Укључује/искључује пријемник.
- Frequency Plus/Minus Buttons: Adjusts the channel frequency.
- Лов Волtagе Индикатор: Упозорава на слабу батерију.
- IR Sync Button: Initiates infrared pairing with the transmitter.
- Индикатор пуњења: Светли током пуњења.
- Антена: За пријем бежичног сигнала.
5. Водич за подешавање
5.1 Почетно пуњење
- Use the provided 2-in-1 USB charging cable to simultaneously charge both the transmitter and receiver.
- Connect the USB cable to a standard USB power adapter (not included).
- The charging indicators on both units will illuminate during charging.
- A full charge takes approximately 2.5 to 3 hours. The indicators will change or turn off once fully charged.

Image 5.1: Charging the transmitter and receiver.
5.2 Инсталација антене
Ensure the antenna on the bottom of the receiver is properly installed before use for optimal signal reception.
5.3 Укључивање/искључивање
Press and hold the Power Button on both the transmitter and receiver for a few seconds to turn them on or off.
5.4 Pairing the System (Infrared Automatic Pairing)
The system uses infrared automatic pairing for quick setup.
- Укључите и предајник и пријемник.
- Ensure the transmitter and receiver are close to each other (within a few inches).
- Press the IR Sync Button on both units. The units will automatically pair.
- The RF indicator on the receiver will light up steadily once paired.
5.5 Channel Adjustment (for multiple systems)
The system offers 16 adjustable channels to prevent interference, supporting up to 4 systems simultaneously.
- For the first system: Pair the transmitter and receiver as described in Section 5.4. Note the channel displayed on the receiver.
- For subsequent systems: Before pairing, use the Frequency Plus/Minus buttons on the receiver to select a new channel. It is recommended to choose a channel number that is at least 3 channels apart from any already paired systems to minimize interference.
- Once a new channel is selected on the receiver, press its IR Sync Button, then press the IR Sync Button on the corresponding transmitter to pair them.
- Repeat this process for each additional system.

Image 5.2: Channel adjustment for multiple systems.
5.6 Connecting to Audio Systems
- Plug the 6.35mm plug of the receiver into the instrument input of your active PA system, active speaker, ampлајфер или аудио миксер.
- If your audio device requires a 3.5mm input, use the included 6.35mm to 3.5mm adapter.

Image 5.3: Compatibility with various musical instruments and audio systems.
5.7 Постављање микрофона
Attach the transmitter's clip to the bell of your instrument (e.g., saxophone, trumpet, tuba). Adjust the flexible gooseneck to position the microphone for optimal sound capture.
- Ensure the microphone angle is approximately 45 degrees or greater relative to the instrument's bell.
- Maintain a distance of at least 10cm (approximately 4 inches) between the microphone and the instrument's sound source for best results.
- The rubber padding on the clip protects your instrument from damage.

Image 5.4: Optimal microphone placement using the flexible gooseneck.
6. Операција
6.1 Основна употреба
Once the transmitter and receiver are charged, paired, and connected to your audio system:
- Turn on your audio system (PA, speaker, ampлифиер).
- Adjust the volume on your audio system to a suitable level.
- Begin playing your instrument. The sound will be transmitted wirelessly to your audio system.

Image 6.1: Wireless transmission in action.
7. Одржавање
7.1 Одржавање батерије
- Recharge the units regularly, especially if they have not been used for an extended period.
- Избегавајте често потпуно пражњење батерије како бисте продужили њен век трајања.
- Чувајте јединице на хладном и сувом месту када се не користе.
7.2 Чишћење
- Wipe the exterior of the transmitter and receiver with a soft, dry cloth.
- Не користите јаке хемикалије или абразивна средства за чишћење.
- Keep the microphone head clean and free from dust or debris.
КСНУМКС. Решавање проблема
8.1 Нема звука или лош квалитет звука
- Проверите снагу: Ensure both the transmitter and receiver are powered on and charged.
- Проверите упаривање: Verify that the transmitter and receiver are successfully paired (RF indicator on receiver should be steady). Re-pair if necessary.
- Проверите везе: Ensure the receiver is securely plugged into your audio system's input.
- Подесите јачину звука: Increase the volume on your audio system and ensure the microphone is positioned correctly.
- сметње: If experiencing static or dropouts, try changing the channel on the receiver and re-pairing the units (refer to Section 5.5).
- Удаљеност: Ensure the transmitter and receiver are within the effective operating range (up to 130ft/40m in open areas). Obstacles can reduce this range.
- Положај микрофона: Adjust the gooseneck to ensure the microphone is optimally positioned relative to the instrument (refer to Section 5.7).
8.2 Interference from Other Wireless Devices
- The ST-5 system operates on UHF frequencies. Other wireless devices operating on similar frequencies may cause interference.
- Change the operating channel of your ST-5 system (refer to Section 5.5) to find a clear frequency.
- Maintain a reasonable distance from other wireless equipment.
8.3 Кратак век трајања батерије
- Ensure the units are fully charged before use (2.5-3 hours).
- Перформансе батерије могу се временом смањити уз интензивну употребу.
- Operating in extremely cold environments can temporarily reduce battery life.
9. Спецификације
| Феатуре | Спецификација |
|---|---|
| Број модела | СТ-5 |
| Трансмиссион Типе | УХФ Вирелесс |
| Sampлинг Рате | 48 кХз |
| Канали | 16 Adjustable Channels |
| Оперативни опсег | До 40 метара (130 стопа) на отвореном простору |
| Тип микрофона | Кондензатор |
| Тип батерије | Литијум полимер (укључен) |
| Време непрекидног коришћења | Отприлике 6 сата |
| Време пуњења | Approximately 2.5 - 3 hours |
| Тип конектора | 6.35mm Plug, 3.5mm Jack (with adapter) |
| Тежина артикла | 1.06 фунти |
| Димензије пакета | 11.22 к 5.47 к 2.44 инча |
10. Гаранција и подршка
For warranty information and technical support, please refer to the documentation included with your purchase or contact ACEMIC customer service directly. Specific warranty terms may vary by region and retailer.