
Увод
This manual provides essential information for the setup, operation, maintenance, and troubleshooting of your GIGABYTE MO34WQC2 34-inch QD-OLED Curved Gaming Monitor. Please read this manual thoroughly before using the product to ensure correct usage and optimal performance.
The GIGABYTE MO34WQC2 monitor features a 34-inch curved QD-OLED display, offering a 0.03ms GTG response time and a 240 Hz refresh rate for smooth visual experiences. It includes Type-C KVM functionality, allowing seamless switching between multiple devices.
Кључне карактеристике:
- 3rd Gen QD-OLED Panel: Delivers high image quality and gaming performance.
- GIGABYTE OLED Care: AI-based algorithm to minimize burn-in risks with adjustable settings.
- Брзина освежавања од 240Hz и време одзива од 0.03ms: Ensures ultra-smooth motion clarity and responsiveness.
- Life-Like Colors: Features 1.5M:1 contrast ratio, 99% DCI-P3 color gamut, and 10-bit color depth.
- VESA DisplayHDR True Black 400 & ClearMR 13000: Provides realistic contrast and top-tier motion clarity.
- АМД ФрееСинц Премиум Про: Reduces screen tearing and stuttering, especially in HDR content.
- Тактичке карактеристике: Includes Game Assist (timer, crosshairs, PIP/PBP), Black Equalizer 2.0, and Dashboard for enhanced gameplay.
- 3-годишња гаранција: Covers panel burn-in (terms may vary by region).
Упутства за подешавање
1. Распакивање и монтажа
Пажљиво извадите монитор и све компоненте из паковања. Поставите монитор лицем надоле на меку, чисту површину да бисте спречили огреботине.

This image shows the GIGABYTE MO34WQC2 monitor with its stand, viewed from the front. The monitor is curved and displays a vibrant, colorful image.
Причвршћивање постоља:
- Причврстите врат постоља на панел монитора. Уверите се да је сигурно закачио на своје место.
- Attach the stand base to the stand neck and tighten the screw at the bottom of the base.
Alternatively, the monitor supports VESA 100x100mm wall mounts. Refer to the image below for VESA mounting points.

This image illustrates the adjustable stand of the GIGABYTE MO34WQC2 monitor, showing its tilt range (-5° to +20°) and height adjustment (130mm). A close-up inset highlights the VESA 100x100mm mounting area on the back of the monitor.
2. Повезивање каблова
Connect the necessary cables to the monitor's I/O ports. Ensure all connections are firm.

This diagram shows the input/output ports on the back of the GIGABYTE MO34WQC2 monitor. Ports include HDMI 2.1 (in), DP 1.4 (in), USB Type-C (DP Alt), Mic, Headphone, USB 3.2 (Upstream), and USB 3.2 (Downstream).
- Кабл за напајање: Повежите кабл за напајање са монитором и утичницом.
- Видео улаз: Connect your PC or gaming console using an HDMI 2.1, DisplayPort 1.4, or USB Type-C cable.
- УСБ упстреам: For KVM functionality and USB hub use, connect a USB 3.2 Upstream cable from your PC to the monitor.
- аудио: Connect headphones or external speakers to the Headphone jack if desired.
Упутство за употребу
1. Укључивање/искључивање
Притисните дугме за напајање, које се обично налази на задњој или доњој страни монитора, да бисте га укључили или искључили. Индикаторска лампица напајања ће светлети када је монитор укључен.
2. Навигација преко екранског менија (OSD)
The monitor features a joystick control for navigating the OSD menu. This joystick is typically located on the back of the monitor.
- Притисните: Enter OSD menu / Confirm selection.
- Горе доле: Крећите се по опцијама менија.
- лево/десно: Adjust settings / Navigate sub-menus.
3. KVM Functionality
The built-in KVM (Keyboard, Video, Mouse) switch allows you to control multiple devices (e.g., a desktop PC and a laptop) with a single keyboard and mouse connected to the monitor. To use KVM, ensure both devices are connected to the monitor via video input (HDMI/DP/USB-C) and the USB Upstream cable from the primary device.

This image shows the GIGABYTE MO34WQC2 monitor connected to a desktop PC via HDMI/DP and a laptop via USB Type-C, illustrating how the Type-C KVM feature allows switching between devices with a single button press.
Switch between connected devices using the dedicated KVM button or through the OSD menu.
4. Подешавања екрана
Приступите OSD менију да бисте подесили различита подешавања екрана:
- слика: Осветљеност, контраст, оштрина, температура боје.
- Боја: Gamma, Hue, Saturation.
- Играње: Overdrive, FreeSync Premium Pro, Black Equalizer 2.0, Crosshair, Timer.
- Улаз: Select input source (HDMI, DisplayPort, USB-C).
- Систем: Language, OSD Timeout, Power LED.
5. GIGABYTE OLED Care
The monitor includes AI-based OLED Care features to prevent burn-in. These settings can be accessed and adjusted via the OSD menu. It is recommended to keep these features enabled for optimal panel longevity.
Одржавање
1. Чишћење монитора
- Увек искључите монитор и извуците кабл за напајање пре чишћења.
- Лагано користите меку крпу која не оставља длачице дampиспрати водом или неабразивним средством за чишћење екрана.
- Не прскајте средство за чишћење директно на екран.
- Избегавајте употребу јаких хемикалија, растварача или абразивних материјала.
2. OLED Panel Care
To prolong the life of your QD-OLED panel and minimize the risk of burn-in, utilize the GIGABYTE OLED Care features available in the OSD menu. These features include pixel shift, static image detection, and pixel refresh cycles. Regular use of these functions is recommended.
Решавање проблема
Ако наиђете на проблеме са монитором, погледајте следеће уобичајене проблеме и решења:
| Проблем | Могуће решење |
|---|---|
| Нема слике на екрану | Ensure the power cable is securely connected and the monitor is powered on. Verify the video input cable (HDMI, DP, USB-C) is properly connected to both the monitor and the source device. Select the correct input source via the OSD menu. |
| Треперење или изобличење слике | Check video cable connections. Ensure the graphics card drivers are up to date. Try a different video cable or port. Disable or adjust FreeSync Premium Pro settings in the OSD if experiencing issues. |
| Боје изгледају погрешно | Adjust color settings (brightness, contrast, color temperature) in the OSD menu. Ensure HDR is correctly configured on your source device and monitor. |
| Burn-in or image retention | Utilize the GIGABYTE OLED Care features in the OSD menu, such as Pixel Refresh or Static Image Detection, to mitigate these issues. Avoid displaying static images for extended periods. |
| KVM not switching devices | Ensure the USB Upstream cable is connected from the primary device to the monitor. Verify all video inputs are correctly connected. Check KVM settings in the OSD menu. |
Спецификације
| Феатуре | Детаљ |
|---|---|
| Бранд | ГИГАБИТЕ |
| Број модела | MO34WQC2-SA |
| Величина екрана | 34 инча |
| Резолуција | ВКХД 3440 к 1440 |
| Аспецт Ратио | 21:9 |
| Дисплаи Типе | КД-ОЛЕД |
| Рефресх Рате | 240 Хз |
| Време одговора | 0.03 Milliseconds (GtG) |
| Однос контраста | 1,500,000:1 |
| Гамут боја | 99% ДЦИ-П3 |
| ХДР подршка | VESA DisplayHDR True Black 400 |
| Адаптиве Синц | АМД ФрееСинц Премиум Про |
| Повезивање | 2x HDMI 2.1, 1x DisplayPort 1.4, 1x USB Type-C (DP Alt Mode), 2x USB 3.2 (Downstream), 1x USB 3.2 (Upstream), Headphone Jack |
| Подешавања | Height, Tilt |
| ВЕСА Моунт | 100к100мм |
| Димензије (Ш к Д к В) | 31.96 cm x 9.65 cm x 23.42 cm (са постољем) |
| Тежина | 21.7 фунти |
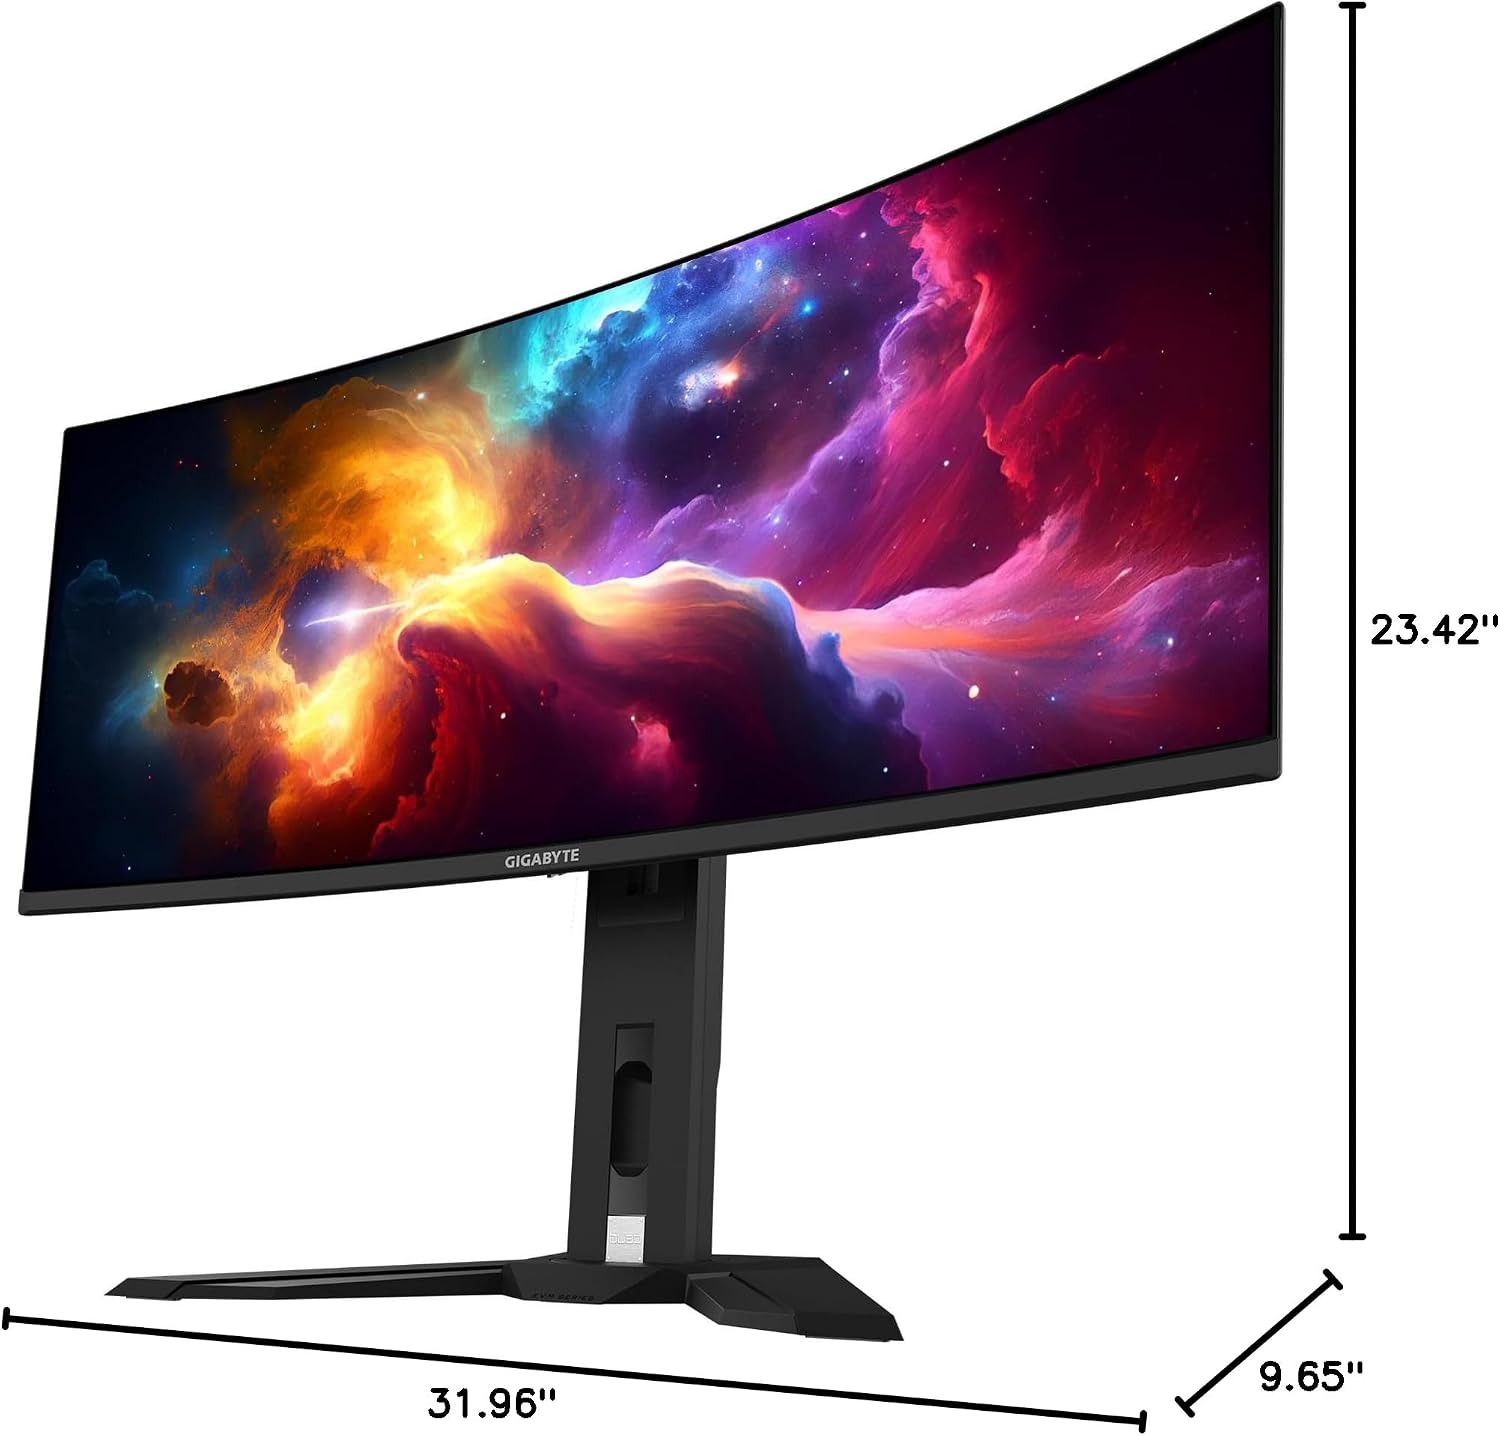
This image provides a diagram of the GIGABYTE MO34WQC2 monitor's dimensions, showing a width of 31.96 inches, a depth of 9.65 inches, and a height of 23.42 inches (including the stand).
Гаранција и подршка
Информације о гаранцији
Your GIGABYTE MO34WQC2 monitor comes with an extended 3-year manufacturer warranty. This warranty includes coverage for panel burn-in, supported by the AI-based GIGABYTE OLED Care protection. Please note that warranty terms may vary by region.
Корисничка подршка
For technical assistance, warranty claims, or further inquiries, please visit the official GIGABYTE support website or contact their customer service department. Refer to the product packaging or GIGABYTE's official website for specific contact details and support resources in your region.