
1. Увод
The MUSE M-179 P Alarm Clock Radio is designed to provide reliable timekeeping and audio entertainment. This device features an FM PLL radio with the capacity to store 20 preset stations. It includes a time projection function, allowing you to adjust both the angle and rotation of the projected image for optimal viewing. As an alarm clock, it offers a dual alarm system, enabling you to wake up to either your preferred radio station or a standard buzzer. Additional functions include a snooze feature for extra sleep and a sleep timer for falling asleep to music.
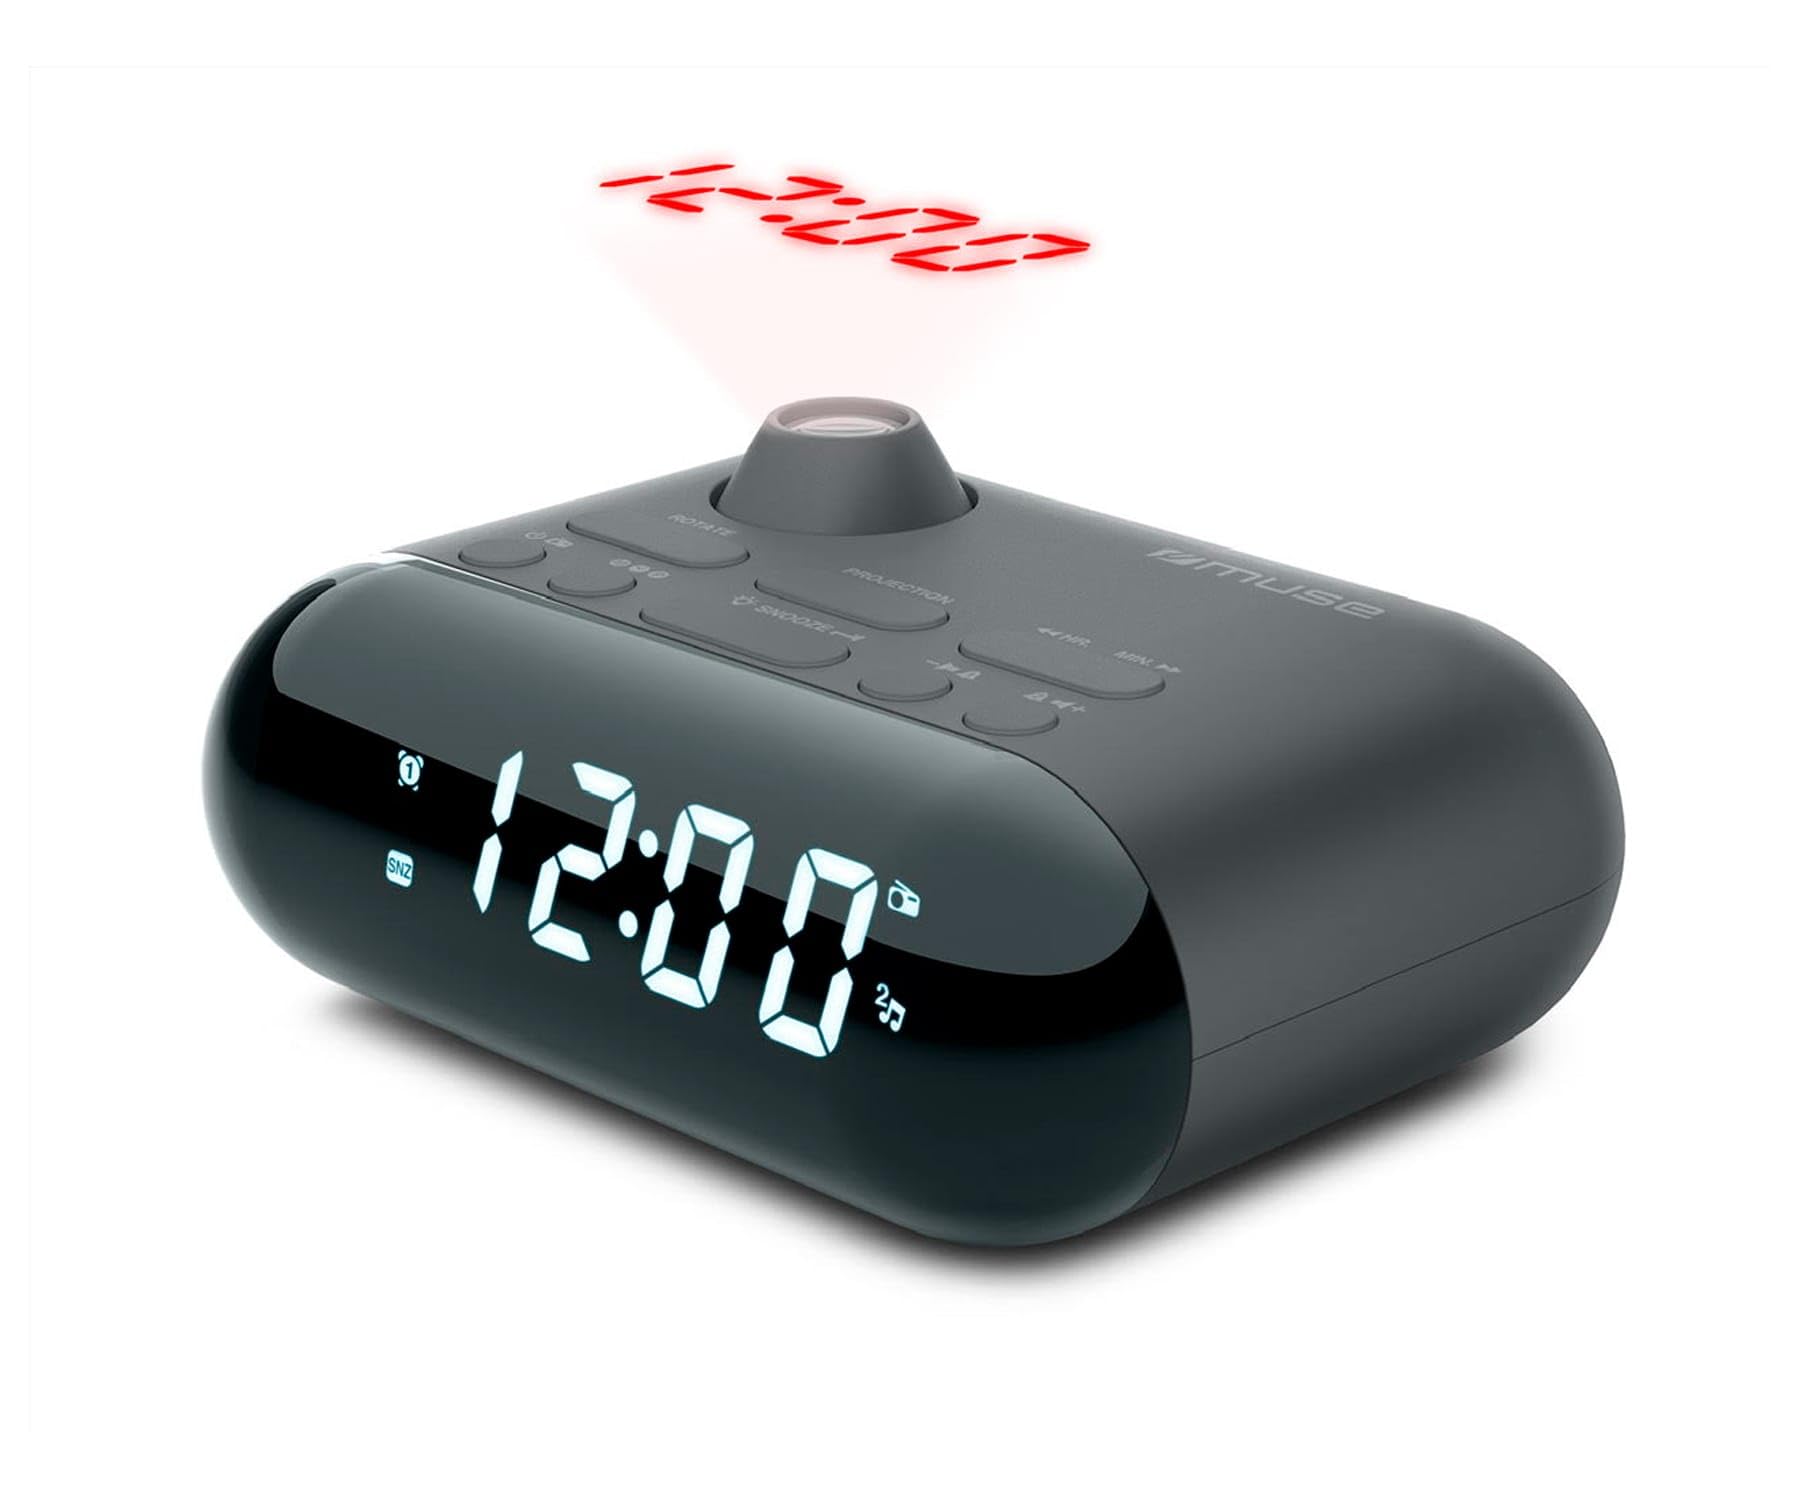
Image showing the front of the MUSE M-179 P Alarm Clock Radio, featuring the LED display and control buttons.
2. Безбедносна упутства
- Пажљиво прочитајте сва упутства пре употребе уређаја.
- Сачувајте ово упутство за будућу употребу.
- Не излажите уређај капању или прскању воде.
- Обезбедите одговарајућу вентилацију; не блокирајте ниједан вентилациони отвор.
- Не постављајте уређај у близини извора топлоте као што су радијатори, грејни уређаји, шпорети или други уређаји (укључујући ampлифиерс) који производе топлоту.
- Користите само додатке/прибор које је навео произвођач.
- Истрошене батерије одлажите одговорно у складу са локалним прописима.
- Do not attempt to disassemble or modify the unit. Refer all servicing to qualified service personnel.
3. Садржај пакета
Молимо вас да проверите да ли су следеће ставке укључене у ваш пакет:
- MUSE M-179 P Alarm Clock Radio Unit
- 1 x AA Battery (for backup or primary power, depending on model)
- Кориснички приручник (овај документ)
4. Карактеристике производа
- Alarm Clock Radio: Integrated alarm and radio functions.
- Временска пројекција: Projects the current time onto a wall or ceiling.
- Двоструки аларм: Подесите два независна аларма.
- Опције буђења: Choose to wake up to FM radio or a buzzer sound.
- PLL FM Radio: Digital tuning for stable radio reception.
- 20 FM Presets: Store up to 20 of your favorite FM radio stations.
- Одгода функција: Temporarily pause the alarm.
- Мерач спавања: Fall asleep to radio with automatic shut-off.
- Уграђени сат: Accurate timekeeping.
- Преносиви дизајн: Compact and easy to move.
5. Контроле и дисплеј
The MUSE M-179 P features an intuitive layout for easy operation. While specific button labels may vary, common controls include:
- ЛЕД дисплеј: Shows current time, alarm status, and radio frequency.
- Дугме за подешавање времена: For adjusting hours and minutes.
- Alarm 1/Alarm 2 Buttons: To set and activate individual alarms.
- Snooze/Sleep Button: Activates snooze or sets the sleep timer.
- Radio/Tuning Buttons: For scanning and selecting radio stations.
- Контрола јачине звука: Подешава аудио излаз.
- Projector On/Off & Adjustment: Controls the time projection feature.
6. Подешавање
6.1. Прикључак за напајање
- Open the battery compartment, usually located on the bottom or back of the unit.
- Insert 1 AA battery, ensuring correct polarity (+/-). This battery powers the unit.
- Добро затворите одељак за батерије.
6.2. Почетно подешавање времена
- When the unit is first powered on, the display may flash or show a default time.
- Притисните и држите ВРЕМЕНСКИ СКЛОП button (or similar) until the hour digits begin to flash.
- Користите ХОУР и МИНУТЕ buttons (or tuning buttons) to adjust the hour. Pay attention to AM/PM indicators if present.
- Притисните ВРЕМЕНСКИ СКЛОП again to confirm the hour and move to minute adjustment.
- Adjust the minutes using the appropriate buttons.
- Притисните ВРЕМЕНСКИ СКЛОП one last time to save the current time.
7. Упутство за употребу
7.1. Подешавање аларма
The M-179 P features two independent alarms (Alarm 1 and Alarm 2).
- Притисните и држите АЛАРМ 1 дугме док цифре сата аларма не затрепере.
- Користите ХОУР и МИНУТЕ дугмад да бисте подесили жељено време аларма.
- Притисните АЛАРМ 1 again to confirm the time and select the wake-up source (radio or buzzer). Use the tuning buttons to toggle between options.
- Притисните АЛАРМ 1 once more to save the settings. The alarm indicator will light up on the display.
- Repeat the process for АЛАРМ 2 користећи се АЛАРМ 2 дугме.
7.2. Коришћење FM радија
- Притисните тастер РАДИО ОН/ОФФ дугме за укључивање радија.
- Користите ТУНЕ +/- дугмад за ручно подешавање фреквенције.
- To auto-scan for stations, press and hold the ТУНЕ +/- button. The radio will stop at the next strong signal.
- To save a preset station: Tune to the desired station, then press and hold the ПРЕСЕТ дугме (или МЕМ). The preset number will flash. Use ТУНЕ +/- да бисте изабрали број предефинисане поставке (1-20), а затим притисните ПРЕСЕТ опет да уштедим.
- To recall a preset station: Press the ПРЕСЕТ више пута притискајте дугме да бисте се кретали кроз сачуване станице.
- Подесите јачину звука помоћу ВОЛУМЕ +/- дугмад.
7.3. Временска пројекција
- Лоцирајте ПРОЈЕКТОР УКЉУЧЕН/ИСКЉУЧЕН switch or button. Turn it on to activate the time projection.
- Adjust the projection angle by physically rotating the projector lens housing.
- Ако је доступно, користите РОТАЦИЈА СЛИКА button or dial to flip the projected time display 180 degrees for optimal viewing on a ceiling or wall.
- Adjust the focus of the projected image by rotating the focus ring around the projector lens.
7.4. Функција одлагања
Када се огласи аларм, притисните дугме СНООЗЕ button. The alarm will temporarily stop and sound again after a few minutes (typically 5-9 minutes, depending on the model's default setting).
7.5. Мерач спавања
- Док радио свира, притисните дугме СЛЕЕП дугме.
- Више пута притискајте СЛЕЕП button to cycle through available sleep timer durations (e.g., 90, 60, 30, 15 minutes, or OFF).
- Радио ће се аутоматски искључити након изабраног времена.
8. Одржавање
8.1. Чишћење
- Обришите уређај меком, сувом крпом.
- Не користите абразивна средства за чишћење, воскове или раствараче.
8.2. Замена батерије
- When the display dims or the unit malfunctions, it may be time to replace the battery.
- Open the battery compartment and replace the old AA battery with a new one, observing correct polarity.
- Dispose of the old battery according to local environmental regulations.
КСНУМКС. Решавање проблема
| Проблем | Могући узрок | Решење |
|---|---|---|
| Јединица се не укључује. | Батерија је празна или је неправилно уметнута. | Замените батерију или проверите поларитет. |
| Лош радио пријем. | Антена није издужена или је сигнал лош. | Extend the FM antenna fully. Reposition the unit for better reception. |
| Аларм се не оглашава. | Аларм није активиран или је погрешно подешен. | Ensure alarm is set and activated (alarm indicator visible). Check alarm volume. |
| Time projection is blurry. | Фокус није подешен. | Rotate the focus ring on the projector lens until the image is clear. |
| Projected time is upside down. | Image rotation needs adjustment. | Press the IMAGE ROTATION button or adjust the dial to flip the display. |
10. Спецификације
- Бренд: МУСЕ
- Број модела: M-179 P
- Извор напајања: Battery powered (1 AA battery required)
- Тип приказа: ЛЕД
- Технологија повезивања: Auxiliary (3.5 mm Audio Interface)
- Тип тјунера: FM
- Подржани радио бендови: FM
- Посебне карактеристике: Built-in clock, Portable
- Димензије производа (Д к Ш к В): 15 цм к 12.4 цм к 6.8 цм
- Ниво водоотпорности: Waterproof (Note: This specification should be interpreted with caution for electronic devices. Avoid direct exposure to water.)
- Internal Material: Пластика
- Препоручена употреба: За унутрашњу употребу
- Compatible Devices (Auxiliary): Headphones, Speaker, MP3 player, Laptop
11. Гаранција и подршка
This product is covered by a standard manufacturer's warranty. For detailed warranty information, please refer to the warranty card included in your product packaging or visit the official MUSE website. For technical support, troubleshooting assistance, or to inquire about spare parts, please contact MUSE customer service through their official channels.
Молимо вас да сачувате доказ о куповини за евентуалне рекламације у вези са гаранцијом.