1. Увод
This manual provides comprehensive instructions for the setup, operation, and maintenance of your Netzu Loud Alarm Clock Model 6208B. Please read this manual thoroughly before using the product to ensure proper function and longevity.
2. Безбедносне информације
- Уверите се да је адаптер за напајање компатибилан са вашим локалним напајањем.
- Не излажите уређај води или прекомерној влази.
- Избегавајте постављање уређаја у близини извора топлоте или на директном сунцу.
- Чувати ван домашаја деце.
- Користите само испоручени адаптер за напајање.
3. Садржај пакета
- Netzu Loud Alarm Clock (Model 6208B) x 1
- УСБ кабл за напајање к 1
- Адаптер за напајање к 1
- Упутство за употребу к 1
4. Производ је готовview
Familiarize yourself with the alarm clock's components and controls.

Контроле и индикатори:
- Дугме СНООЗЕ: Located on top, for temporary alarm pause.
- +/- Дугмад: Adjust time, alarm, or volume.
- Alarm 1/2 Set Buttons: For setting individual alarms.
- Дугме за подешавање времена: За подешавање тренутног времена.
- Дугме 12/24 сата: To switch between 12-hour and 24-hour time formats.
- Dimmer Slider: On the side, to adjust display brightness.
- Клизач волумена: On the side, to adjust alarm volume.
- УСБ порт: For power input and charging.
- Одељак за батерије: For backup batteries (2x AAA, not included).
5. Подешавање
5.1 Прикључак за напајање
Connect the alarm clock to a power source using the provided USB cable and power adapter. The display will illuminate once connected.

5.2 Резервна батерија
Insert 2 AAA batteries (not included) into the battery compartment at the bottom of the clock. These batteries serve as a backup for time and alarm settings during a power outage. The display will not be lit during a power outage, but the alarm function will remain active.
5.3 Подешавање тренутног времена
- Притисните и држите ВРЕМЕНСКИ СКЛОП button for 2 seconds. The hour digits will begin to flash.
- Користите + or - дугмад за подешавање сата.
- Притисните ВРЕМЕНСКИ СКЛОП поново. Цифре за минуте ће трептати.
- Користите + or - дугмад за подешавање минута.
- Притисните ВРЕМЕНСКИ СКЛОП још једном да бисте потврдили и изашли из режима подешавања времена.
5.4 Формат 12/24 сата
To switch between 12-hour and 24-hour time display, press the 12/24ХР дугме на полеђини сата.

6. Operating the Alarm Clock
6.1 Setting Alarms (Alarm 1 & Alarm 2)
The clock features two independent alarms. Follow these steps for each alarm:
- Притисните и држите АЛАРМ 1 СЕТ or АЛАРМ 2 СЕТ button for 2 seconds. The hour digits for that alarm will flash.
- Користите + or - дугмад за подешавање сата аларма.
- Притисните одговарајуће АЛАРМ СЕТ поново притисните дугме. Цифре за минуте ће трептати.
- Користите + or - дугмад за подешавање минута аларма.
- Притисните одговарајуће АЛАРМ СЕТ button once more to confirm and exit alarm setting mode. The corresponding bell icon will appear on the display, indicating the alarm is active.

6.2 Јачина звука аларма
The alarm features 4 volume levels (85dB to 115dB). Adjust the volume using the ВОЛУМЕ slider on the side of the clock.

6.3 Функција одлагања
Када се огласи аларм, притисните велико СНООЗЕ button on top of the clock to temporarily pause the alarm for 9 minutes. The alarm will sound again after 9 minutes. To turn off the alarm completely, press any other button.
6.4 Turning Alarms On/Off
To activate or deactivate an alarm, press the corresponding АЛАРМ 1 УКЉУЧЕН/ИСКЉУЧЕН or АЛАРМ 2 УКЉУЧЕН/ИСКЉУЧЕН button on the side of the clock. The bell icon on the display will indicate if the alarm is active.
6.5 Setting Customized Alarm Days
You can customize which days your alarms are active. Use the small switches next to the ALARM 1/2 SET buttons on the back of the clock to select:
- MON-SUN: Alarm active every day.
- ПОН-ПЕТ: Alarm active on weekdays only.
- SAT-SUN: Alarm active on weekends only.
Video 1: How to Set the Customized Alarm. This video demonstrates the process of setting a customized alarm, including selecting specific days for the alarm to be active. While the video may feature a similar product from a different brand (GOLOZA), the functionality for setting alarm days is generally applicable.
7. Подешавања екрана
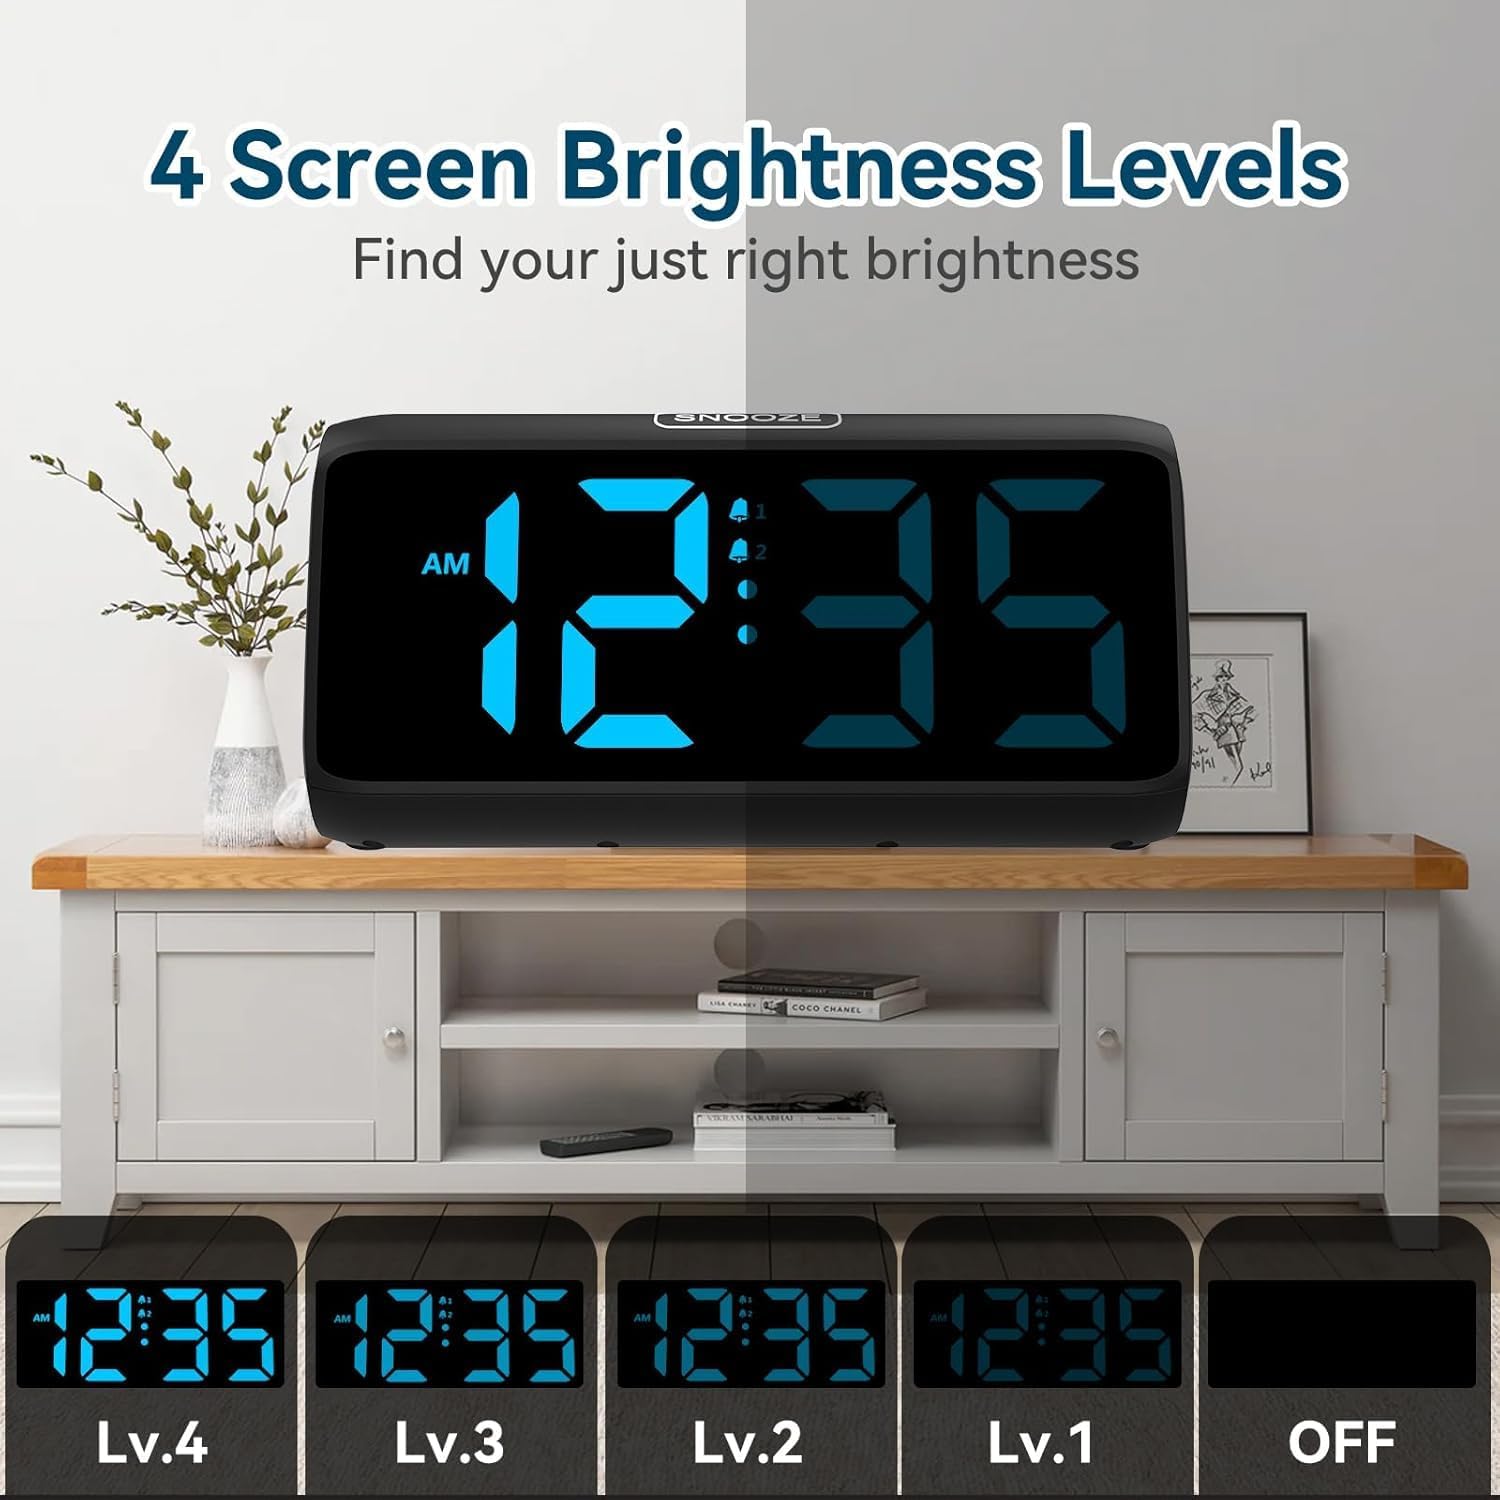
7.1 нивоа осветљености
The alarm clock offers 5 levels of display brightness, including an option to turn the display completely off. Use the ДИММЕР slider on the side of the clock to adjust the brightness to your preference.
Video 2: FAMICOZY Small Simple Digital Alarm Clock. This video demonstrates basic features of a digital alarm clock, including brightness adjustment and alarm settings. While from a different brand, the core functionalities are similar to the Netzu alarm clock.
8. Одржавање
- Очистите сат меком, сувом крпом. Не користите абразивна средства за чишћење или раствараче.
- Уверите се да је уређај искључен пре чишћења.
- Replace backup batteries annually or when the low battery indicator appears.
КСНУМКС. Решавање проблема
| Проблем | Могући узрок | Решење |
|---|---|---|
| Екран је празан | Нема напајања. | Проверите везу адаптера за напајање. Уверите се да је утичница функционална. |
| Аларм се не оглашава | Аларм није активиран или је јачина звука прениска. | Ensure the alarm is turned ON (bell icon visible). Adjust volume slider. |
| Time/Alarm settings reset after power outage | Резервне батерије су празне или нису инсталиране. | Инсталирајте или замените 2 ААА резервне батерије. |
| Екран је превише светао/там | Потребно је подесити ниво осветљености. | Adjust the DIMMER slider on the side of the clock. |
10. Спецификације
| Феатуре | Детаљ |
|---|---|
| Број модела | 6208Б |
| Бранд | Нетзу |
| Димензије производа | 15.8 к 3.81 к 7.2 цм |
| Тежина артикла | 280 г |
| Материјал | Пластика |
| Дисплаи Типе | Дигитал |
| Нивои јачине звука аларма | 4 (85dB до 115dB) |
| Нивои осветљености екрана | 5 (including OFF) |
| Трајање одлагања | КСНУМКС минута |
| Извор напајања | Plug-in (AC adapter) with 2x AAA battery backup (for memory) |
11. Гаранција и подршка
For warranty information or technical support, please refer to the product packaging or contact Netzu customer service through the retailer where the product was purchased. Keep your purchase receipt for warranty claims.