Увод
Thank you for choosing the WELLFOR NK Faucet Bathroom Waterfall Faucet. This manual provides essential information for the safe installation, operation, and maintenance of your new faucet. Please read these instructions thoroughly before installation and keep them for future reference.
Безбедносне информације
- Увек искључите главни довод воде пре инсталирања или обављања било каквог одржавања славине.
- Носите одговарајућу личну заштитну опрему, као што су заштитне наочаре, током инсталације.
- Уверите се да су сви спојеви безбедни како бисте спречили цурење.
- Ако нисте сигурни у вези са било којим делом процеса инсталације, консултујте квалификованог водоинсталатера.
- This product is designed for bathroom sink use only.
Садржај пакета
Пре почетка инсталације проверите да ли су све компоненте присутне:
- WELLFOR NK Faucet (Main Body)
- Једна ручка
- Децк Плате
- Склоп са искачућим одводом
- Монтажни хардвер
- Цеви за довод топле и хладне воде
Подешавање и инсталација
The WELLFOR NK Faucet is designed for easy deck-mount, vessel installation. Follow these general steps for installation. Specific details may vary based on your sink and plumbing setup.
- Припремите судопер: Ensure the sink hole is clean and appropriately sized for the faucet. If using a deck plate, place it over the sink hole.
- Монтирајте славину: Insert the faucet body through the sink hole (and deck plate, if used). From underneath the sink, secure the faucet with the provided washer and mounting nut. Tighten firmly but do not overtighten.
- Повежите водоводне цеви: Attach the hot and cold water supply lines to the corresponding inlets on the faucet body. Connect the other ends to your hot and cold water supply valves. Ensure all connections are hand-tight, then use a wrench for a final quarter-turn.
- Инсталирајте искачући одвод: Follow the instructions provided with the pop-up drain assembly to install it into your sink's drain opening. Connect the drain linkage (if applicable) to the faucet.
- Тест за цурење: Slowly turn on the main water supply. Check all connections for leaks. If leaks occur, tighten the connections further.

Слика 1: Technical diagram showing the dimensions of the WELLFOR NK Faucet, including spout height (10.03 inches), spout reach (4.92 inches), and base measurements. This diagram is essential for planning installation and ensuring compatibility with your sink.
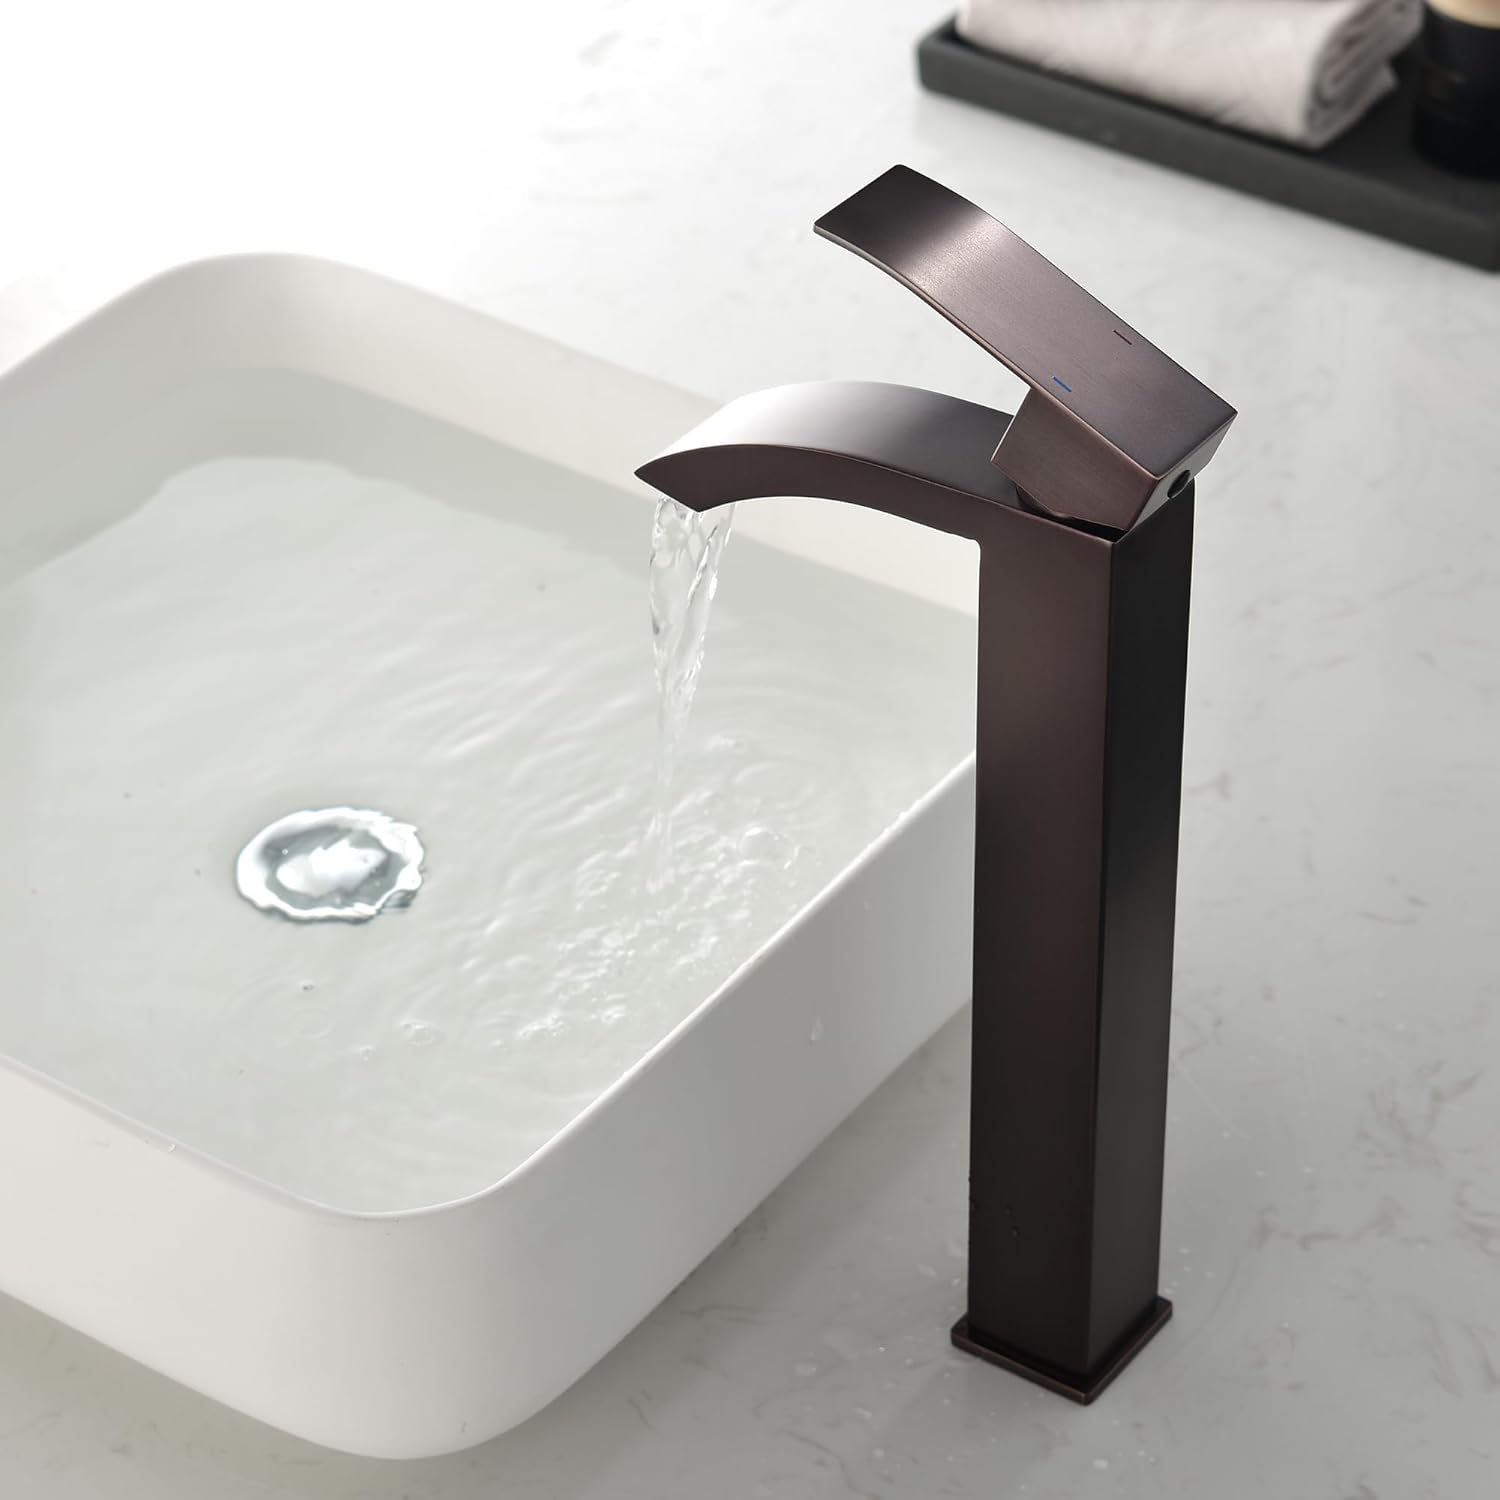
Слика 2: Image of the WELLFOR waterfall faucet installed on a bathroom sink, with water flowing into the basin. This illustrates the faucet's appearance and water delivery in a typical setup.
Упутство за употребу
The WELLFOR NK Faucet features a single handle for controlling both water temperature and flow.
- Проток воде: Lift the handle upwards to turn on the water and increase flow. Push the handle downwards to decrease flow and turn off the water.
- Температура воде: Померите ручку улево за топлу воду и удесно за хладну воду. Подесите положај ручке између леве и десне стране да бисте постигли жељену температуру воде.
- Waterfall Spout: The faucet delivers a clear and steady laminar waterfall stream, enhancing the aesthetic and user experience.

Слика 3: A hand adjusting the single handle of the WELLFOR faucet, demonstrating how to control water flow and temperature.

Слика 4: Hands placed under the flowing waterfall stream from the faucet, illustrating the water delivery pattern.
Одржавање
Regular cleaning and maintenance will ensure the longevity and optimal performance of your WELLFOR faucet.
- Чишћење: Редовно чистите славину меком крпом и благим сапуном. Избегавајте абразивна средства за чишћење, јаке хемикалије или жичане сунђере, јер они могу оштетити бронзану завршну обраду нанесену уљем.
- Водене тачке: Да бисте спречили појаву мрља од воде, обришите славину сувом након сваке употребе.
- Aerator (if applicable): Periodically check and clean the aerator (if present) to remove any mineral buildup that might affect water flow.
Решавање проблема
Ако наиђете на проблеме са славином, погледајте следеће уобичајене проблеме и решења:
- Низак проток воде:
- Проверите да ли су вентили за довод воде потпуно отворени.
- Inspect the supply lines for kinks or obstructions.
- Clean the aerator (if applicable) for mineral buildup.
- Leaks from Faucet Base:
- Ensure the mounting nut under the sink is securely tightened.
- Check the O-rings and gaskets for proper seating and damage.
- Leaks from Handle:
- This may indicate an issue with the internal cartridge. Contact customer support for assistance.
- No Hot or Cold Water:
- Verify that the hot/cold water supply valves are open.
- Check if the hot/cold supply lines are correctly connected to the faucet.
Спецификације
| Феатуре | Детаљ |
|---|---|
| Бранд | ВЕЛЛФОР |
| Назив модела | NK faucet |
| Тип монтаже | Децк Моунт |
| Врста инсталације | Брод |
| Финисх Типе | Уљем утрљана бронза |
| Материјал | Brass, Ceramic (Handle) |
| Број дршке | 1 |
| Максимални проток | 1.2 галона у минути |
| Висина излива | 10.03 инча |
| Споут Реацх | 4.92 инча |
| Димензије производа | 4.56"Д к 4.56"Ш к 6.61"В |
| Тежина артикла | 2.6 фунти |
| Посебне карактеристике | Lead Free, Lightweight, Pop Up Drain |
| УПЦ | 769047275092 |
Гаранција и подршка
WELLFOR products are manufactured to high-quality standards and are backed by a manufacturer's warranty. For specific warranty details, claims, or technical support, please refer to the warranty card included with your product or visit the official WELLFOR website. Please have your model number (NK faucet) and purchase information ready when contacting support.