Netzu 6210TB
Netzu Digital Alarm Clock Model 6210TB User Manual
Comprehensive Instructions for Setup and Operation
1. Увод
This manual provides detailed instructions for the setup, operation, and maintenance of your Netzu Digital Alarm Clock, Model 6210TB. Please read this manual thoroughly before using the device to ensure proper function and longevity.
2. Безбедносне информације
- Не излажите уређај екстремним температурама, директној сунчевој светлости или високој влажности.
- Избегавајте испуштање или излагање уређаја јаким ударима.
- Use only the provided power adapter or a compatible USB power source.
- Држите уређај даље од воде и других течности.
- Не покушавајте сами да раставите или поправите уређај. Обратите се корисничкој подршци за помоћ.
- Осигурајте одговарајућу вентилацију око уређаја.
3. Садржај пакета
- Netzu Digital Alarm Clock (Model 6210TB)
- УСБ кабл за напајање
- Повер Адаптер
- Кориснички приручник (овај документ)
4. Производ је готовview
Упознајте се са главним компонентама и контролама вашег будилника.

Слика 4.1: Фронт view of the Netzu Digital Alarm Clock showing the display and a connected phone.
This image displays the Netzu Digital Alarm Clock from a slight angle, highlighting its large digital time display (red), smaller temperature (green), and date (orange) readouts. A smartphone is shown connected via a cable, indicating a charging function or power source connection. The clock features buttons on top for various functions.
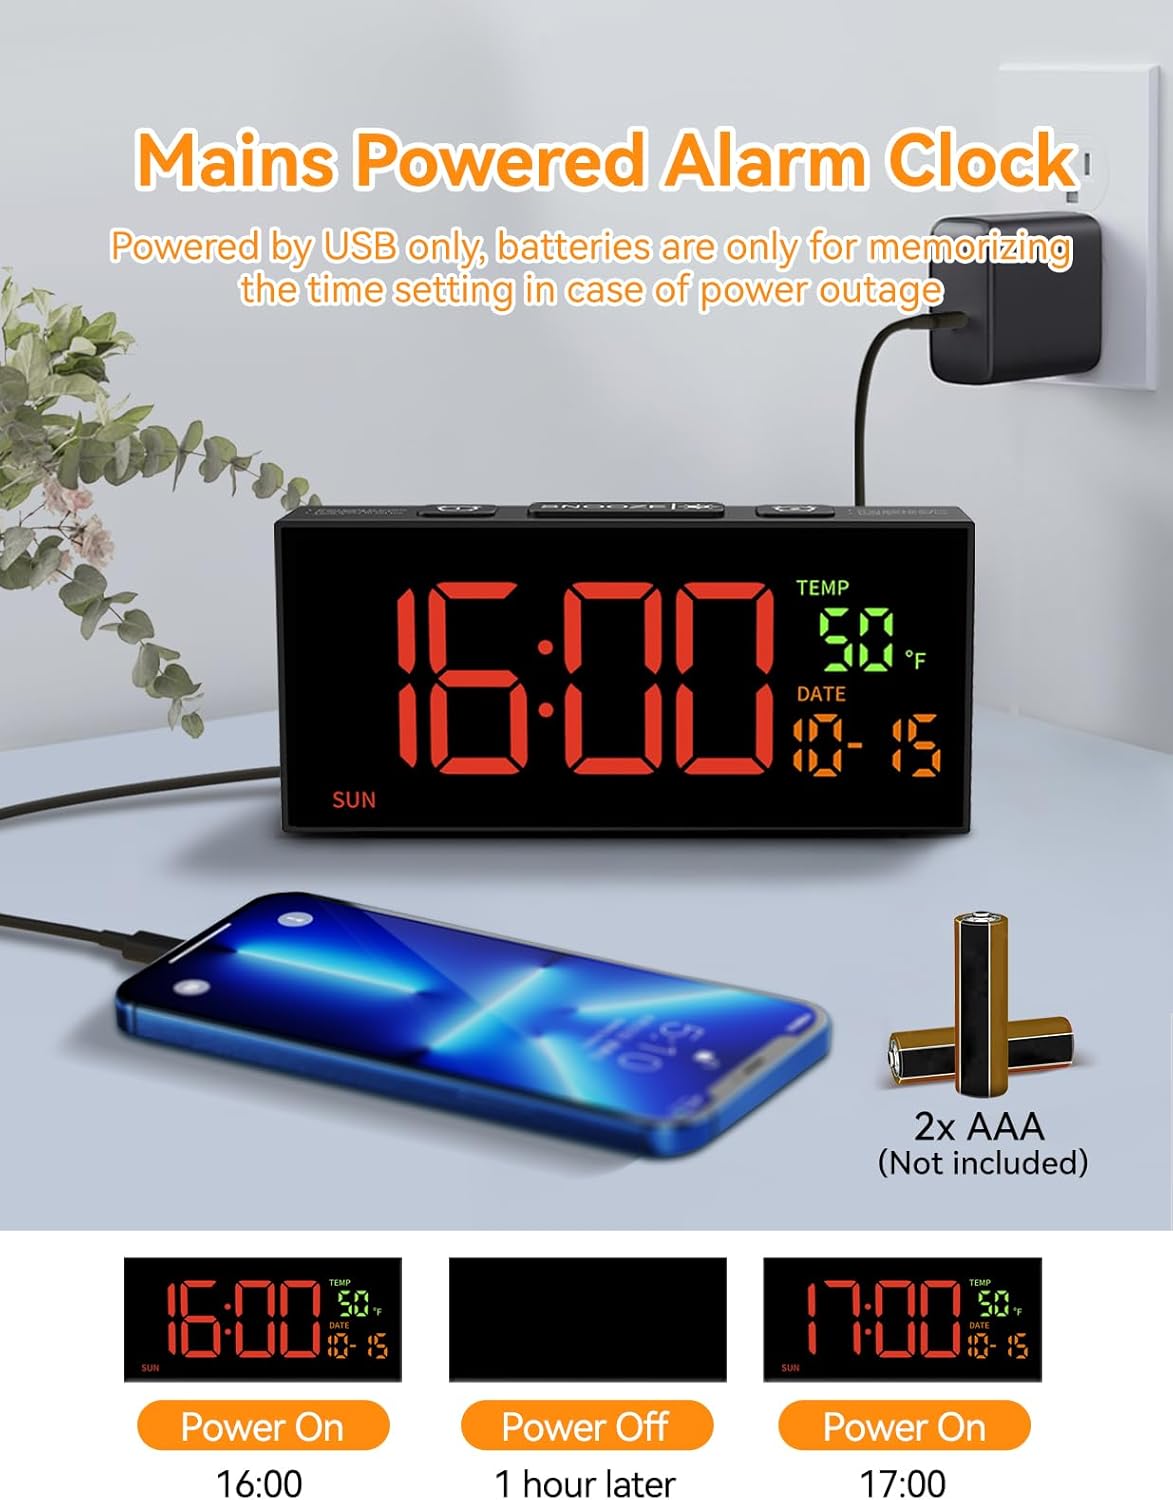
Слика 4.2: Power connection and battery backup illustration.
This image illustrates the power connection of the alarm clock, showing it plugged into a wall adapter. It also highlights the requirement for two AAA batteries (not included) for the memory backup function, ensuring settings are retained during power outagес.
5. Подешавање
5.1 Прикључак за напајање
- Connect the provided USB power cable to the clock's power input port.
- Укључите други крај УСБ кабла у адаптер за напајање.
- Insert the power adapter into a standard electrical outlet. The clock display will illuminate.
5.2 Инсталација резервне батерије
The clock requires 2 AAA batteries (not included) for memory backup. These batteries preserve your time and alarm settings during a power outage or if the clock is unplugged.
- Пронађите одељак за батерије на полеђини сата.
- Отворите поклопац одељка за батерије.
- Уметните 2 ААА батерије, водећи рачуна о исправном поларитету (+ и -).
- Добро затворите поклопац одељка за батерије.
6. Основна подешавања
6.1 Подешавање времена и датума

Слика 6.1: Step-by-step guide to setting the clock's time and date.
This image provides a visual guide for setting the time and date. It shows pressing the 'SET' button to enter settings, then using '+' and '-' buttons to adjust hours, minutes, year, month, and day. Blinking digits indicate the adjustable field.
- Set Clock Time:
- Притисните и држите СЕТ button for 2 seconds to enter time setting mode. The hour digits will blink.
- Користите + or - дугмад за подешавање сата.
- Притисните СЕТ again. The minute digits will blink.
- Користите + or - дугмад за подешавање минута.
- Постави годину:
- Притисните СЕТ again. The year digits will blink.
- Користите + or - дугмад за подешавање године.
- Set Month & Day:
- Притисните СЕТ again. The month digits will blink.
- Користите + or - дугмад за подешавање месеца.
- Притисните СЕТ again. The day digits will blink.
- Користите + or - дугмад за подешавање дана.
- Притисните СЕТ one last time to confirm all settings and exit the setting mode.
Напомена: The system default year is 2024. Please update it to the current year. If the year, month, and day are set correctly, the day of the week will be displayed automatically.
6.2 Формат 12/24 сата
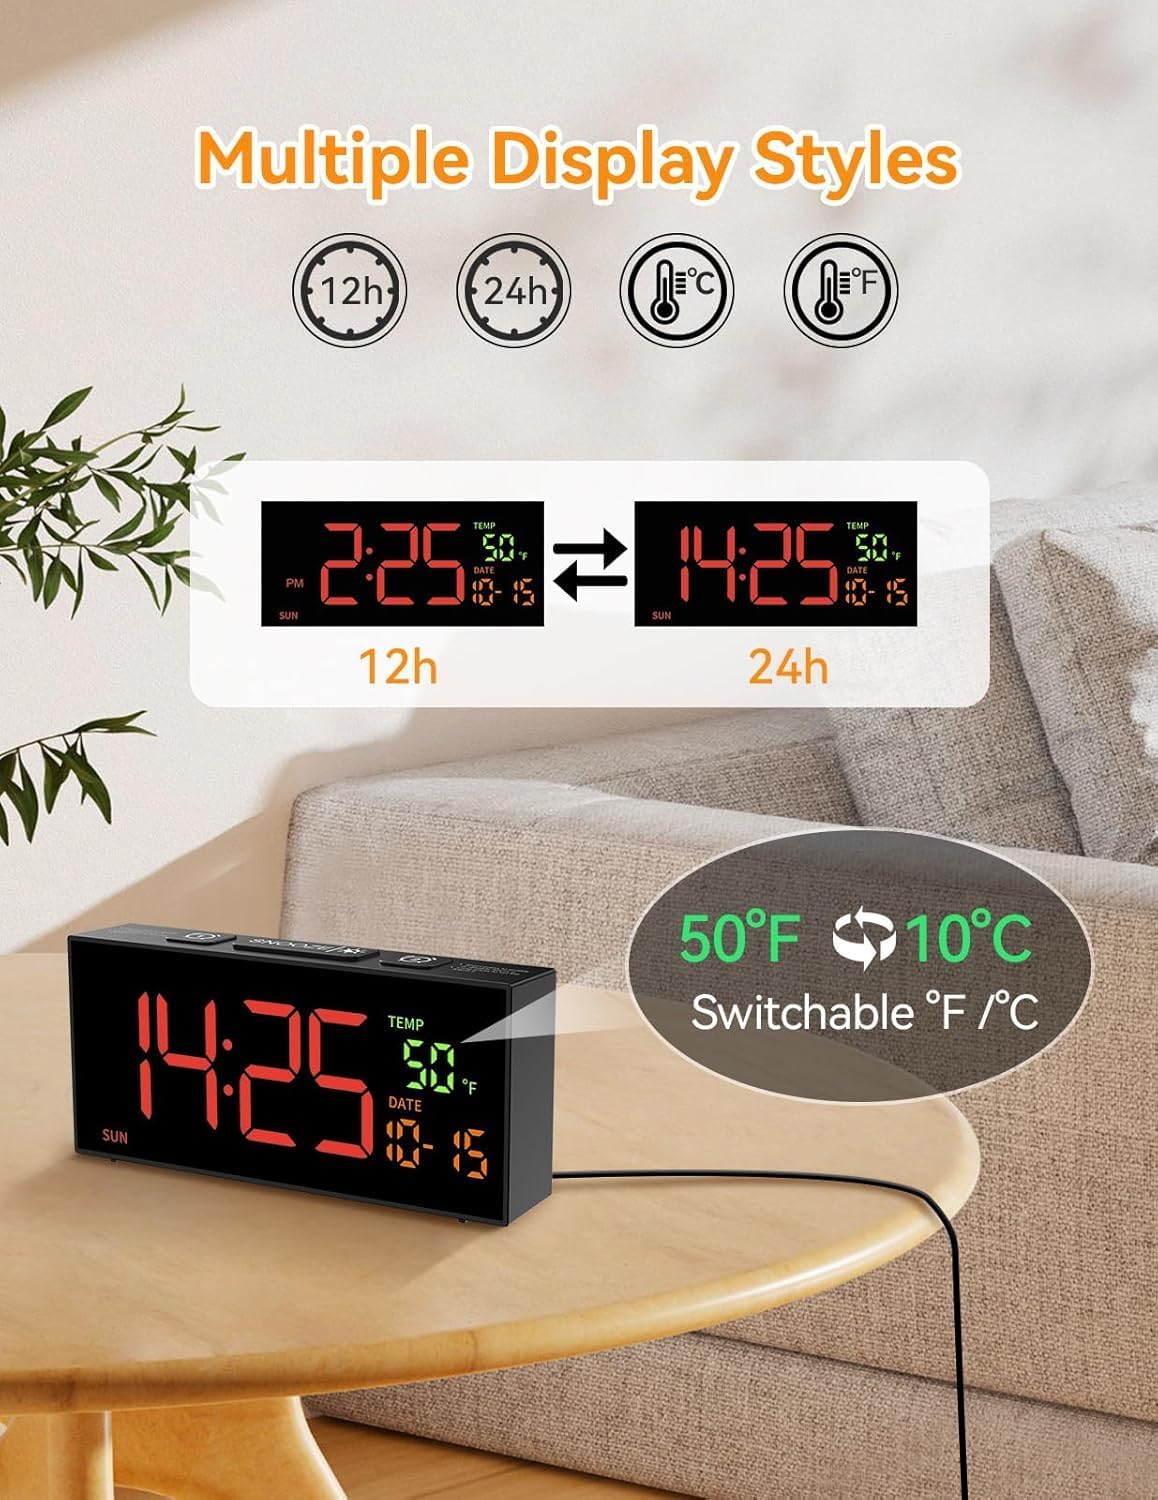
Слика 6.2: Switching between 12-hour and 24-hour time formats.
This image demonstrates the clock's ability to display time in either 12-hour (with AM/PM indicator) or 24-hour format. Two clock displays are shown side-by-side, illustrating the change from "2:25 PM" to "14:25".
To switch between 12-hour and 24-hour time formats, press the 12/24Hr button (often combined with the '+' button during setting). The display will change accordingly.
6.3 Temperature Unit (°C/°F)
To switch between Celsius (°C) and Fahrenheit (°F) temperature units, press the ° Ц/° Ф button (often combined with the '-' button during setting). The temperature display will update.
6.4 Подешавање летњег рачунања времена (DST)

Слика 6.3: Manual adjustment for Daylight Saving Time.
This image illustrates the manual DST feature. It shows the clock display changing from 11:30 to 10:30 (or vice versa) with a long press of the 'DST' button, indicating the time shift for Daylight Saving Time.
To manually adjust for Daylight Saving Time:
- Притисните и држите ДСТ дугме.
- The time will move forward by one hour when DST starts, and backward by one hour when it ends.
- Release the button to set the new time.
7. Подешавања аларма
7.1 Setting Alarms (Alarm 1 & Alarm 2)

Слика 7.1: Illustration of dual alarms and their operational modes.
This image highlights the clock's dual alarm capability, showing two different alarm times (6:00 and 15:00) set for different scenarios. It also visually represents the three alarm modes: Daily, Weekday (Mon-Fri), and Weekend (Sat-Sun).
The clock features two independent alarms (Alarm 1 and Alarm 2).
- Притисните тастер АЛАРМ 1 or АЛАРМ 2 button to select the desired alarm. The alarm time will appear and blink.
- Користите + or - дугмад за подешавање сата.
- Притисните тастер АЛАРМ button again. The minute digits will blink.
- Користите + or - дугмад за подешавање минута.
- Притисните тастер АЛАРМ button one last time to confirm and activate the alarm. An alarm icon will appear on the display.
7.2 Режими аларма
After setting the alarm time, you can select one of three alarm modes:
- Daily Mode (MON-SUN): The alarm will sound every day.
- Weekday Mode (MON-FRI): The alarm will sound only on weekdays.
- Weekend Mode (SAT-SUN): The alarm will sound only on weekends.
To cycle through alarm modes, press the АЛАРМ button repeatedly after setting the alarm time, until the desired mode is displayed.
7.3 Alarm Tone Selection

Слика 7.2: Options for alarm tones and volume levels.
This image illustrates the variety of alarm tones (Chime, 7 Soft Music, Ring, Beep) and the four adjustable volume levels (90dB, 100dB, 105dB, 110dB) available on the Netzu alarm clock.
The clock offers 10 different alarm tones. To select an alarm tone:
- While in alarm setting mode (after setting time), press the + or - buttons to cycle through the available tones.
- The selected tone will play briefly for preview.
- Притисните тастер АЛАРМ дугме да потврдите свој избор.
7.4 Подешавање јачине звука
There are 4 adjustable volume levels for the alarm. To adjust the volume:
- While in alarm setting mode (after selecting tone), press the + or - buttons to cycle through the volume levels.
- The volume will adjust, allowing you to hear the difference.
- Притисните тастер АЛАРМ дугме да потврдите свој избор.
7.5 Функција одлагања
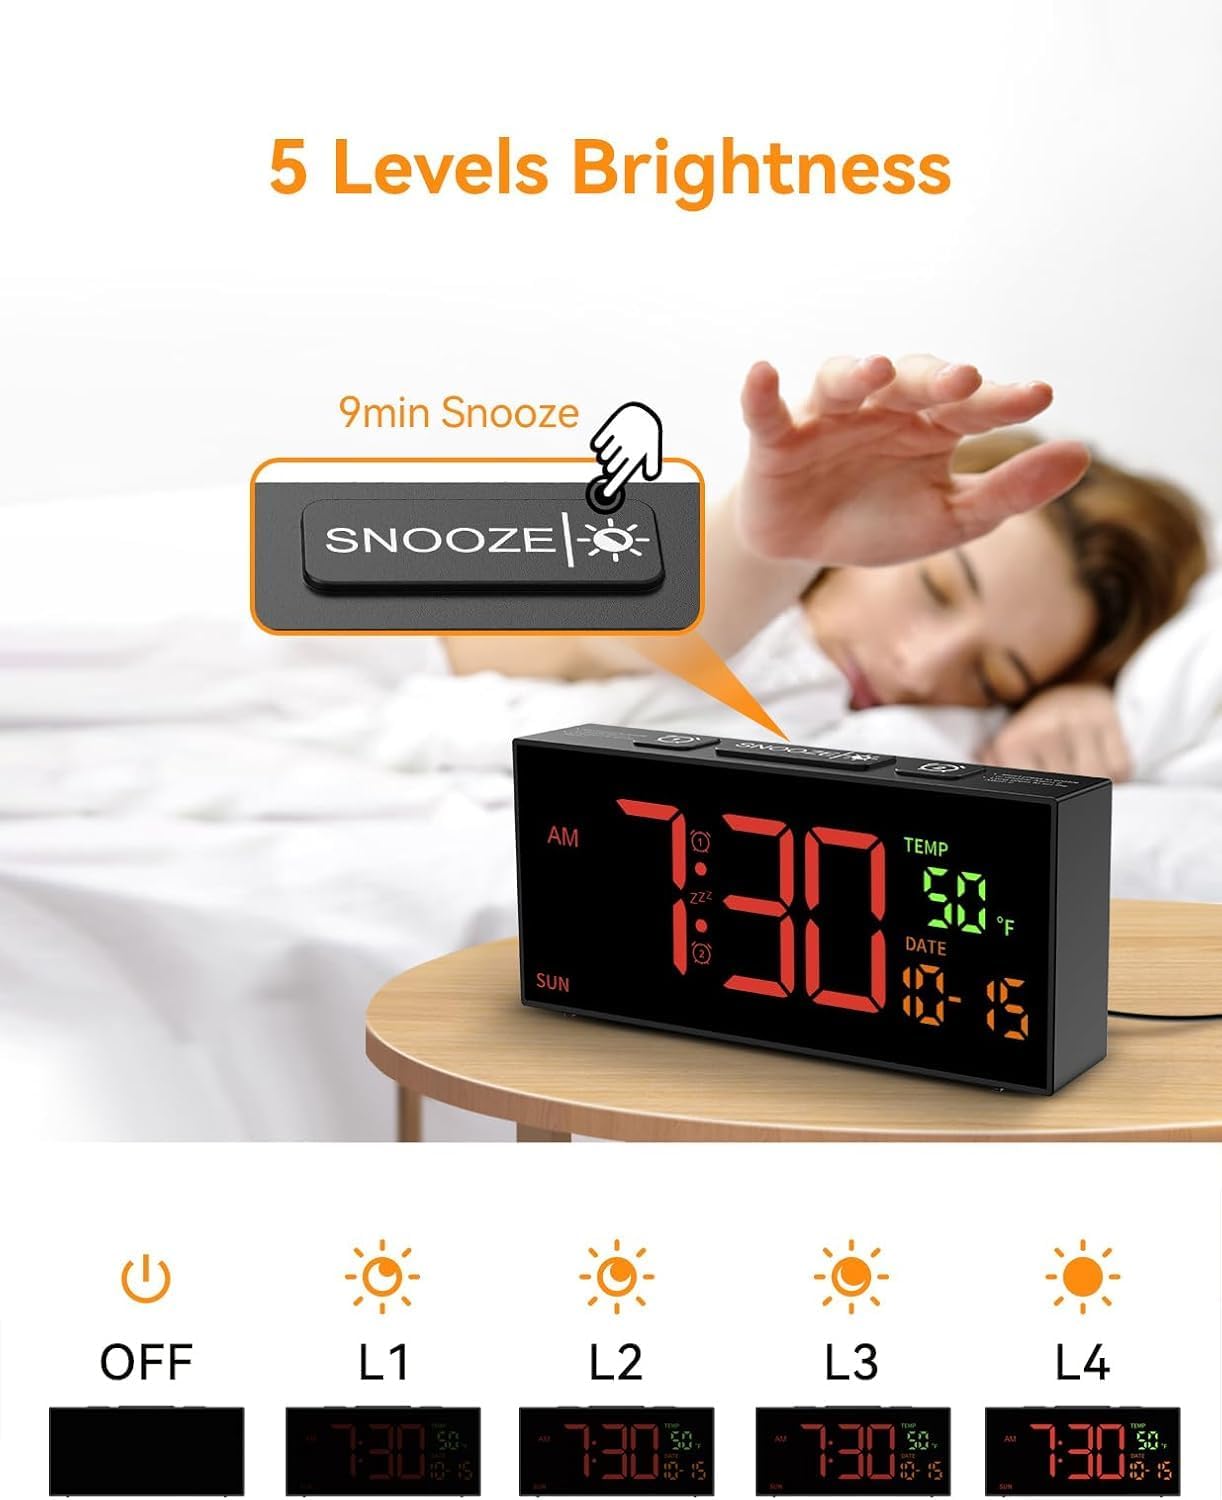
Слика 7.3: Snooze button and brightness adjustment options.
This image illustrates the large 'SNOOZE' button on top of the clock, which also functions as a brightness control. It shows a hand pressing the button and depicts the five levels of display brightness, from off to maximum illumination.
Када се огласи аларм, притисните велико СНООЗЕ button on top of the clock. The alarm will pause for 9 minutes and then sound again.
To turn off the alarm completely, press any other button on the clock (e.g., АЛАРМ 1, АЛАРМ 2, СЕТ, +, -).
8. Подешавања екрана
8.1 Подешавање осветљености
The clock offers 5 levels of display brightness, including an "OFF" setting.
- To adjust the brightness, press the СНООЗЕ/БРИГХТНЕСС button (the large button on top) repeatedly.
- Each press will cycle through the brightness levels (L4, L3, L2, L1, OFF).
- Изаберите ниво који је најпријатнији за ваше окружење.
9. Одржавање
- Чишћење: Use a soft, dry cloth to clean the clock's surface. Do not use abrasive cleaners or solvents.
- Складиштење: If storing the clock for an extended period, remove the AAA backup batteries to prevent leakage. Store in a cool, dry place.
КСНУМКС. Решавање проблема
| Проблем | Могући узрок | Решење |
|---|---|---|
| Приказ сата је искључен. | Нема напајања. | Ensure the power adapter is securely plugged into the clock and a working electrical outlet. Check if the brightness is set to "OFF". |
| Аларм се не оглашава. | Аларм није подешен, јачина звука је прениска или је режим аларма неисправан. | Verify alarm time and mode are correctly set. Increase alarm volume. Ensure the alarm icon is visible on the display. |
| Подешавања су изгубљена након нестанка струјеtage. | Резервне батерије нису инсталиране или су испражњене. | Уметните 2 нове ААА батерије у одељак за батерије. |
| Time is incorrect after DST. | DST not adjusted. | Manually adjust DST by pressing and holding the ДСТ дугме. |
11. Спецификације
- Модел: 6210ТБ
- Тип приказа: Дигитал ЛЕД
- Извор напајања: Corded Electric (USB cable and adapter included)
- Резервна батерија: 2 к ААА батерије (нису укључене)
- Димензије производа: 6.89" Ш x 3.1" В
- Тежина: 10.6 унци (приближно 0.3 кг)
- Alarm Features: Dual alarms, 3 alarm modes (Daily, Weekday, Weekend), 10 alarm tones, 4 volume levels, 9-minute snooze.
- Карактеристике екрана: 5 brightness levels, 12/24 hour format, °C/°F temperature display, date, day of week.
- Посебне карактеристике: Manual DST adjustment.
12. Гаранција и подршка
For warranty information or technical support, please refer to the contact details provided with your purchase documentation or visit the official Netzu webсајт. Молимо вас да сачувате доказ о куповини за потребе гаранције.
Контакт информације:
- Произвођач: Нетзу
- Емаил: netzuserservice@outlook.com
Ask a question about this manual
Ask about setup, troubleshooting, compatibility, parts, safety, or missing instructions. Manuals+ will review the question and use this page’s manual context to help answer it.